Forums Latest Members

On My Bench - Tudor Submariner 7928

  1. JimInOz Melbourne Australia Nov 25, 2019

    Posts
    15,491
    Likes
    32,381
    Onward.

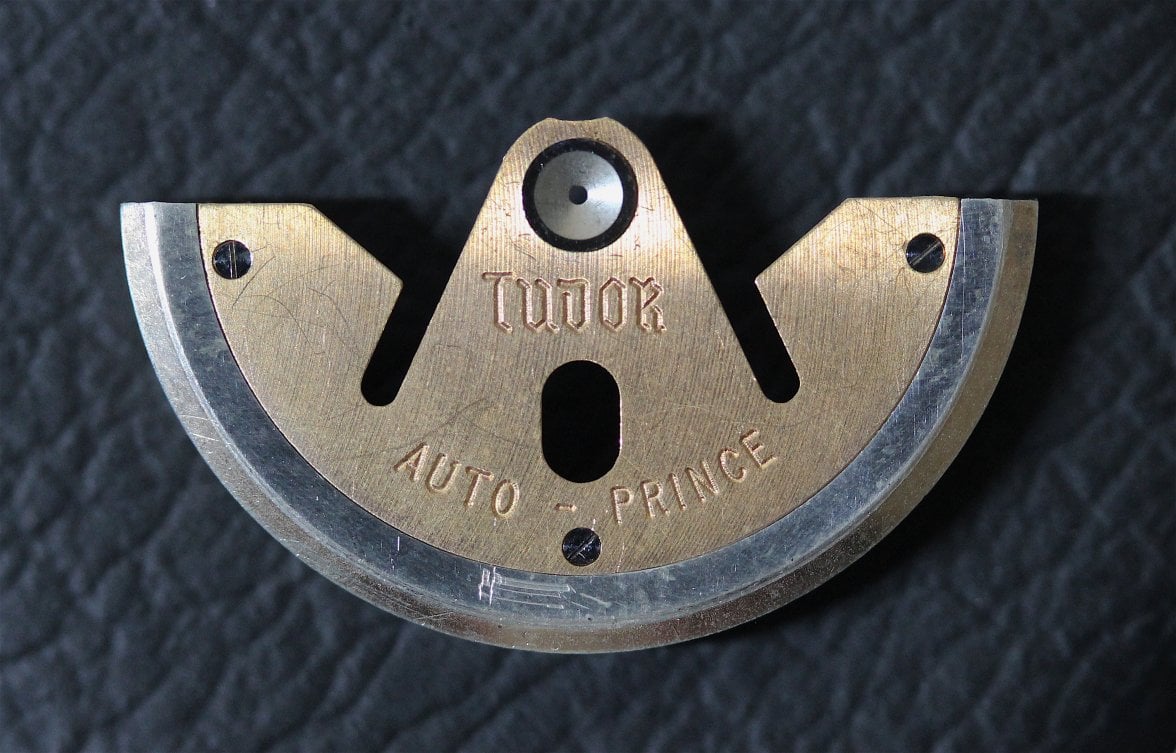
    Step 1. Firstly, the rotor was stripped and checked for wear and then the gouge was smoothed out and the rotor parts cleaned.

    RotorStripped.JPG

    Then it was re-assembled.

    RotorCleaned.JPG

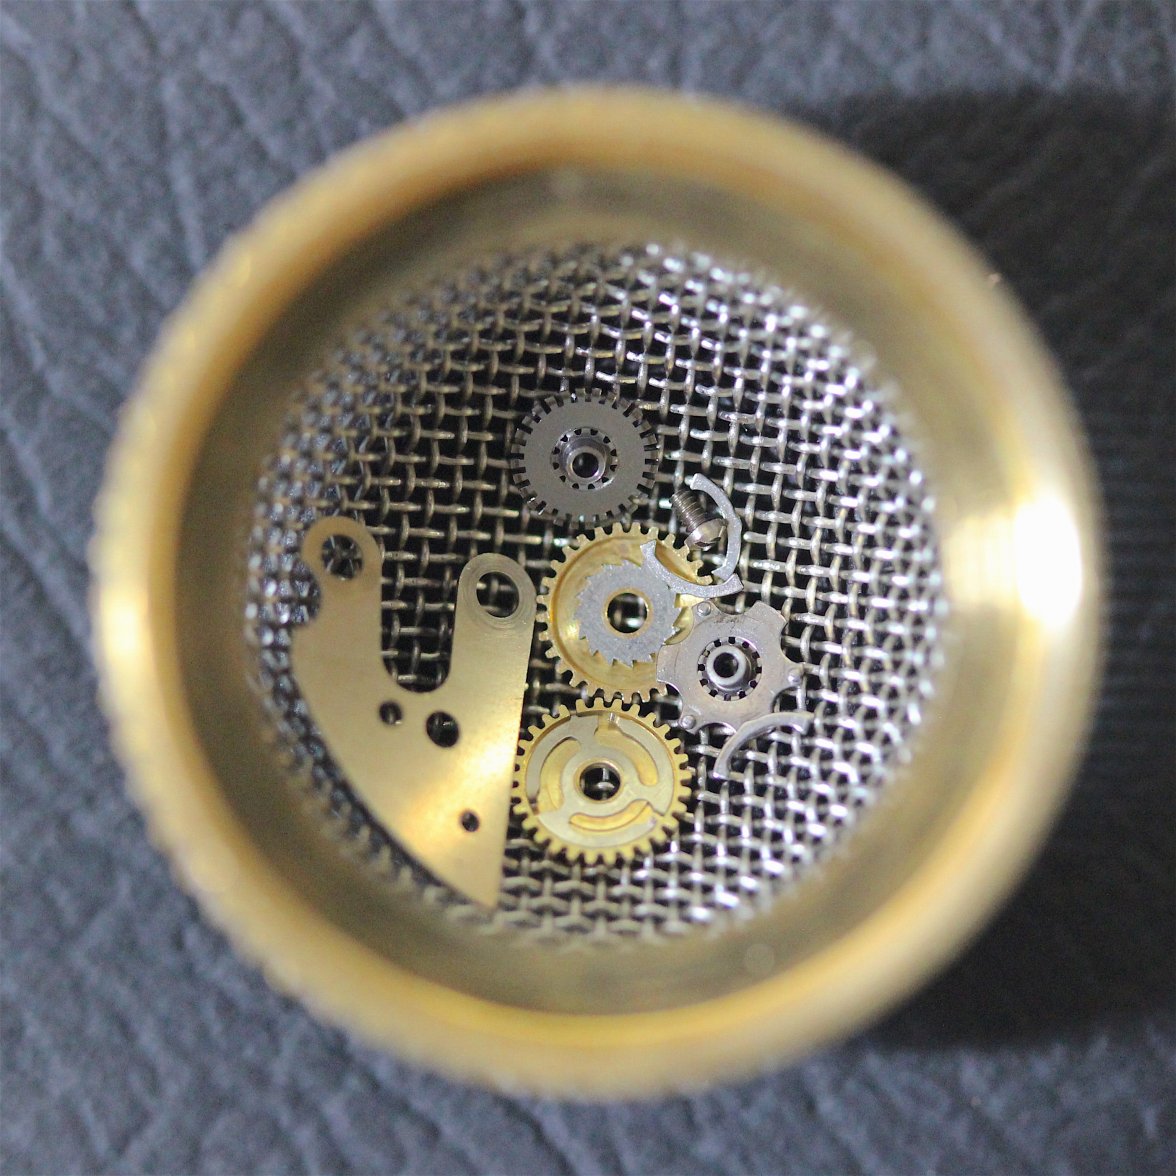
    The reverser wheels and bits were removed from the auto bridge and cleaned.

    ReversersPostClean.JPG

    As you can see, there are two styles of reverser wheel. Why? No idea, but I wish it was two of the tri-spring ones.

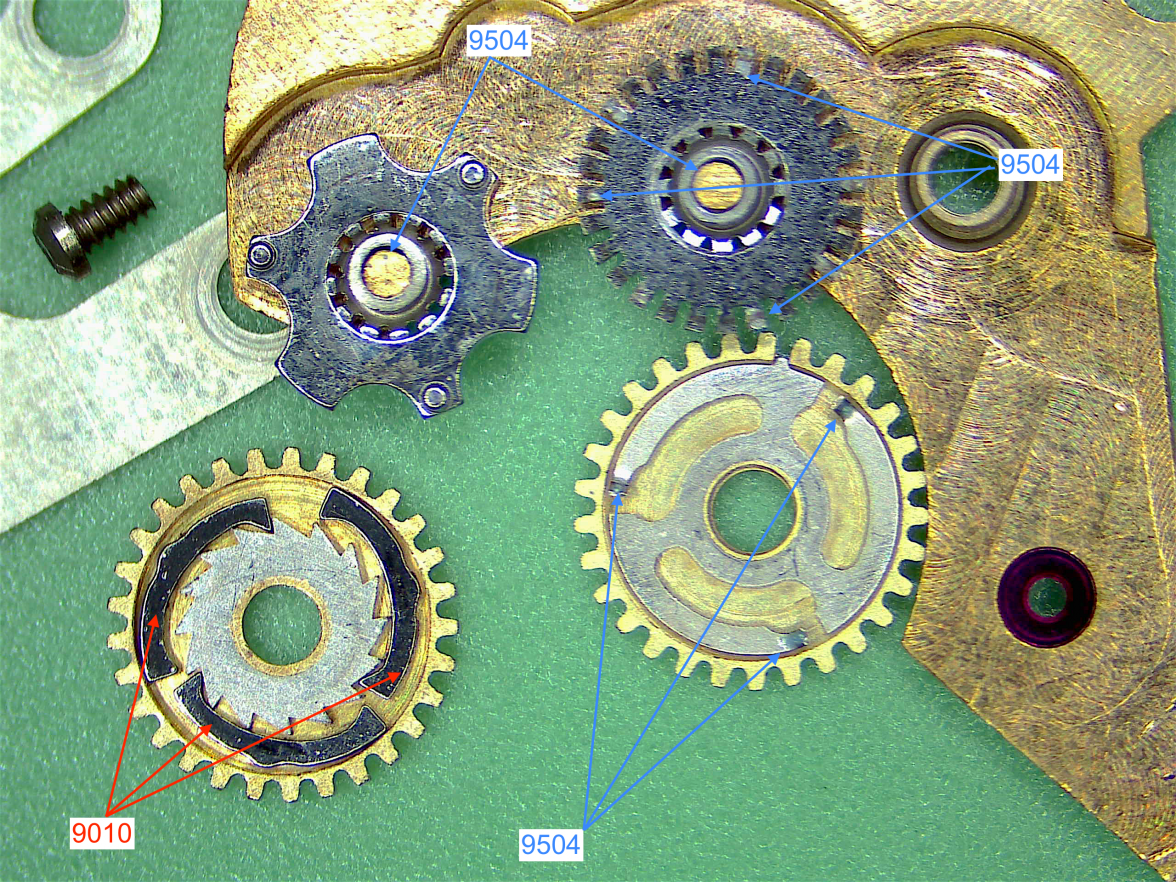
    Lubricating was an experiment, mainly for the three little pawl fingers. I used a pegwood stick just damp with Moebius 9010 and wiped the inside of the barrel, then I wiped the oil onto a sheet of glass and put the fingers in the oil (turning to coat all over). Then I transferred the fingers to a sheet of watch paper to get rid of excess oil, a bit like cooking fish fingers, but much harder!

    ReverserPawls.JPG

    My cooked fingers were then installed in the barrel and the pivot posts on the bridge given a film of Moebius 9504 and the tri-spring reverser was also treated with a tiny amount of 9504.

    ReverserLube.png

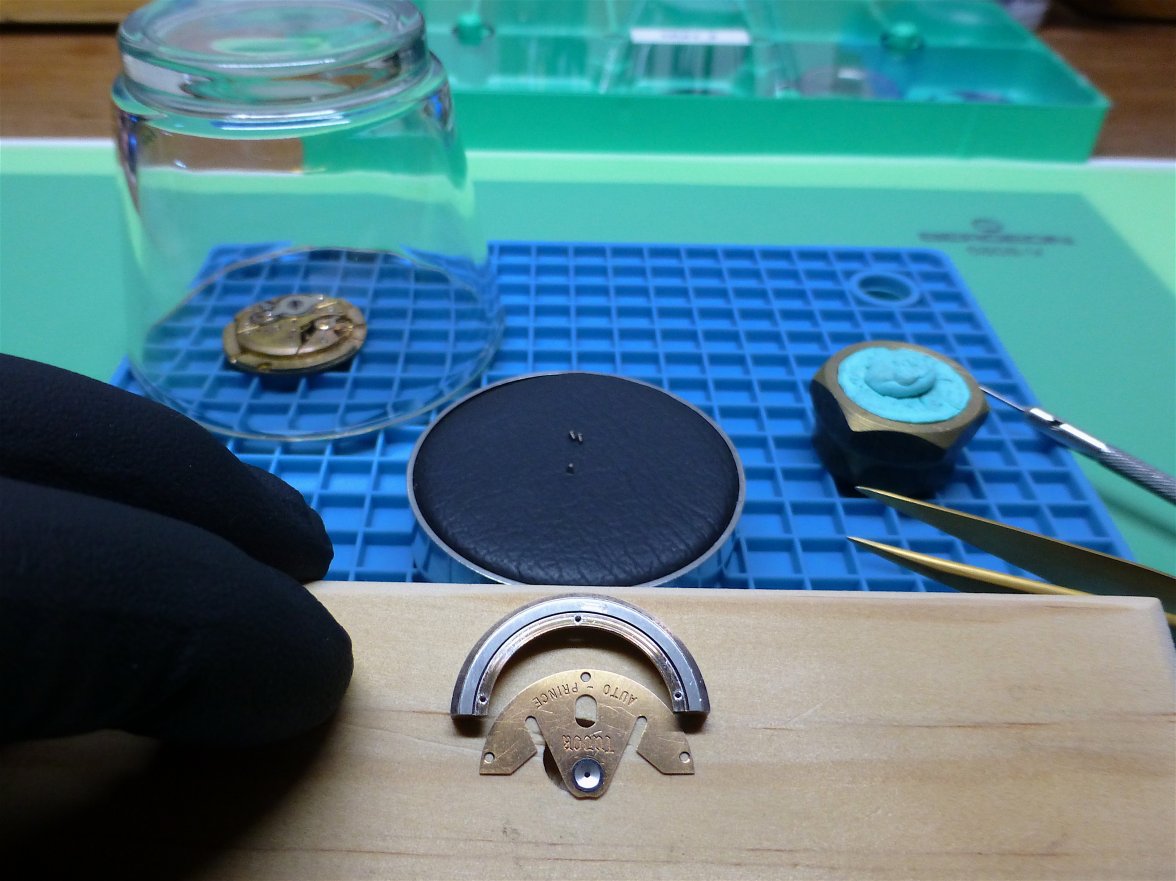
    Reverser system was fitted to the bridge and that's where the fun began. As explained previously, the rotor can only be installed with the bridge off the movement. I lubricated the rotor pin and installed it and the rotor pinion and the rotor to the bridge.

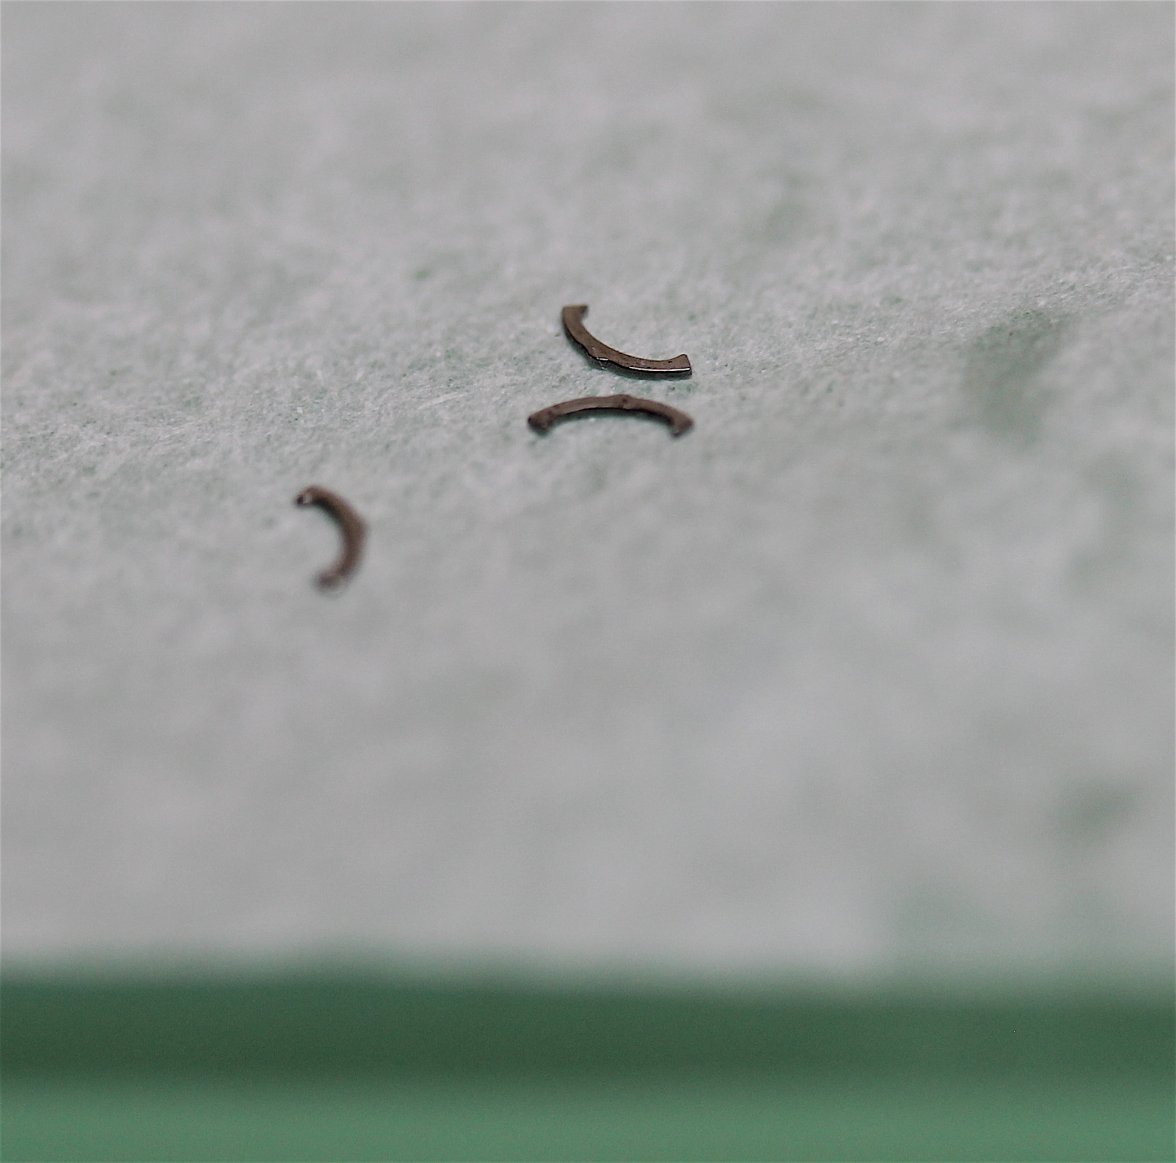
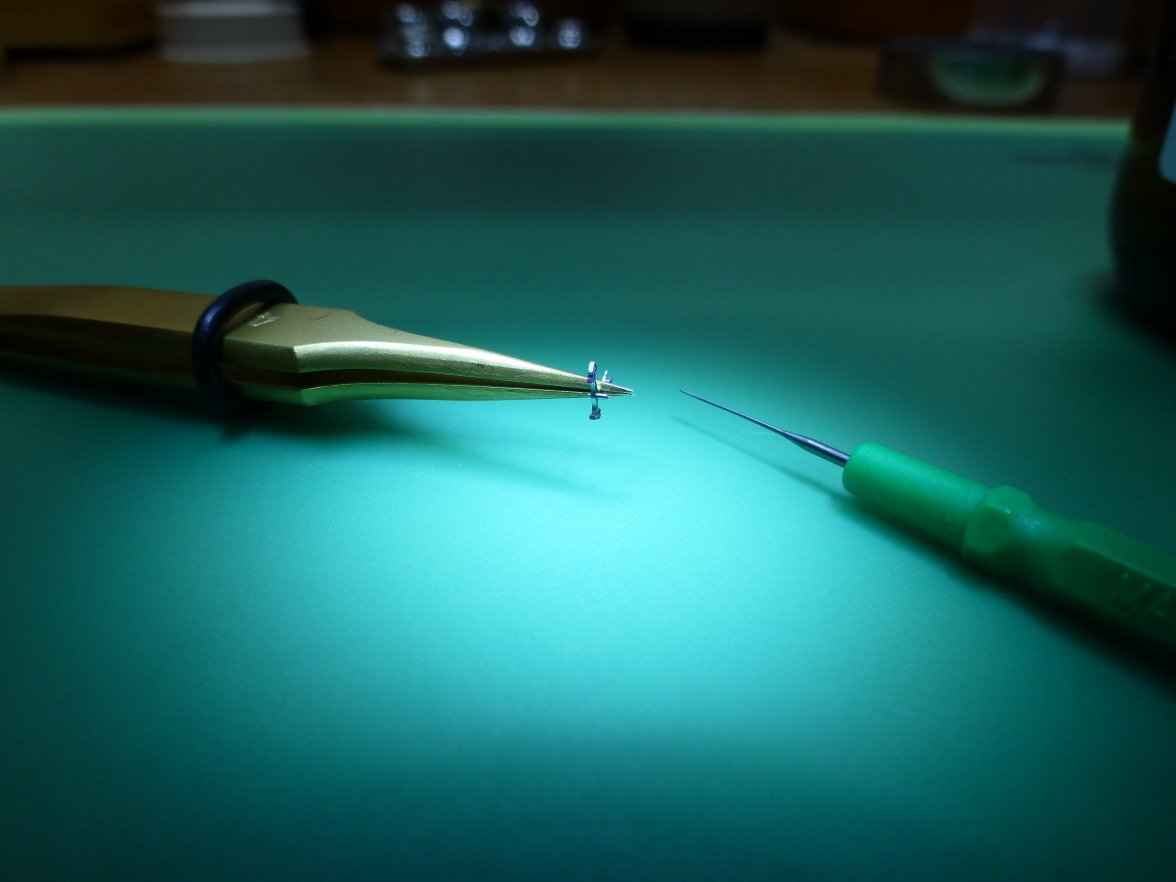
    Then, squeezing the rotor pin/rotor/bridge between the fingers of my left hand, I used my right hand to pick up my tweezers, pick up the tiny cross clip that hold the rotor on the pin and position it over the pin. Next I had to swap tweezers for a specially shaped bamboo stick, all the while keeping the rotor parts together and not disturbing the precariously poised cross clip. The bamboo stick was then pushed onto the clip to seat it. It god a bit interesting when the finger of my glove started to wrinkle under pressure and get in the way of the clip, but thankfully it popped into place and didn't ping off into the ether!

    I say thankfully, because if you lose one and need another you need to find one first, and then hold your breath when you pay $75 for a used one. :eek: Again, that's if you can find any, so I'm happy the little bugger is where it should be.

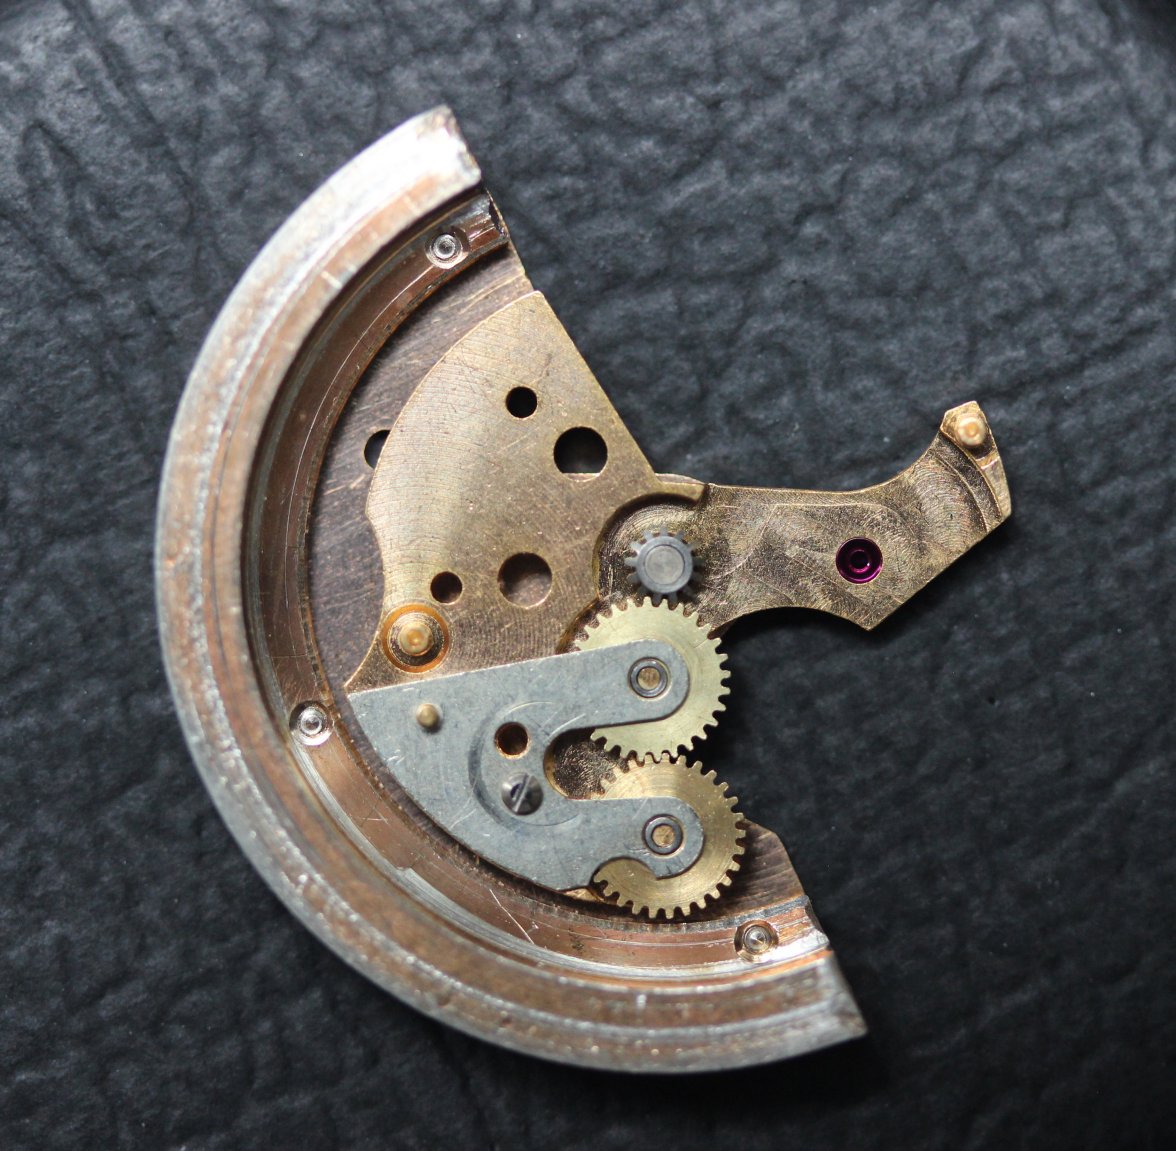
    Here we see the underside of the rotor/bridge assembly showing the cumbersome inelegant design.

    AutoLower.JPG

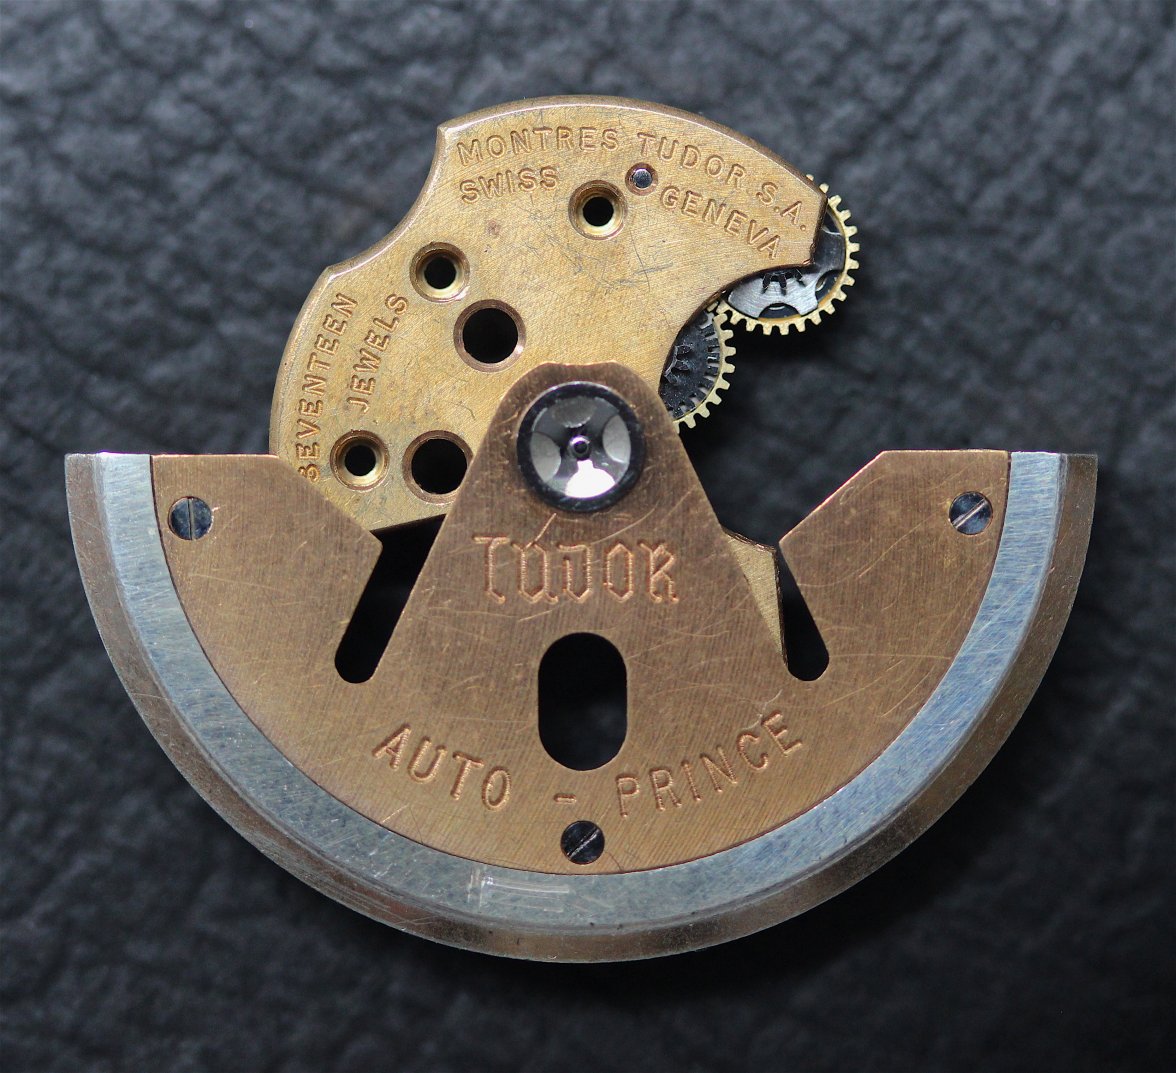
    And here's a shot of the complete assembly, upper side, showing the equally clumsy example of watch design.
    Did I mention that the little cross clip in the centre will cost $75 (if you can find one).

    AutoUpper.JPG
    Well that's the autowind assembly wrapped up and put away.

    I wonder what interesting features the base caliber holds in store?

    :cautious:

    We shall see.
     
    DaveK, FREDMAYCOIN, Yak1 and 13 others like this.
  2. bdp Nov 25, 2019

    Posts
    227
    Likes
    605
    I like the fish fingers!!
    Looks like its going well, great pictures by the way.
    Keep up the great work and please keep us posted.
     
  3. steveb73 Nov 25, 2019

    Posts
    112
    Likes
    394
    Really enjoying it. Thanks for sharing and adding the detailed pictures!
     
  4. Archer Omega Qualified Watchmaker Nov 25, 2019

    Posts
    26,463
    Likes
    65,604
    What did I ever do to you?! ;)
     
  5. Archer Omega Qualified Watchmaker Nov 25, 2019

    Posts
    26,463
    Likes
    65,604
    Well, as we discussed this kind of flies in the face of how you would handle a similar modern Rolex reverser, so I guess we'll see how it works. I think coating the sides of the fingers may cause them to not move freely, which they need to do.

    I would count on doing a rather long test period here before you ship the watch back. How the watch winds manually with the automatic winding installed will likely give you a good indicator - if you feel any grabbing at all as you wind, or the rotor starts to spin, then you will have to clean all this up and take a more minimal lubrication approach. Reversers can be very sensitive to dirt or excess lubrication.

    Cheers, Al
     
  6. wsfarrell Nov 25, 2019

    Posts
    2,441
    Likes
    4,133
    Pretty sure that's the first time this sentence has ever appeared.
     
    DaveK, larryganz and Shabbaz like this.
  7. JimInOz Melbourne Australia Nov 25, 2019

    Posts
    15,491
    Likes
    32,381
    Understood Al, I just felt that dry metal to metal contact isn't good and that a minute amount of lubricant would be OK.
    As I said, it's an experiment and if there are issues it's a small task to remove and clean that wheel.

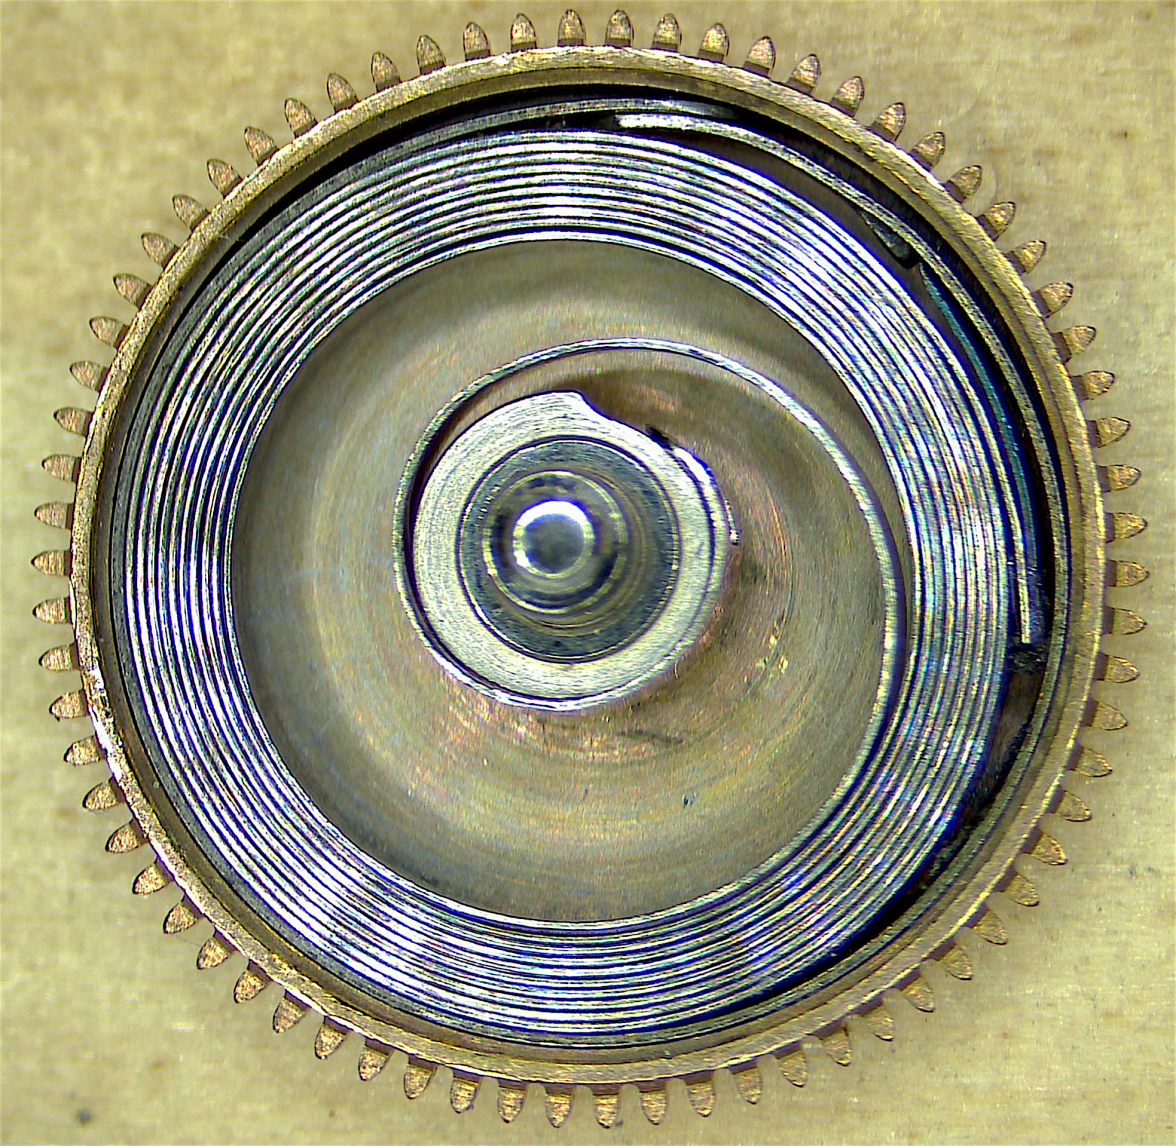
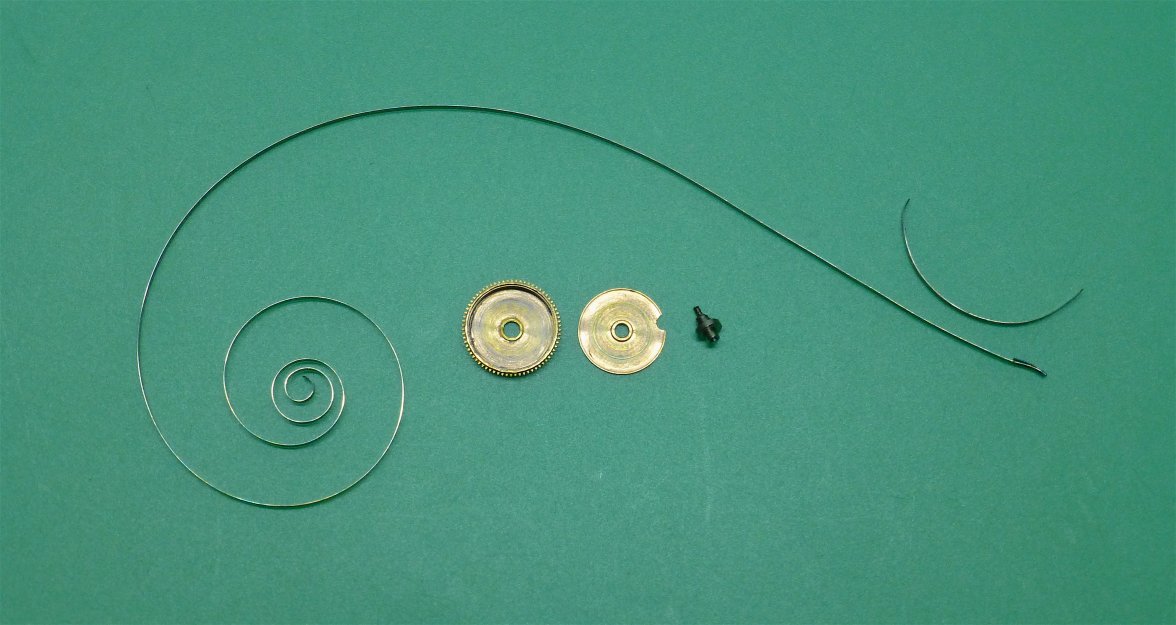
    Something more confusing has raised its head. I'm stripping the base caliber for cleaning, and that includes the mainspring. However, on opening the barrel I was confronted with, what in my experience, is an unusual arrangement.

    It appears that there is a manual wind mainspring with a hook tail that engages in a slipping bridle to achieve and automatic style mainspring.
    The mainspring in the video you sent me is a normal automatic style, and this one appears to be a bit of a Heath Robinson contraption, or did very early auto mainsprings come like this?

    MainspringOpened.png

    I intend to replace the mainspring if I can locate the correct one, or a generic one if I can find one of the correct size.
     
  8. Archer Omega Qualified Watchmaker Nov 26, 2019

    Posts
    26,463
    Likes
    65,604
    Often early mainsprings used a separate bridle. Omega still lists them in some cases, even when they no longer offer them. For example for a Cal. 330 bumper movement, they list the mainspring:

    72203301208 | MAINSPRING

    And also the bridle, or what they call the brakespring:

    72203301209 | BRAKESPRING

    Here's a photo of one I serviced a couple of years ago, and you can see the bridle on the bench with the manual wind mainspring:

    [​IMG]

    Every so often I will get an older watch in that has one still in it, but you can just use a regular automatic mainspring if you like. If you have trouble finding the right automatic mainspring, you can try finding a properly size manual wind mainspring, and then use the separate bridle again - I would not discard it just yet until you are sure you can find an auto spring of the right size.

    Cheers, Al
     
    watch3s likes this.
  9. JimInOz Melbourne Australia Nov 27, 2019

    Posts
    15,491
    Likes
    32,381
    :thumbsup:

    Thanks Al.

    And before I head off to bed, just a confirmation.

    This mainspring is "set", right?

    MainspringOld.JPG

    Cheers

    Jim
     
  10. Archer Omega Qualified Watchmaker Nov 27, 2019

    Posts
    26,463
    Likes
    65,604
    I would not use that spring again certainly...
     
  11. verithingeoff Nov 27, 2019

    Posts
    639
    Likes
    3,057
    Hi Guys, can one of you explain "set" please? And what does the second part of the spring do [the short curved part]?
     
  12. Archer Omega Qualified Watchmaker Nov 27, 2019

    Posts
    26,463
    Likes
    65,604
    A "set" spring is one that has lost some of the initial shape it had when it was new. Set springs are most often found in older watches, and with the old blued steel springs, finding set springs is quite normal. The newer alloy springs tend to last much longer before they break, and hold their shape much longer.

    If you look at the shape of the mainspring in my photo above, you will see it has an overall "S" shape to it, where the one in Jim's photo does not. This means the initial shape of the spring in Jim's watch has been lost.

    The extra piece is what allows the spring to slip inside the barrel during automatic winding of the watch.

    Cheers, Al
     
    watchyouwant, DaveK, kkt and 5 others like this.
  13. verithingeoff Nov 27, 2019

    Posts
    639
    Likes
    3,057
    :thumbsup:
     
  14. JimInOz Melbourne Australia Nov 27, 2019

    Posts
    15,491
    Likes
    32,381
    :thumbsup:

    New mainspring now on the way from California.
     
    Archer likes this.
  15. verithingeoff Nov 27, 2019

    Posts
    639
    Likes
    3,057
    :thumbsup:
     
  16. Tristanp Nov 28, 2019

    Posts
    238
    Likes
    2,000
    Great post, fascinating stuff.
    I'm on the lookout for a Tudor Sub, is there any others you'd recommend avoiding because of parts/service nightmares?
     
  17. oinkitt Nov 28, 2019

    Posts
    422
    Likes
    811
    I have 9 Tudors with this movement. I have never had my repairer say much about them. I do remember him mentioning that the had to sort the reversing gear on one of them. He is in his mid 70s now and has been working on these watches for over 50 years. He did charge me the same price for the last one as he is charging me now to service a Venus 190, so perhaps they are a pain in the ass!!
     
    JimInOz likes this.
  18. JimInOz Melbourne Australia Nov 29, 2019

    Posts
    15,491
    Likes
    32,381
    It was a quiet day on the watchmaking front yesterday and today. Amazing how life's issues get in the way.

    I did manage to apply epilame to the escape wheel, the pallet stones and the balance cap jewels. The escape was simply put on a fine wire hook and dunked into the bottle for a minute and then air dried in the sun. Cap jewels were dropped into a drop of epilame o an old watch crystal and removed to some watch paper to dry. The pallet fork was held in my tweezers (little O-ring makes it a mini vice) and epilame applied to the stones using a clean oiler and then left to dry in the sun. Didn't take many pics, here's one of the pallet fork, not that you can see much.

    EpilamePallets.JPG

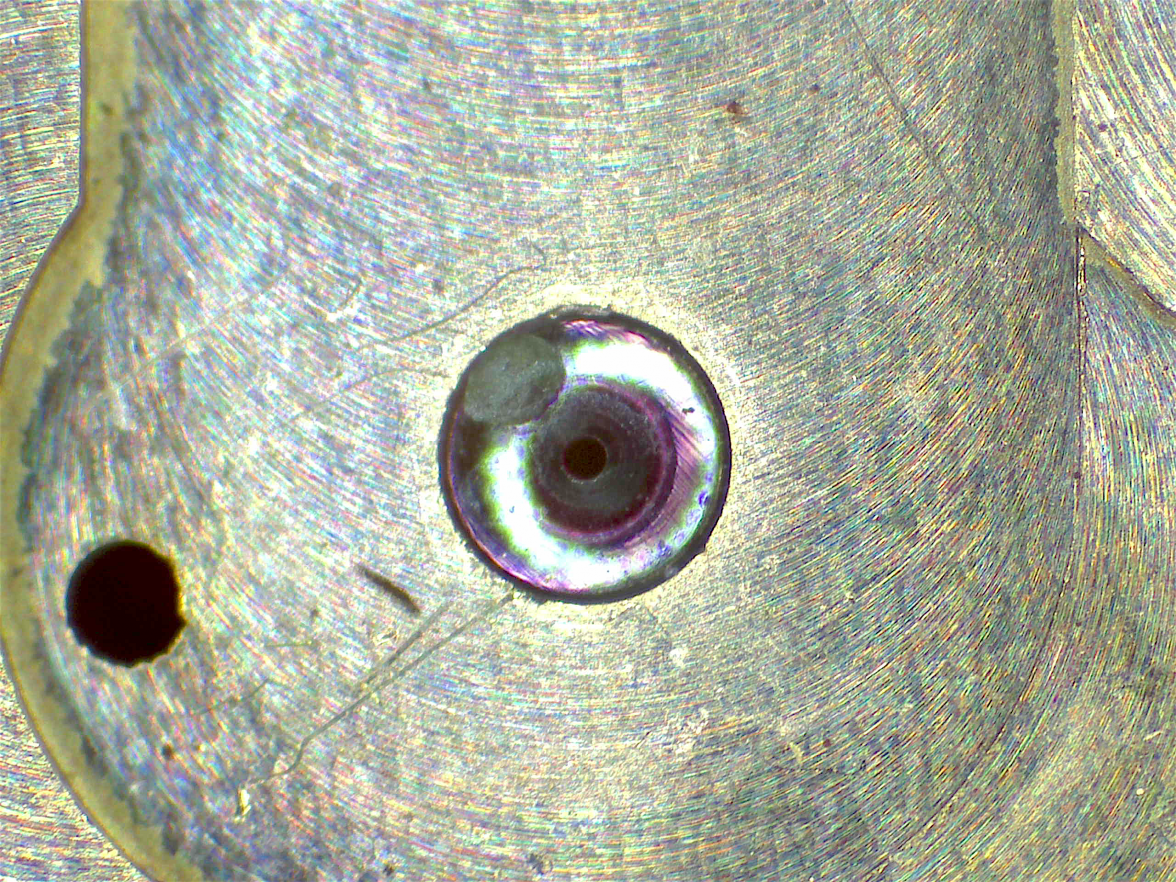
    And because you all like photos, her's a couple of the jewels I took the other day before the plate was cleaned.

    SludgeJewel.png

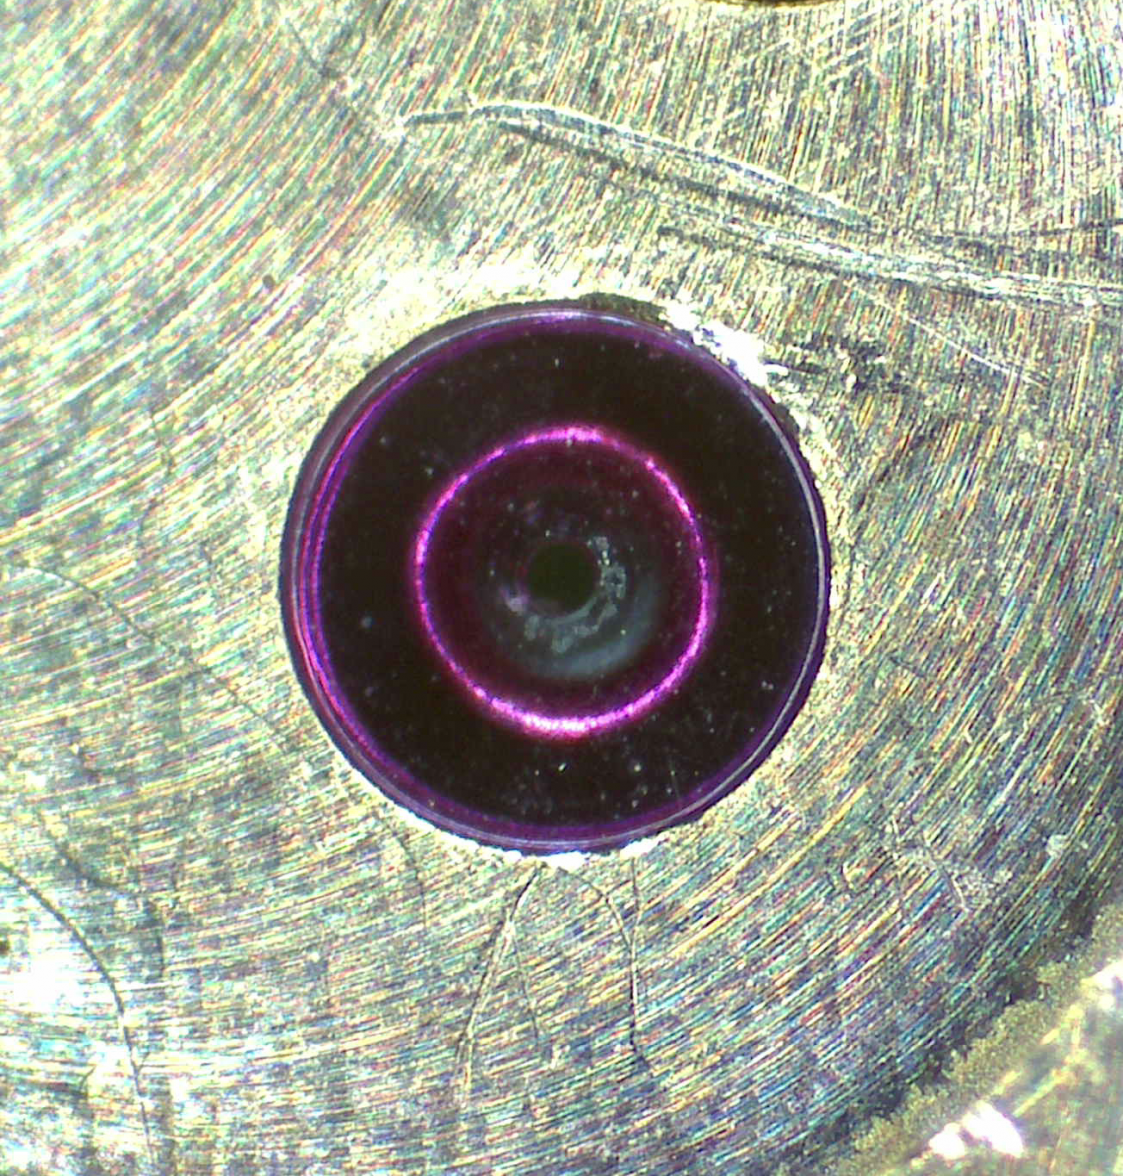
    And another. A good example of how lubricants dry out over time.

    DryJewel.png
     
    kkt, Vitezi, omegaswisst and 4 others like this.
  19. steveb73 Nov 29, 2019

    Posts
    112
    Likes
    394
    Good to see its moving along! Love the photos.
     
  20. JimInOz Melbourne Australia Nov 30, 2019

    Posts
    15,491
    Likes
    32,381
    I had hoped to get more done today, but the weather was so nice and the scoot was crying out for a ride so that wasted a few hours of watch time.

    But I got back to the bench to start re-assembly, and then remembered there was a broken KIF style shock spring.

    To a professional like Al, Doug or Chris, this isn't a problem, they just go to their spares drawers.

    However my "spares" are located in donor movements.
    In a sealed container.
    In the garage.
    Up on a high shelf.

    So after getting the ladder, getting the box down and starting to look for a spare, and after about 10 watches, it dawned on me that I could ignore anything marked "Incabloc" and just look for shock proof or antichoc etc. After about 10 minutes I found one in a movement, got i out without it pinging off into the distance , gave it a clean in the US bath and got ready to fit it.

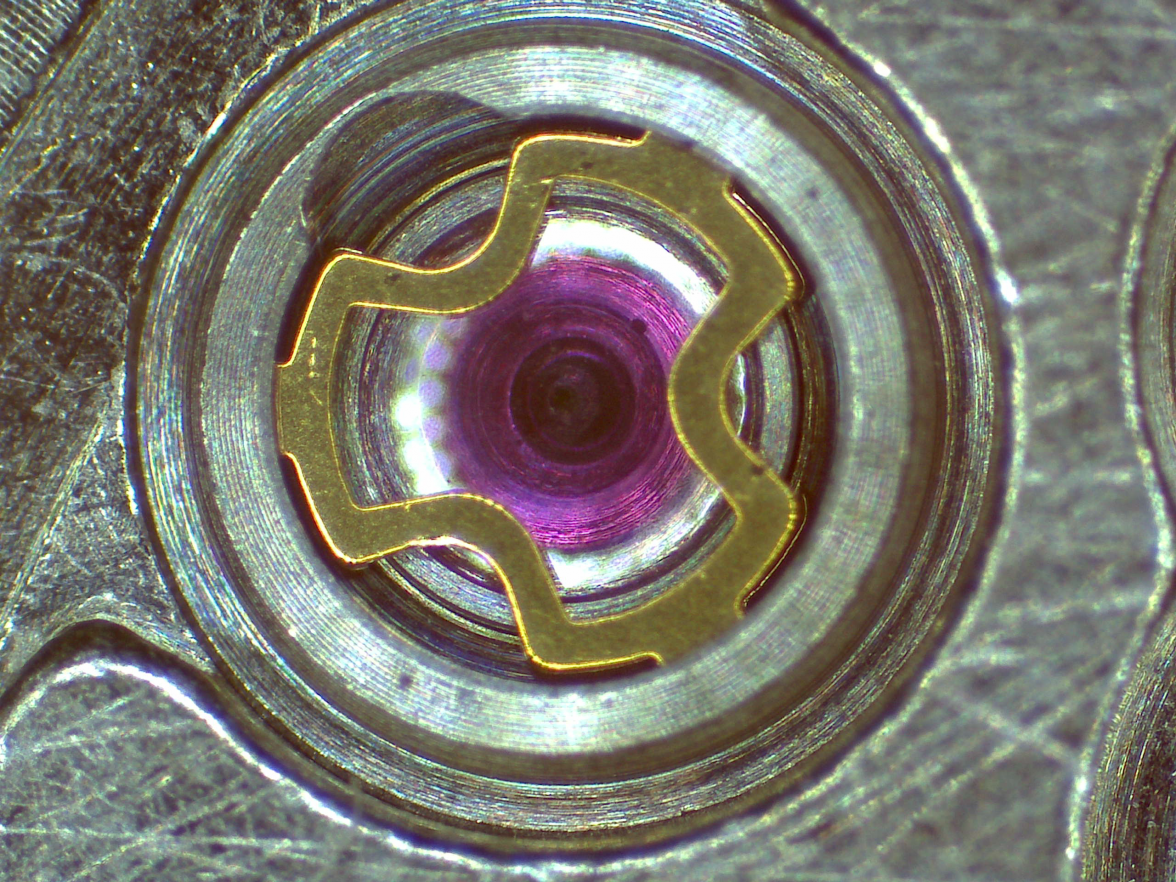
    I don't know what lunatic designed the three aperture mount for the shock spring, even the Seiko style with a tri-lobe spring only uses one hole so setting the spring does't need you to hold one lobe down with your left hand, one down with your right hand, the third down with your other hand, and use your other other hand to rotate the spring :confused:.

    Maybe the designer also had shares in the factory that made the very expensive tool you needed to install these little horrors (I guess there must be such a tool?).

    Not having a tool, I used a fine spring bar fork to hold two lobes down, and my tweezers to push and turn the spring.

    It's a "hold your breath" job as you can't use a probe or pegwood to keep things under control in case there's a slip.

    Enough moaning.

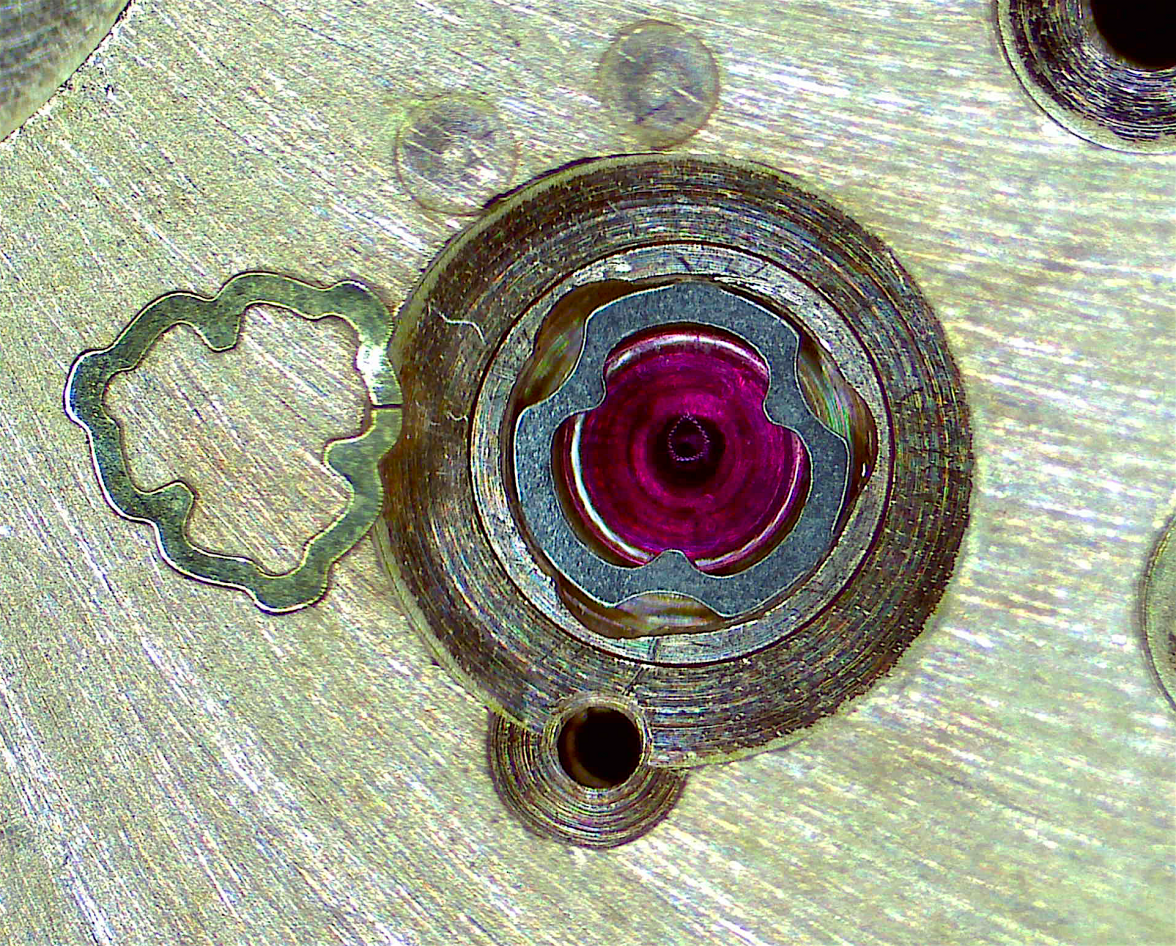
    Here's a pic of the Seiko system where you push one lobe in and turn it until the next lobe aligns, and repeat until all three are seated correctly, all the while having your other hand spare to hold a stick in the centre of the spring in case of "pinging".

    SeikoExample.png

    And here is the culprit, you can see the break in the spring at about its 3 o'clock.

    BrokenShockSpring.png

    Damn! I'm slow today.

    It just dawned on me that I could have tried a Seiko spring from one of the ten movements I have.

    In my bench drawers.

    Right under my nose :rolleyes:.

    Oh well, next time.
     
    Edited by a mod Jul 12, 2021
    nzshadow, sonicosa, ChrisN and 2 others like this.