Forums Latest Members
  1. Archer Omega Qualified Watchmaker Jan 23, 2017

    Posts
    26,463
    Likes
    65,604
    Balance spring removal levers of course. :)

    http://www.jewelerssupplies.com/product9562.html

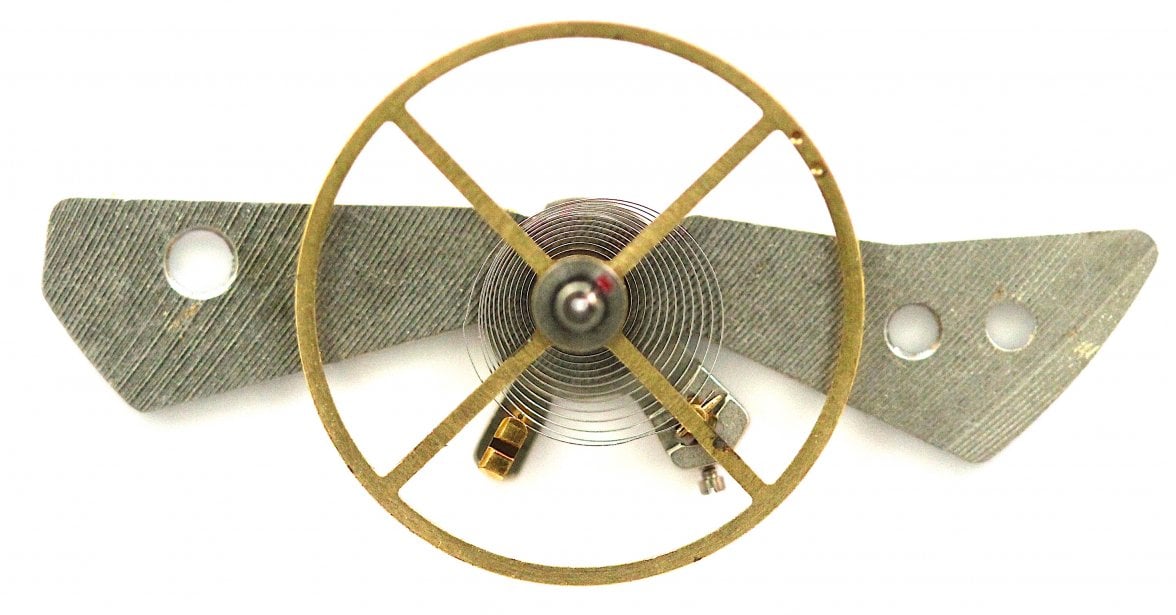
    These are a different shape than hand levers are, but use the same principle. Are you using the screwdriver as a lever (hopefully not pushing it under the collet and twisting!), or are you inserting it into the slot of the collet? I suspect you are only dealing with pinned collets that have a gap in them, so just be aware that opening up the collet this way too many times can lead to a collet that is loose on the staff. So for those who may not know what I mean, this is a traditional pinned collet on this balance:

    [​IMG]

    Note that I took this photo for another reason that you can see as balance screw snapped as I was unscrewing it to add a timing washer while dynamic poising...getting the remainder of the broken balance screw out was :mad:

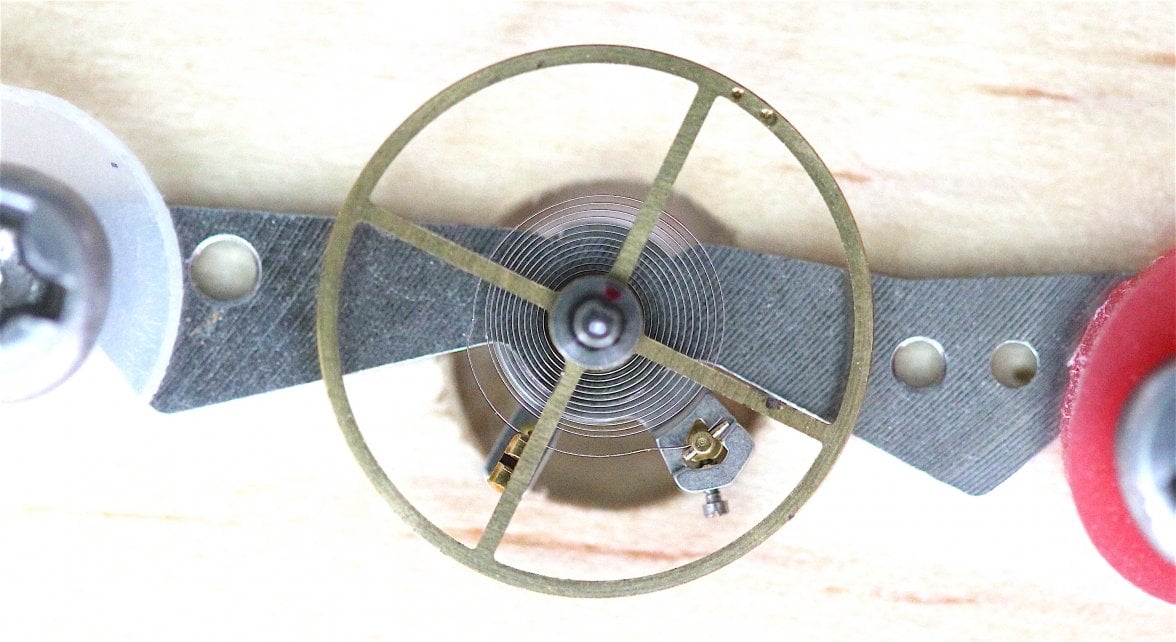
    So on this one the collet is a brass ring with a slot cut in it and a hole drilled for a small taper pin that pins the balance spring to the collet, and the collet is then a friction fit on the balance staff. Using that slot to open up the collet to remove it from the staff can be problematic, and really using a screwdriver as a lever could also cause problems if you are not careful. Here is an older Rolex balance where the collet in more in focus:

    [​IMG]

    I actually can't recall what this balance spring assembly is from, but this assembly is actually made up of the collet, pin at the collet, the spring, the stud, and the pin at the stud, so 5 different parts:

    [​IMG]

    Of course many modern watches don't have this kind of round collet with a slot, so there's no slot to stick a screwdriver in, and trying to lever it off with a screwdriver won't go well. This is a modern balance "ETA based" and as you can see the collet is a completely different animal - oddly shaped and the balance spring is welded to the collet, not pinned:

    [​IMG]

    On the stud end it's glued into the stud, not pinned or welded. These tend to fit very tightly on the staff, so levers are the best way to remove them and it takes some force to do so...they come off with a bit of a snap...

    Hope this helps.

    Cheers, Al
     
    Mad Dog, JimInOz and François Pépin like this.
  2. Syrte MWR Tech Support Dept Jan 23, 2017

    Posts
    7,422
    Likes
    20,891
    Good choice ;)
    (We're missing Dennis here....)
     
  3. François Pépin Jan 23, 2017

    Posts
    1,531
    Likes
    1,081
    Thanks a lot Al! Very helpfull, as usual.

    Sometimes I put one screwdriver in the slot of the collet, but when I feel I would have to use to much force, I prefer to use screwdrivers as levers. So I guess I was not doing well!

    I service only vintage watches, and for the moment have not yet met the collets you showed in your last pics. But I still already had the feeling that using screwdrivers as levers could get me into troubles because it implies most of the time that the collet do not get off the staff strictly right.

    Lesson learned: I have just ordered hairspring levers!

    By the way, Al, could you please tell me how you manage to get off the broken screw from the balance? I have faced this issue a couple of times and it is really a pain in the neck to remove those broken screws!
     
    Edited Jan 23, 2017
  4. Archer Omega Qualified Watchmaker Jan 24, 2017

    Posts
    26,463
    Likes
    65,604
    Very carefully. If I recall on that one I filed flats on either side of the screw that was protruding on the inside of the balance, and then was able to grip those with #5 tweezers and slowly turn it out...
     
    François Pépin likes this.
  5. François Pépin Jan 24, 2017

    Posts
    1,531
    Likes
    1,081
    OK, thanks!
     
  6. ConElPueblo Feb 5, 2017

    Posts
    9,587
    Likes
    26,978
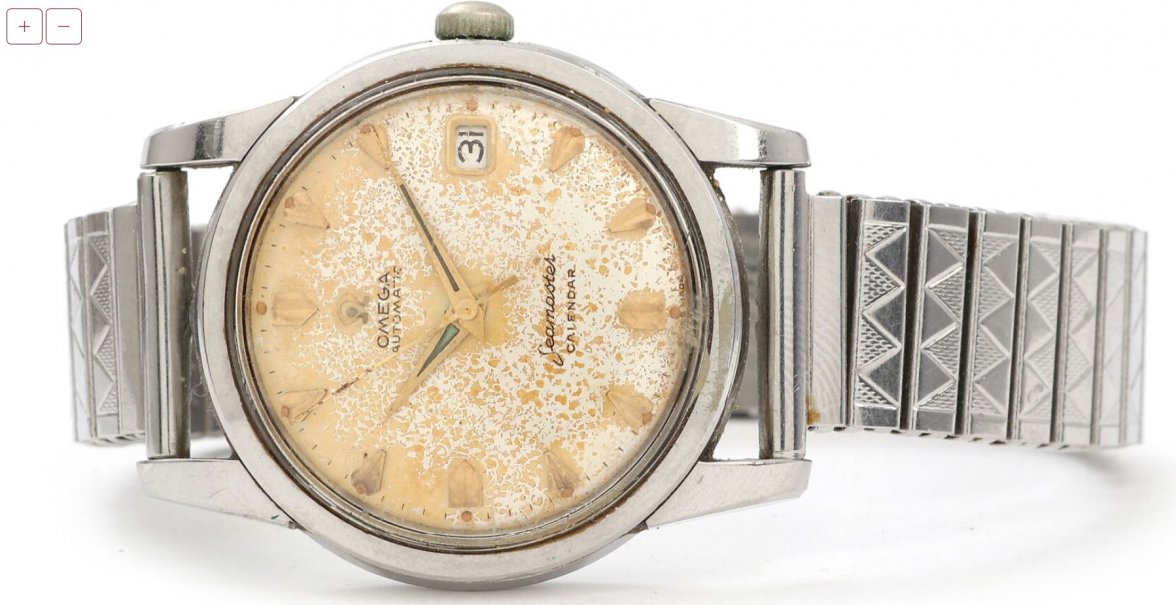
    I recently posted this one in the "What Did You Buy Today" thread:

    Udklip.JPG

    I bought it rather cheaply and I had an idea that the dial could be cleaned, as I couldn't discern any loss of text anywhere on the dial, leading me to believe that the orange patina was on top of the lacquer.

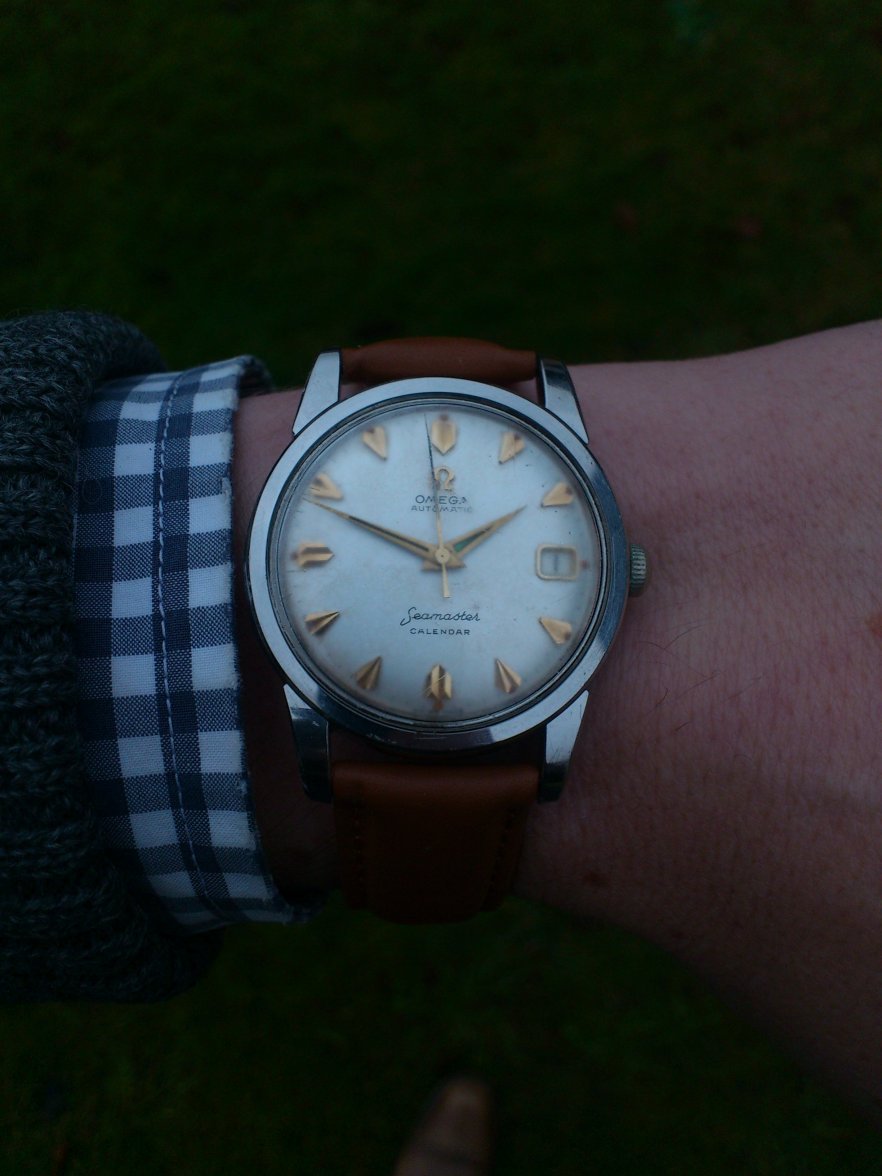
    I wasn't dissapointed :)

    DSC_0441.JPG

    I carefully removed it without disturbing the radium plots, and pretty much everything came of easily. In my eagerness to get a photo of the result before the last light had gone, I didn't dry the case properly, as you can see - that has been corrected now.
     
    WYO_Watch, pitpro, ahartfie and 4 others like this.
  7. ahsposo Most fun screen name at ΩF Feb 5, 2017

    Posts
    3,745
    Likes
    19,993
    Nice! Tell me about the cleaning technique, please.
     
    Jwit likes this.
  8. Rman Feb 5, 2017

    Posts
    2,416
    Likes
    9,563
    Ditto that please
     
    Jwit likes this.
  9. ConElPueblo Feb 5, 2017

    Posts
    9,587
    Likes
    26,978
    Pretty boring and straight-forward: lukewarm, soapy water on cotton sticks. No dipping or anything as I didn't want to lose the great looking radium lume plots :)
     
  10. wsfarrell Feb 5, 2017

    Posts
    2,441
    Likes
    4,133
    That's a welcome surprise. I always thought it would take something stronger (like lemon juice) to clean a dial like that.
     
  11. JimInOz Melbourne Australia Feb 5, 2017

    Posts
    15,491
    Likes
    32,381
    Thread hijack warning.

    I had just finished assembling a Seiko 6139B and had put the balance in to run the movement for about ten minutes to clear the epilame from the pallets and escape teeth so I could do the oiling.

    I was carefull removing the balance to do that when I felt a big sneeze coming, I held my breath and froze, hopig to stifle it.
    No success, a huge snort and I bumped the balance coming out of the movement.

    On checking for damage I saw a big inward bend next to the stud. With great care I removed the bend enough to see what the real damage was. As can be seen below, the spring is now way out of shape and I'll have to bring it back somehow.

    I could Google the many guides on hairspring manipulation and go for it, but I don't want to make it worse.

    So, my predicament, where do I start and what needs to be done to get concentricity back etc.

    Any help from the masters (@ChrisN @Archer et al) would be greatly appreciated.

    Here is the mess I have at the moment.

    HairspringWreck.JPG
     
  12. Archer Omega Qualified Watchmaker Feb 5, 2017

    Posts
    26,463
    Likes
    65,604
    Pretty clear where the damage is, so this one is easy to pick where to start. The key is taking your time and doing this when you are fresh. Not something you want to learn when you are feeling tired or frustrated.

    If you make just one bend on the left it will come back most of the way. As I've mentioned to Chris often very bad looking springs can be brought back a long way with just one adjustment. Not sure what tweezers you have but I would use a good set of #5's and a clean oiler, and start to gently move it near the bend. I would just start with small adjustments and don't do anything drastic all at once, partly because it will show you how this will come back. I would avoid over adjusting where you go too far and have to adjust back...if you bend back and forth too much it will work harden the spring and the potential for breakage increases.

    Try to keep your adjustments in plane - you don't want to introduce and out of flat condition as you make these corrections, which is something people tend to do when they start out doing this sort of work. Of course once you have the coils concentric, you will have to check the overall spring for flatness, and adjust as needed.

    It really isn't a bad situation...it's pretty straightforward. I'm sure you can handle it. Just take your time, study where you want to bend and anticipate in advance what that bend will do. Don't rush it, and if you are feeling stressed, take a break and walk away for a while, and come back to it another time. People often get stressed or intimidated by these and really it's not as difficult as you think it will be once you get by the initial fear.

    Hope this helps, and if you get stuck post more photos.

    Cheers, Al
     
  13. JimInOz Melbourne Australia Feb 5, 2017

    Posts
    15,491
    Likes
    32,381
    Thanks Al, I've put the balance on a block of pine so I can steady my hands. I've pushed on the bend and can see where the result will be so I'm going to take a break and just do 5 minutes or so at a time and have a breather to settle my nerves :D.

    Hairspring tweezers are the next tool order.
     
  14. JimInOz Melbourne Australia Feb 6, 2017

    Posts
    15,491
    Likes
    32,381
    Well after a number of attempts with #4 Dumonts and a fine wire I'm here and I've had enough for the day.
    It's extremely difficult to do with normal tweezers without introducing any twist.
    I can see maybe a slight adjustment could be done or is this within limits?

    Maybe tomorrow after a good night's sleep.

    HairspringImproved.JPG
     
  15. ChrisN Feb 6, 2017

    Posts
    2,218
    Likes
    4,756
    Coming along Jim.:thumbsup: It's still a little offset so needs a little more work. I'm not a Master (thanks;)) like Al at this yet but, I could give some tips on top of those that Al has already given.

    I know Al does a lot of his adjustments with the balance and spring mounted but, for those of us with less experience, I sometimes find it easier to remove the spring from the balance. In case you haven't done this before:

    Open the boot on the regulator – looks like yours has the screwdriver slot so you can rotate it and free the spring (I don’t know this caliber though). A 354 has a tiny hole sideways through the boot which is a real pain to work with.

    Undo the screw holding the stud.

    Free the stud from the cock and lift the balance and spring away from the cock being careful the spring does not get caught on the boot.

    Turn over the balance (careful with that roller table and jewel) and put into your staking/riveting block. If you don’t have one, you can usually take the anvil table off the staking set and use that.

    Assuming you have a split collet, make a note of where it is relative to the arms – a photo helps.

    You use a pair of collet remover levers which are similar to hand removal levers – I have the Bergeon ones and they “lift” the collet off the staff. I think Al has mentioned previously that the other way of inserting a blade into the collet split and opening it slightly to enable you to lift it off is less desirable as it can open the collet up and then you lose some of the interference fit.

    Now, the spring is completely free so, you can work on it on the bench.

    When it’s more or less correct, mount the spring onto the cock at the stud and tighten the screw. Do all this without the balance.

    Now, you can see it’s in the right place for the regulator pin/boot at any regulator position and you can see if the spring collet sits exactly over the jewel hole. When it’s tweaked to do that, you know that when it’s refitted to the balance, the balance will not be pulling it back to the centre position – that’s the big gain for me. You can also check that the spring is parallel to the cock – as Al says, it’s very easy to introduce an out of plane error when making these adjustments. Then remove it from the cock.

    Press the spring collet back onto the balance with the staking set, making sure it’s in the right orientation – careful of that flipping jewel….

    Fit the balance back to the stud and close the regulator boot.

    It should now be absolutely fine as the balance should not affect how it sits.


    That’s the way I make significant changes to a spring as it means I know the balance staff is not pulling the spring across to the centre. I know it’s more work but, all good time at the bench. I obviously don’t go through this whole rigmarole just to make a slight correction to the way a spring sits.

    Good luck.

    Cheers, Chris
     
    François Pépin and Archer like this.
  16. JimInOz Melbourne Australia Feb 6, 2017

    Posts
    15,491
    Likes
    32,381
    Thanks for the tips Chris :thumbsup:.

    That's the method I used on my Ω 161 with the broken balance pivot. Changing the angle of the roller table a number of times to get it in beat, even thought it was set back in the original position, was educational. The tiniest adjustment would produce a significant variation. For the last adjustment I think I just stared very hard at the balance (well, with a gnat's whisker adjustment then) and put it back in to give me a zero beat error.

    Rather than risk any more damage, I'm so close now I'll just be patient and careful with it in the mounted state.

    Now for a calming coffee before I start again.

    Thanks again for the help from both you and Al.
     
    wsfarrell likes this.
  17. ConElPueblo Mar 7, 2017

    Posts
    9,587
    Likes
    26,978
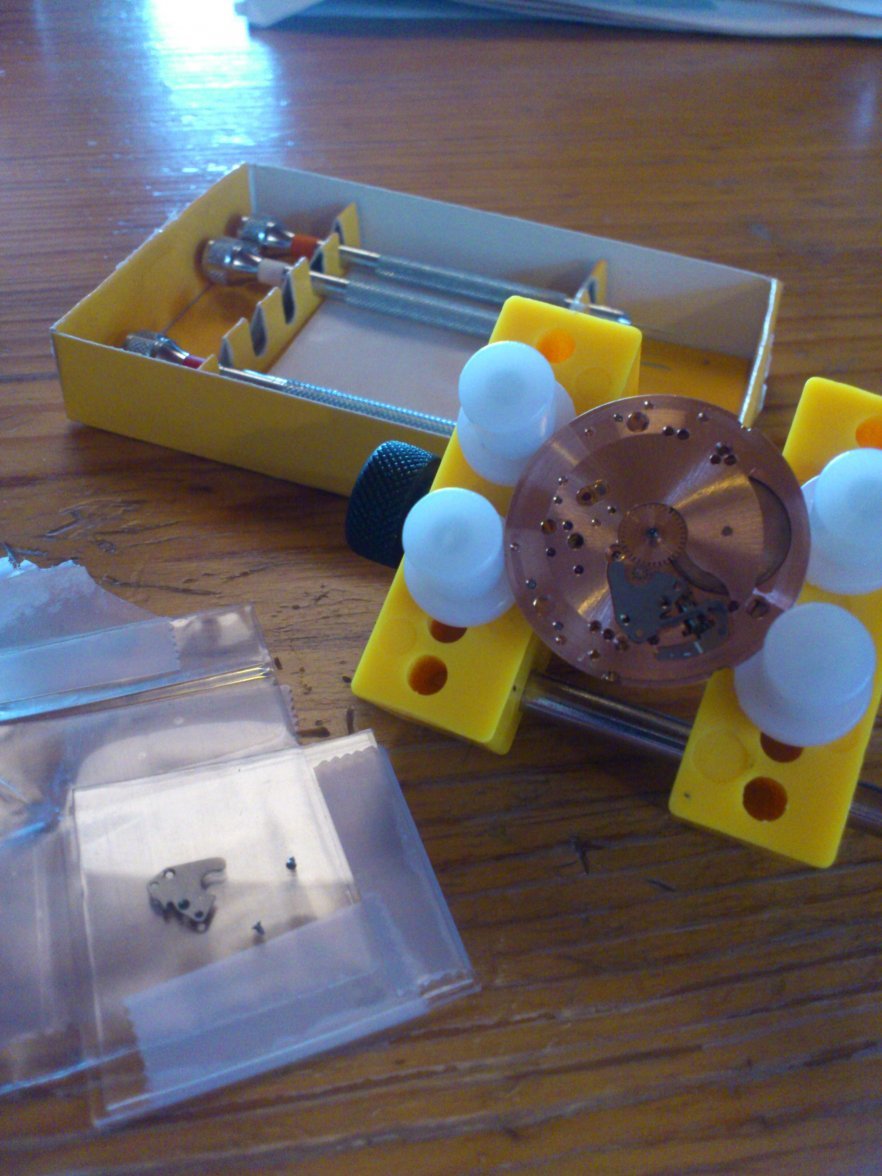
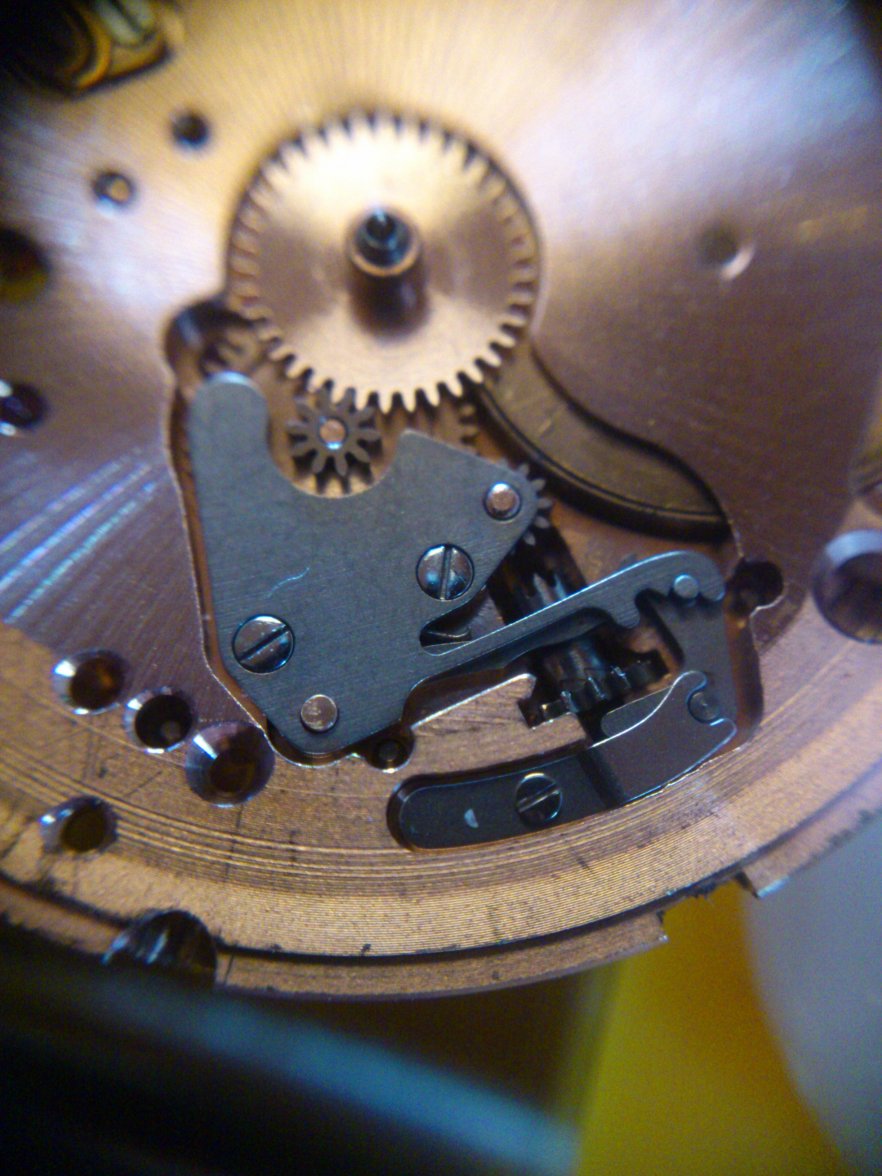
    Having received the setting lever spring from a friendly OF member who had one for sale cheap, I have replaced the broken item:


    DSC_0472.JPG


    DSC_0475.JPG

    I had some trouble getting the two screws off, as my screwdrivers kept slipping. I gave it a pause and came back to the movement, gave the screwdrivers a sanding/polish and managed to carefully get them out without ruining them. Very happy with the end result.

    I now need to get a new crystal for the Constellation (it's a 168.005), so if anyone has one lying around or can order one, I'd love to hear from you :)
     
  18. Mad Dog rockpaperscissorschampion Mar 7, 2017

    Posts
    6,352
    Likes
    74,230
    Hookers? :thumbsup:

    Plastic hookers? :thumbsup:

    IMG_3994.JPG

    IMG_4003.JPG