Hand removal and installation is a topic I’ve wanted to cover for a while, and it is a task that can often cause those new to watchmaking some difficulty. It’s also a task that can be fraught with danger to the hands and dial, so it’s one that seems simple but deserves some respect when doing the task.
I'll start with hand removal, and I’ll show the tools that I use. Tweezers are the first thing - all hands are handled with specific tweezers made for hands that have highly polished surfaces that won’t damage the hands:

Note that there are options out there, ranging from the style I use, to tweezers with wooden or plastic tips, or you can even wrap some tape around a pair of tweezers you have to prevent damage in a pinch.
Next I use hand levers, and I’ve tried different methods to remove hands, but I find these offer the most control:

There are two sizes, one for smaller hands and one for larger hands - these specific levers are made by VOH, and one reason I like them is the long flat section after the curve. Some other levers have steps in the diameter very close to the tips, and those can possibly contact the dial if you are not very careful, where these have more room to “lever” before anything come close to damaging the dial:

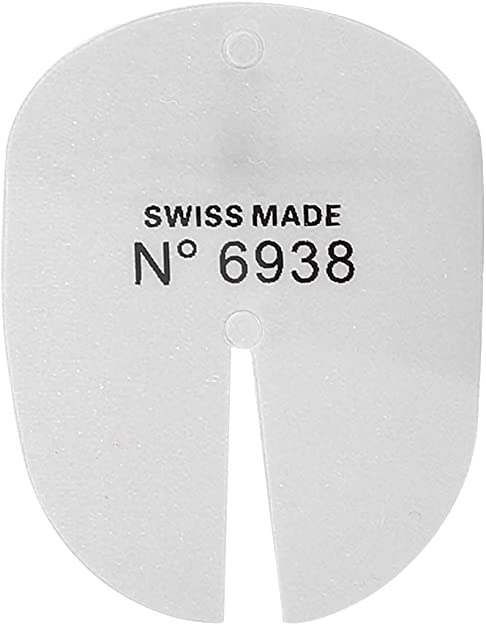
Next, Omega refers to as “pants” as they are shaped a bit like a pair of pants. These are made of a heavy plastic that is is used for wrapping up watches for shipping, and when stacked they stick to each other, but not to anything else. I’ve stacked these and cut them into the shape you see, and the height can be customized by adding or removing layers.

Lastly you need a plastic baggie - I get tons of these containing parts, so they are always plentiful.
I start by removing the sub-dial hands, as I don’t want them in the way when removing the other hands. I lay the plastic bag over the hands, and use the small hand levers to remove those:

Next the central chronograph hand. I line up the hour, and minute hands under the chronograph hand, and I then place the pants of the appropriate height onto the dial. What I want is to have the surface that the levers will work against be nearly the same height as the underside of the chronograph hand:

I then place the plastic bag over all of this:

The small hand levers are used to tuck the bag under the hand, and then lever it off. Since this hand is on tightly, it will sometimes come off with some force, and you will hear a snap sound. The top plastic bag makes sure that the hand doesn’t move much at all during this process, in particular the end of the hand where there is often a section that is lumed. Failing to do this can allow the whiplash that occurs at the end of the hand to cause the lume to fly out of the hand.
Next is the removal of the hour and minute hands, and those are removed together. If you try to get between them to remove them one at a time, it is sometimes possible, but there is risk of possibly scratching the top part of the hour hand. So back to just using the plastic baggie, and using the large hand levers to get under both hands, and gently pry them off:

This process protects both the hands and the dial, and if done properly shouldn’t result in any damage from forces require to remove the hands on most dials (there are very delicate dials that require special procedures). There is always some risk involved in doing this, so in my experience this is the best method to mitigate that risk.
The hands are then stored away properly to prevent damage. There are several ways of doing this, but I use the same packaging that Omega uses for storing and shipping complete hand sets:

For installation of the hands, we need to start with the dial, and hopefully the reasoning for that will become clear. One thing that drives me crazy is hand misalignments, and this is partly because preventing misalignments is usually very easily done. First we should talk about the hour wheel and dial washer. The hour wheel is the wheel that the hour hand attaches to, and unless there is some sort of calendar plate that goes on top of the hour wheel, it can really just be pulled straight off the movement as nothing holds it in place other than the dial.

On top of the hour wheel there is often something called a dial washer, or as Omega sometimes calls it, a metal foil. It’s a curved disk with a hole in it, and it goes on top of the hour wheel:

This is an hour wheel with the dial washer attached, so they can’t be separated. Omega does this on many modern calibers and it prevents the dial washer from being lost:


The hour wheel can freely move up and down under the dial, and the dial washer helps put just a slight amount of tension on the hour wheel to keep it seated. This performs 2 functions:
1 - To prevent the hour wheel from lifting up and skipping a tooth when the watch is turned dial down, causing the hour and minute hands to go out of sync.
2 - To act as a friction spring to take up some backlash in the hour wheel, resulting in smoother movement of the hands.
When you install the dial, you should check the end shake on the hour wheel, making sure that it cannot lift up too far too easily.
Once this is done, we now need to look at the centering of the dial on the movement. Good hand alignment starts with a properly centered dial. Here’s an example - this dial is clearly not centered properly:

You can see this in both the central hole, and the hole for the sub-seconds dial. So how do you center the dial? To do that we need some things, and one is a piece of wood - I’ve taken this piece of wood and traced out the approximate radius of the dial on one end, and use my scroll saw to cut it out:

Next you need a good movement holder, and a small watchmaker’s hammer:

You place the movement in the holder, and place it against a solid item that won’t move (I use the slot for my bench vise), then place the wood up to the dial, and tap the other end with the hammer to center the dial:

My advise here is to go slow, light taps is all that is required. The result after centering:


Note that I have on occasion run across a dial with m ore than one hole in it, where centering the main hole in the middle of the dial, meant that another hole was not centered - the holes in the dial weren't spaced properly. In a case like this, I will prioritize the central hole as that will be most visible regarding hand alignment.
So now we will go back to a Speedmaster to illustrate the hand installation. First another overview of the tools I use, and I start with the movement holders - these are specifically designed for use when installing hands, but can also be very useful in some cases for assembling the dial side of the movement. These holders have adjustable supports in them to support the jewels when pressing the hands on:

The support is typically moved using a screwdriver, and it should be brought up to the underside of whatever jewel is being pressed on.
For hand installation, I use a hand press, and my press has a feature called a decentering plate:

The post in the middle of this plate centers the movement holder for the various hands that are installed - you can see the holes on the underside of the movement holder:

One thing you want to make sure of is that whatever you use to press the hands on, that the surface that will come in contact with the hands is in good condition - difficult to see here since it’s all white, but the tips of the runner for my hand press are something I check regularly, and if they are damaged in any way I clean them up, usually by taking them to the lathe and taking a skim cut off the end:

If these tips are damaged and have burrs on them, they can create uneven pressure on the hand surfaces, and with painted hands this may cause paint to flake off. On to install some hands.
The dial is installed:

I now select the correct runners for my hand press:

Note that there are many different tools that have been used for hand installation, and some are better than others. I find a hand press is valuable for helping install the hands parallel to the dial, and properly aligned. There are individual hand held tools for installing hands, but they are less effective/efficient than a proper hand press.
When installing hands, you generally start with the hands that are closest to the dial first, and on a chronograph that will be the sub-dial hands. Here you can see that decentering plate in action, as the constant seconds hand is installed:

All the hands are installed now:

Now if a hand doesn’t go on perfectly lined up, I would resist the temptation to press down on the hand and “twist” the runner in the press to try to move the hand on the post. This will often just damage the paint or finish on the hand, so if you don’t get it on right the first try, remove the hand and install it again.
Next we install the hour hand, and on a no date watch it can just be pressed on anywhere. For a watch with date, you would advance the hands until the date change, then install the hand right when the date flips over. After installing the hour hand, back it up 1 hour to 11 o’clock:

Then move it forward again to hit the 12 exactly, and without touching the crown, press the minute hand on:

This will assist in getting the hand aligned properly, but I always check it around the dial:


On a watch with date, this is where you would check the accuracy of the date change, to ensure it meets the tolerances of the brand. If it’s all good, you can now install the chronograph seconds recording hand:


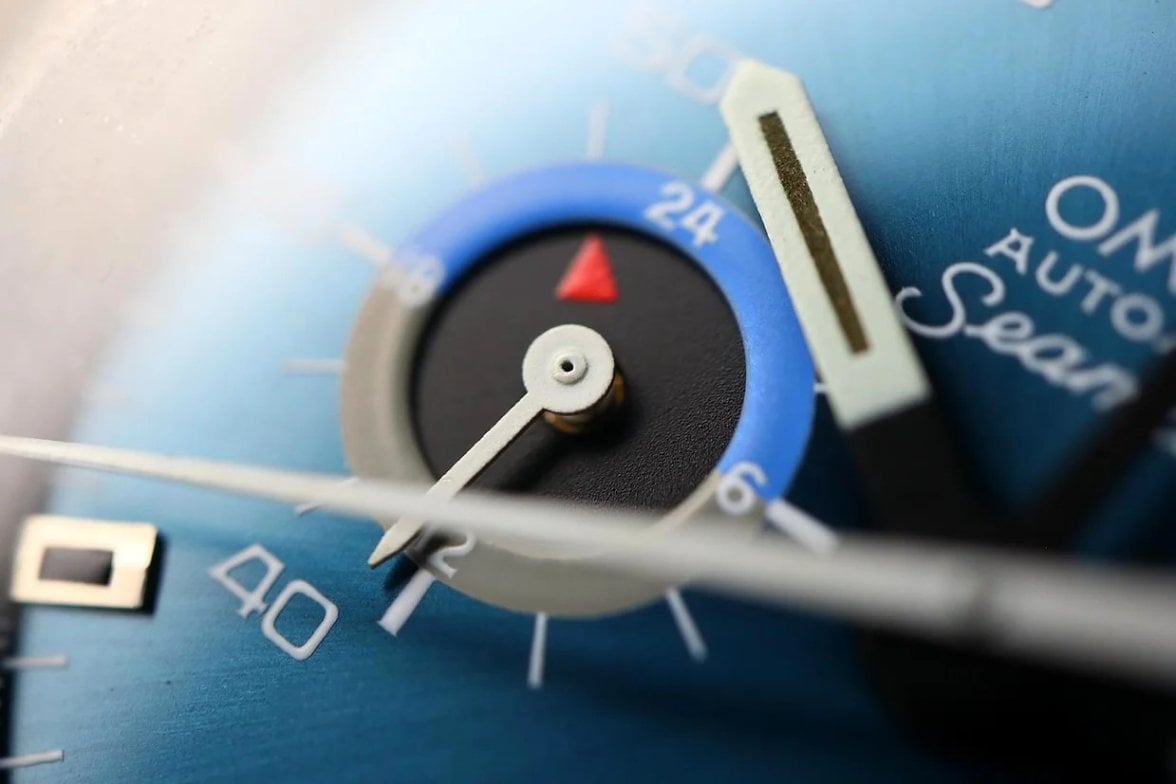
One thing I haven’t mentioned yet is called division. This is the spacing of the hands from the dial and to each other. It’s difficult to photograph well, but what you are looking for generally is that the hour hand (or whatever central hand is closest to the dial) is spaced away from the dial an equal amount to what the minute hand is spaced away from the hour hand, and then the second hand away from the minute hand. The hands should be evenly spaced and parallel to the dial. Of course the hour hand should clear any sub-dial hands or raised marker on the dial.
This was a long post, so I will talk about some problems related to hands and hand fitting in a follow-up post. As always, questions are welcome.
Hope this helps.
Cheers, Al


