- Posts
- 29,951
- Likes
- 77,435
Archer
··Omega Qualified WatchmakerThis is #12 in my series of basic watchmaking tips.
Combining two shorter topics here, because of a need I see on the forum for one, and a request was made to me via PM for the other.
First fitting a new stem. Now this is just the way I do it - you don’t have to follow this, but it works for me.
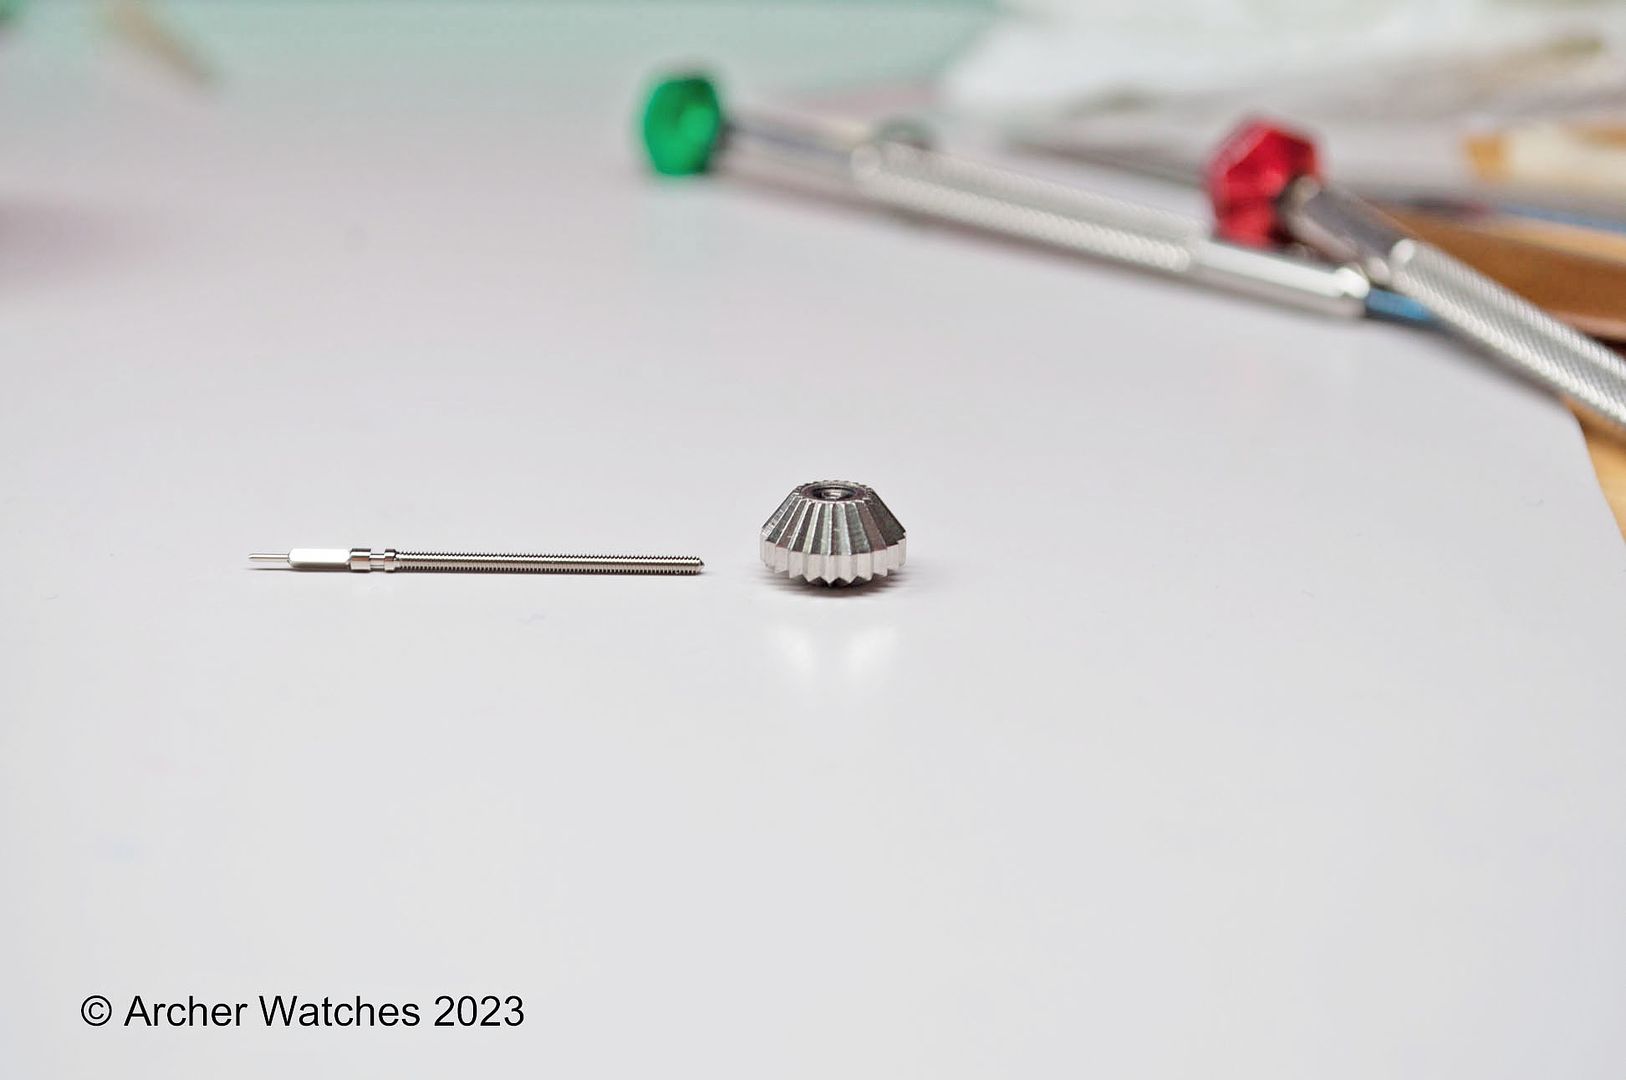
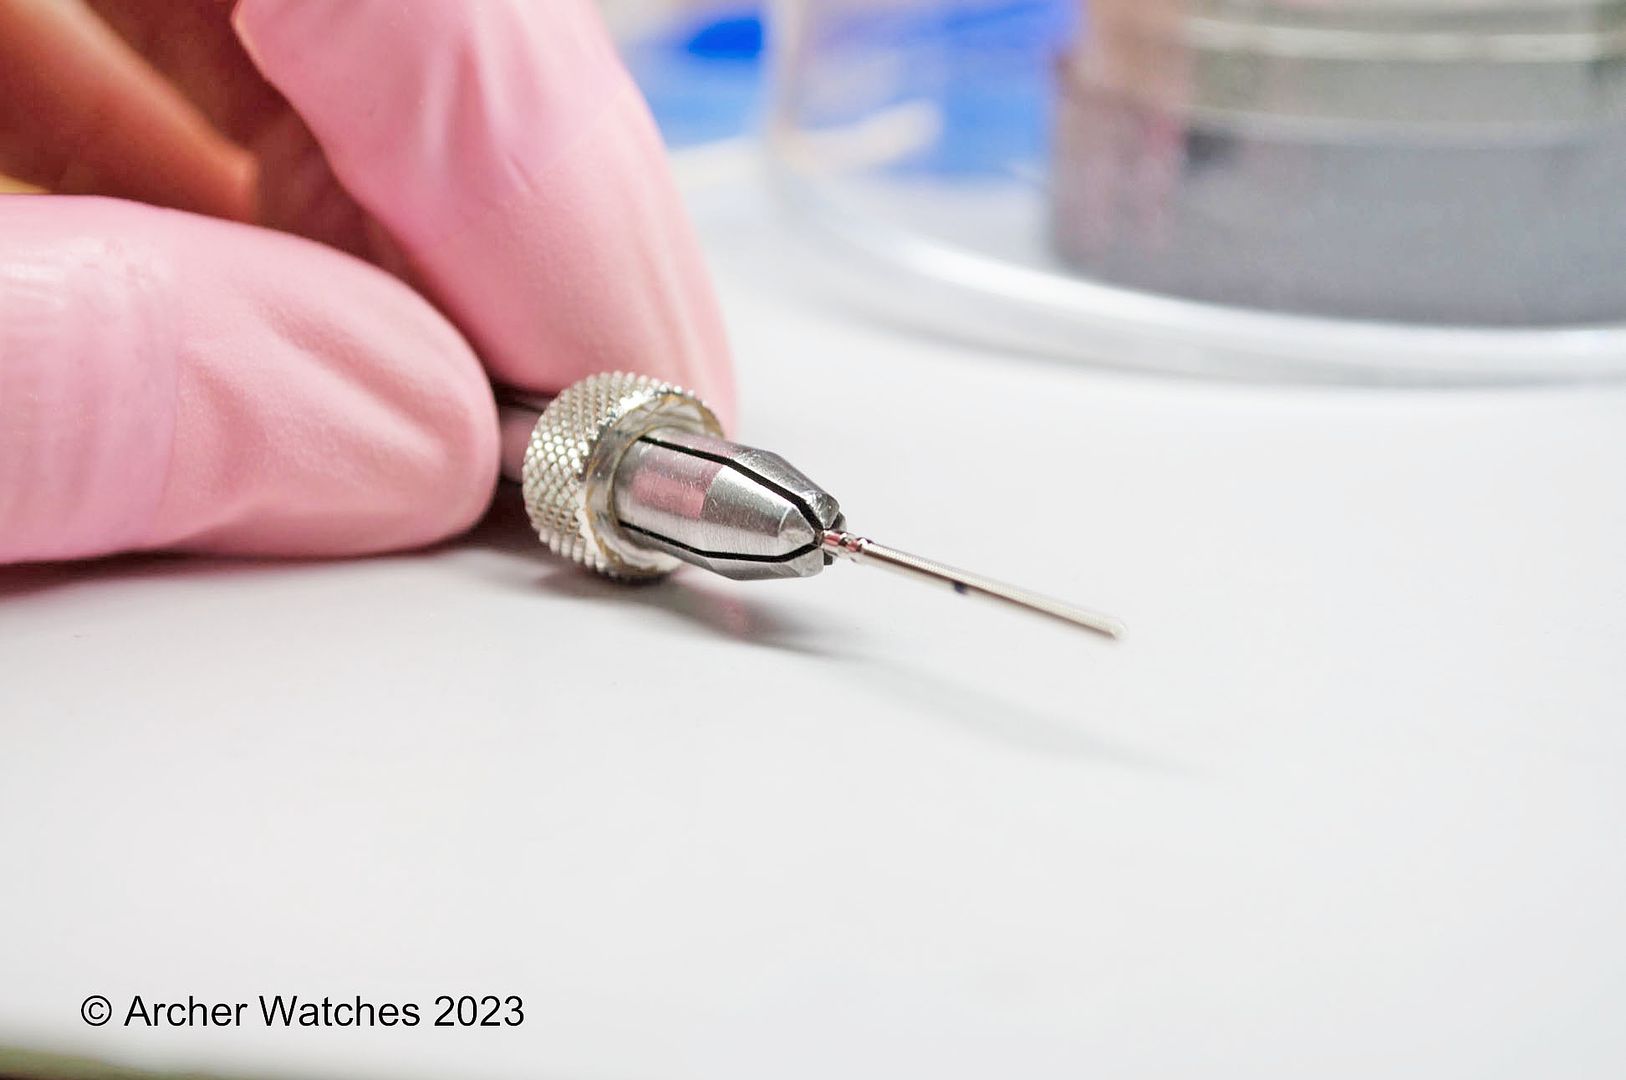
Here is a new stem and crown that needs to be fitted to a watch:

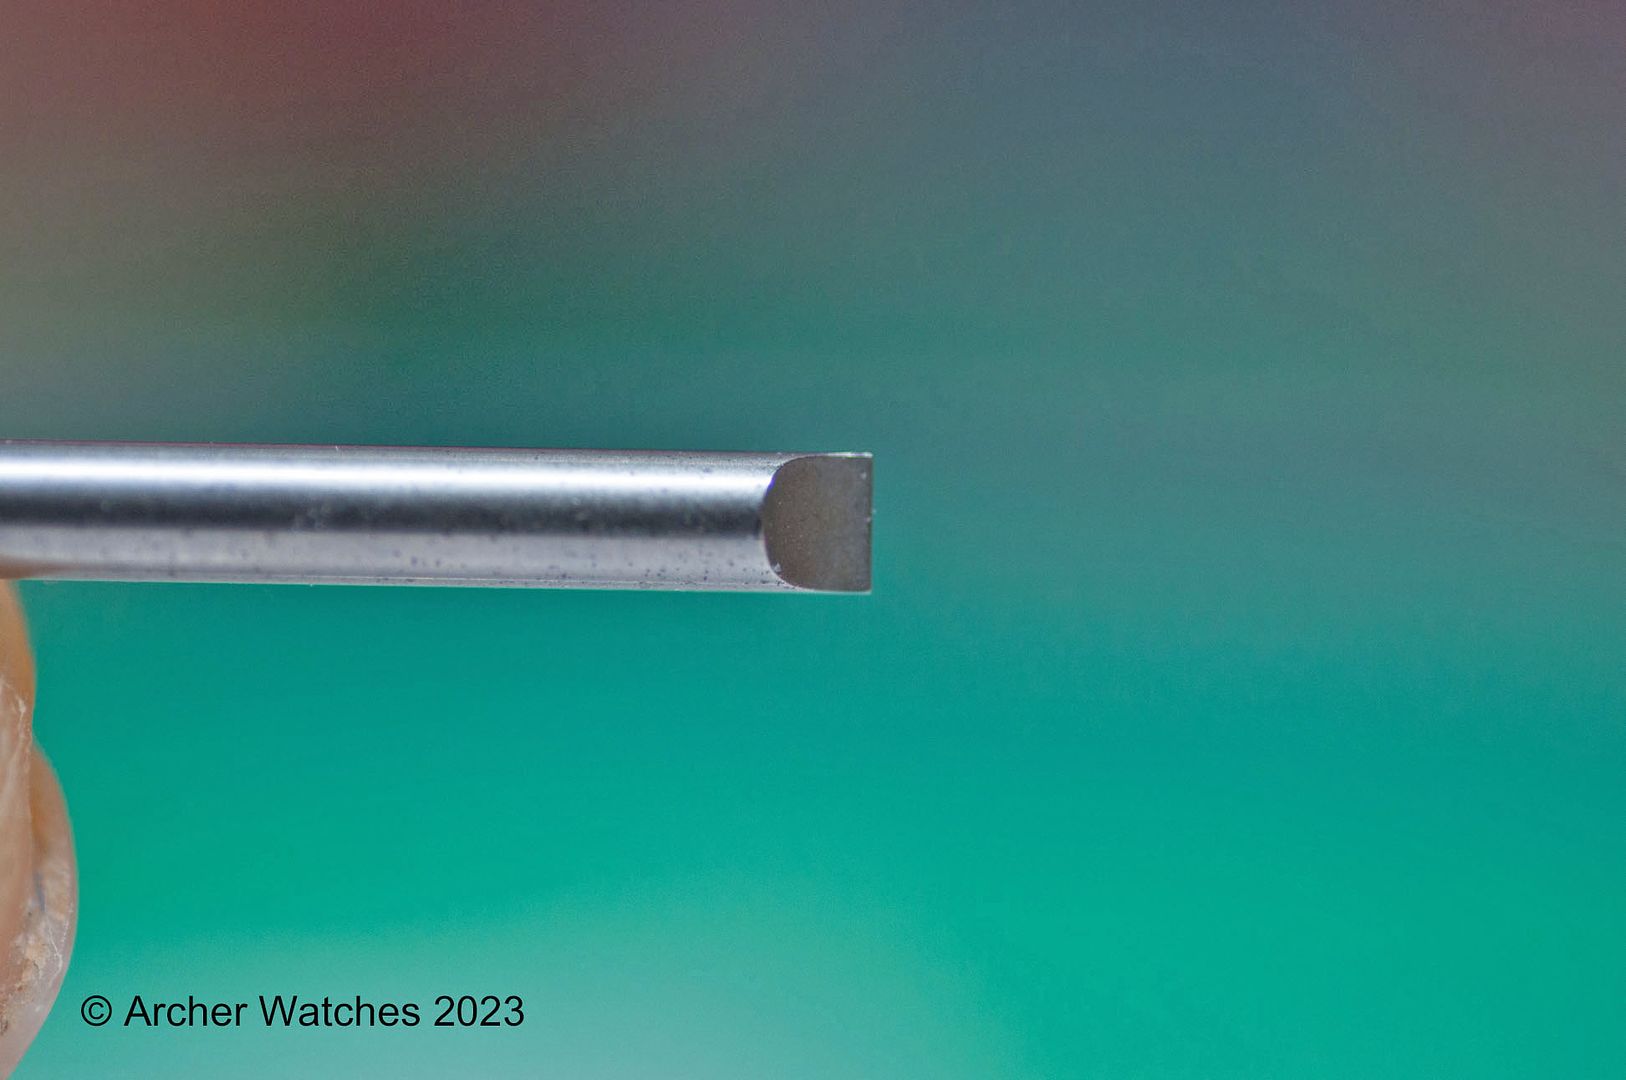
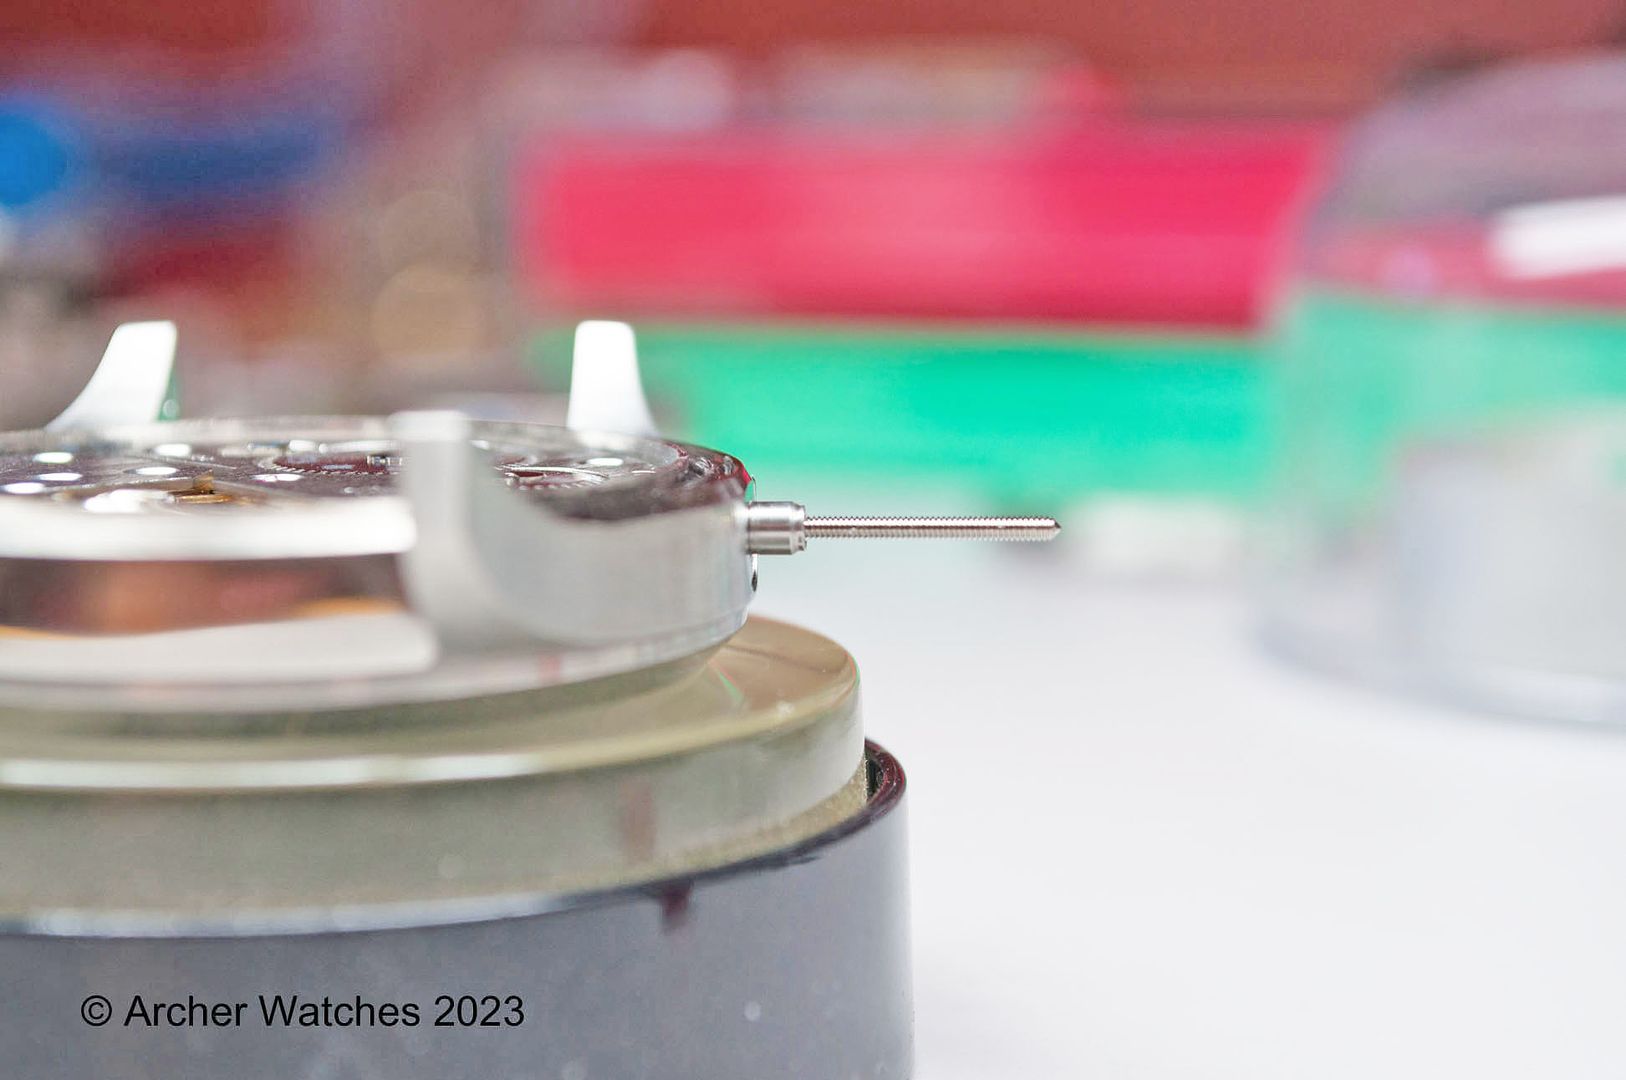
New stems tend to be very long, so I like to get them cut down first to something close, to make it easier to fine tune the final length. With the movement fitted into the case, install the stem - fully install it so if it uses a screw to lock the stem in place, make sure it’s locked down:

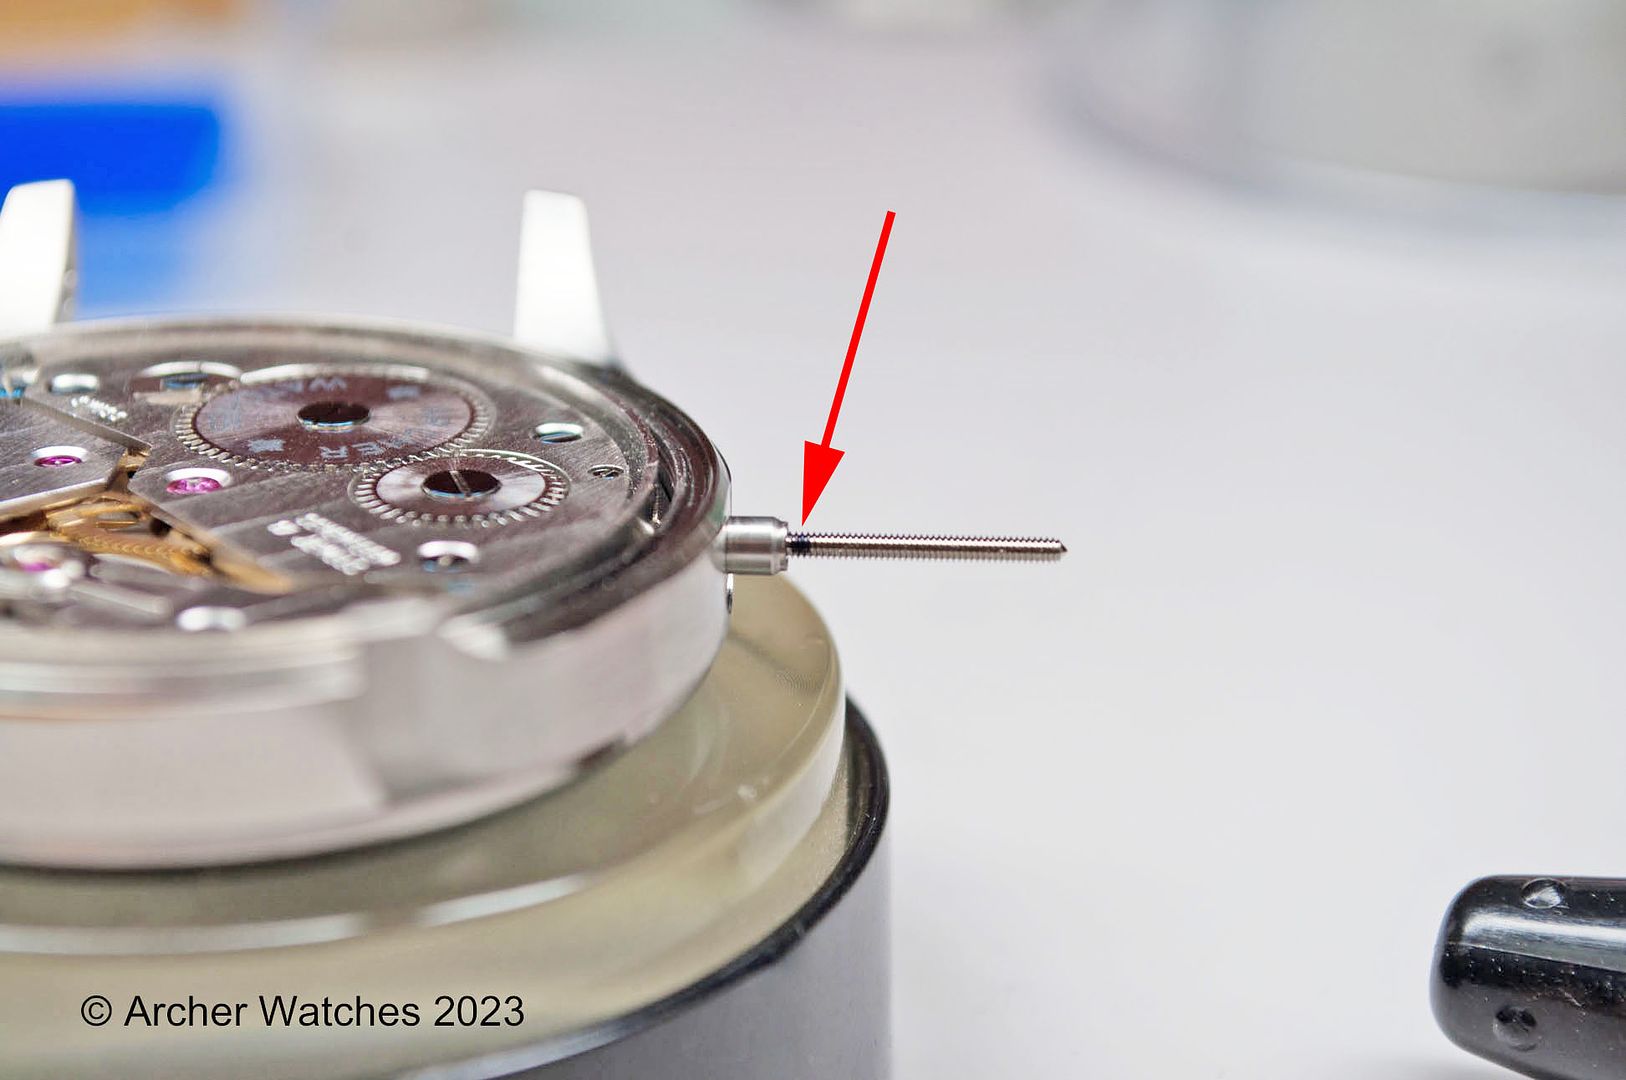
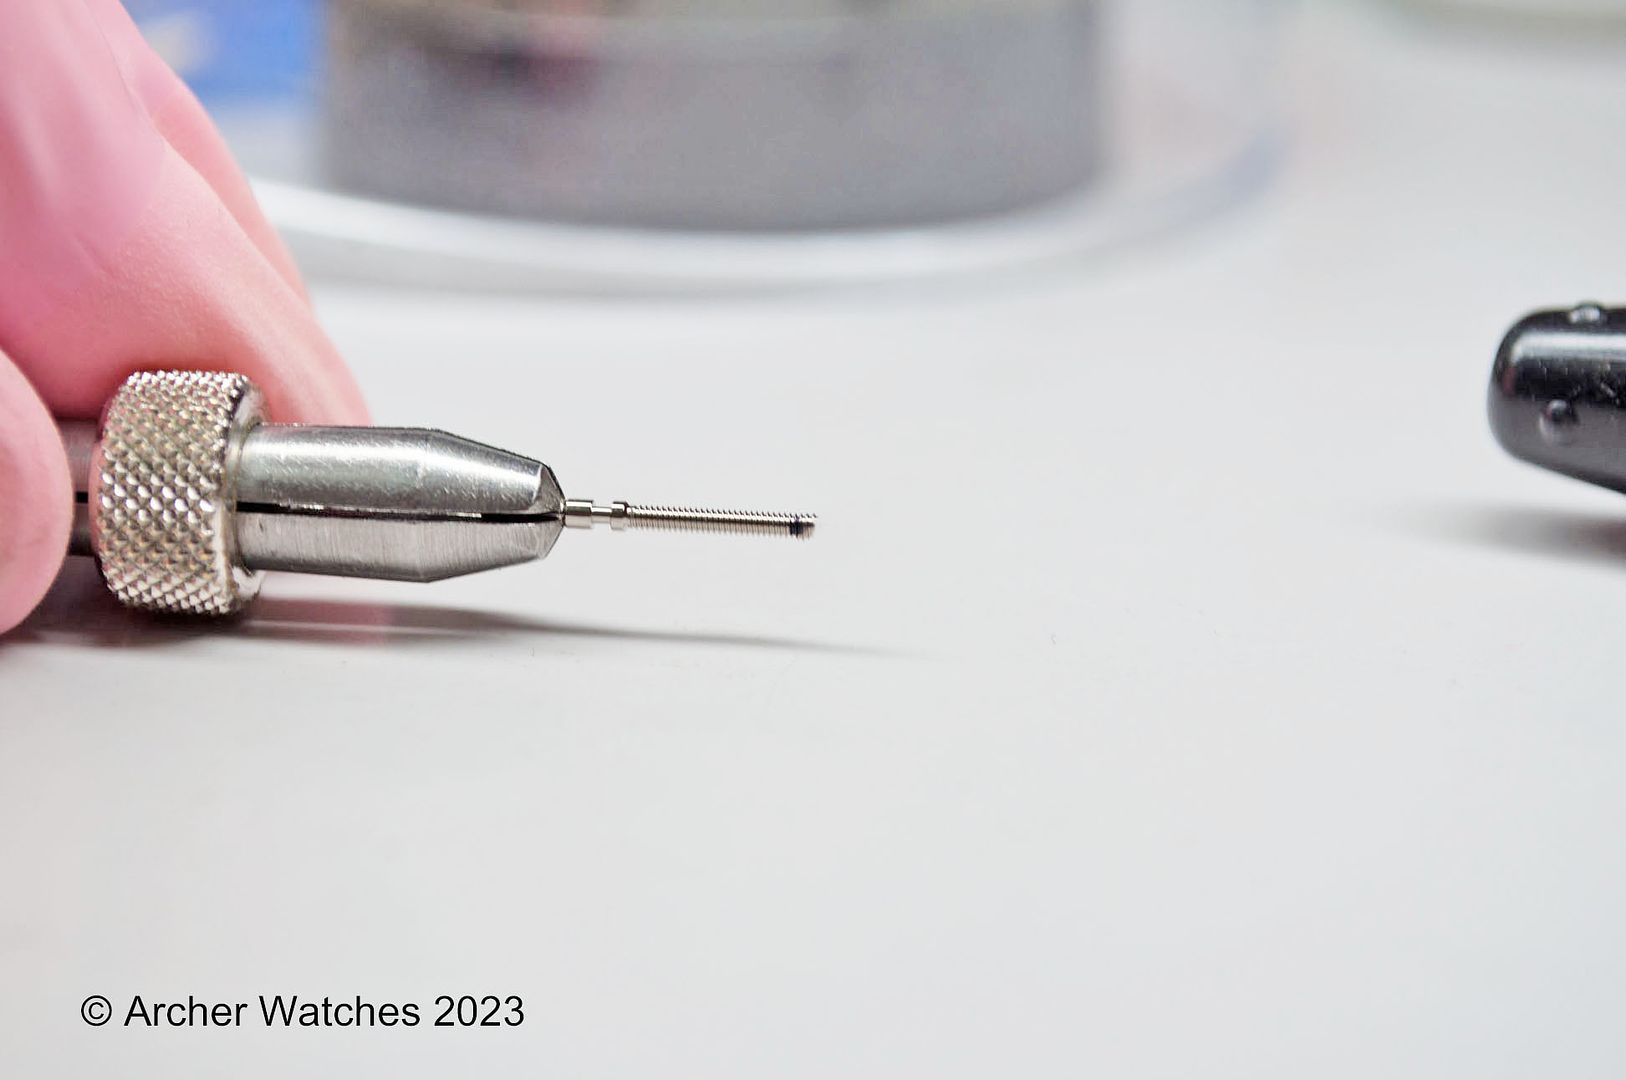
Now mark the stem right at the end of the case tube:

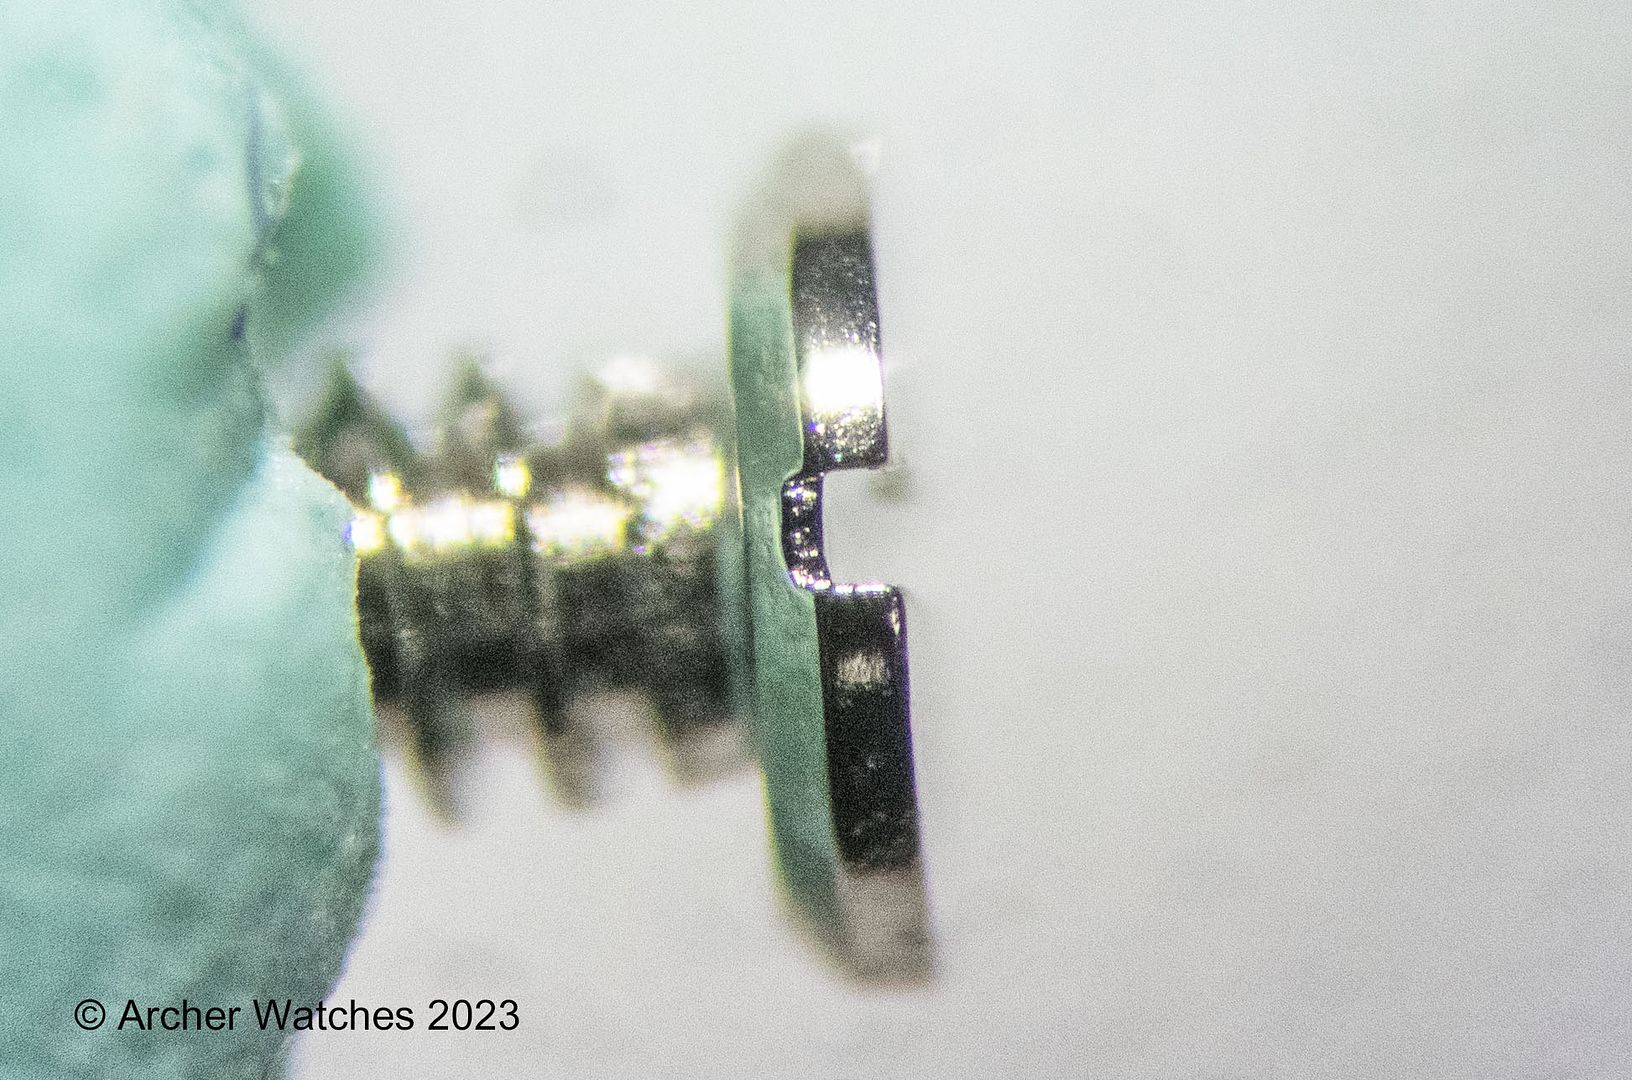
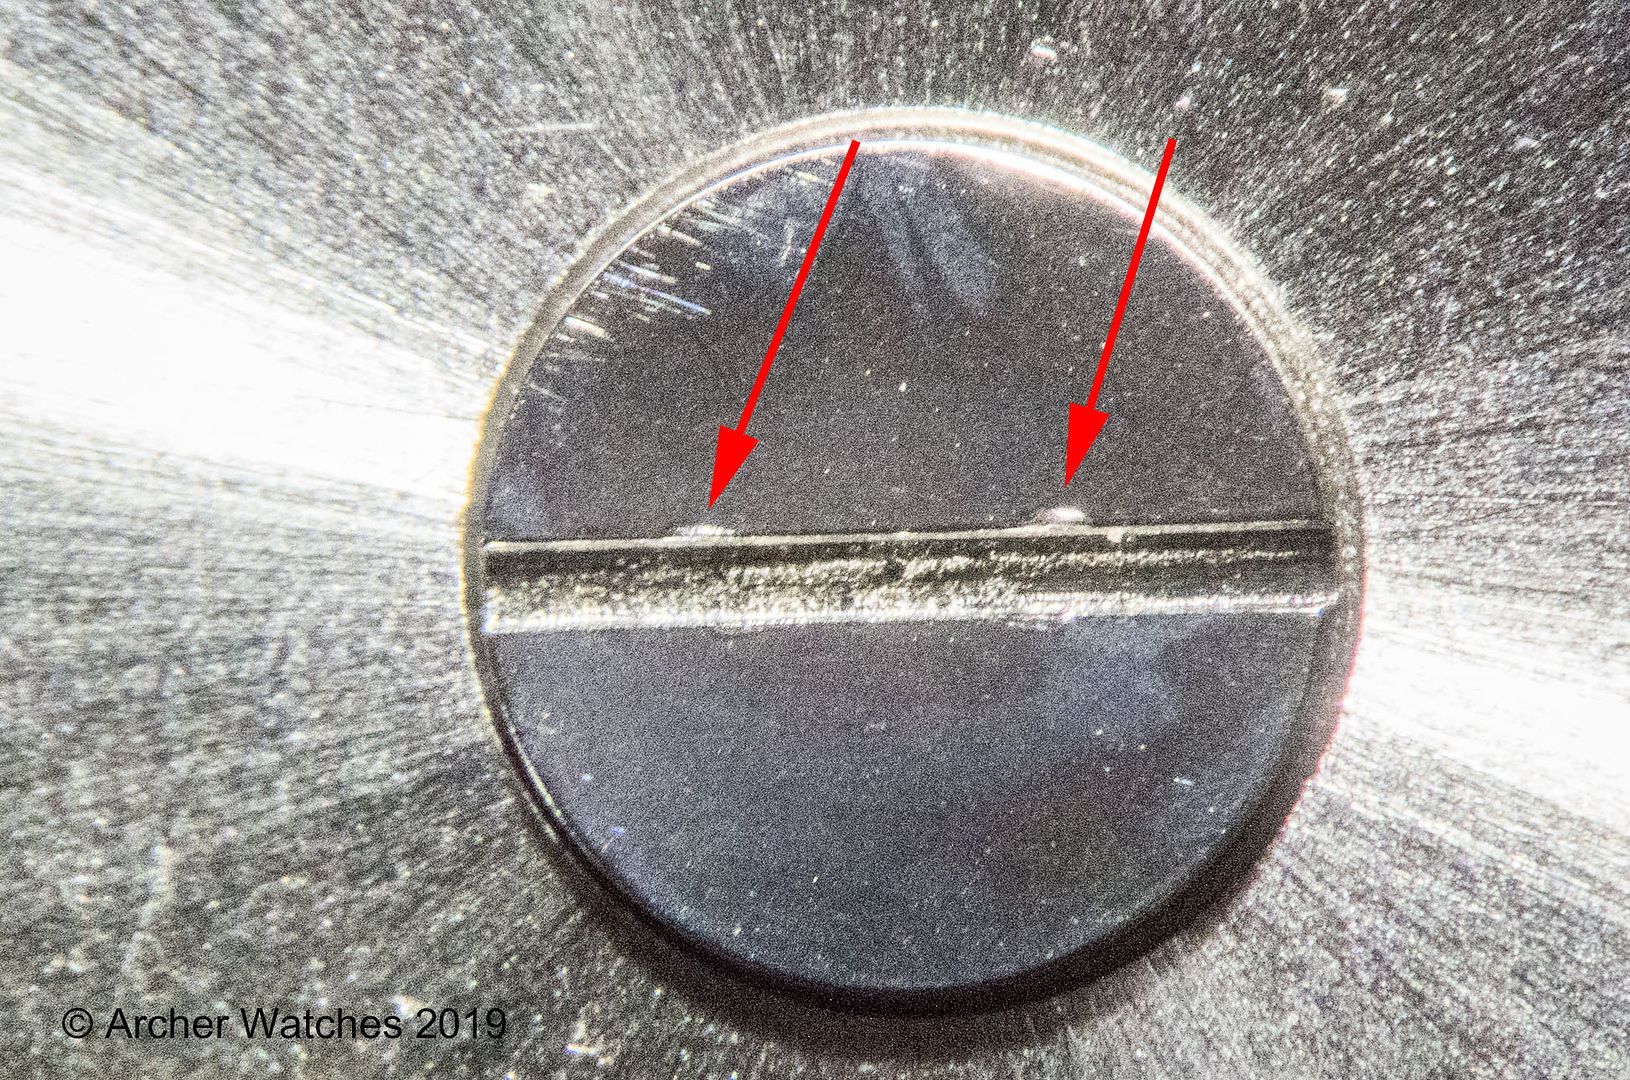
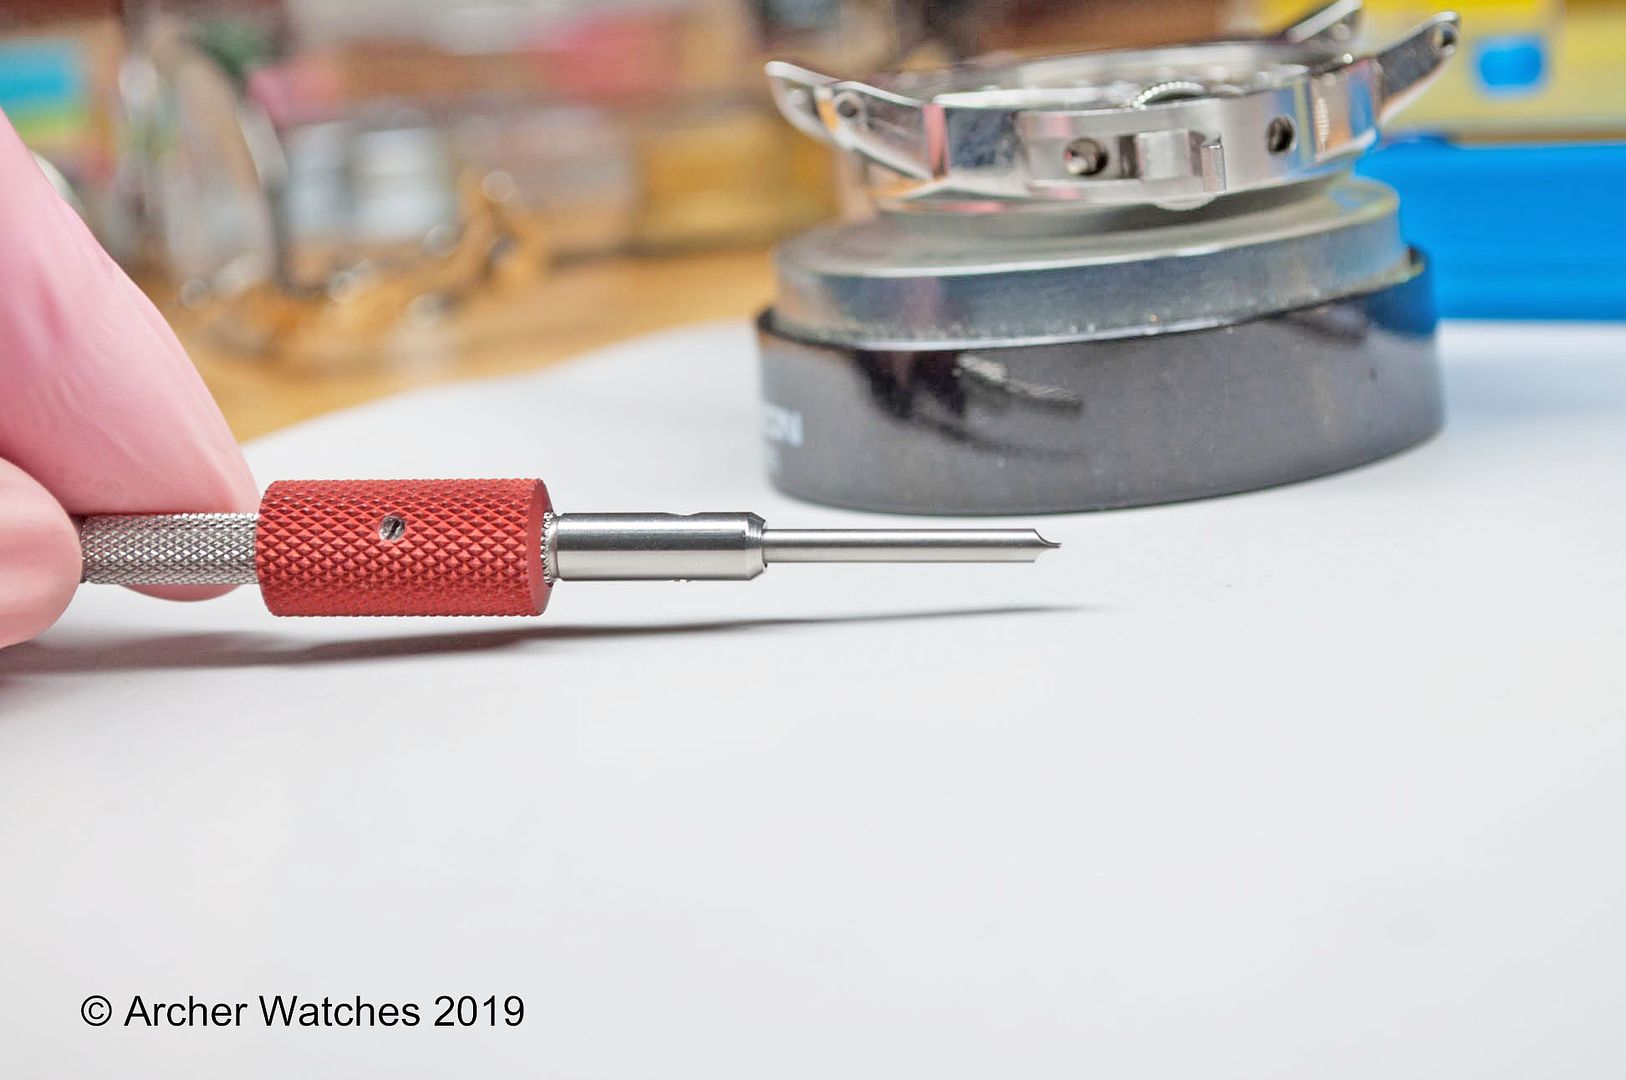
I typically mount the stem in a pin vise through this process, but when you do so, make sure that the 4 jaws of the pin vise are clamping on the 4 flat surfaces of the stem, and not the round surfaces:

Clamping on the round surfaces can raise burrs, that then essentially become cutting tools that will chew up the soft brass in the main plate:

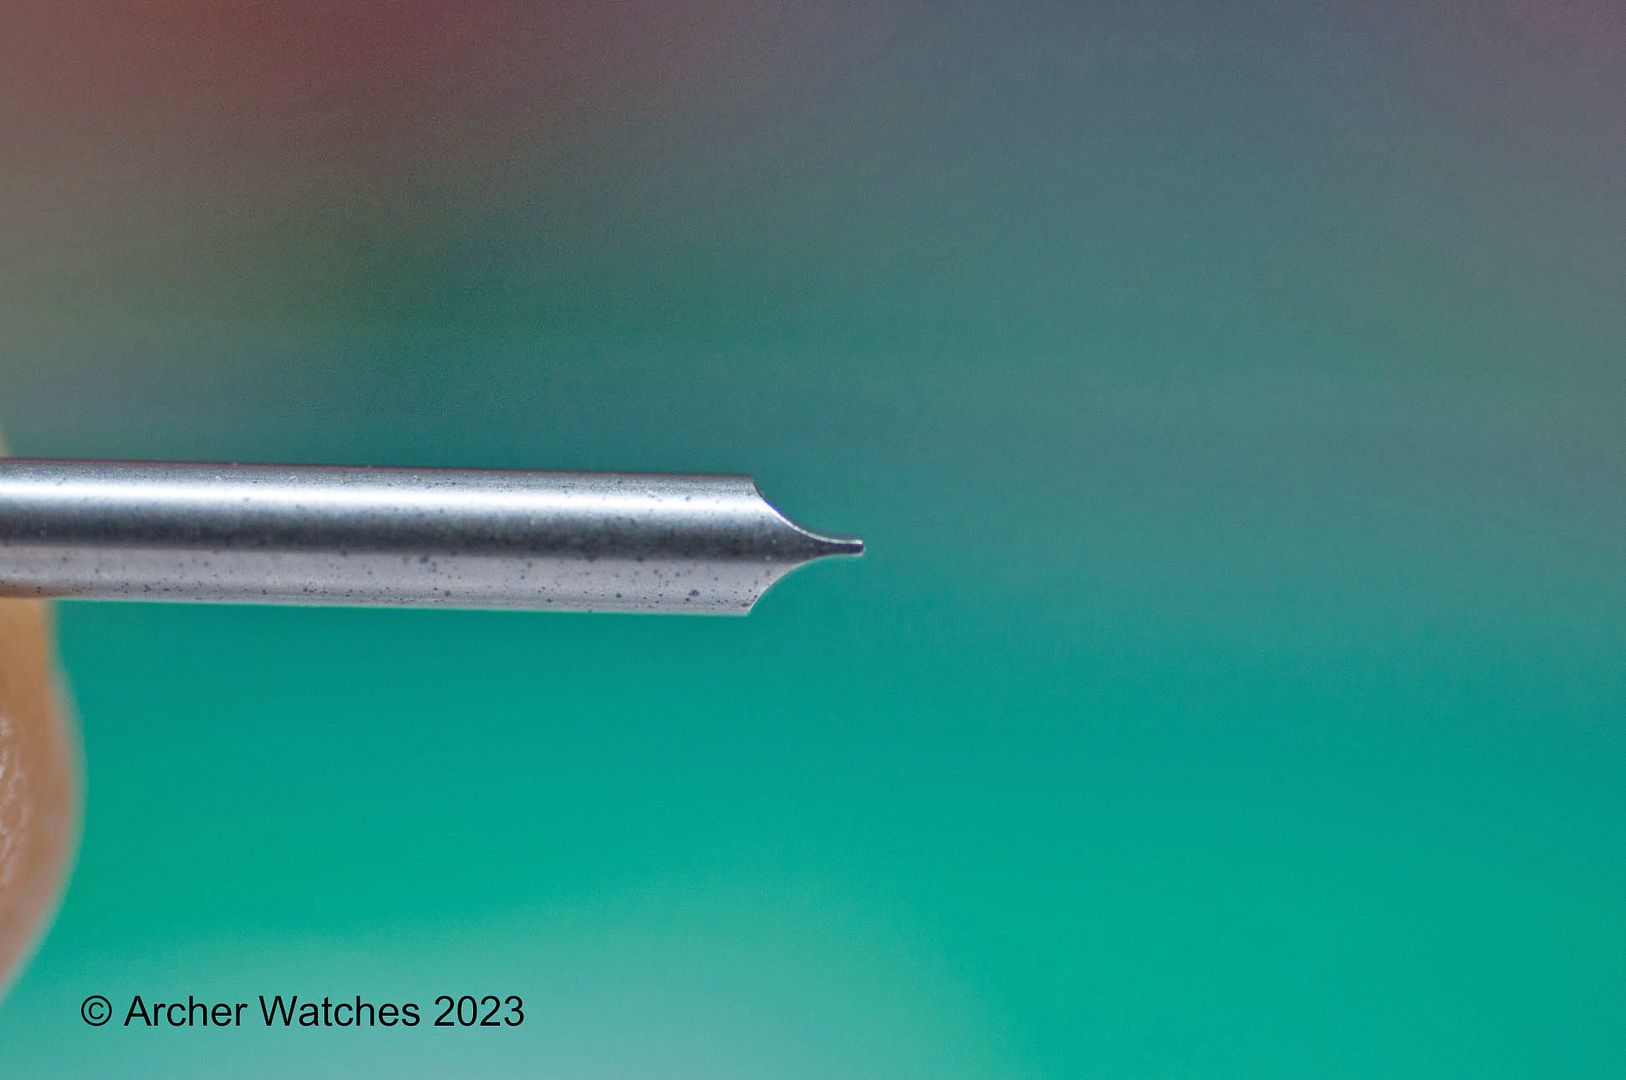
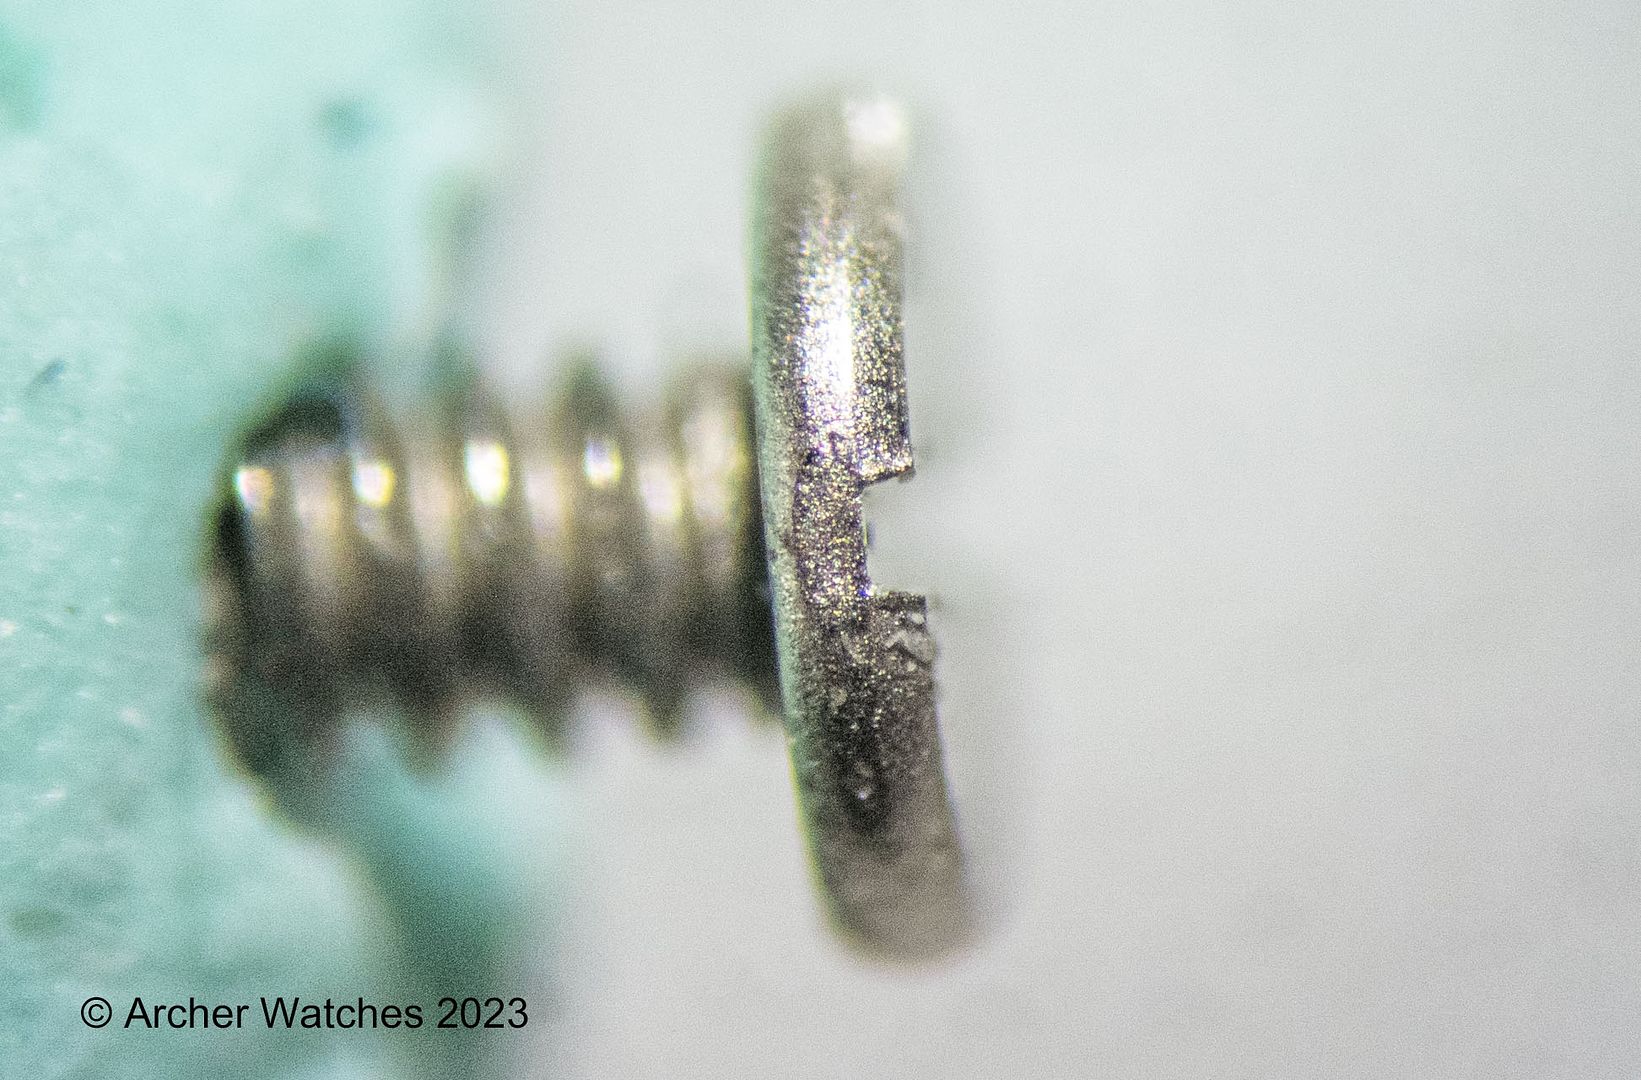
Now cut the stem at the mark you made:

You can use different things to cut the stem, but I just use side cutters. This will leave a rather jagged end, so if using this kind of tool you have to be aware that you need to cut it in such a way that you can clean up that jagged end, and not have the stem too short. It won’t be too short here of course, because you have left plenty of length.
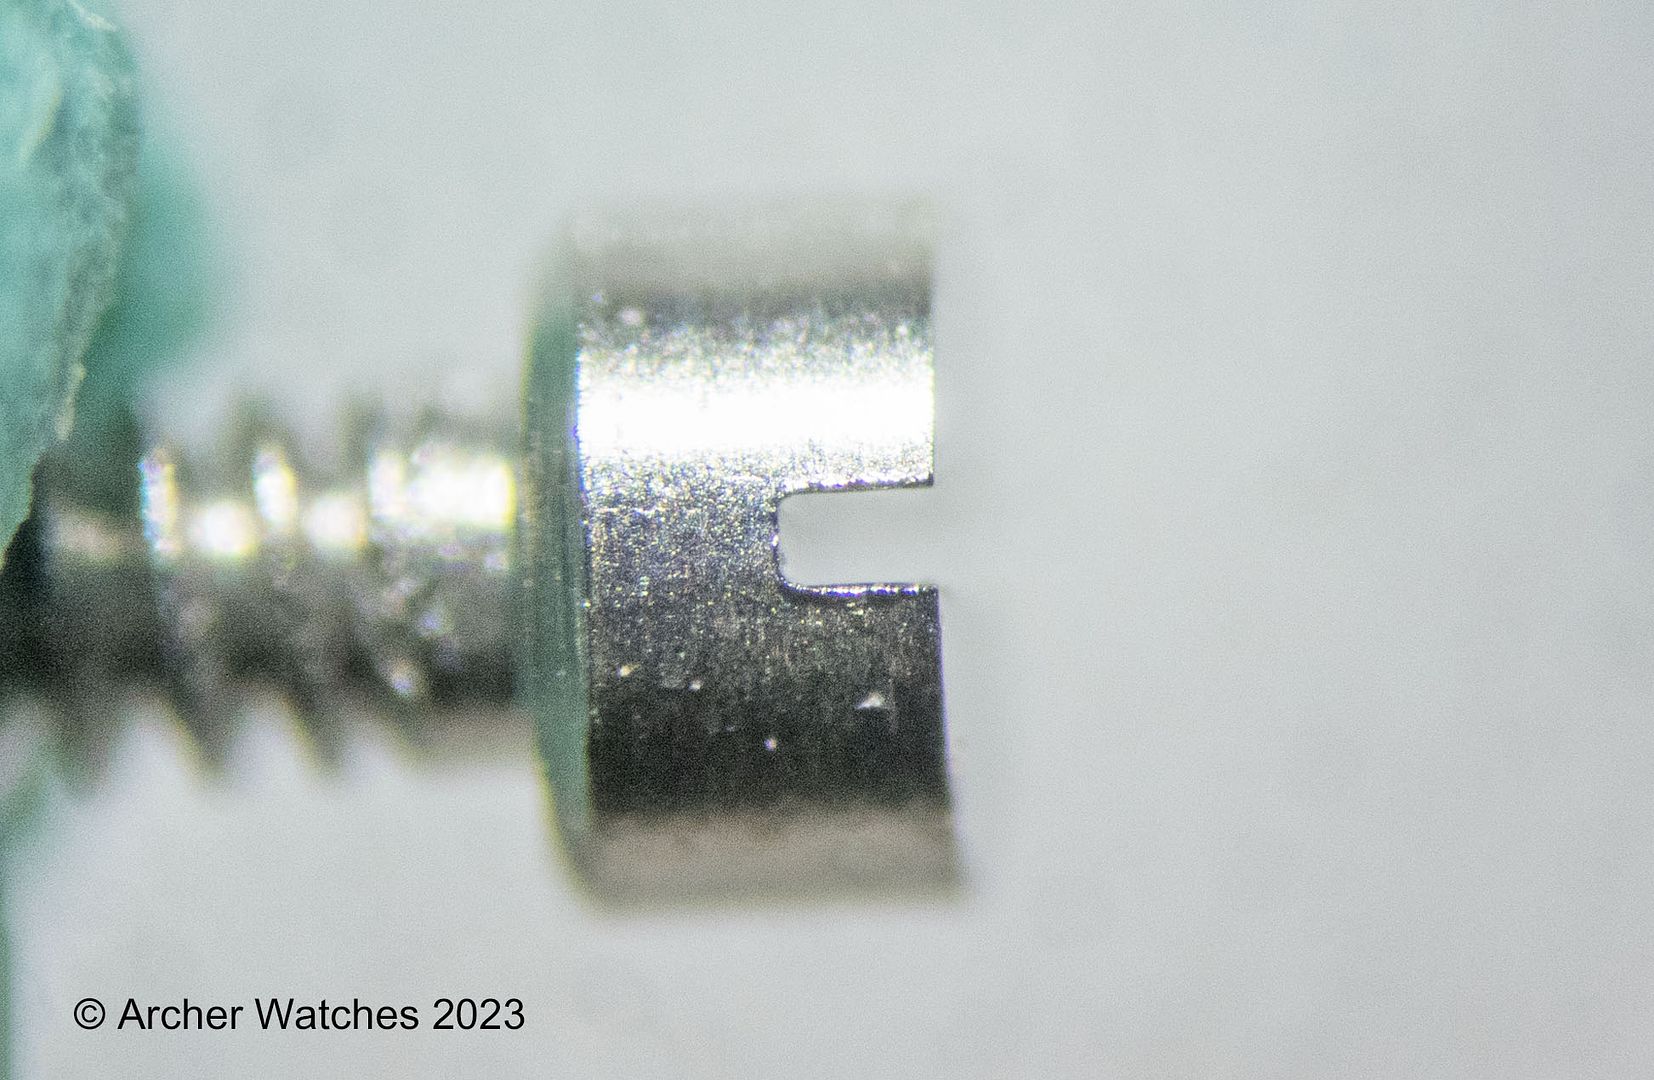
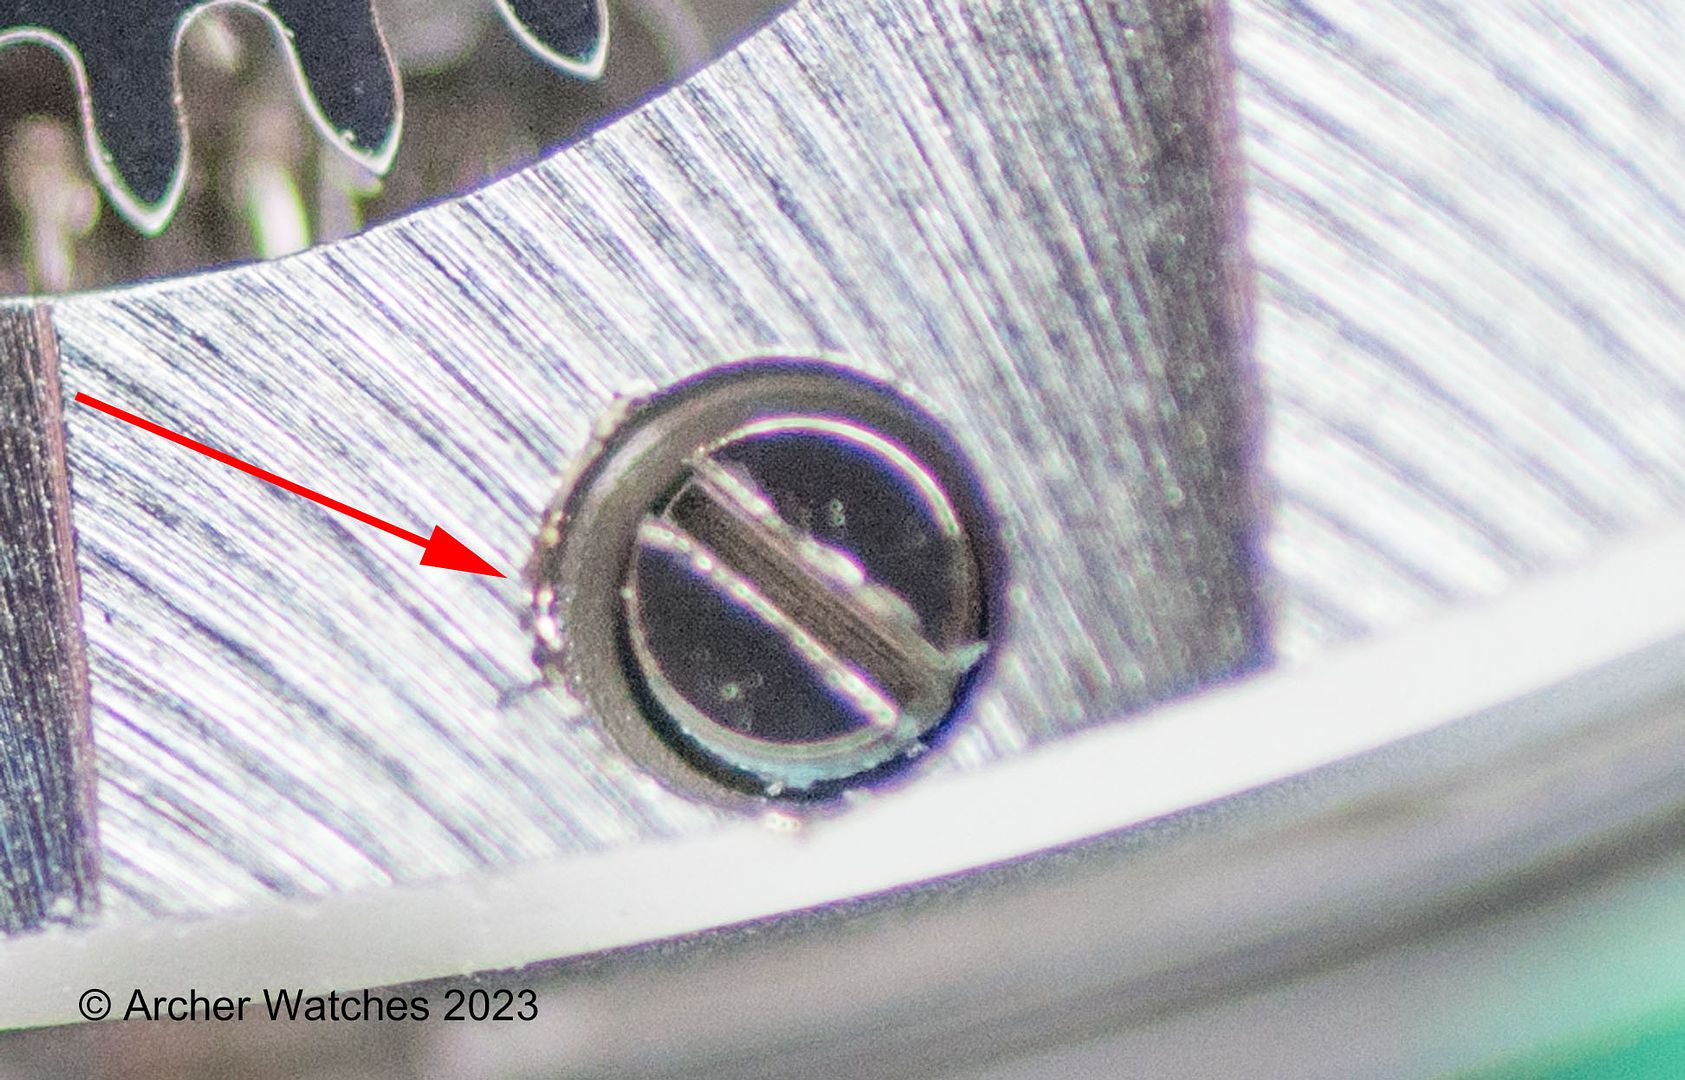
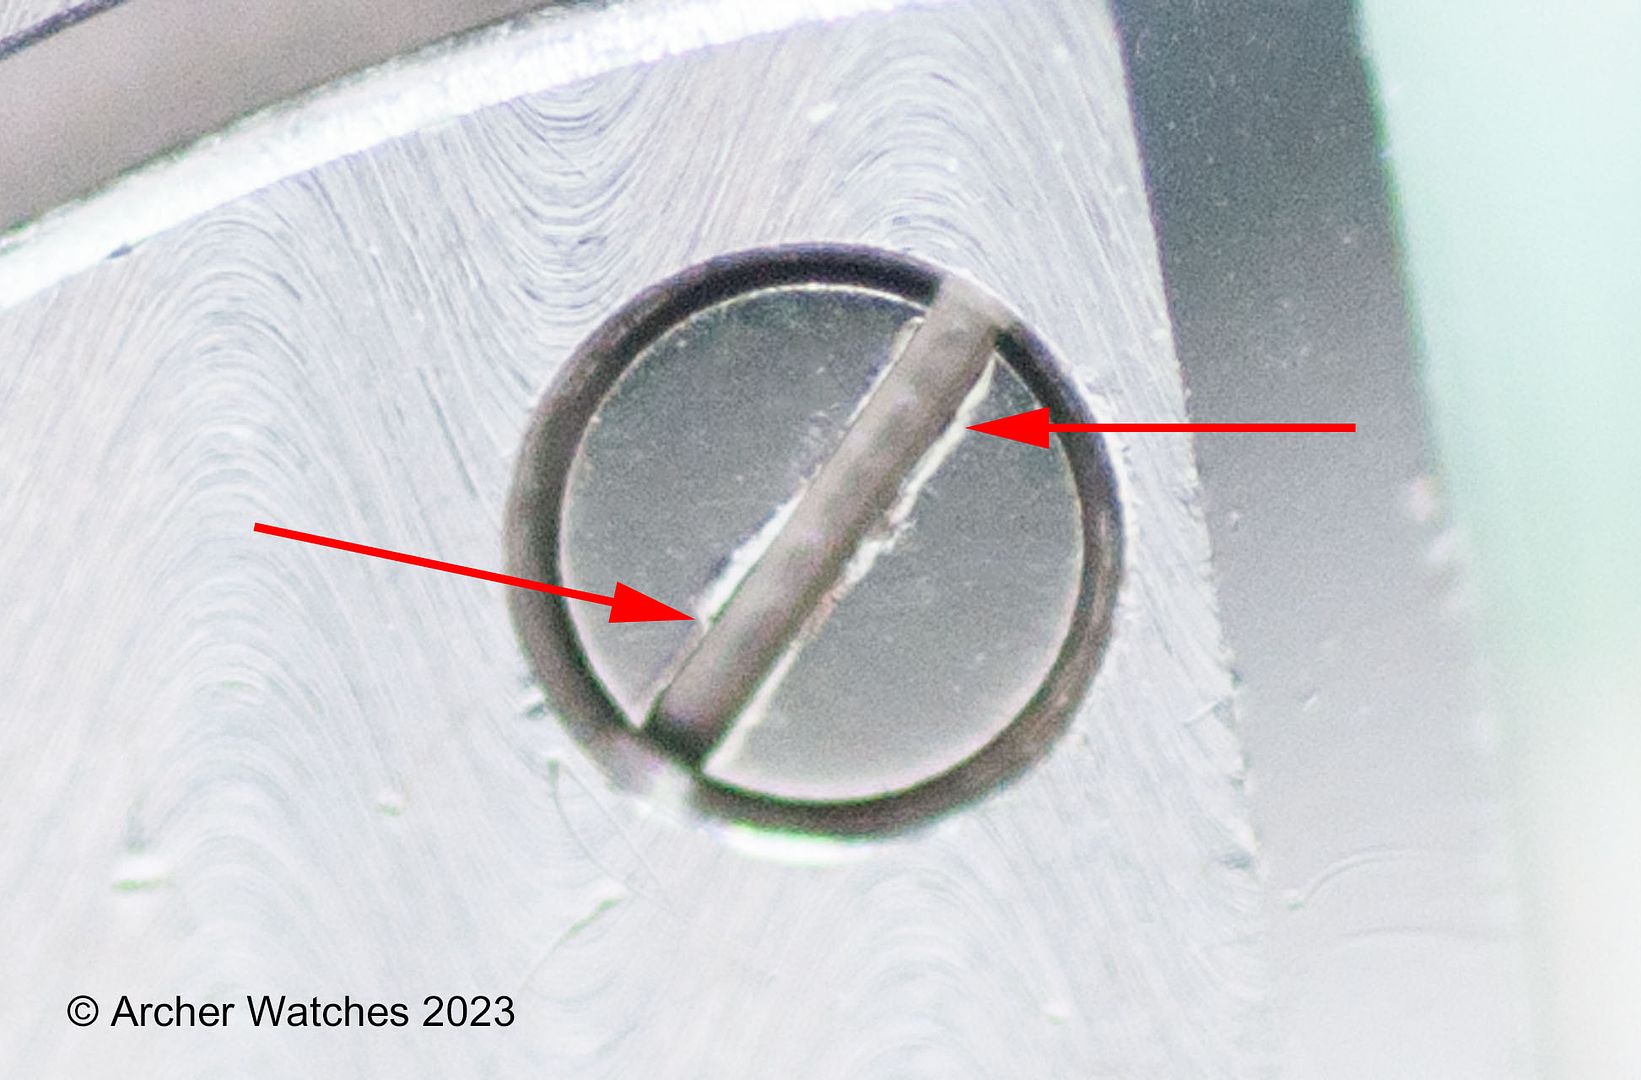
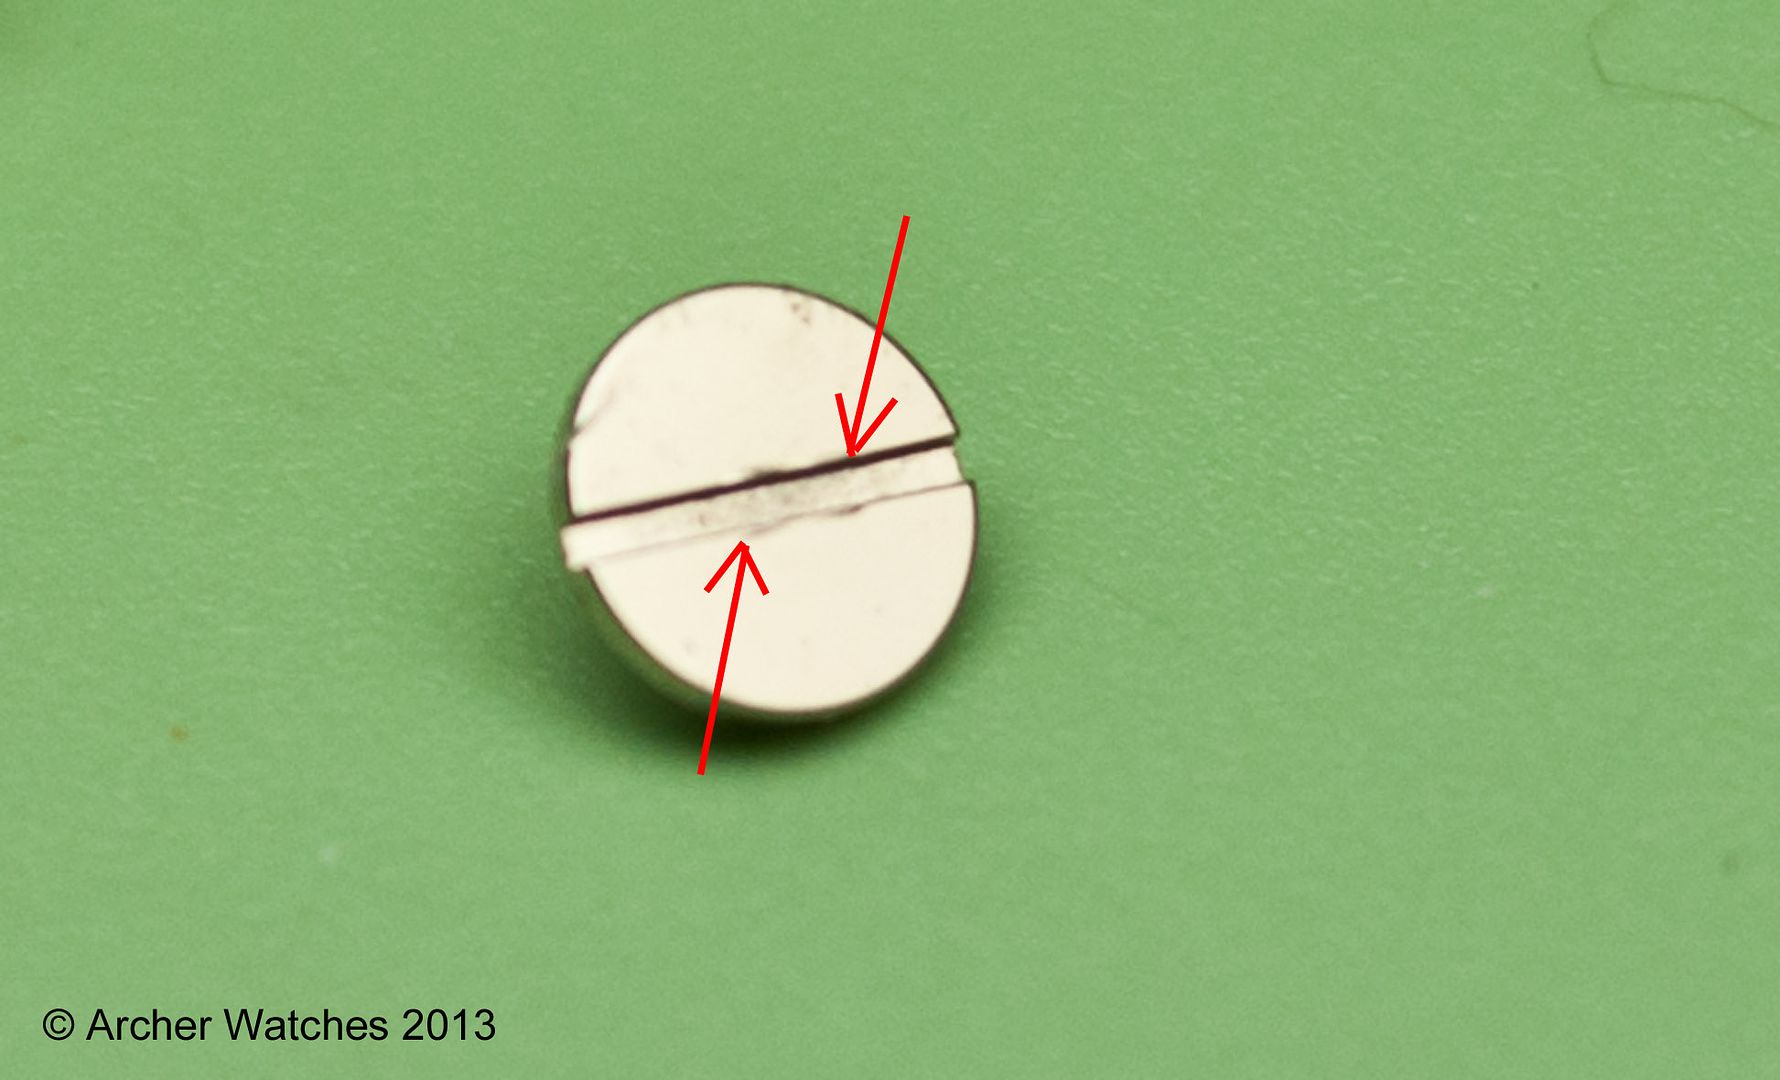
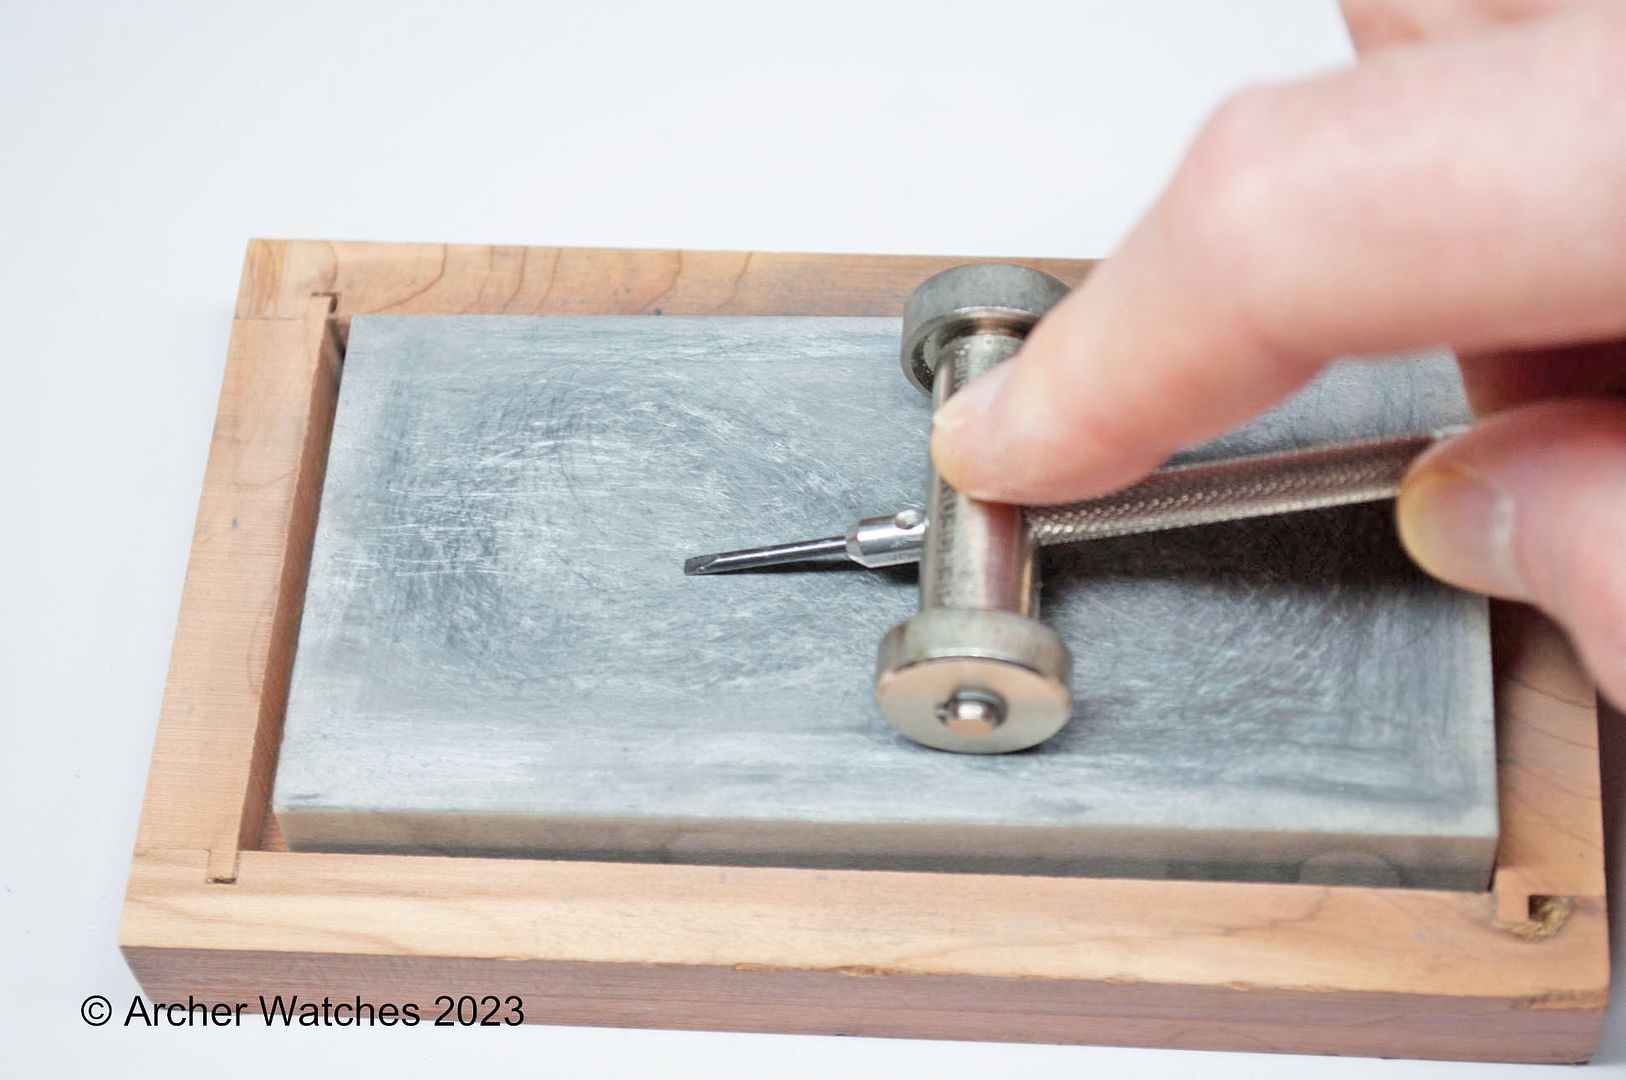
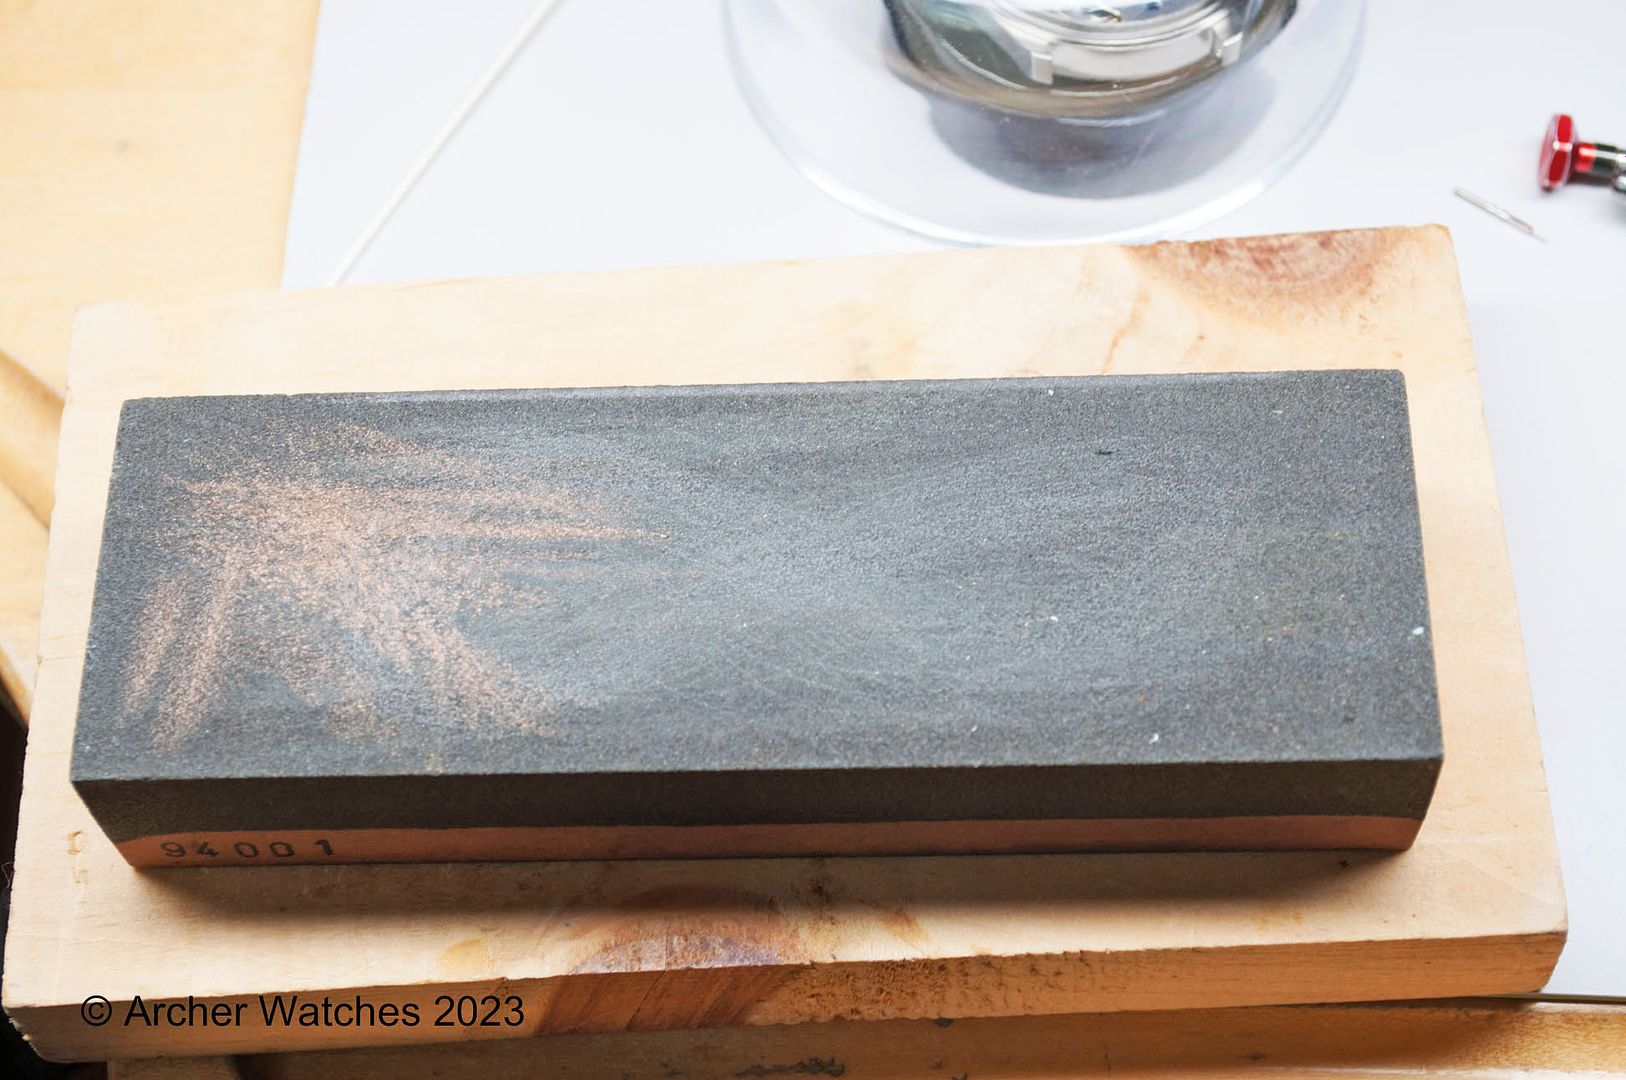
For cleaning up the end of the stem, there are different tools you can use. If you cut it with a Dremel cut off wheel, it will be pretty clean already. But if you need to remove uneven material, you can just use a small file. I tend to use a stone - holding the stem end against the stone, I move it in a figure 8 pattern that you can see on the stone. Using this pattern keeps the stem end perpendicular to the threads:

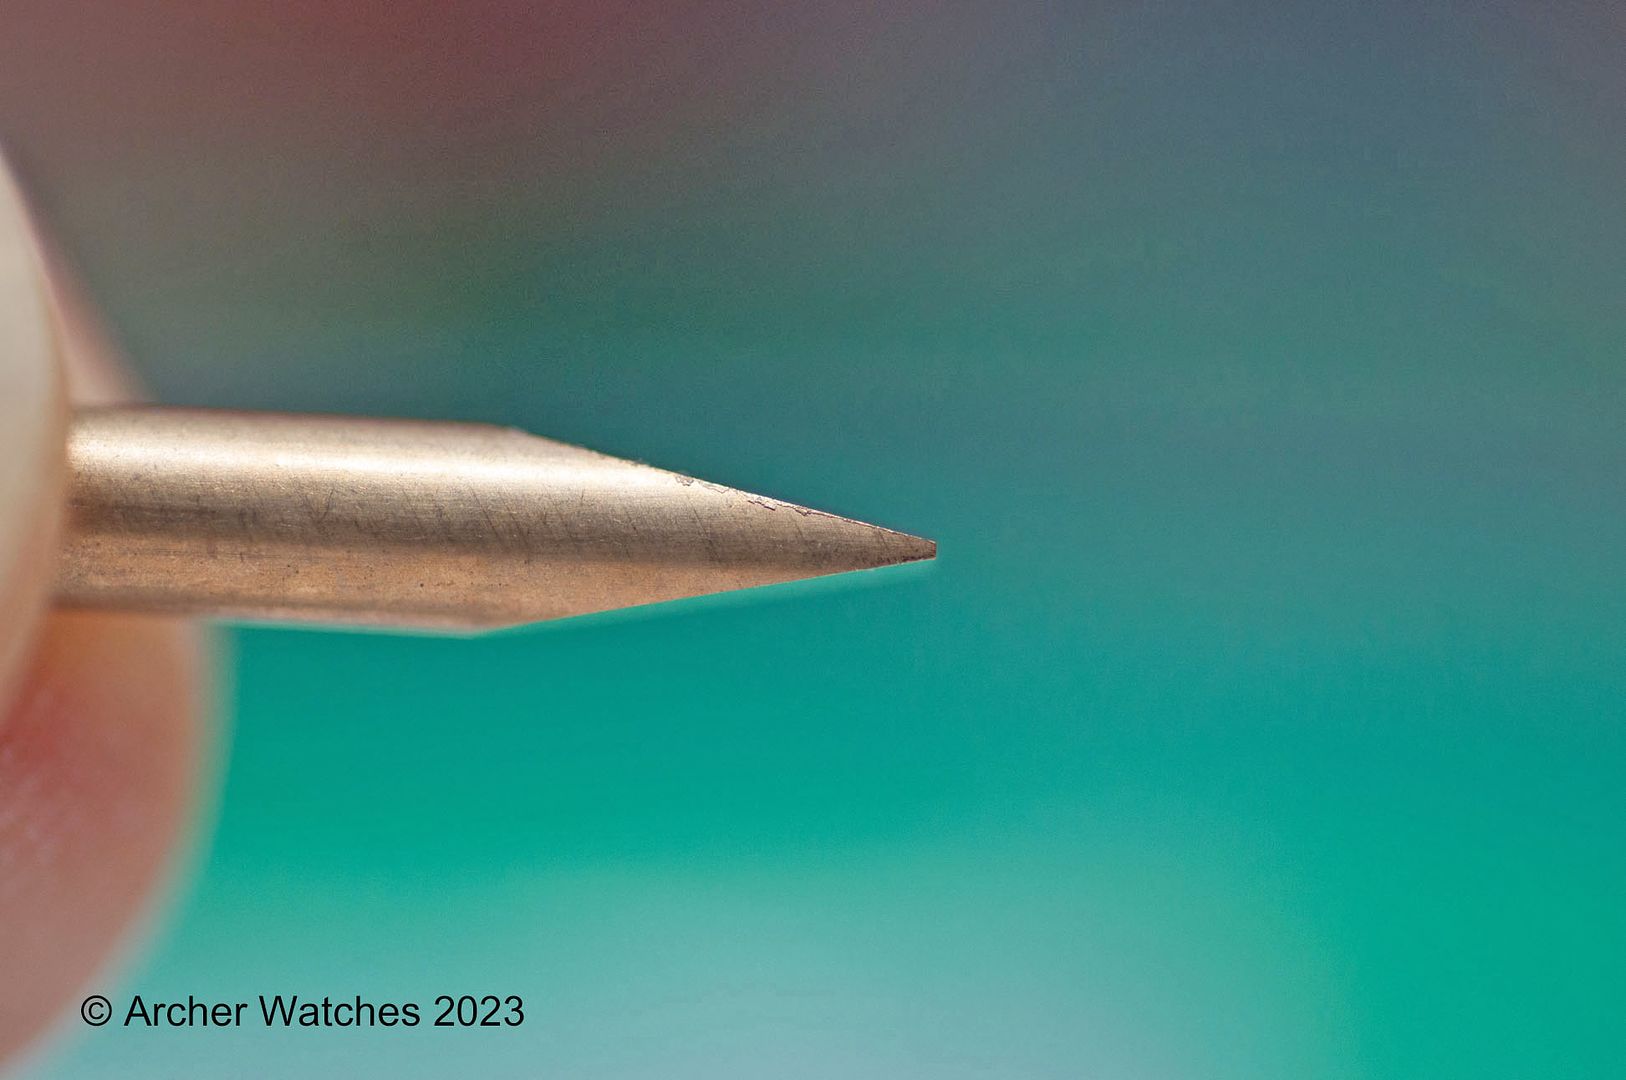
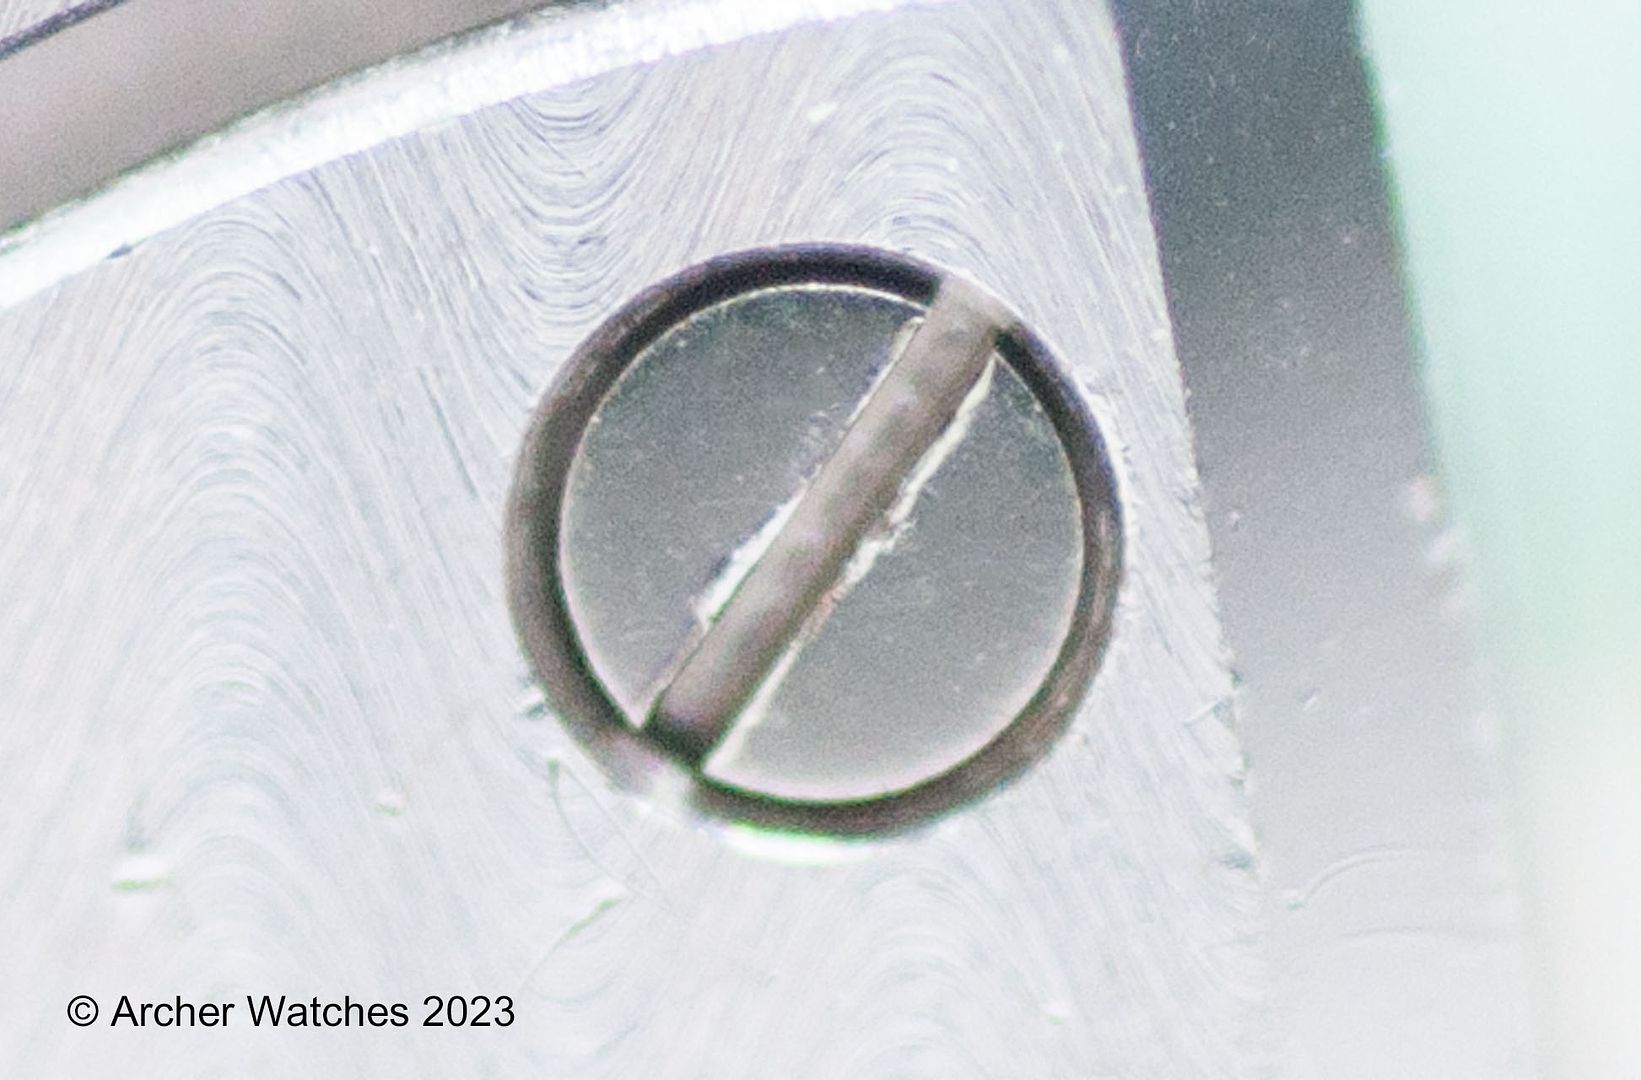
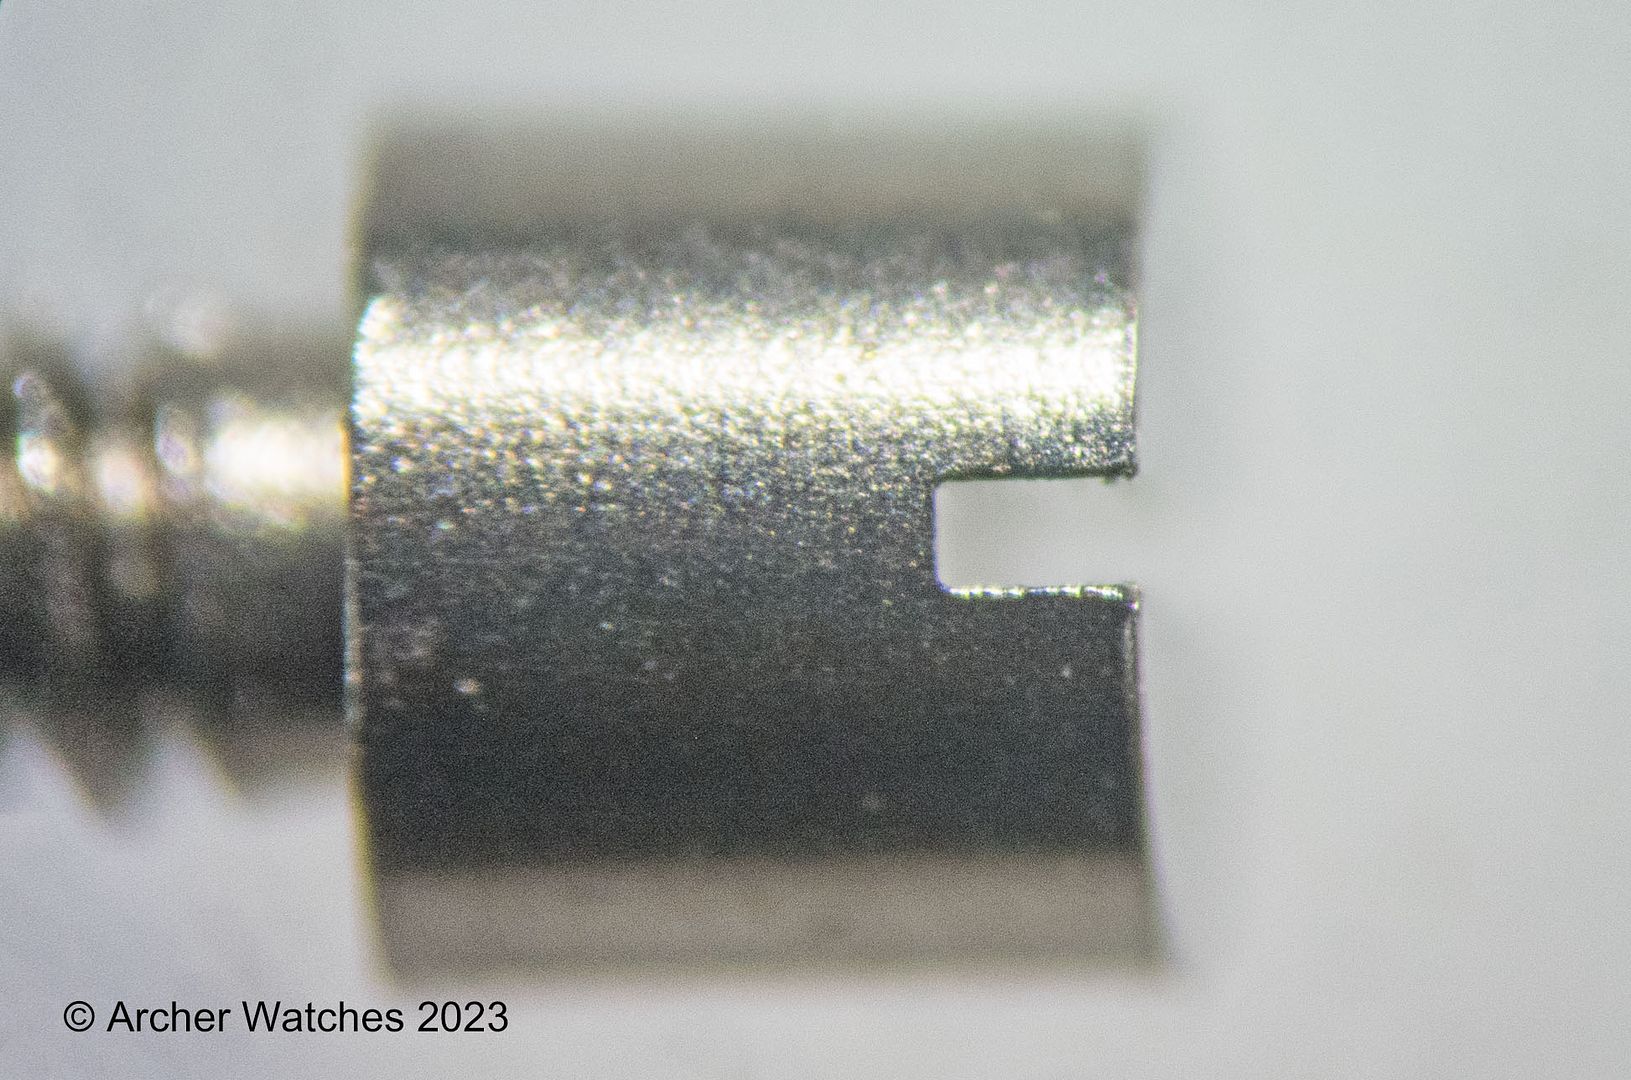
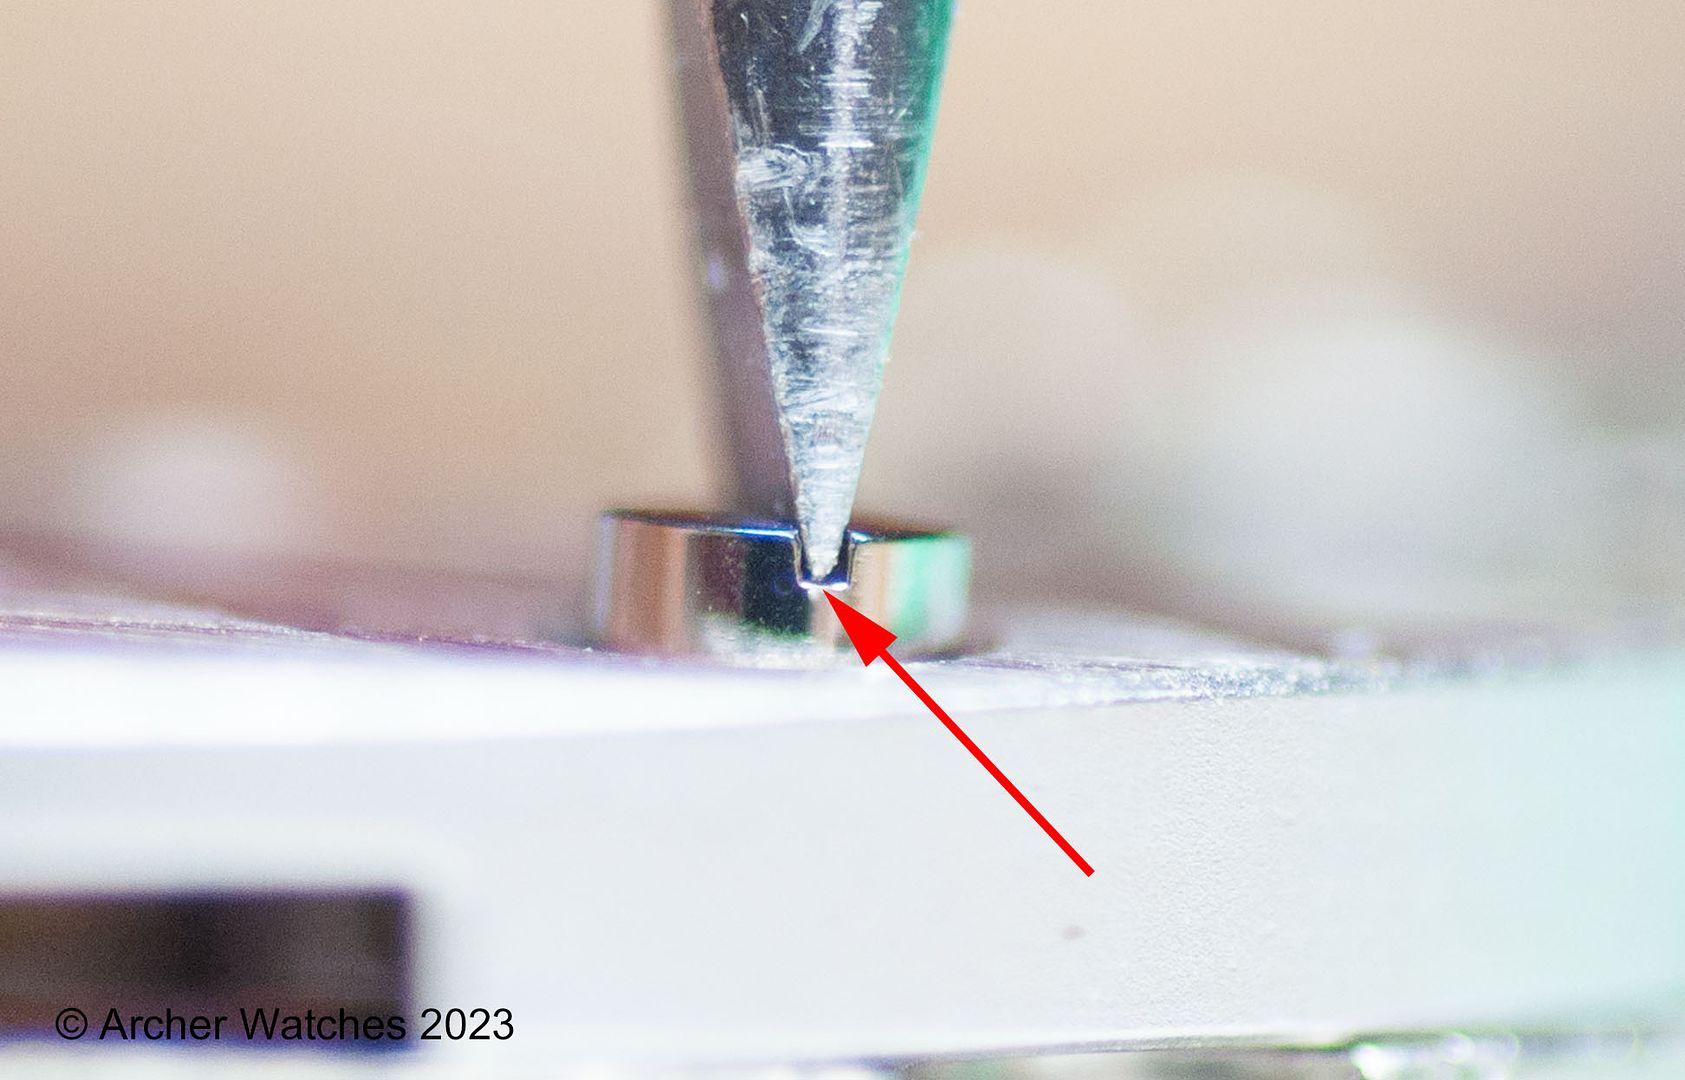
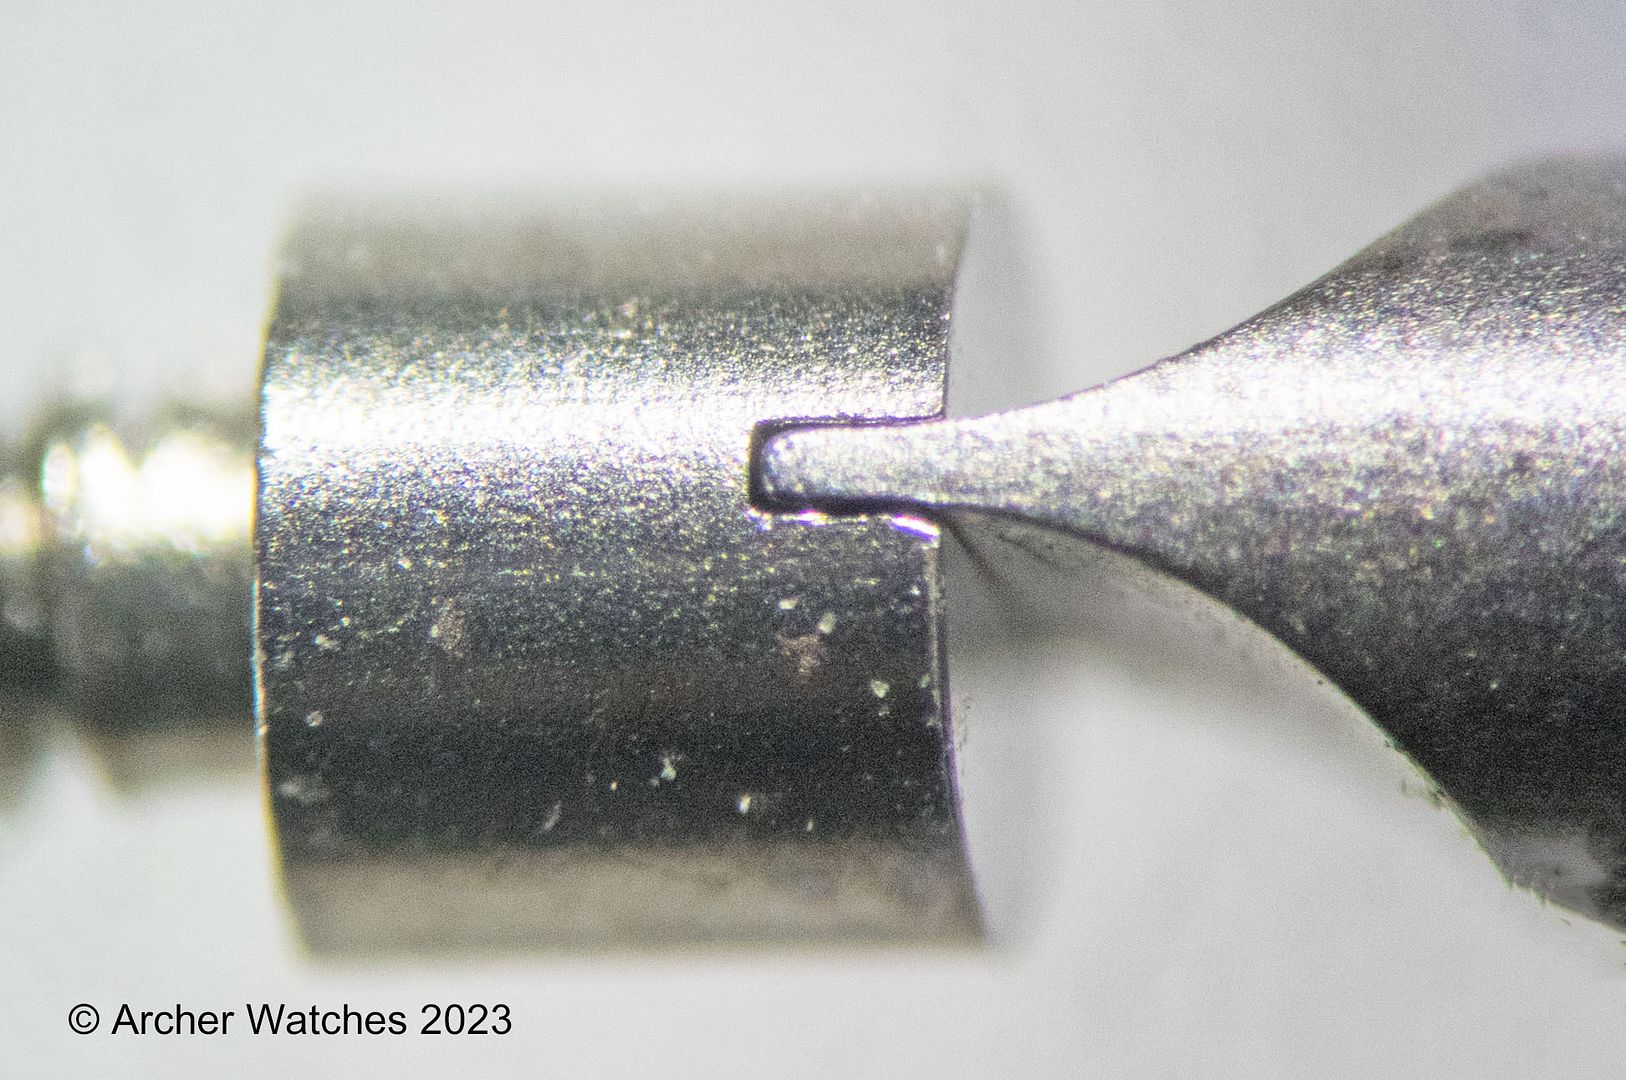
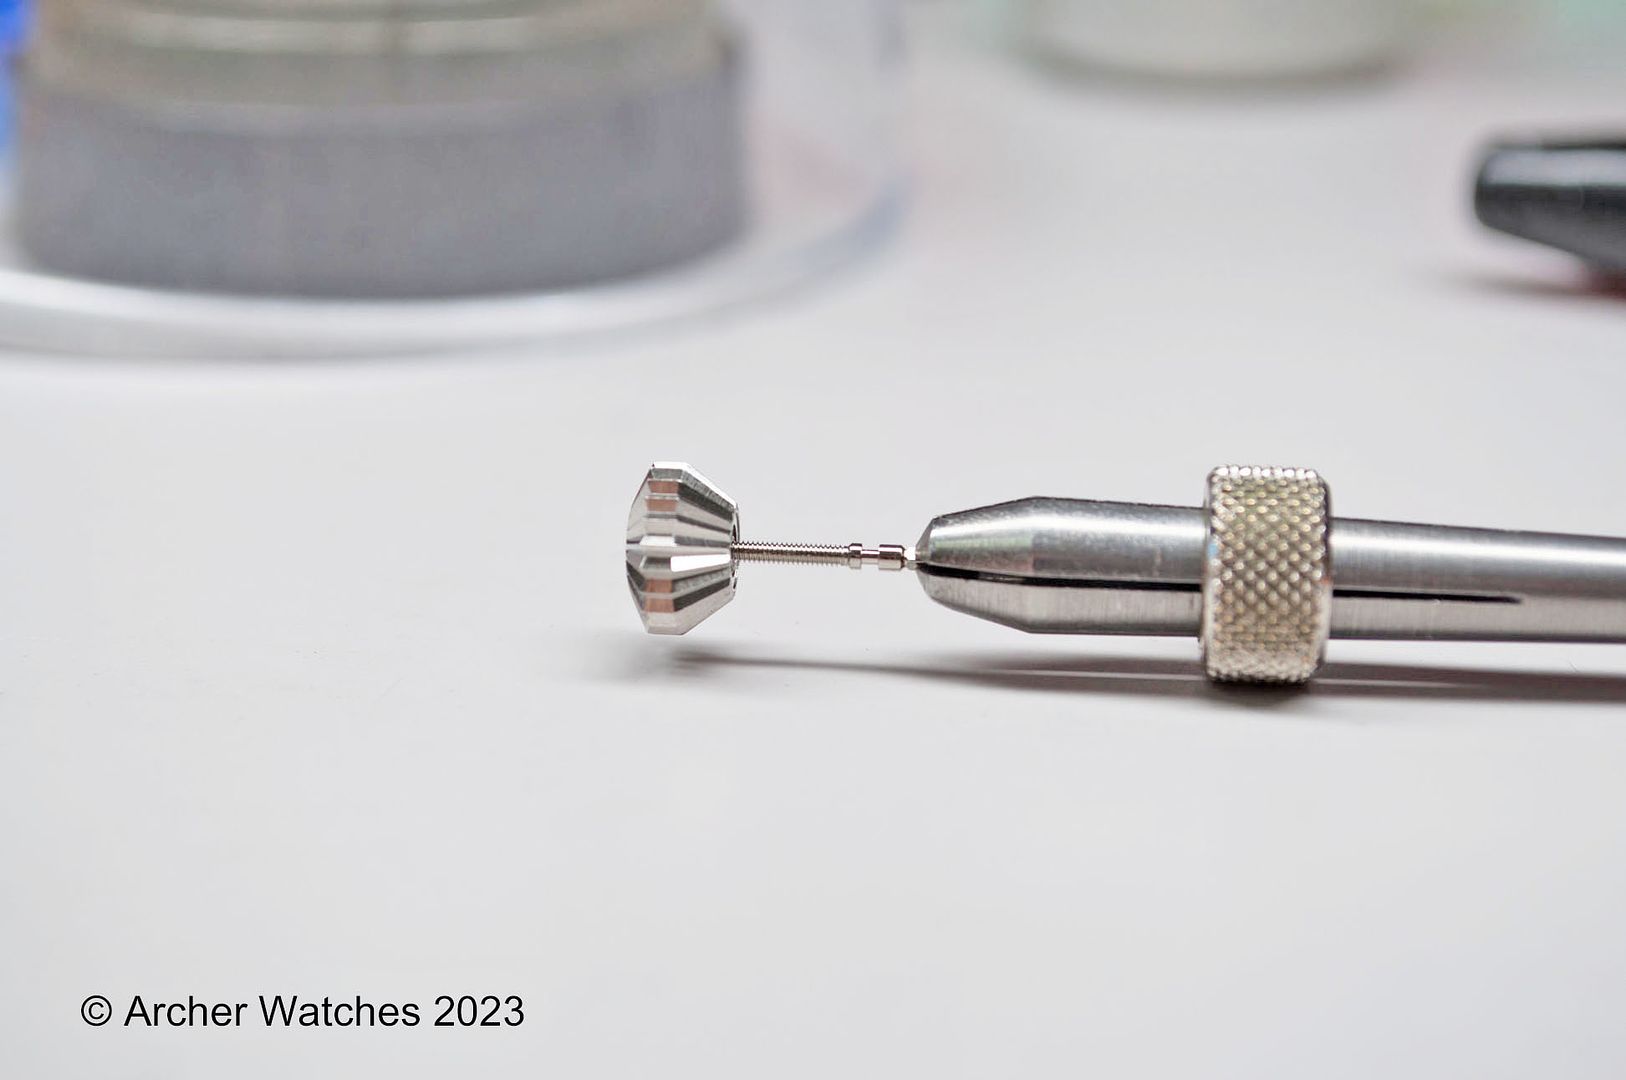
I always put a very slight chamfer on the end of the stem that I just cut, before screwing the crown on:

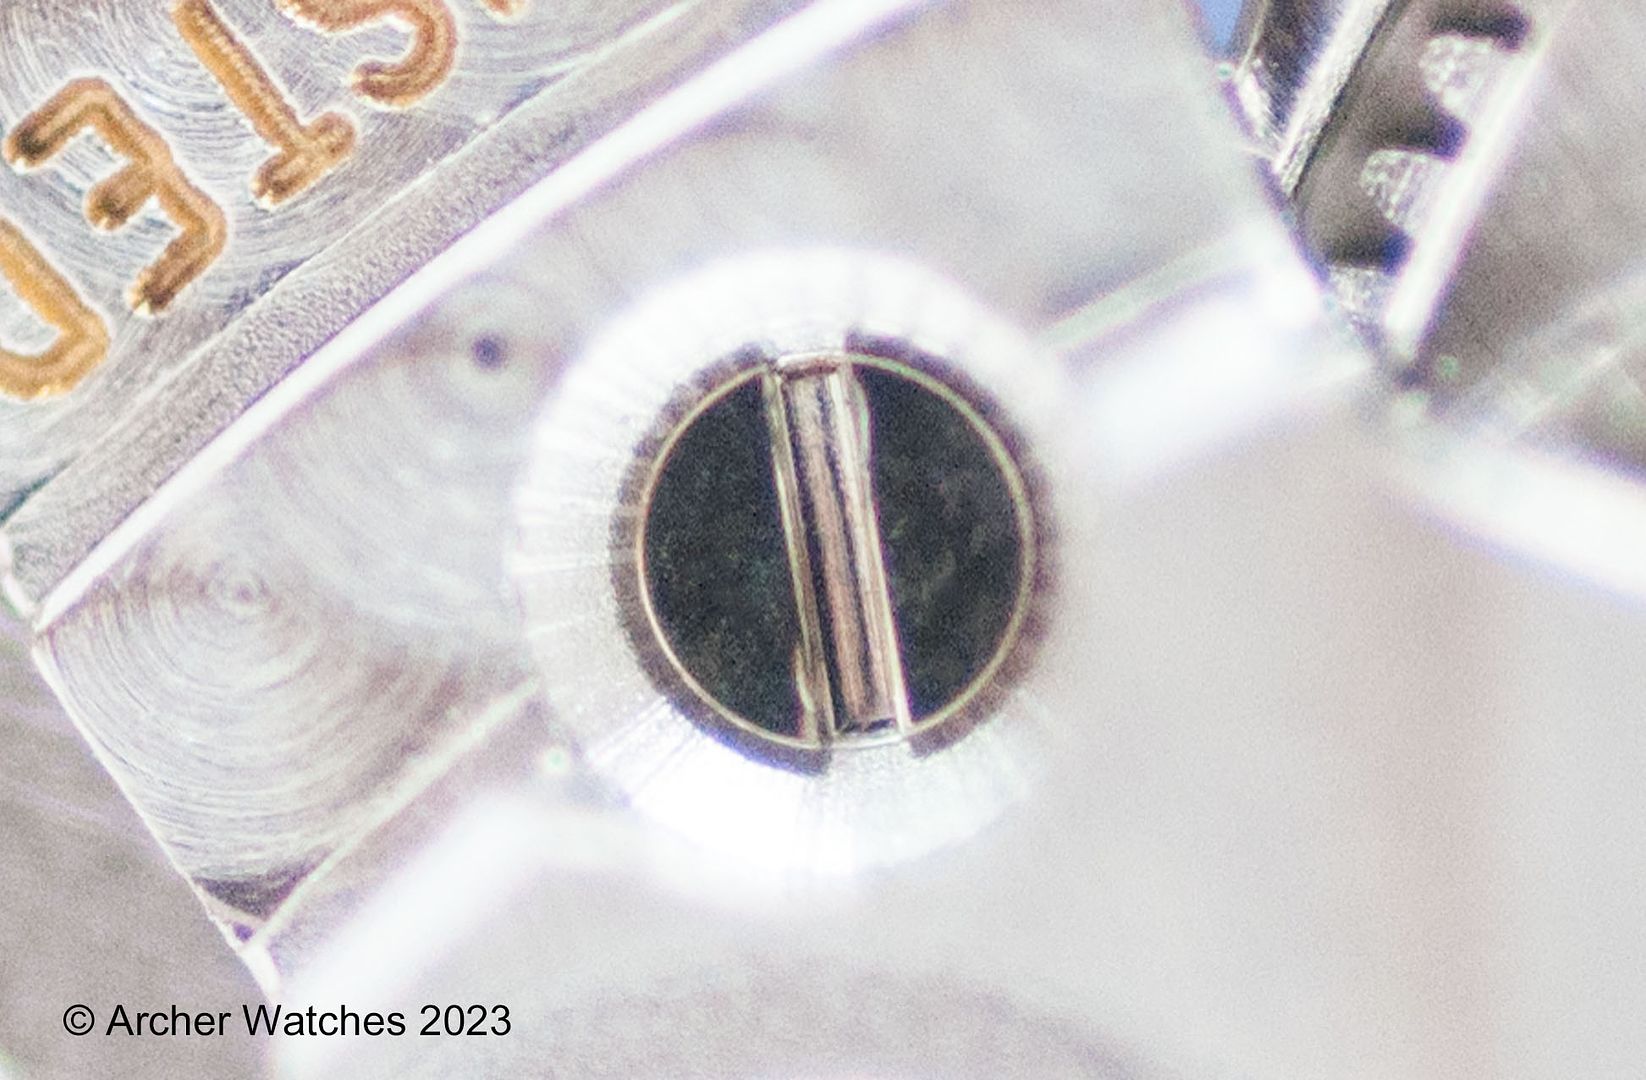
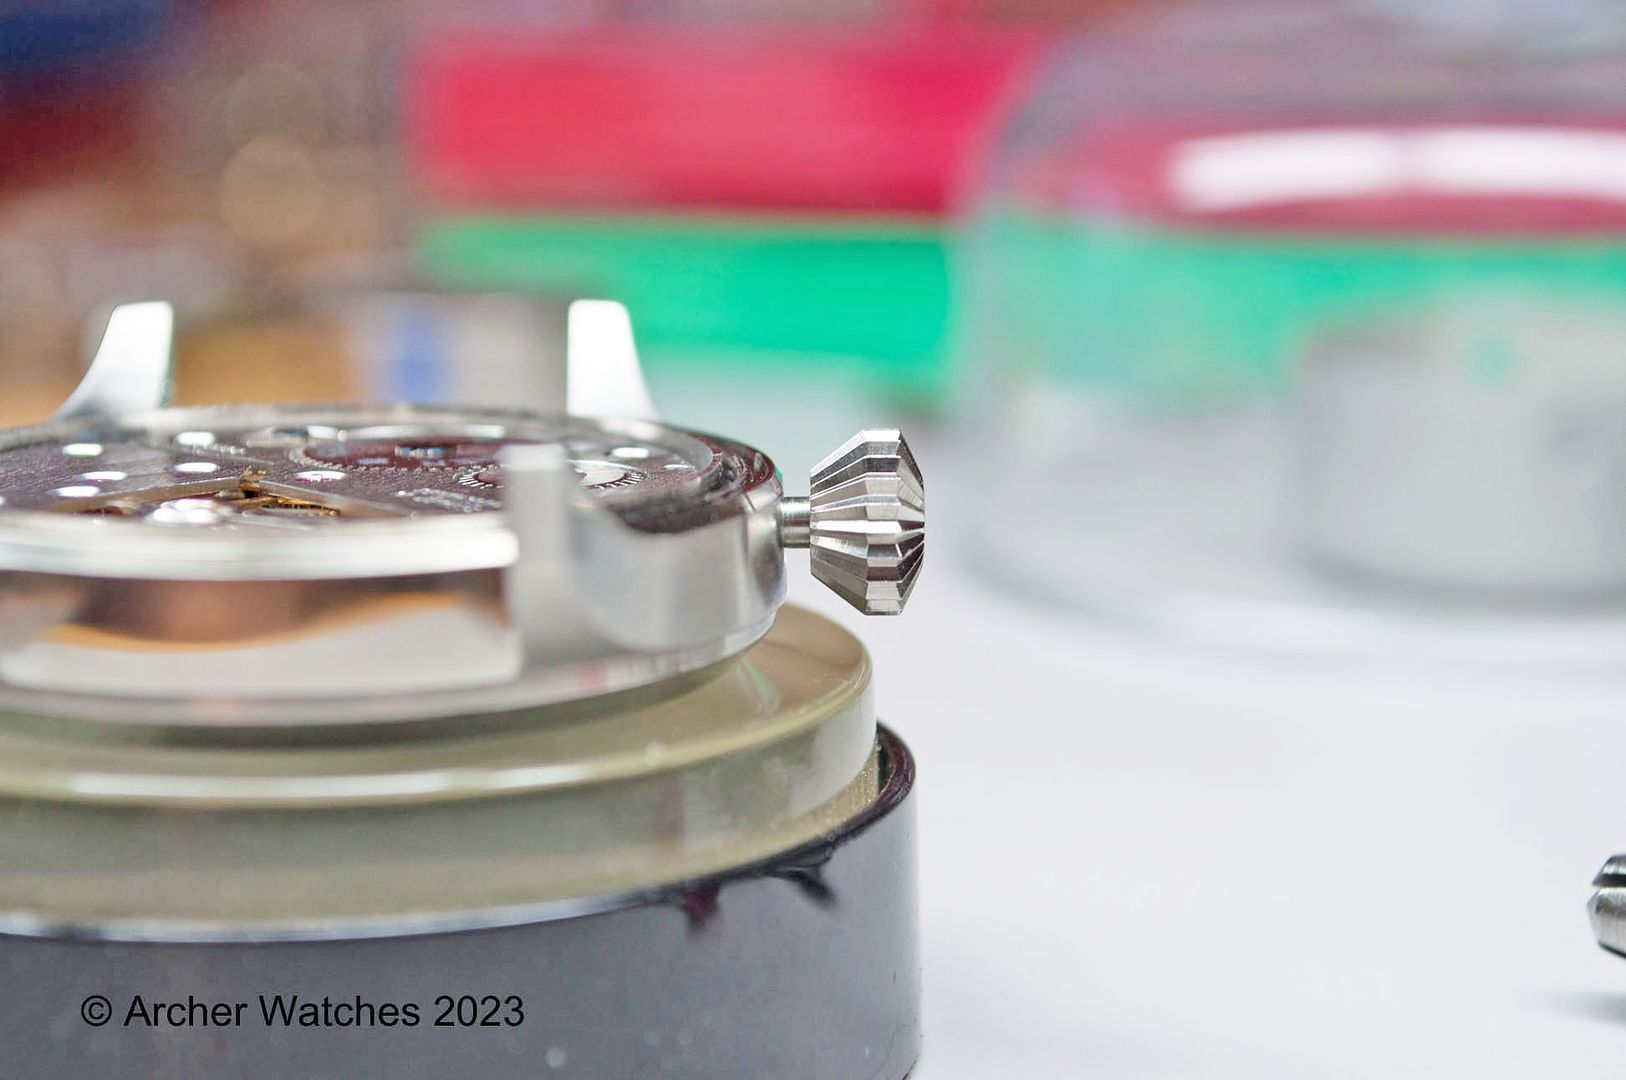
Next I install the stem and crown:

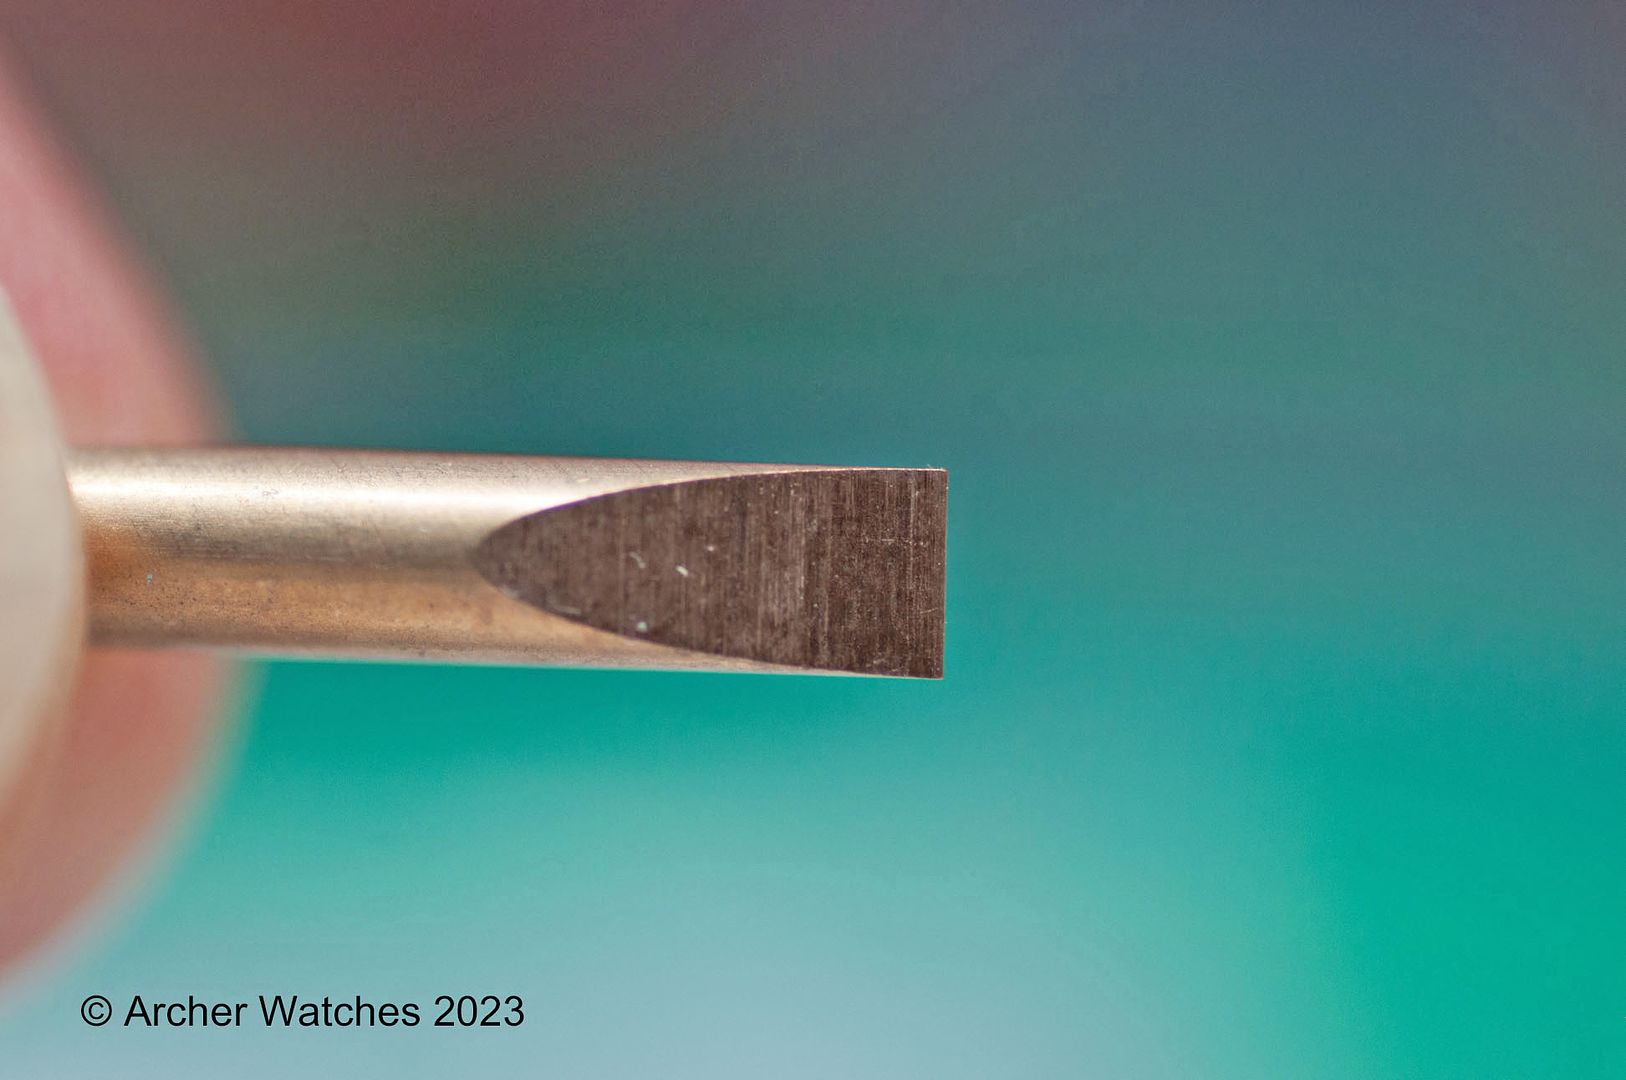
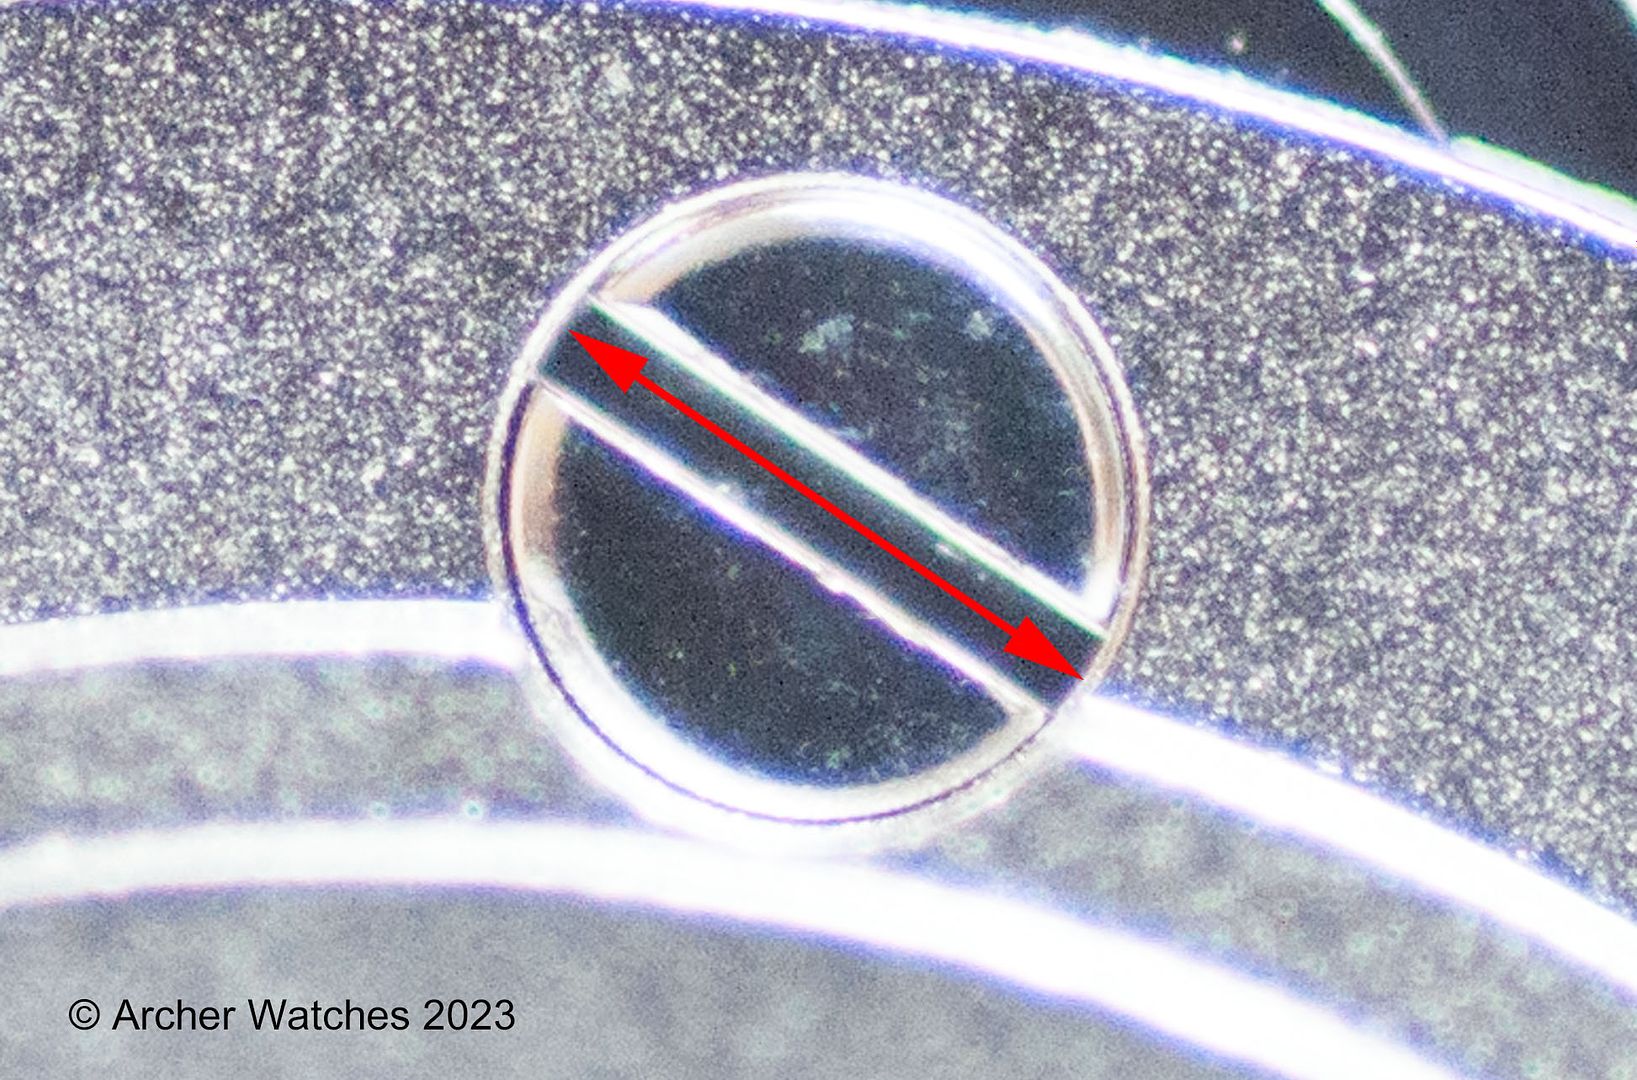
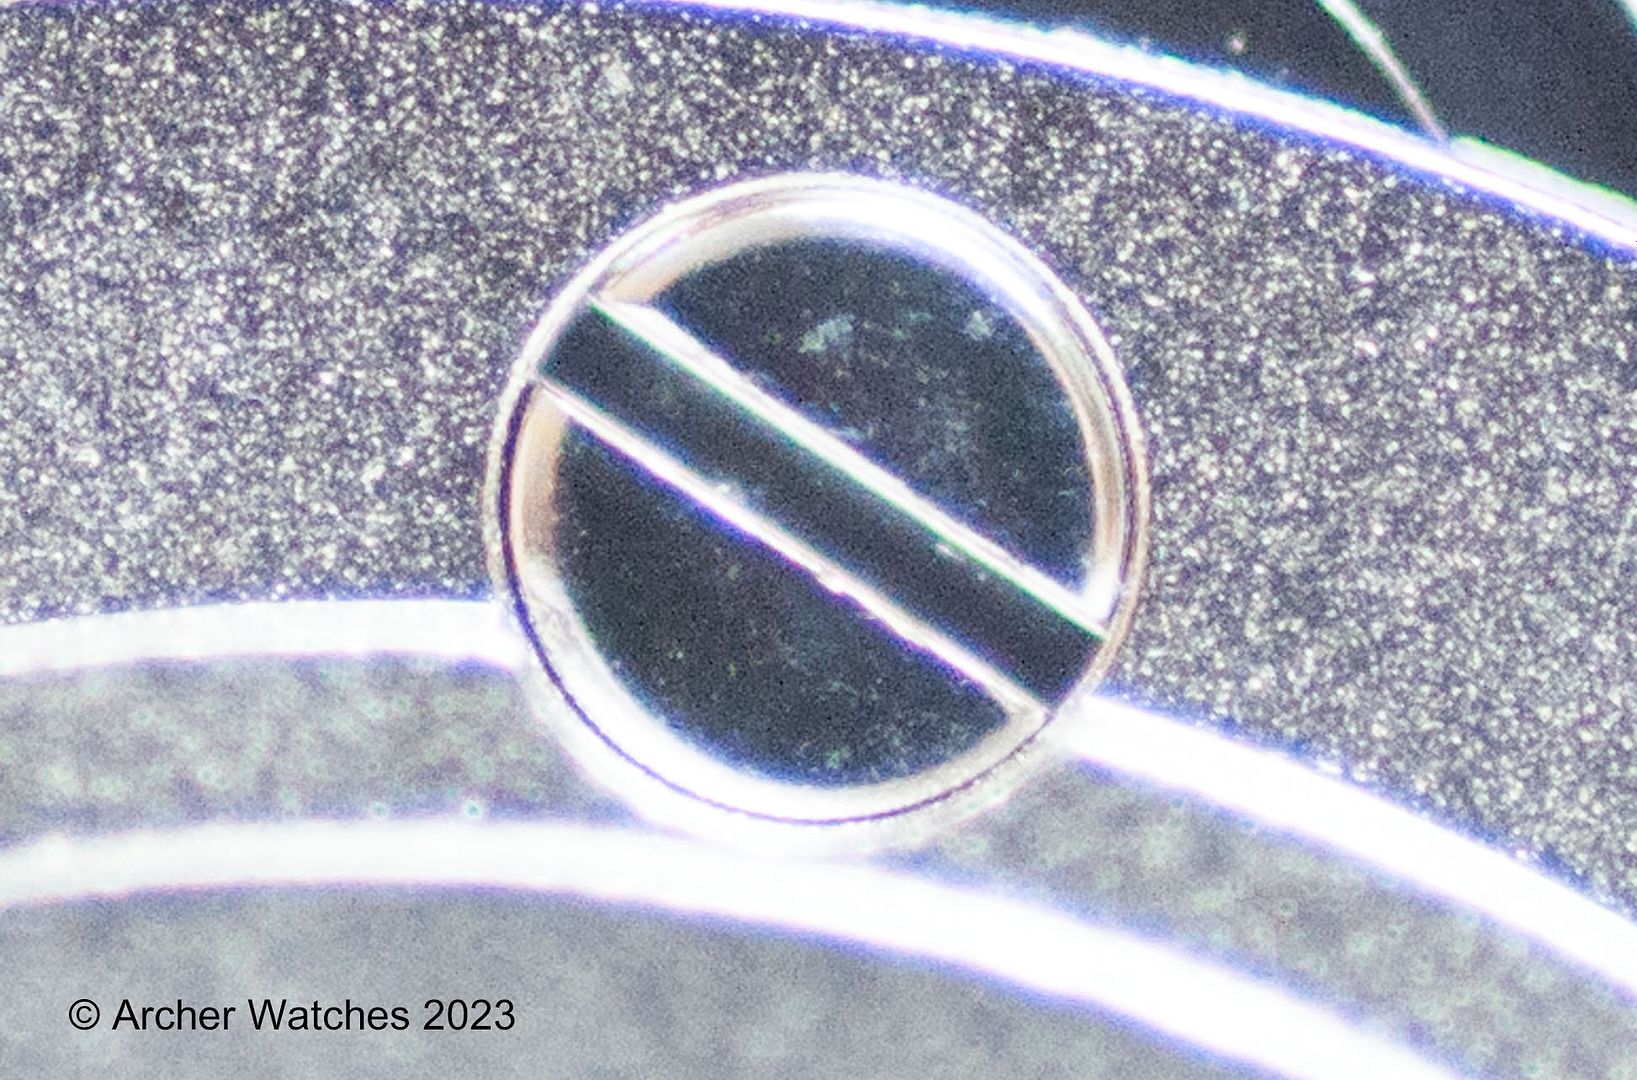
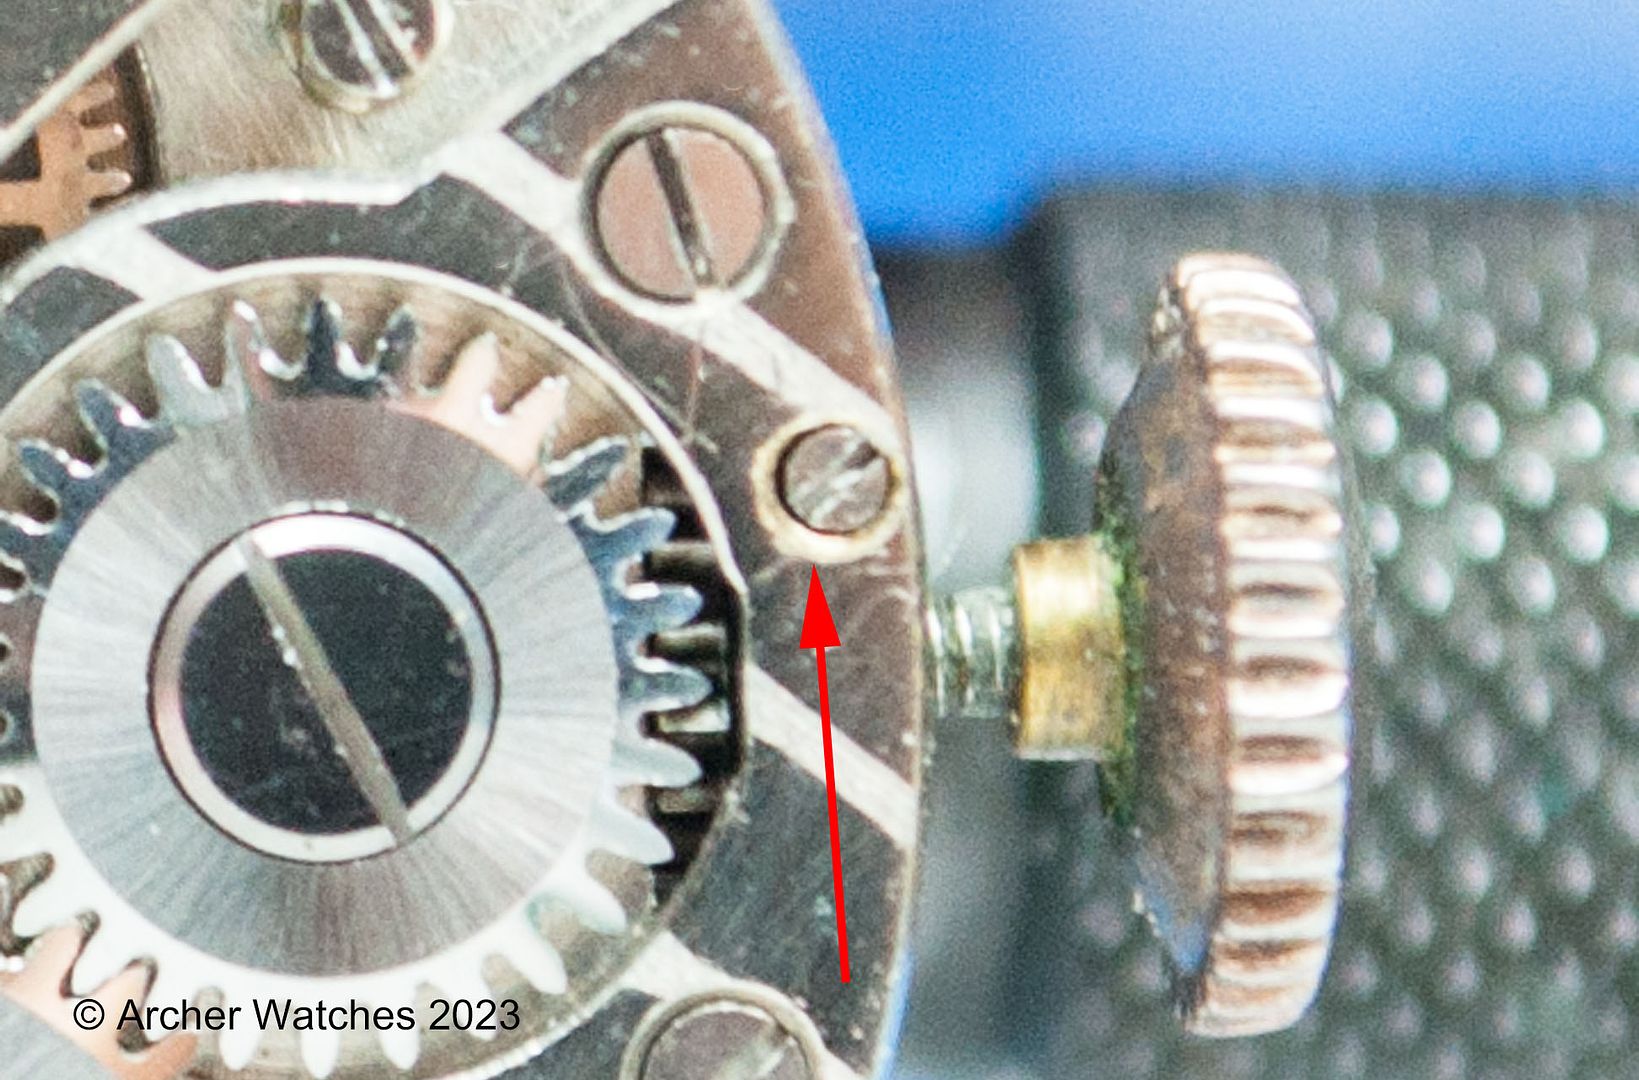
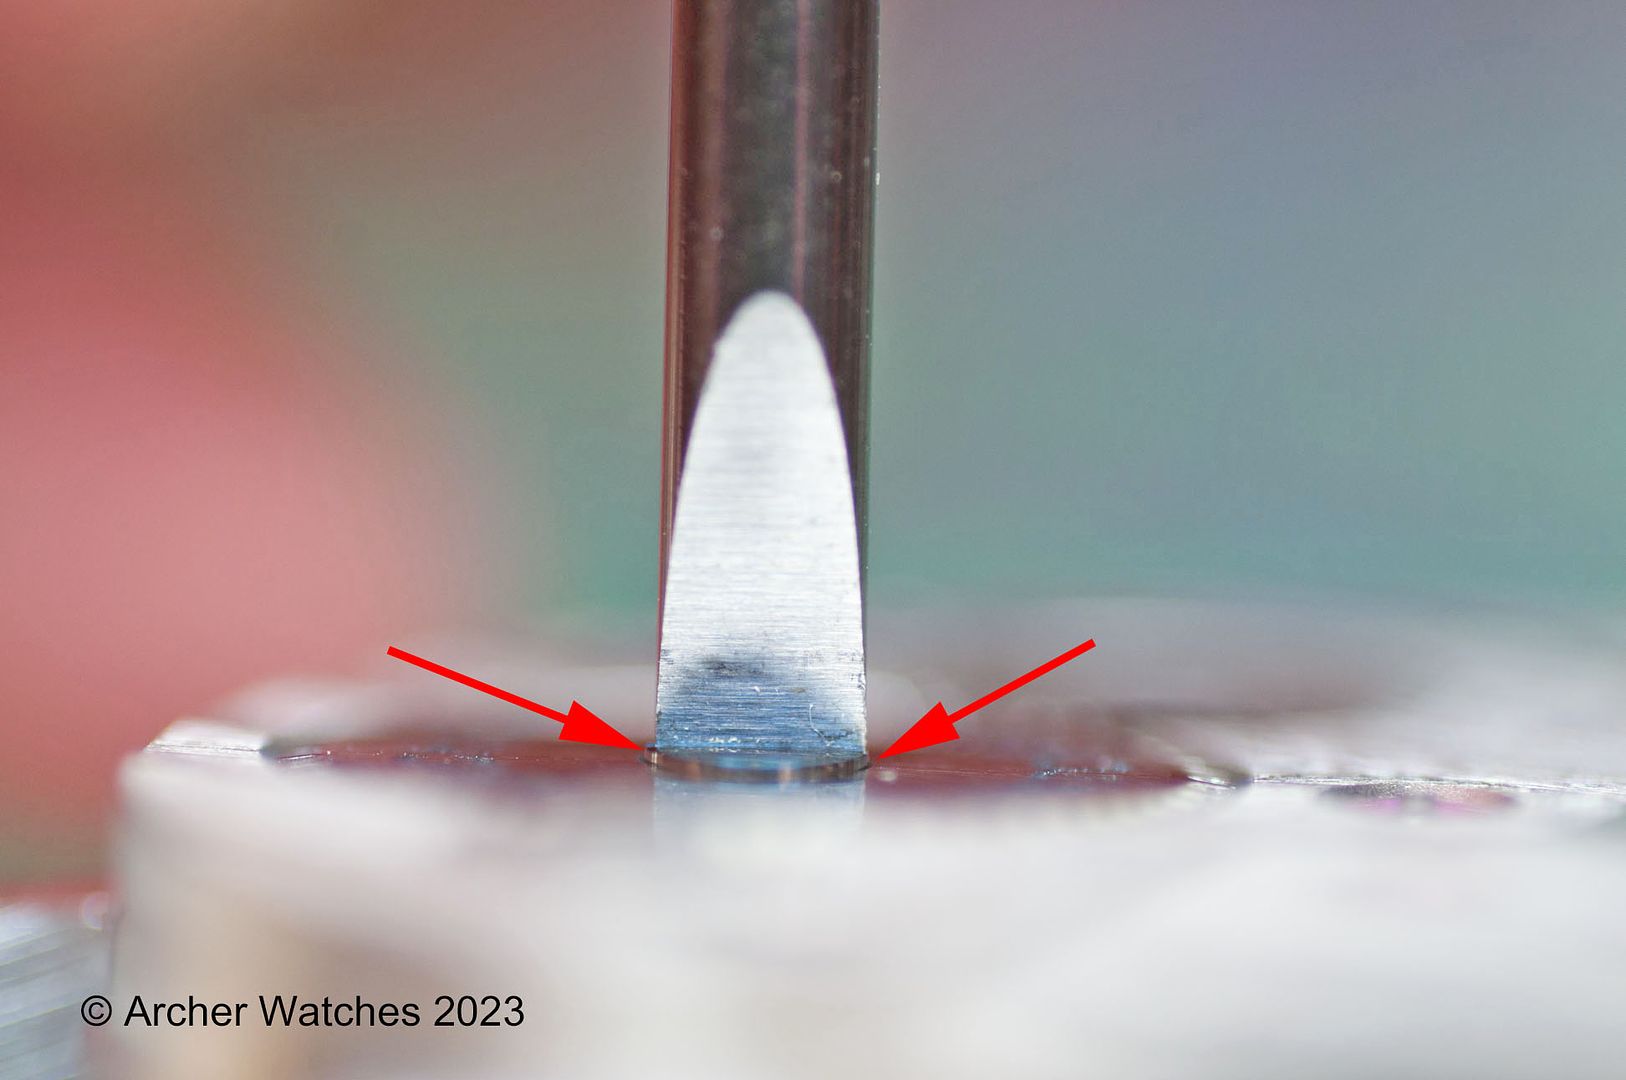
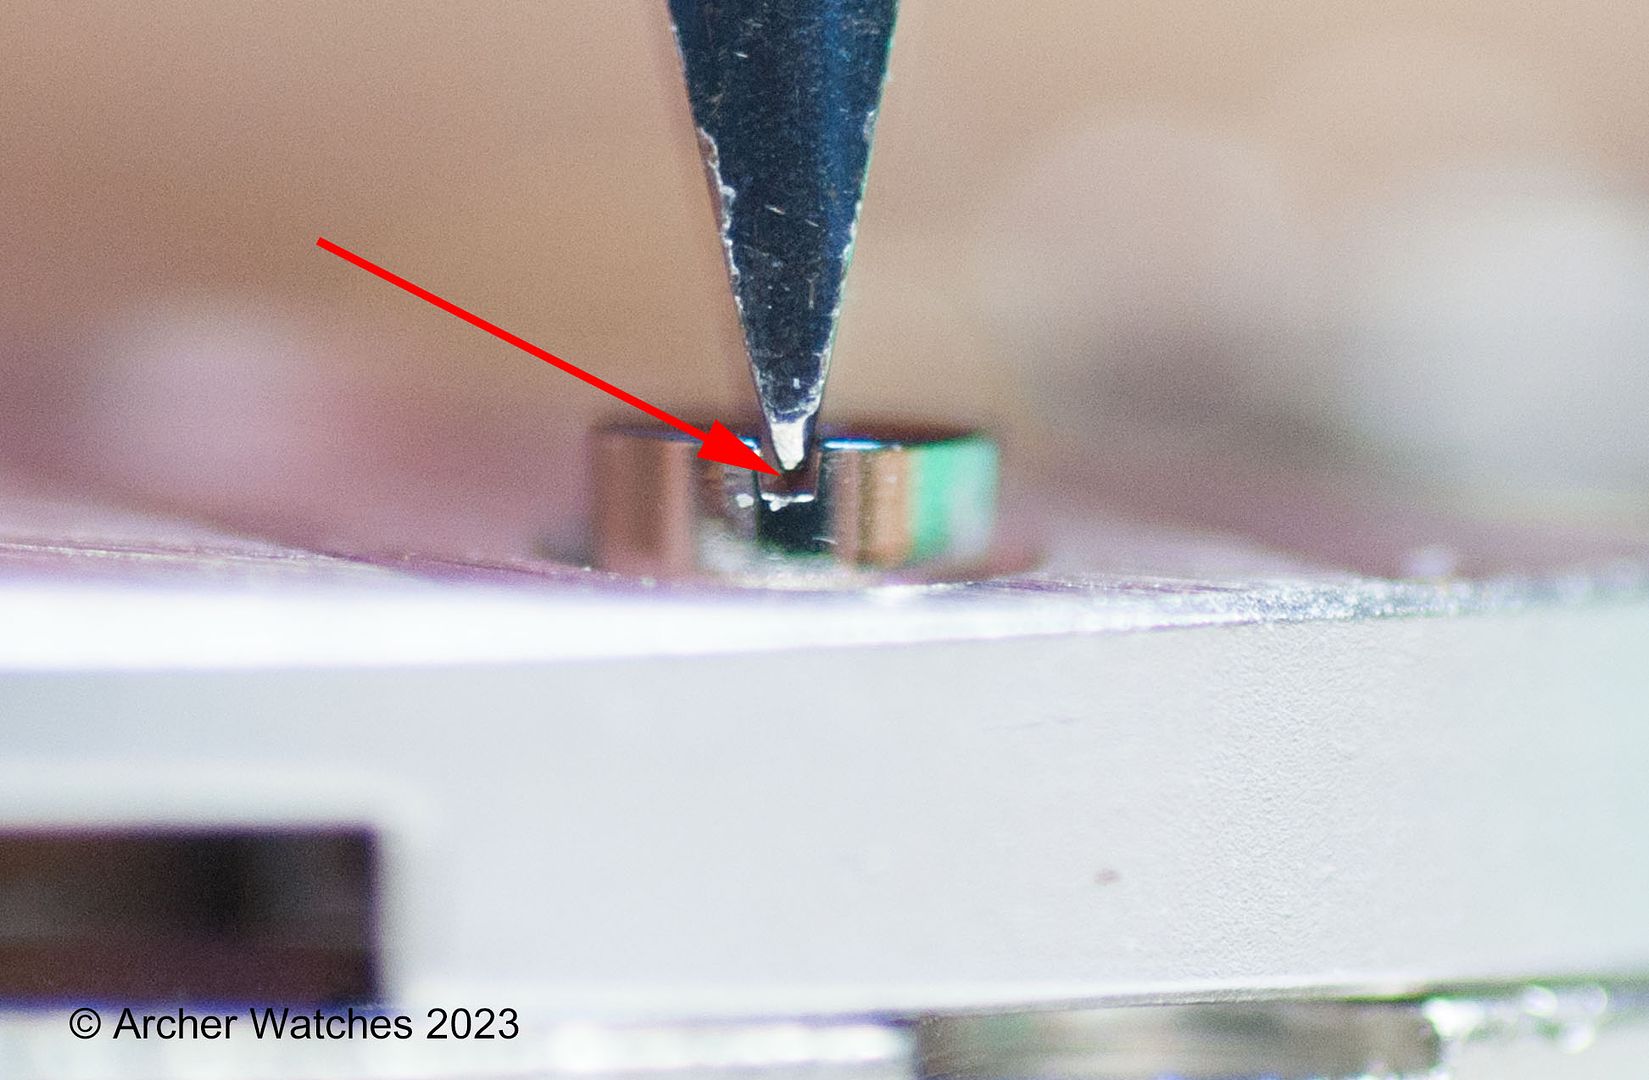
The next thing you need to do, is determine how much stem you still need to cut off. So something to use as a gauge is helpful, and I often use a screwdriver blade:

I can then remove the crown, hold the blade to the stem, and determining exactly how many threads I need to remove from the stem. Then it is given the final trim, and fitted to the watch:

Now if you want to use Loctite, apply a small amount to the threads of the stem, and then screw the crown on - back the threads out, then screw it on again. Of course the stem itself should be properly lubricated, as well as the case tube and crown gasket.
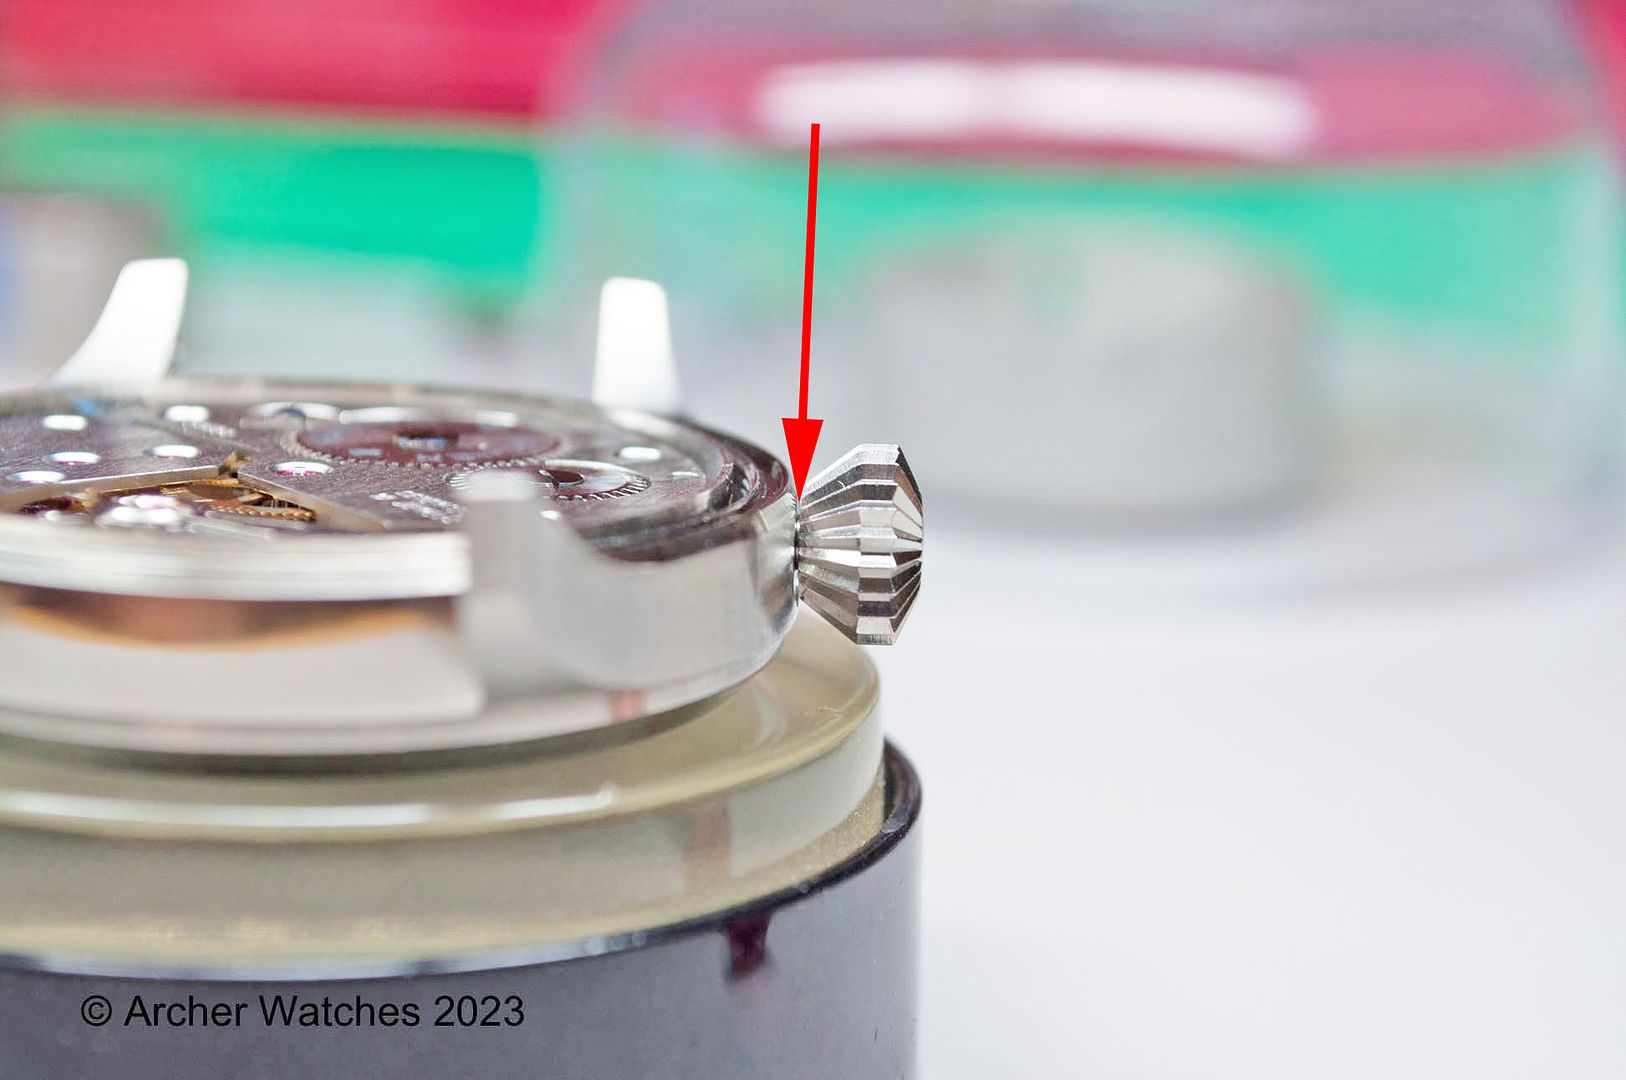
Note that there is a very small gap between the case and the crown. This helps ensure that you don’t cut it too short if there is some play between the movement and the case. It also helps people grip the crown better when they need to move it to the time setting position. Not sue much an issue with a large crown like this, but it can be with small crowns on smaller dressy watches.
If you have any questions on this, please ask.
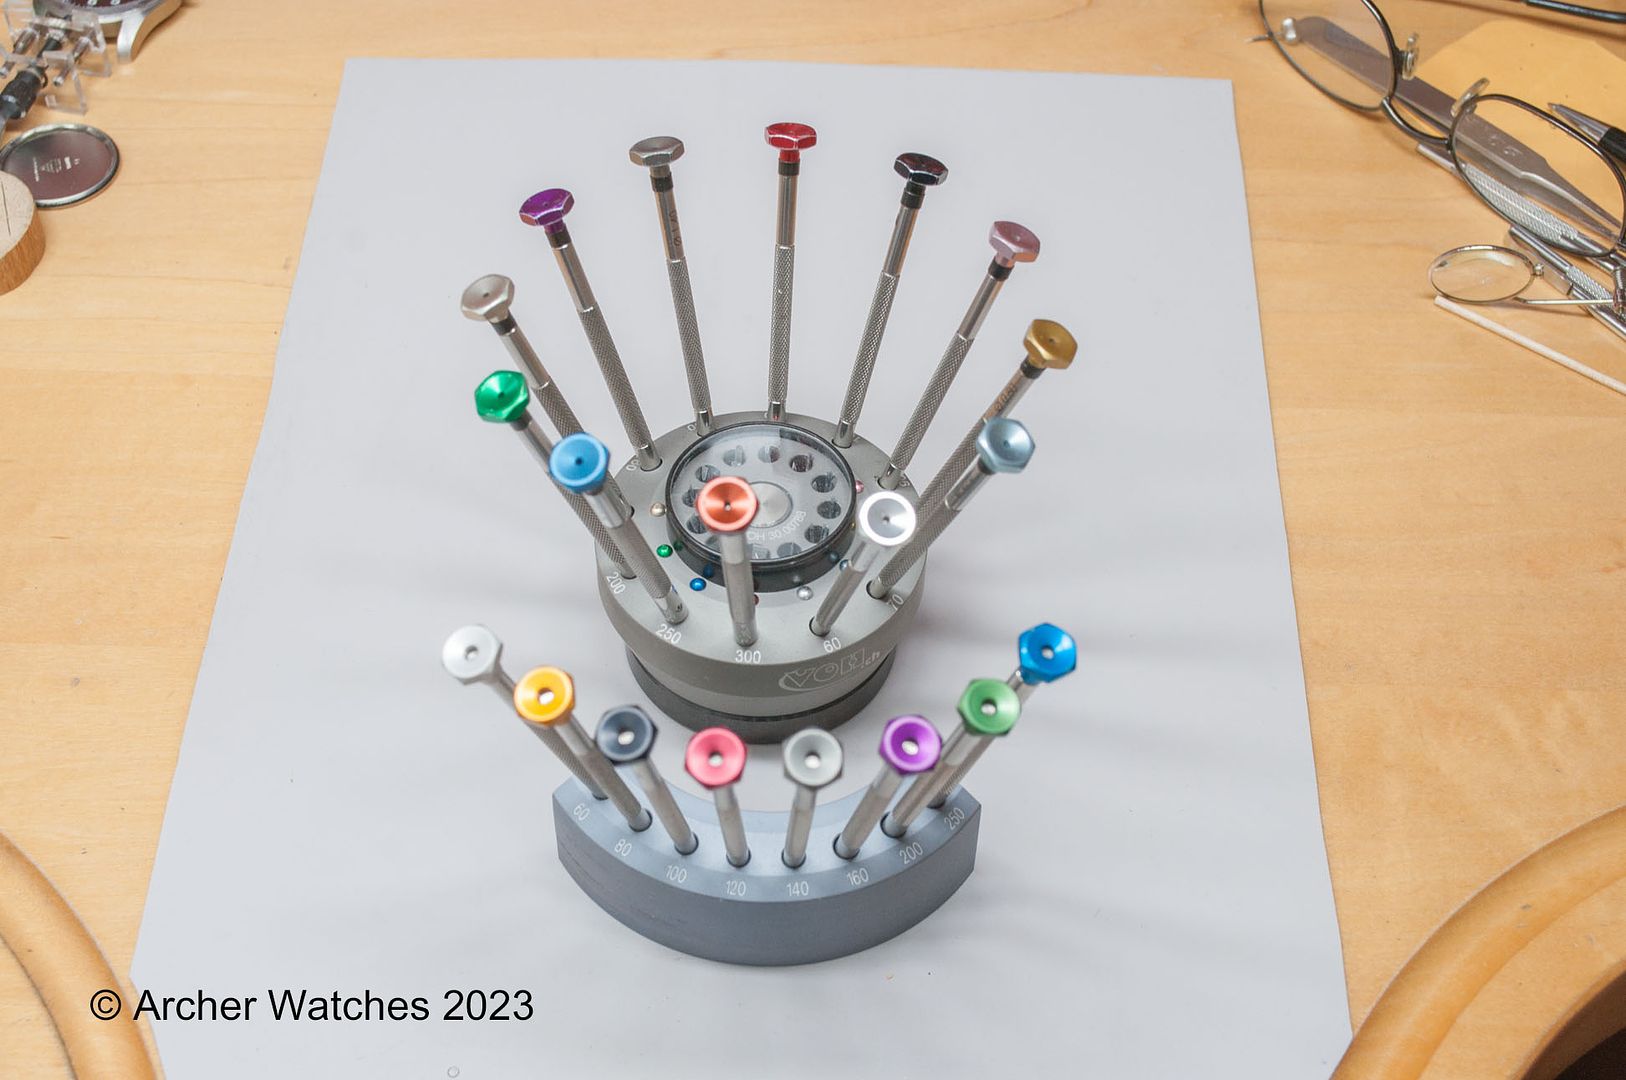
Next post will be on screwdrivers...
Combining two shorter topics here, because of a need I see on the forum for one, and a request was made to me via PM for the other.
First fitting a new stem. Now this is just the way I do it - you don’t have to follow this, but it works for me.
Here is a new stem and crown that needs to be fitted to a watch:
New stems tend to be very long, so I like to get them cut down first to something close, to make it easier to fine tune the final length. With the movement fitted into the case, install the stem - fully install it so if it uses a screw to lock the stem in place, make sure it’s locked down:
Now mark the stem right at the end of the case tube:
I typically mount the stem in a pin vise through this process, but when you do so, make sure that the 4 jaws of the pin vise are clamping on the 4 flat surfaces of the stem, and not the round surfaces:
Clamping on the round surfaces can raise burrs, that then essentially become cutting tools that will chew up the soft brass in the main plate:

Now cut the stem at the mark you made:
You can use different things to cut the stem, but I just use side cutters. This will leave a rather jagged end, so if using this kind of tool you have to be aware that you need to cut it in such a way that you can clean up that jagged end, and not have the stem too short. It won’t be too short here of course, because you have left plenty of length.
For cleaning up the end of the stem, there are different tools you can use. If you cut it with a Dremel cut off wheel, it will be pretty clean already. But if you need to remove uneven material, you can just use a small file. I tend to use a stone - holding the stem end against the stone, I move it in a figure 8 pattern that you can see on the stone. Using this pattern keeps the stem end perpendicular to the threads:
I always put a very slight chamfer on the end of the stem that I just cut, before screwing the crown on:
Next I install the stem and crown:
The next thing you need to do, is determine how much stem you still need to cut off. So something to use as a gauge is helpful, and I often use a screwdriver blade:
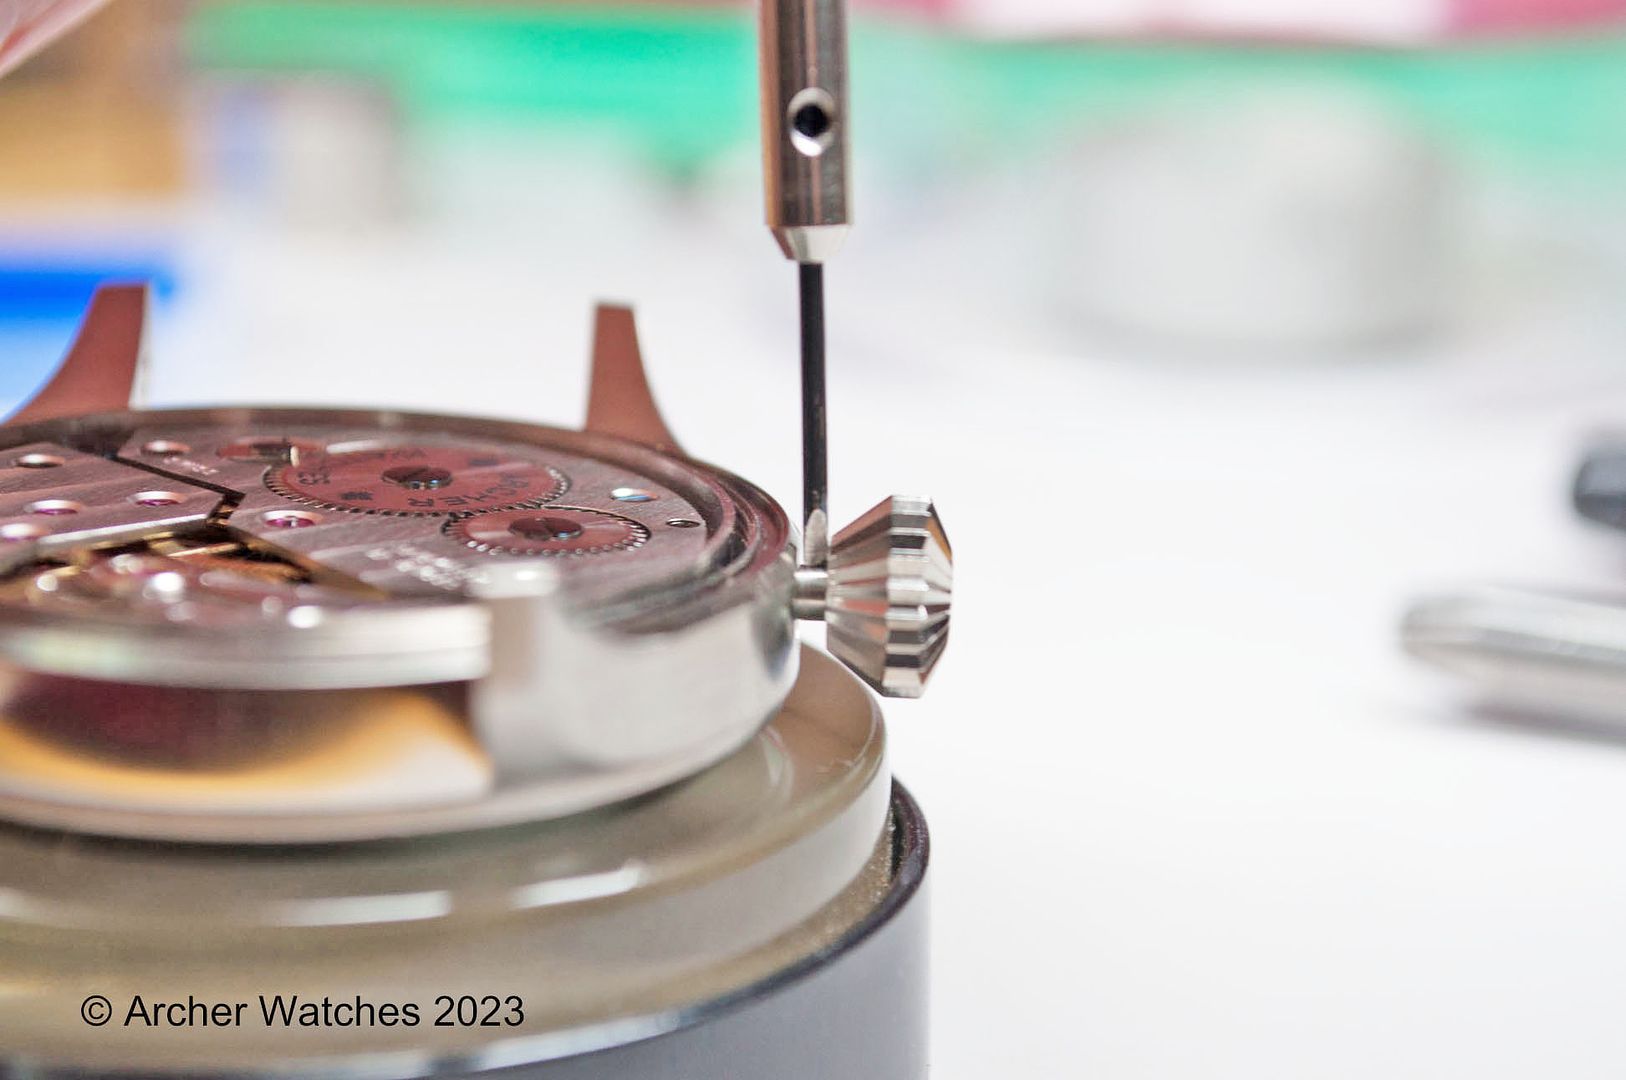
I can then remove the crown, hold the blade to the stem, and determining exactly how many threads I need to remove from the stem. Then it is given the final trim, and fitted to the watch:
Now if you want to use Loctite, apply a small amount to the threads of the stem, and then screw the crown on - back the threads out, then screw it on again. Of course the stem itself should be properly lubricated, as well as the case tube and crown gasket.
Note that there is a very small gap between the case and the crown. This helps ensure that you don’t cut it too short if there is some play between the movement and the case. It also helps people grip the crown better when they need to move it to the time setting position. Not sue much an issue with a large crown like this, but it can be with small crowns on smaller dressy watches.
If you have any questions on this, please ask.
Next post will be on screwdrivers...