- Posts
- 29,951
- Likes
- 77,435
Archer
··Omega Qualified WatchmakerThis is #11 in my series of basic watchmaking tips.
This thread is the result of a direct request made to cover replacement of case tubes, but I will also include some other common replacement items on cases, such as pushers, correctors, etc.
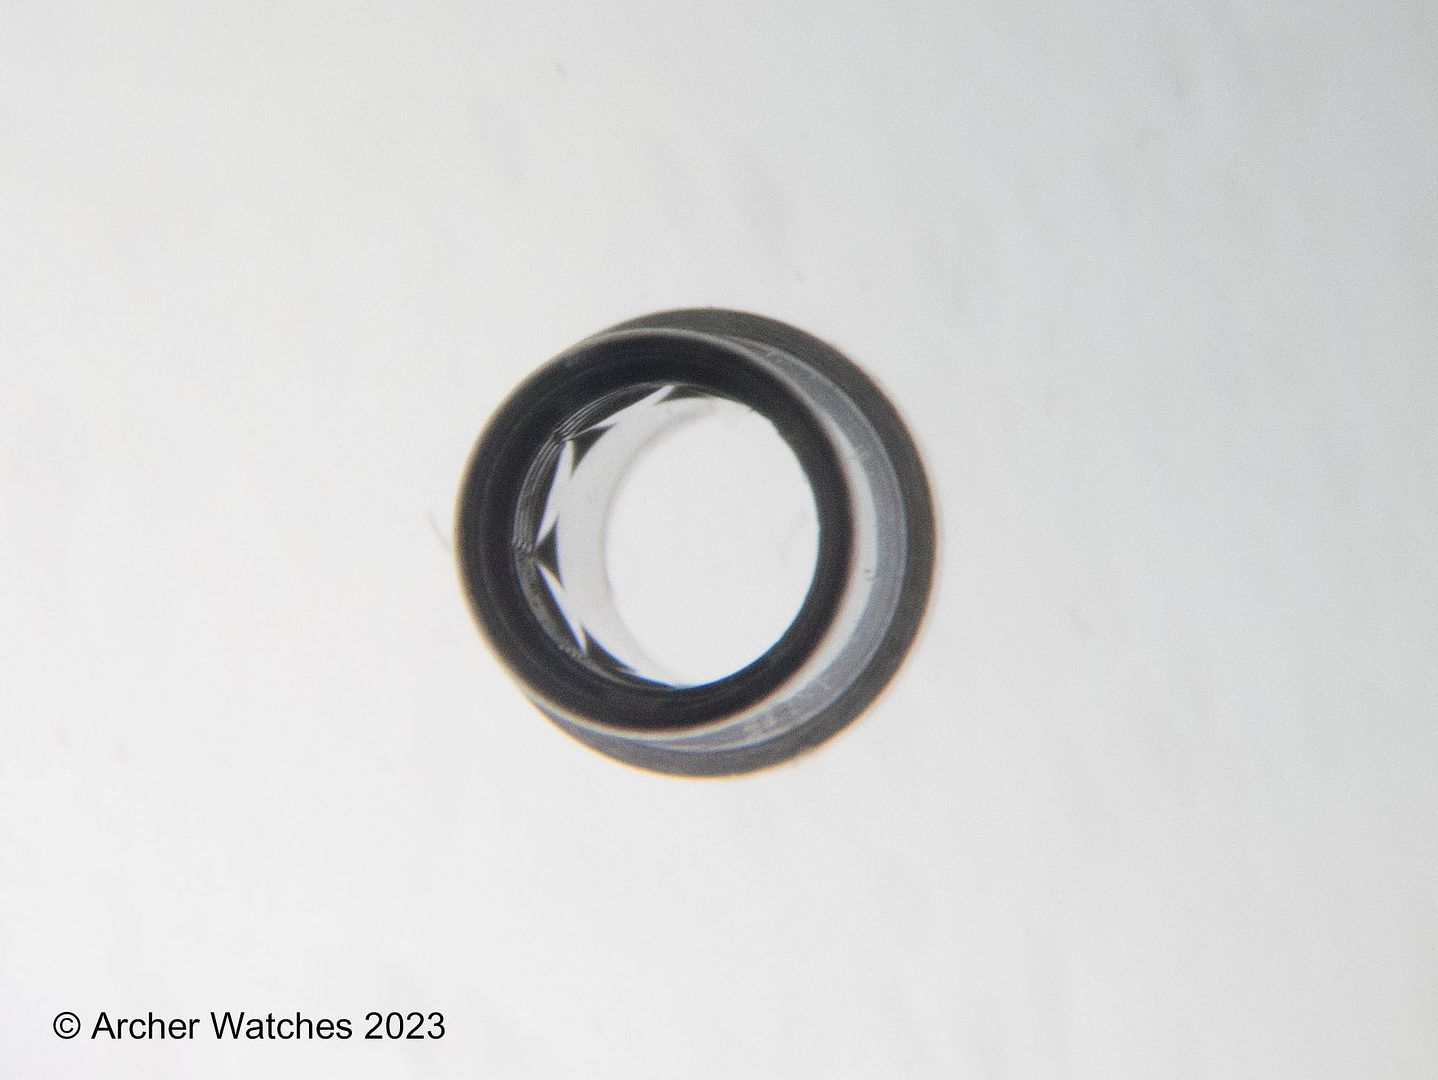
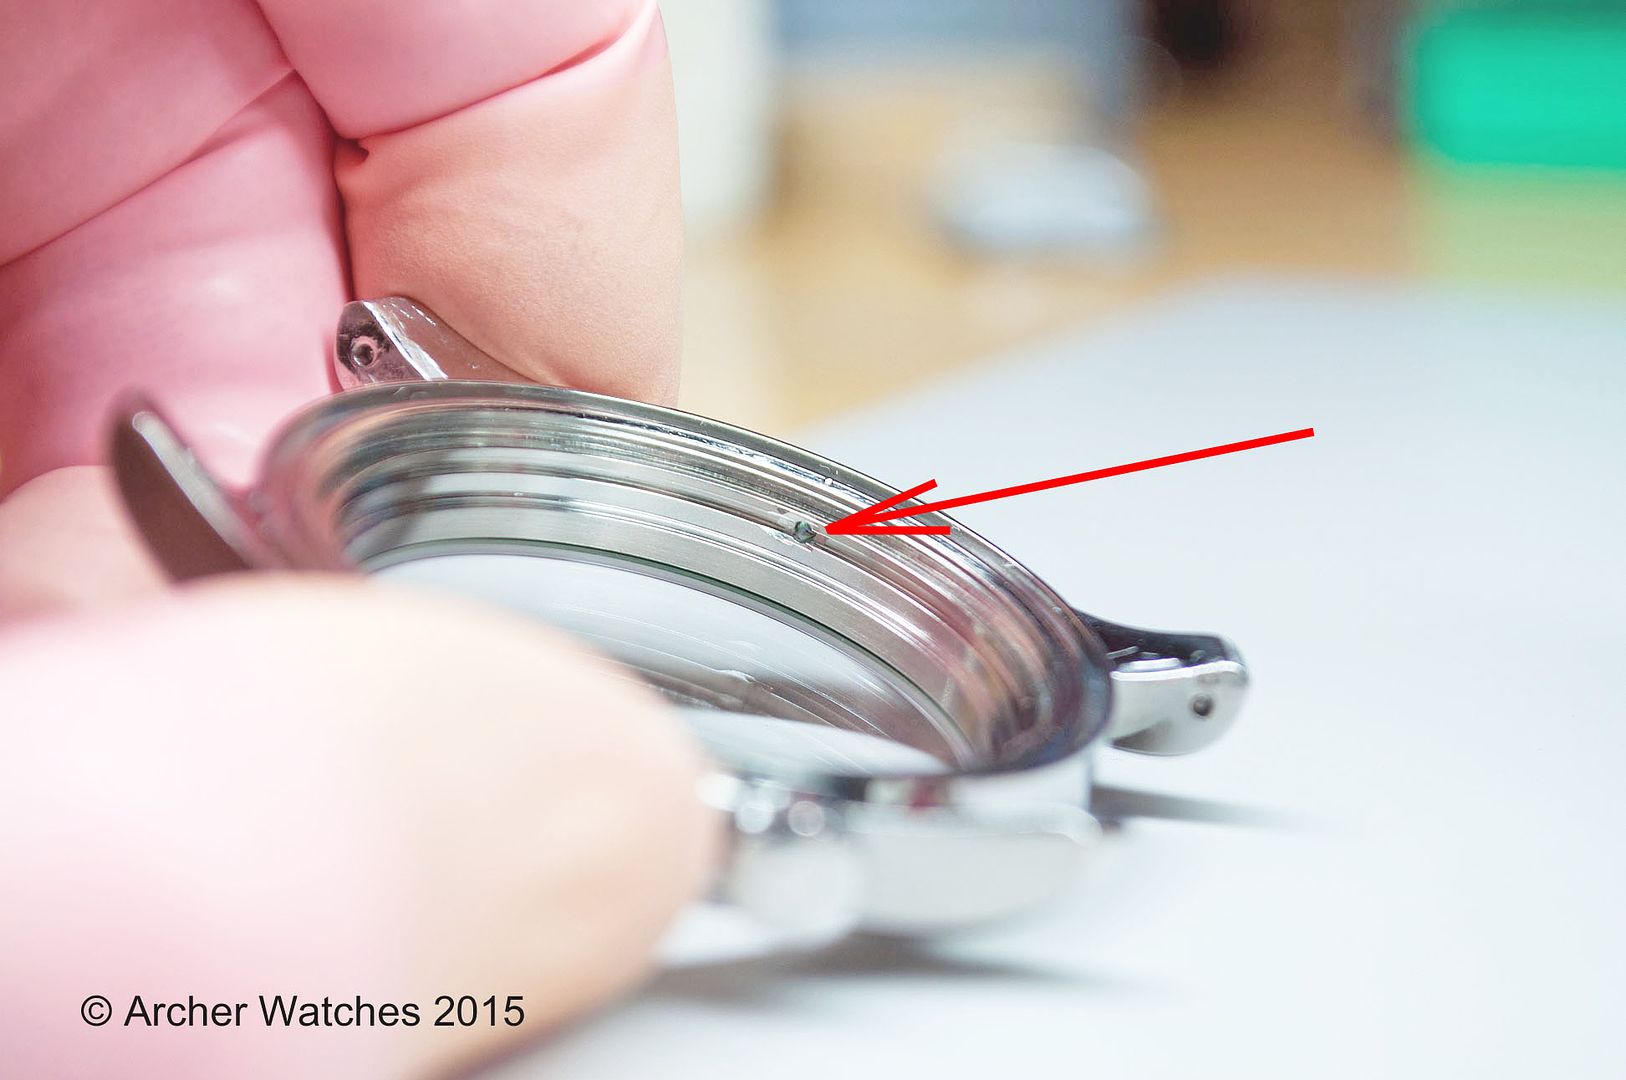
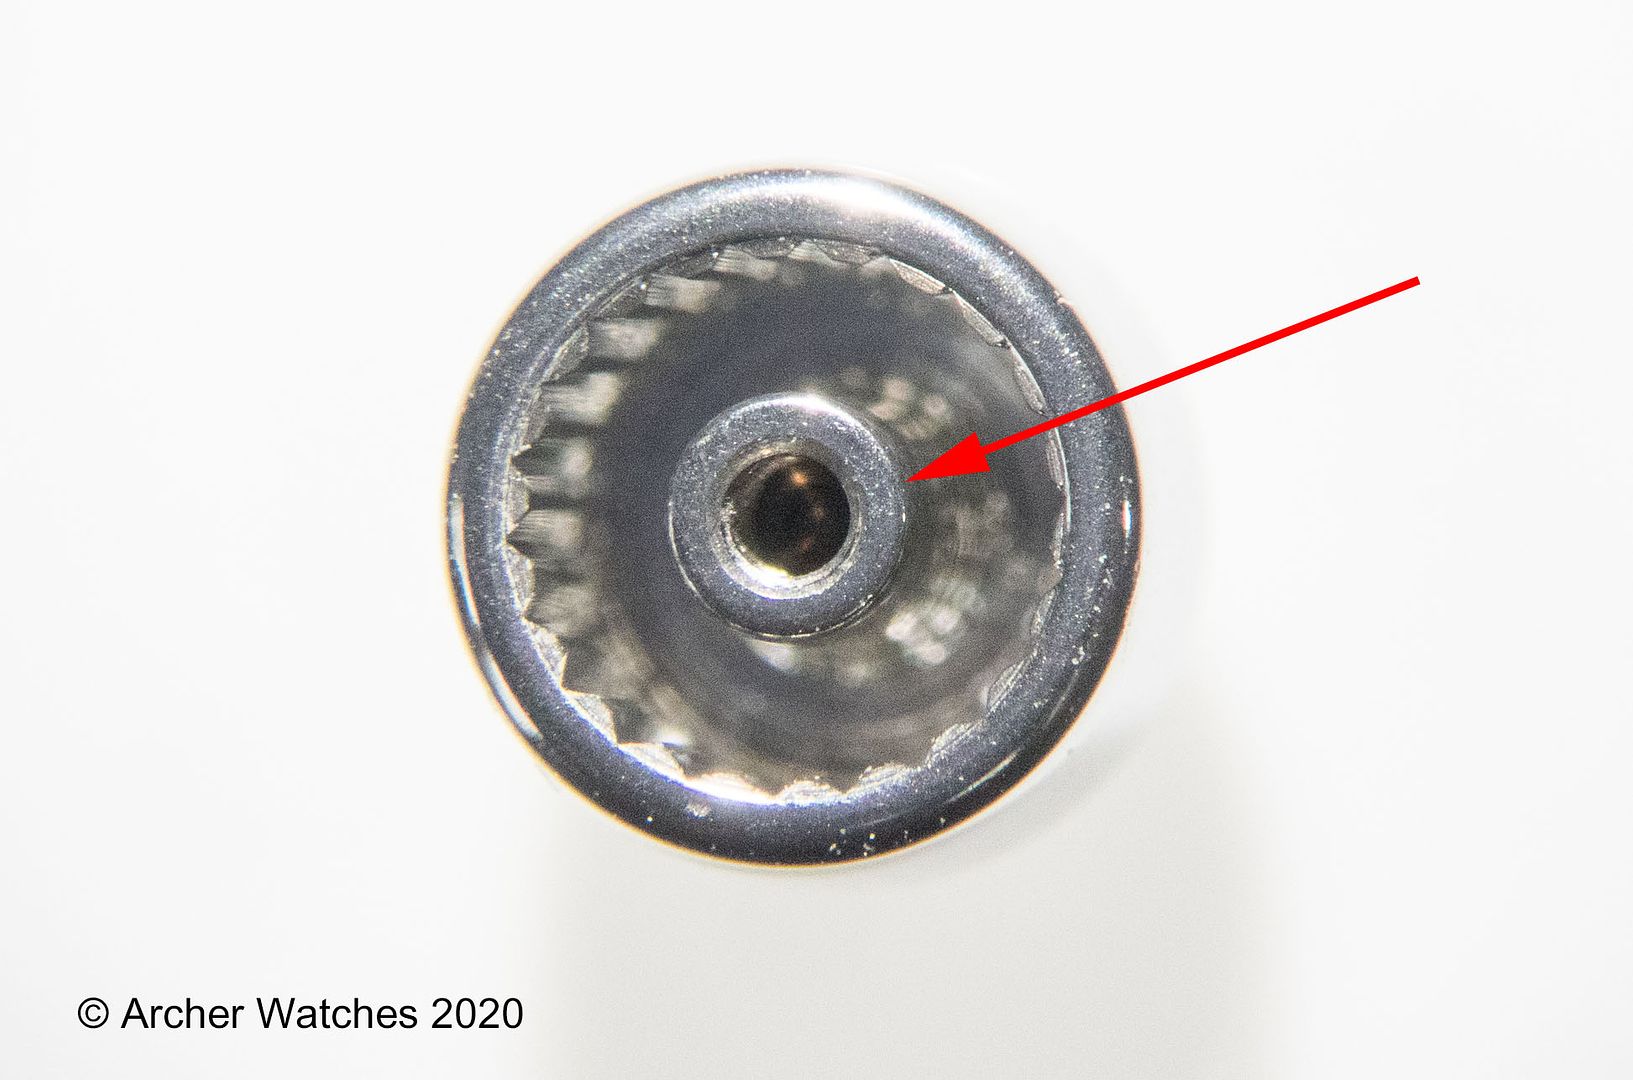
Since case tubes was the specific item a member here requested that I cover, I’ll start there. So the case tube (also sometimes referred to as the pendant tube) is the tube that the crown either screws into, or seals against. These can require replacement for a few reasons, such as impact damage, wear, damaged threads, etc. Here is a simple case tube that is clearly worn:

You might wonder how the rubber O-ring causes wear like this, but over time the O-ring can harden, and become embedded with dirt, which acts as an abrasive. There have been instances where I have been able to polish a slightly worn case tube to make it functional again, but often the best route is complete replacement, with a new tube looking like this:

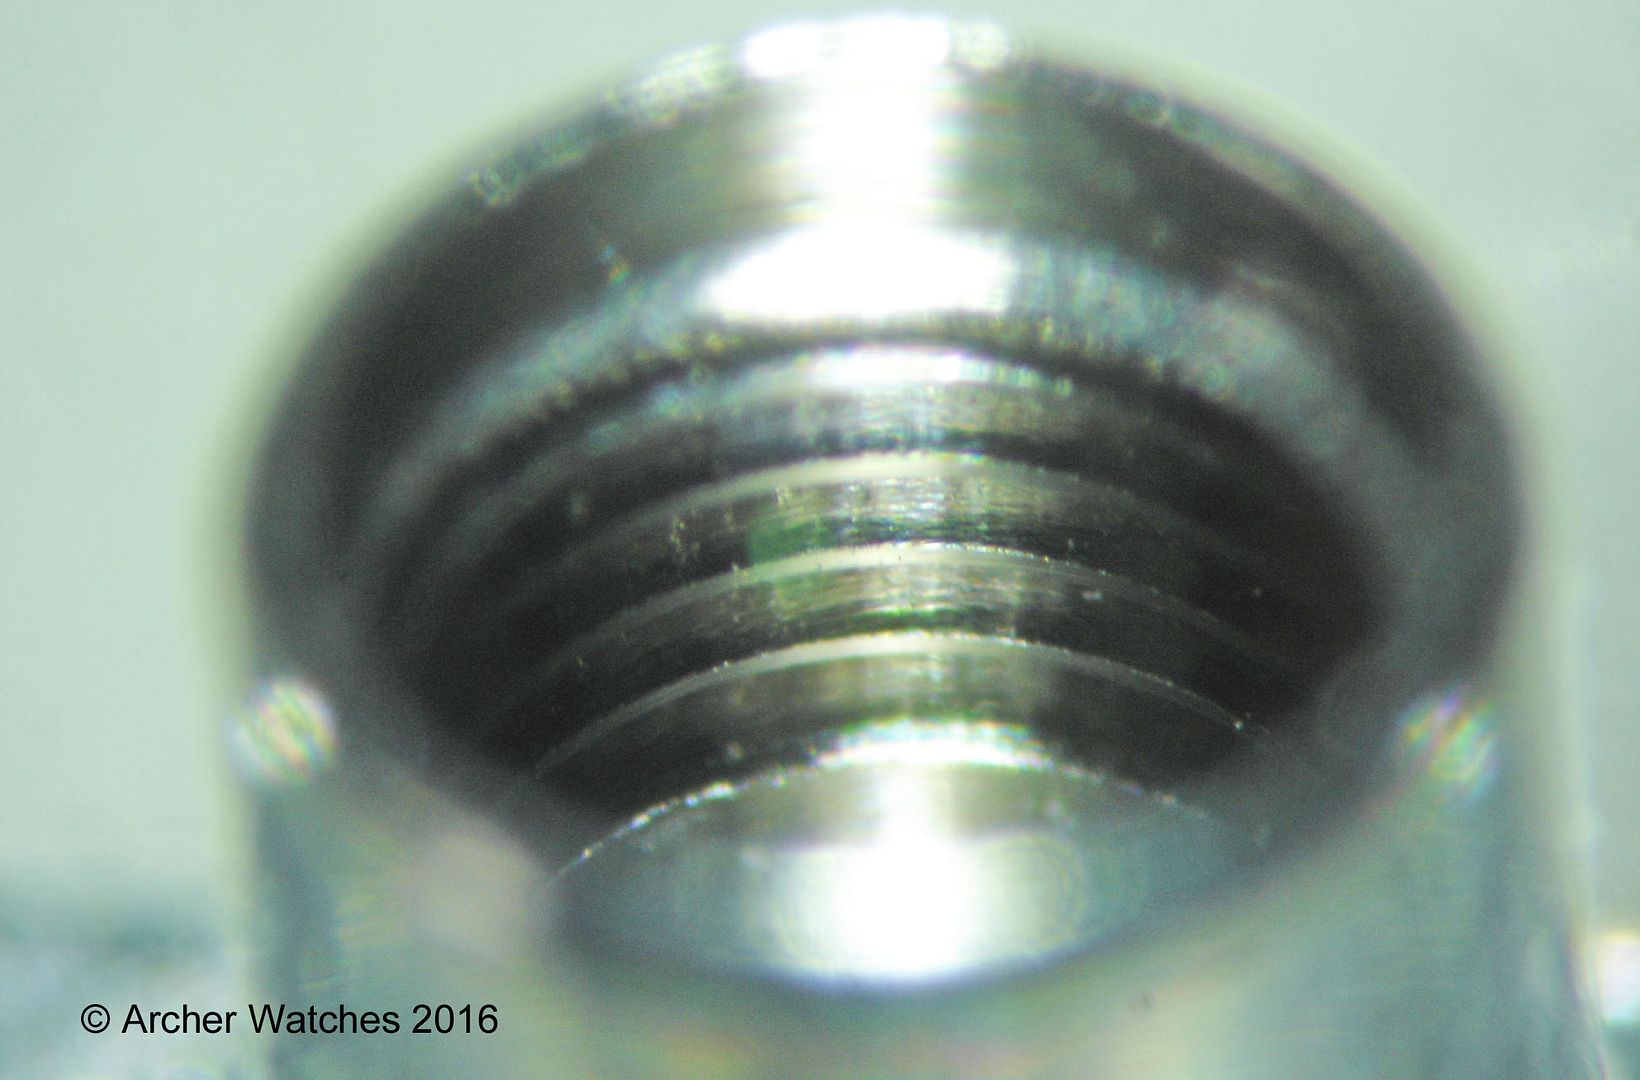
For case tube used with screw down crowns, they often need replacing because they are stripped - this is what a good thread looks like:

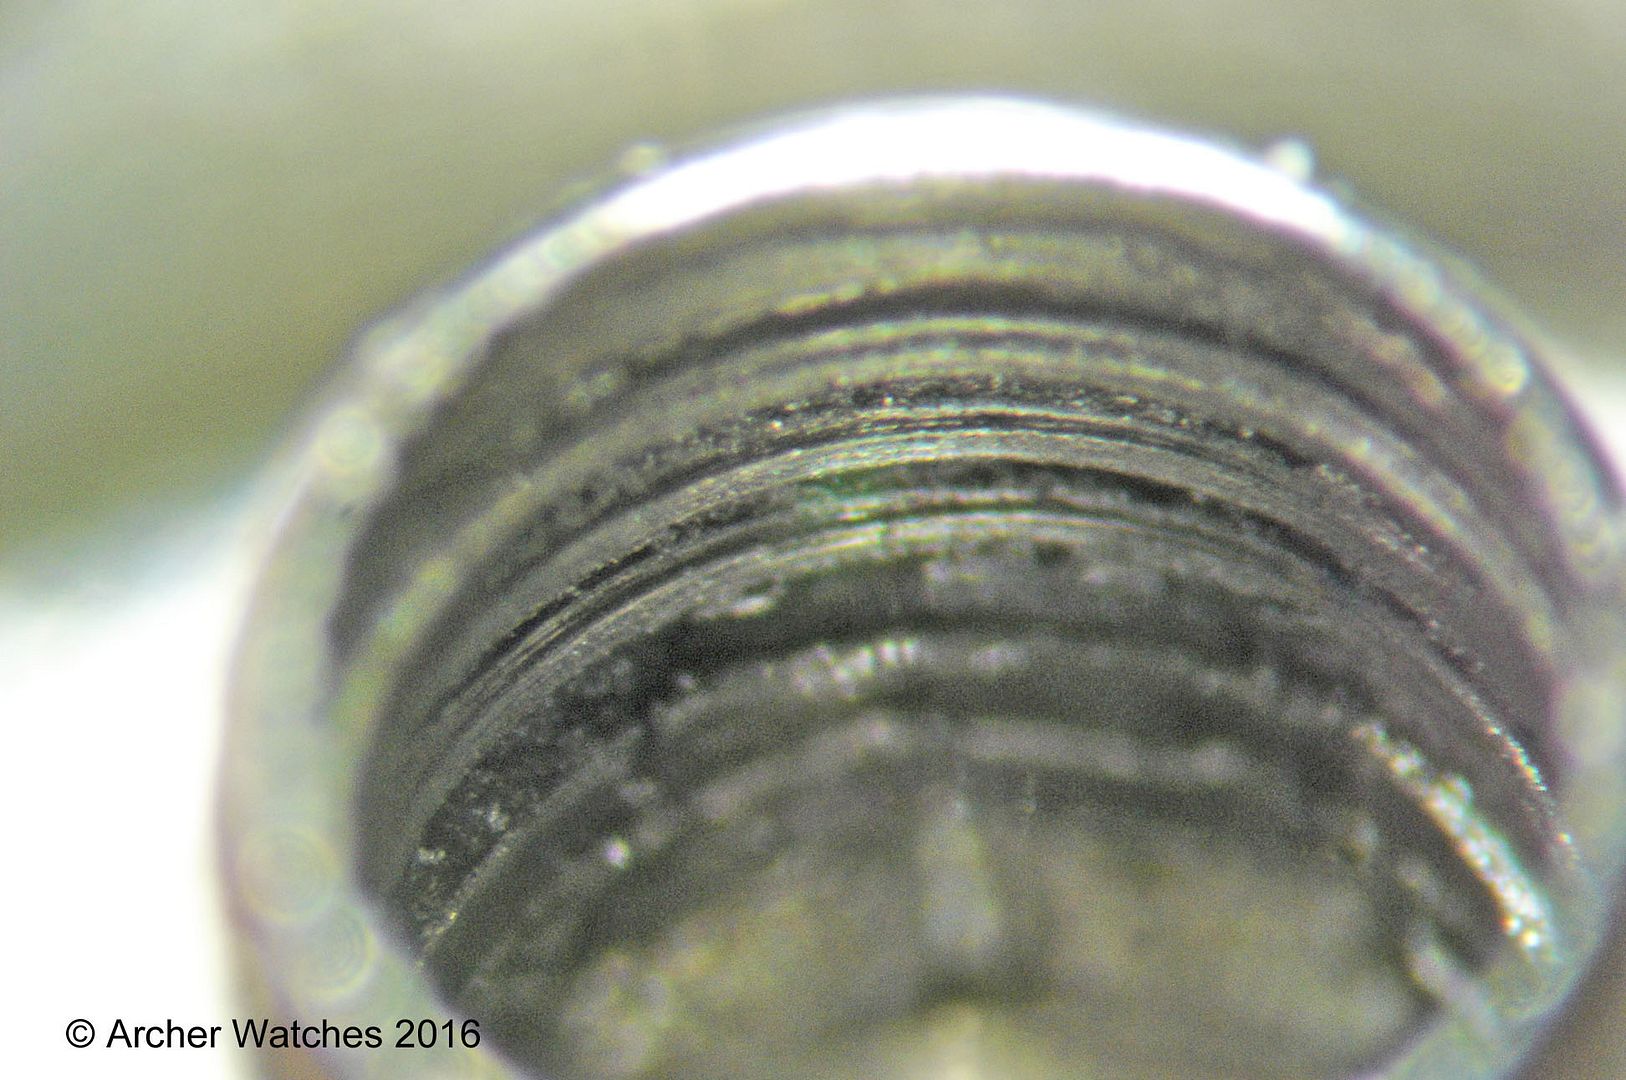
And what damaged threads look like:

Case tube can be attached to the case in different ways. Some are press fitted into the case, so are threaded into the case, and some are soldered into the case.
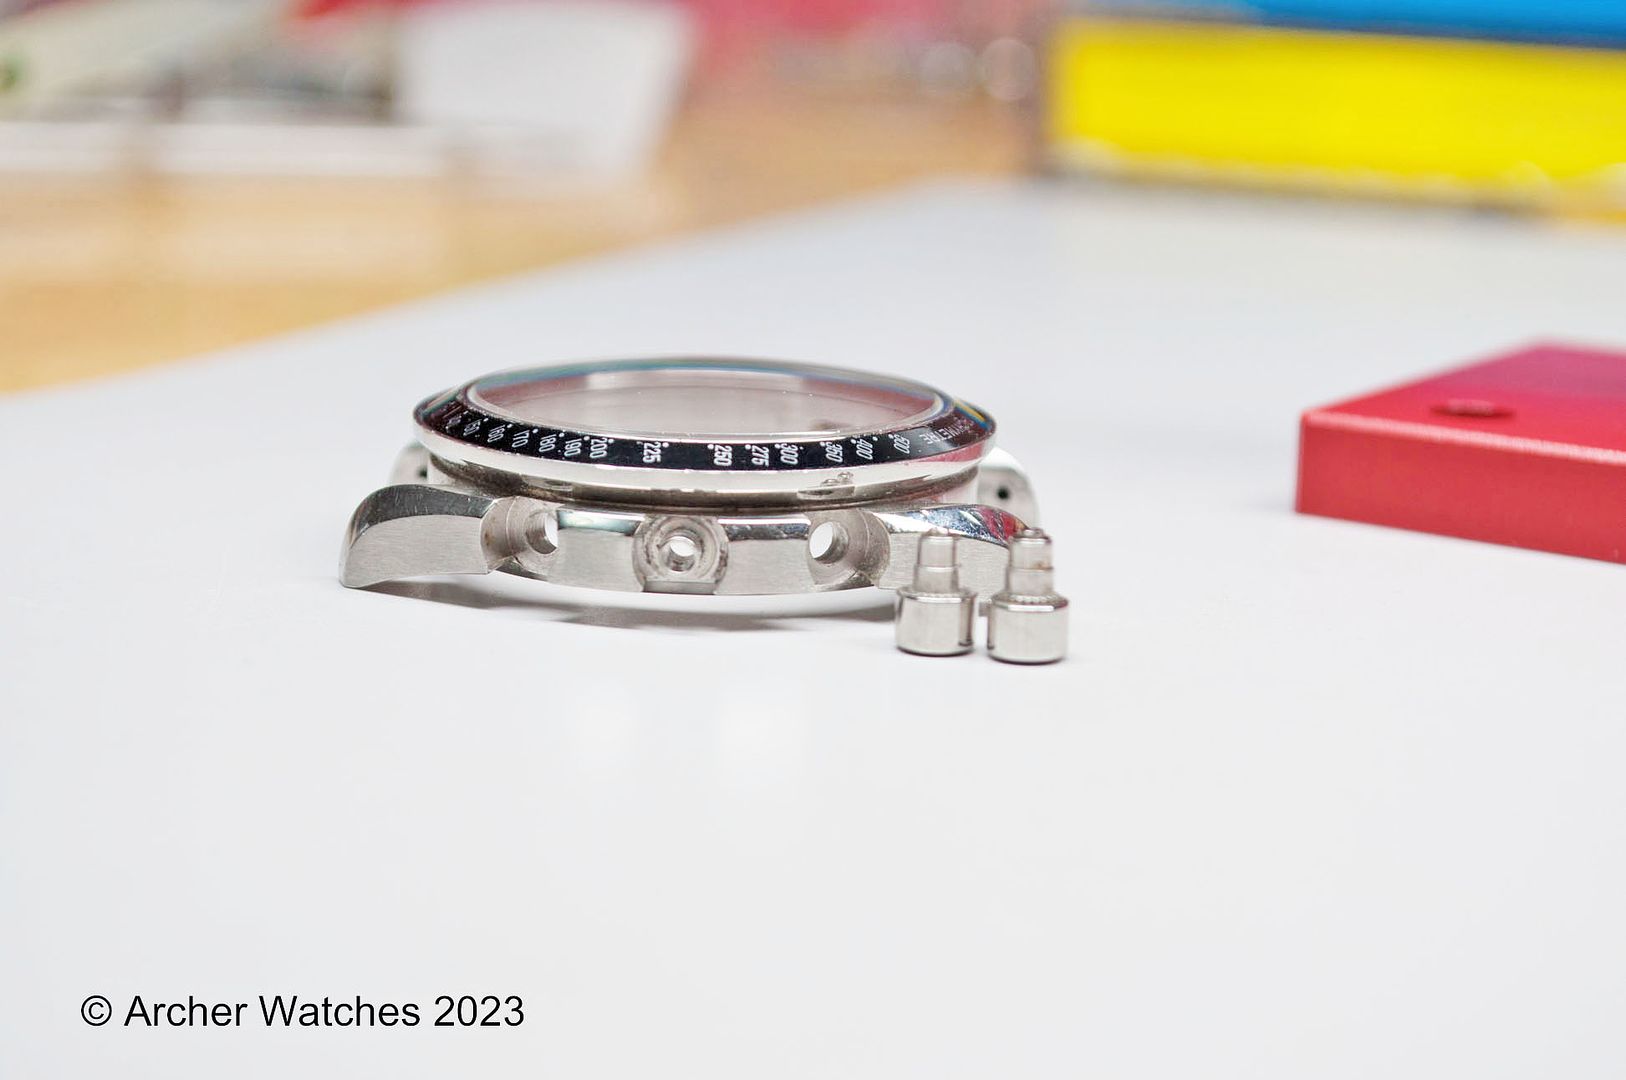
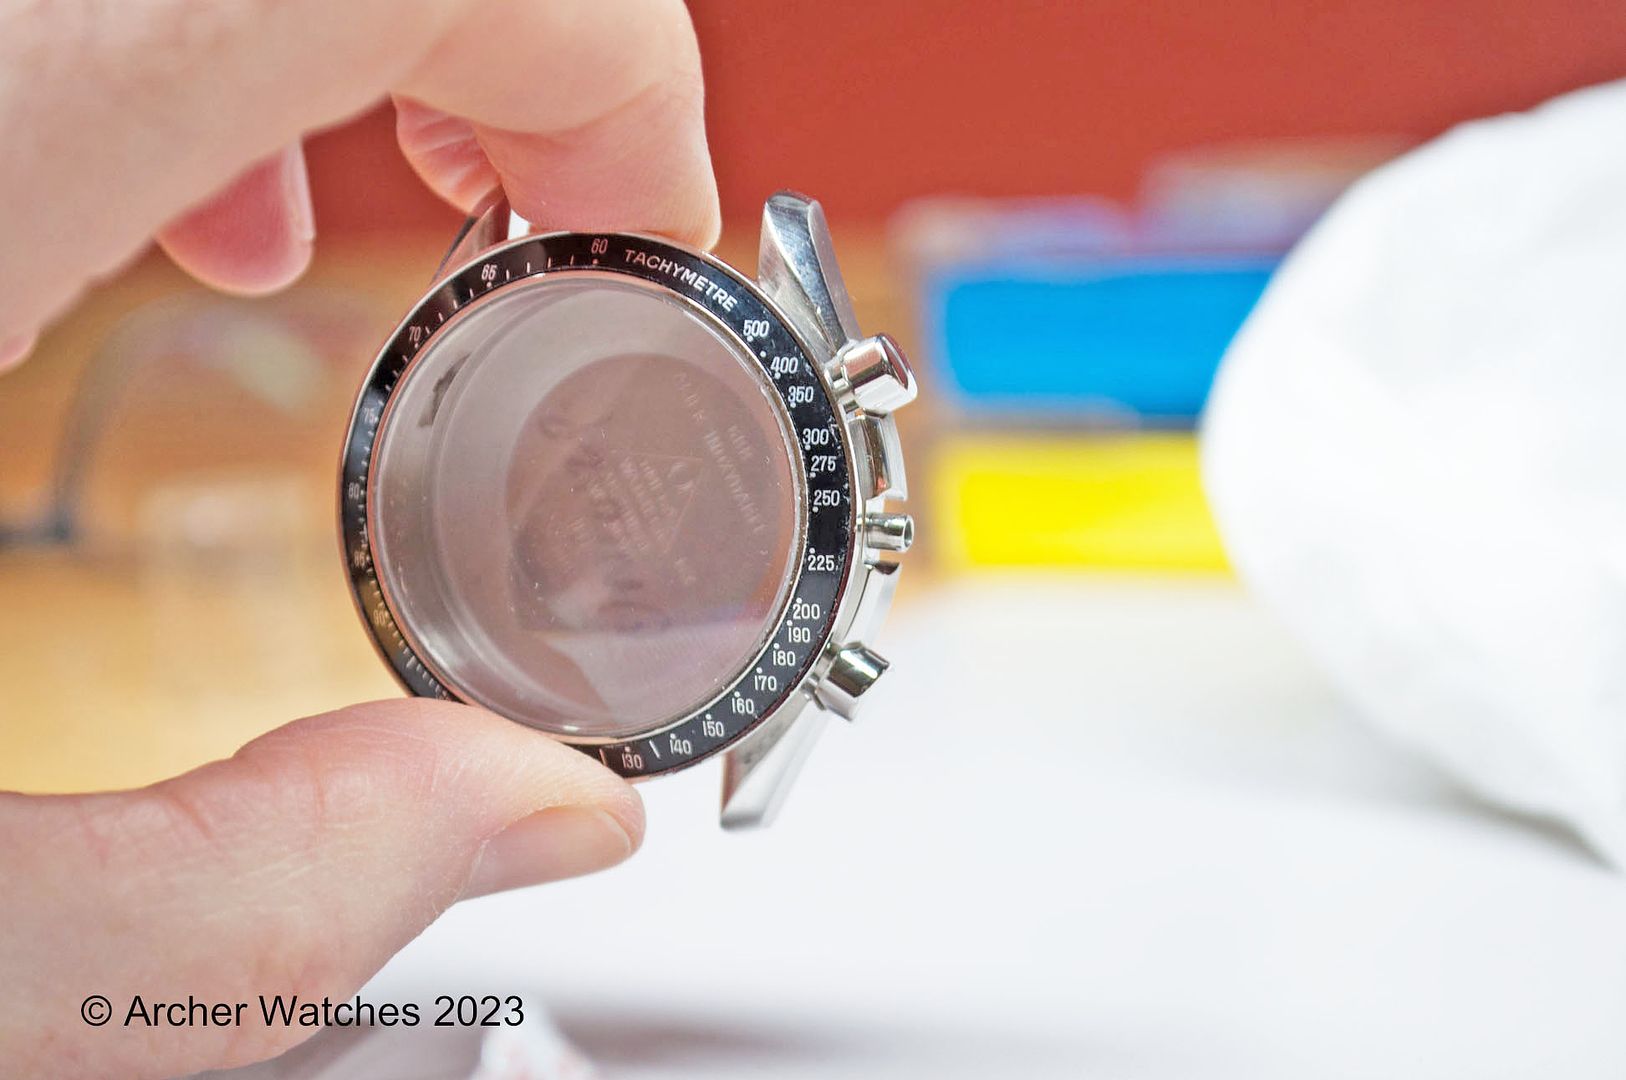
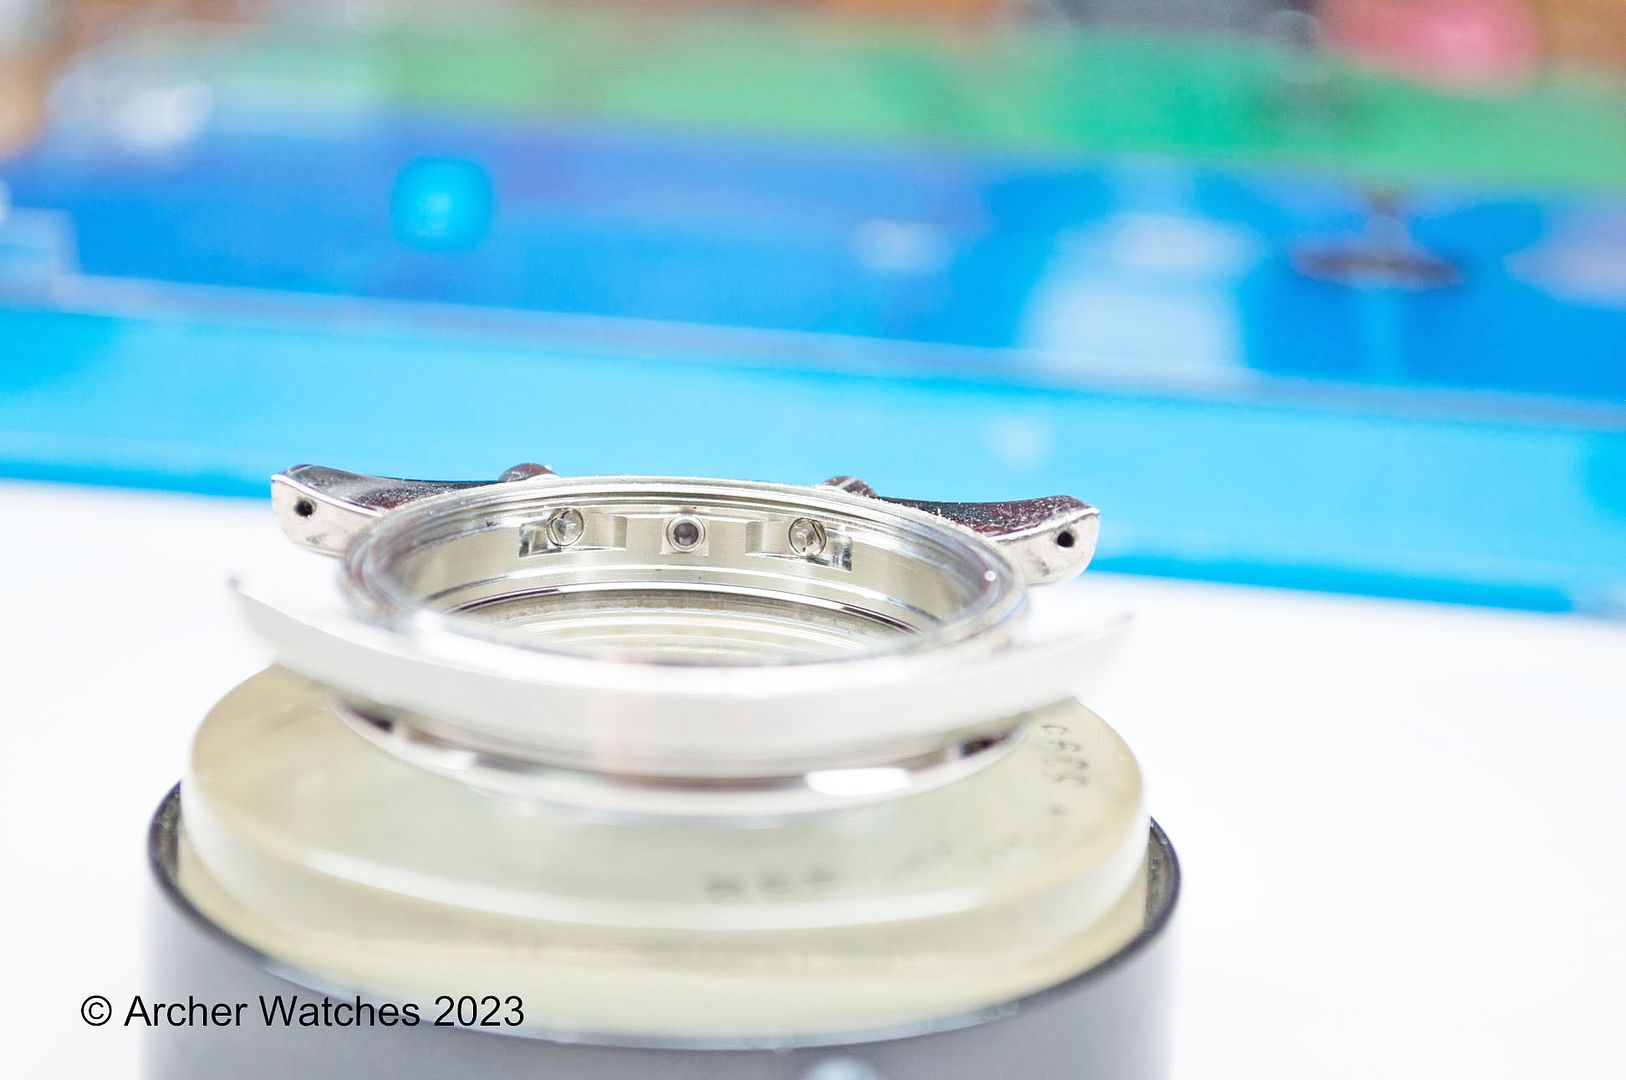
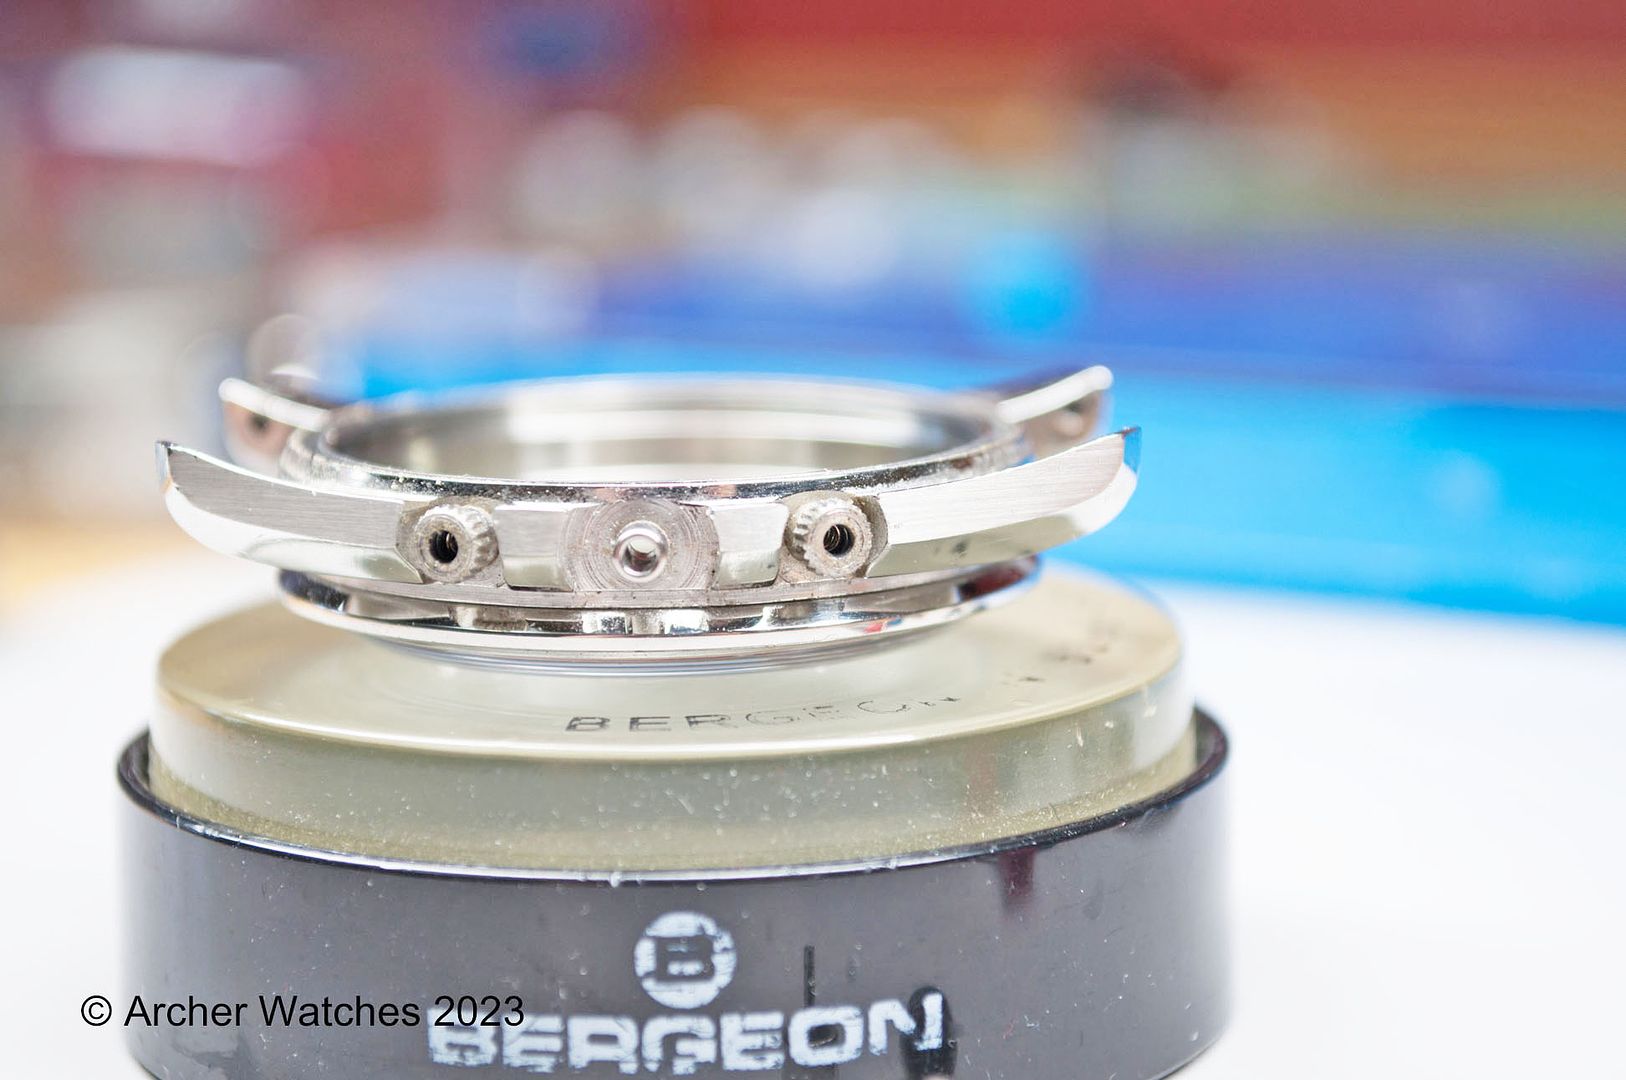
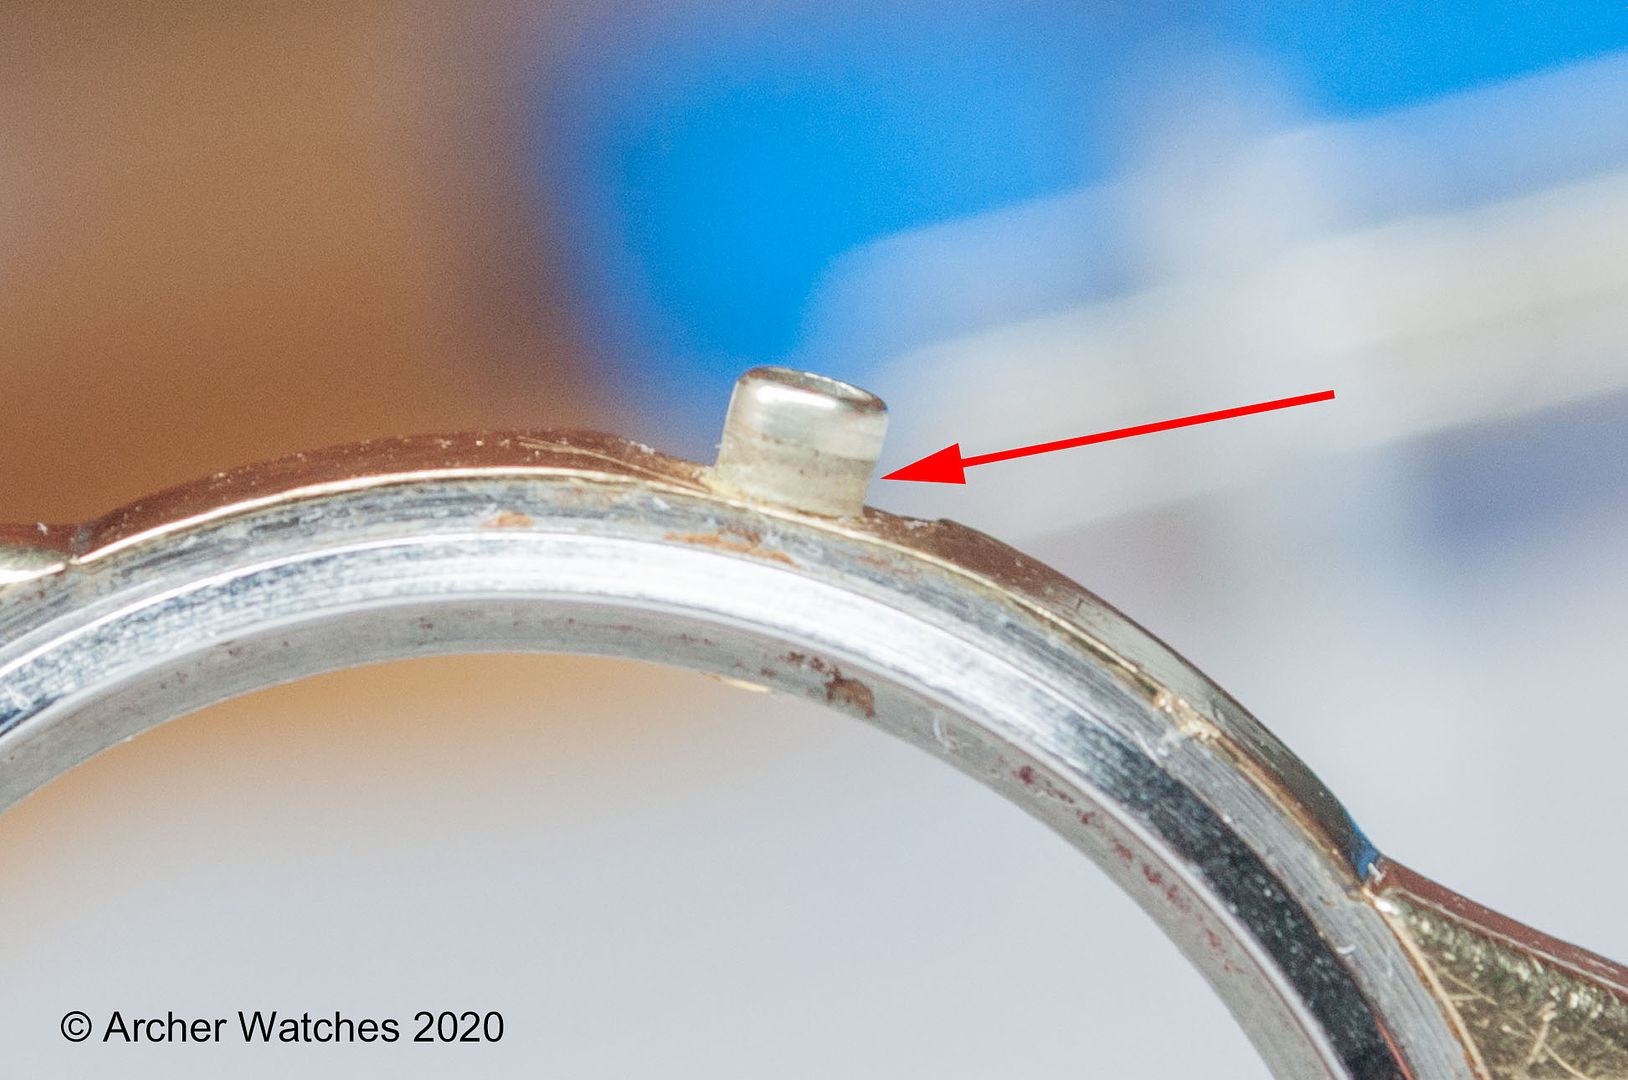
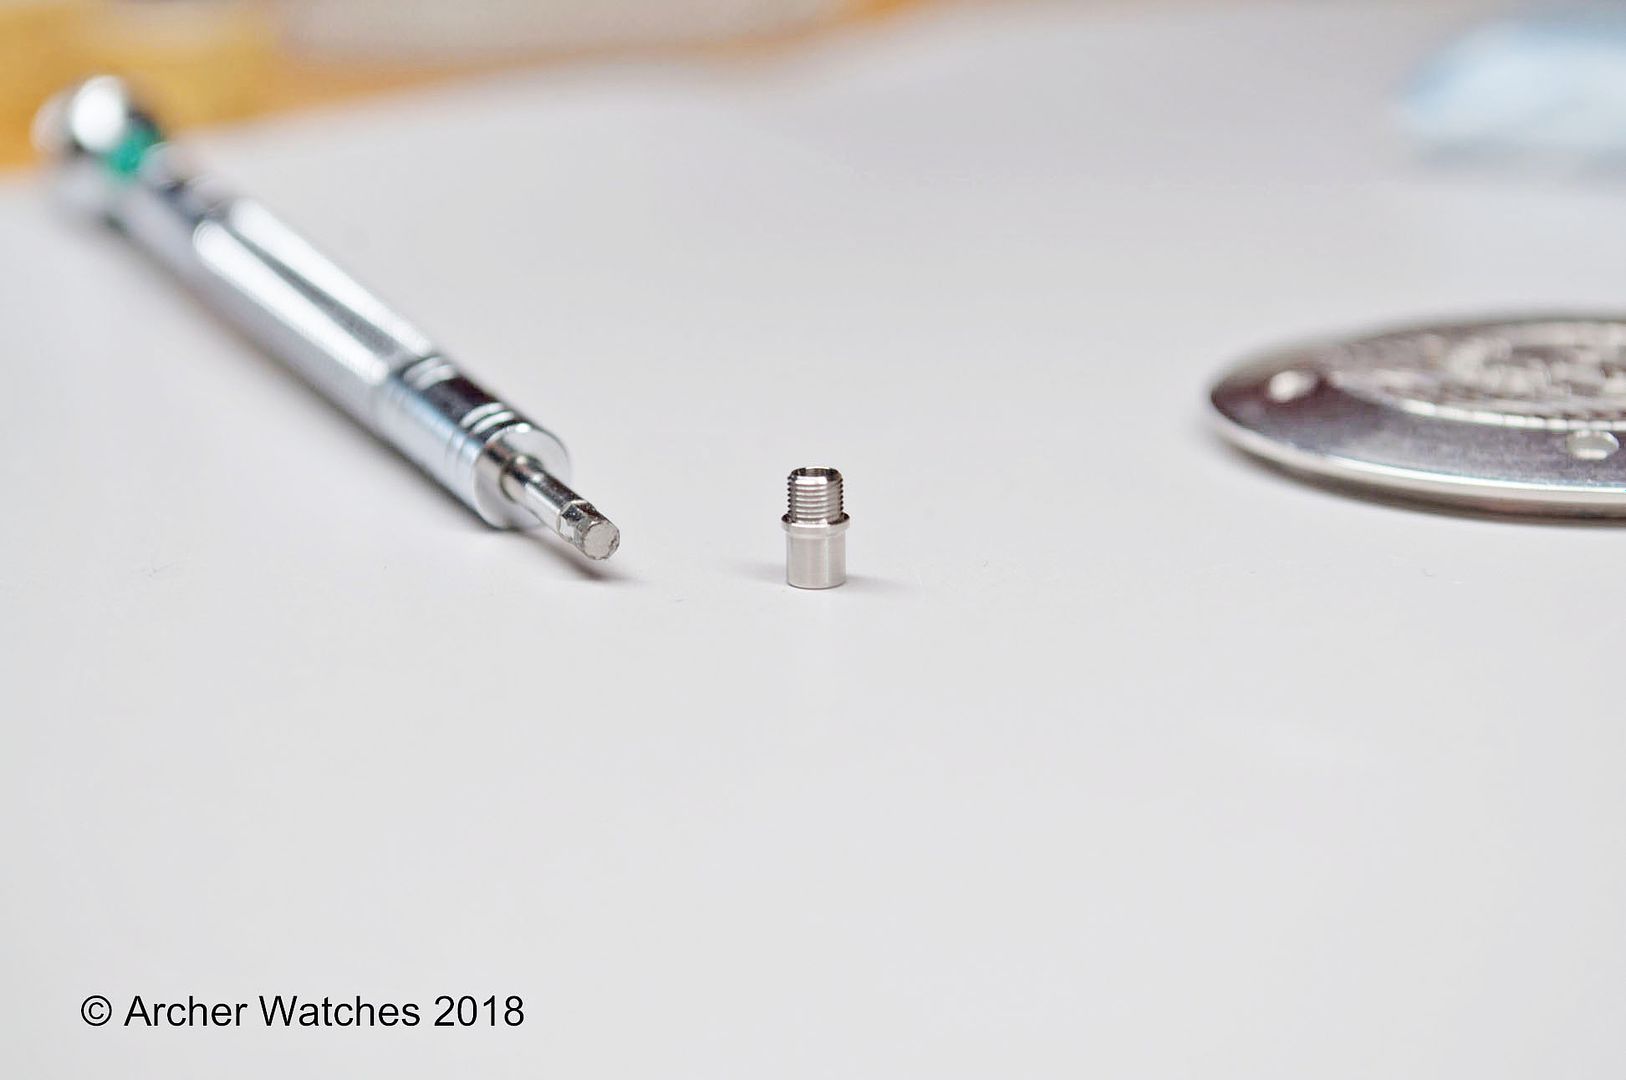
I’ll start with a simple press fitted case tube, and specifically the type that the case tube extends into the case, like this one:

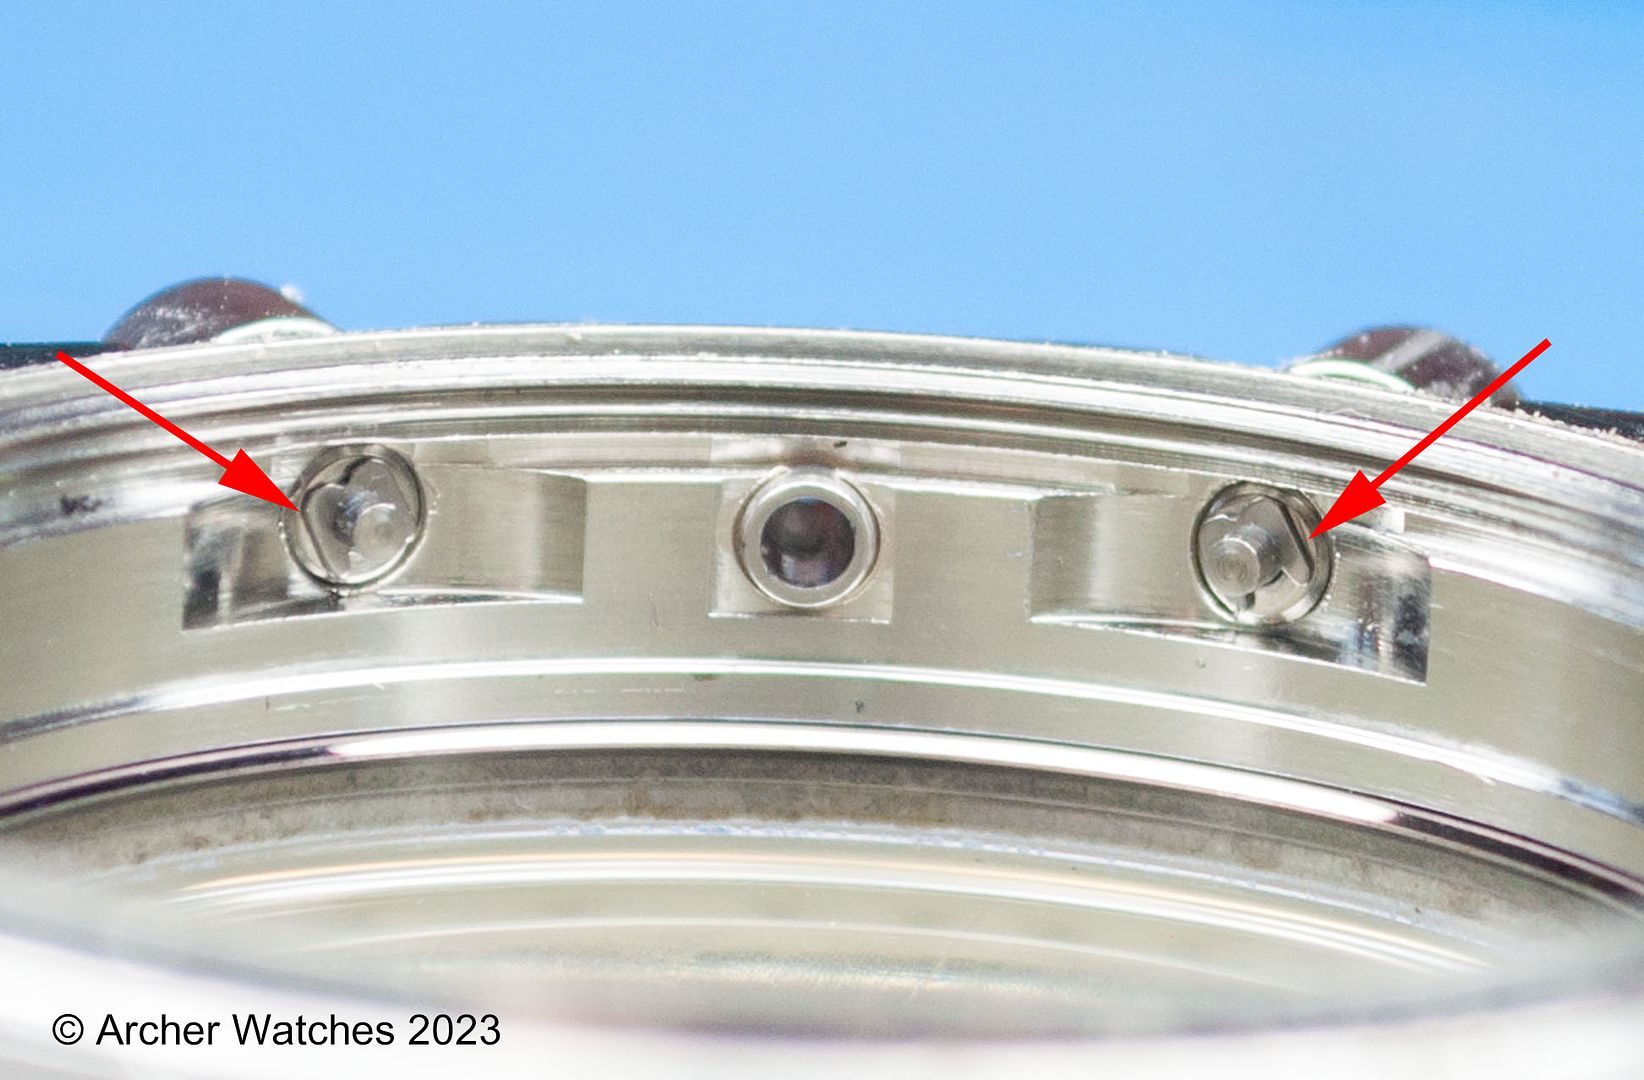
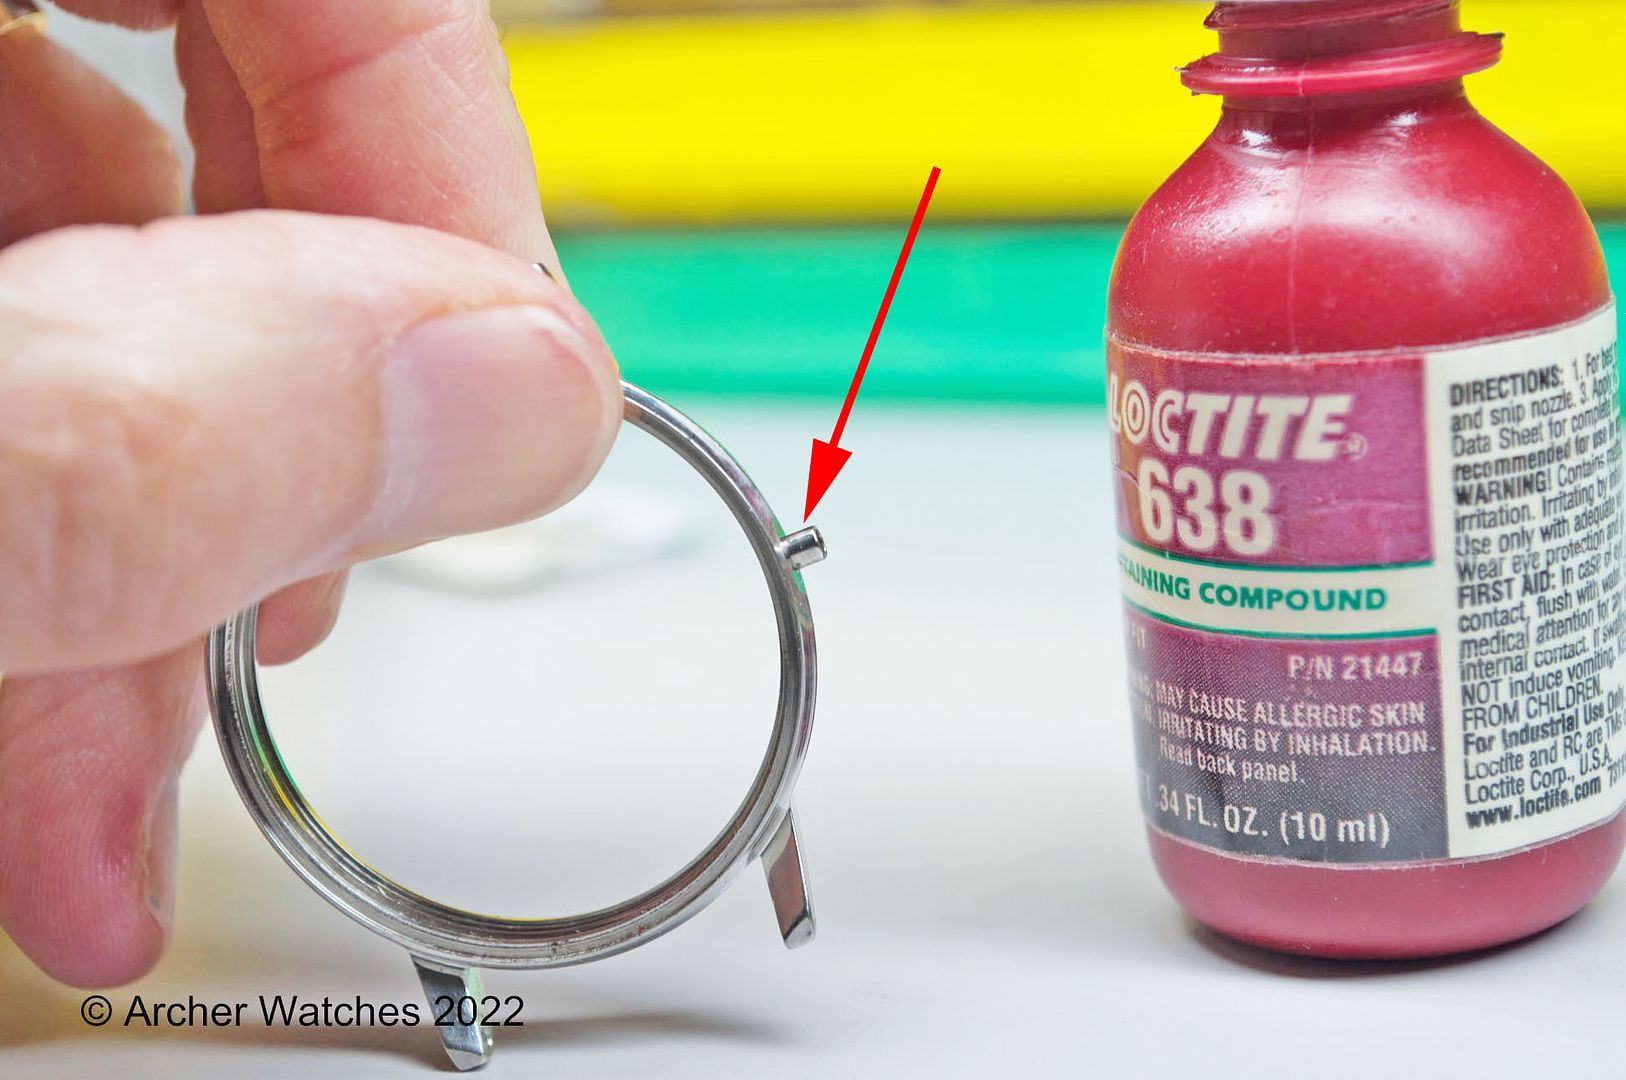
You will note that at the red arrows, it shows that the case tube has been cut out partially, and this is for clearance. So if you come across a case tube like this, it should be replaced with a tube that is also cut out, and the cut out should be oriented “up” when looking into the back of the case like this.
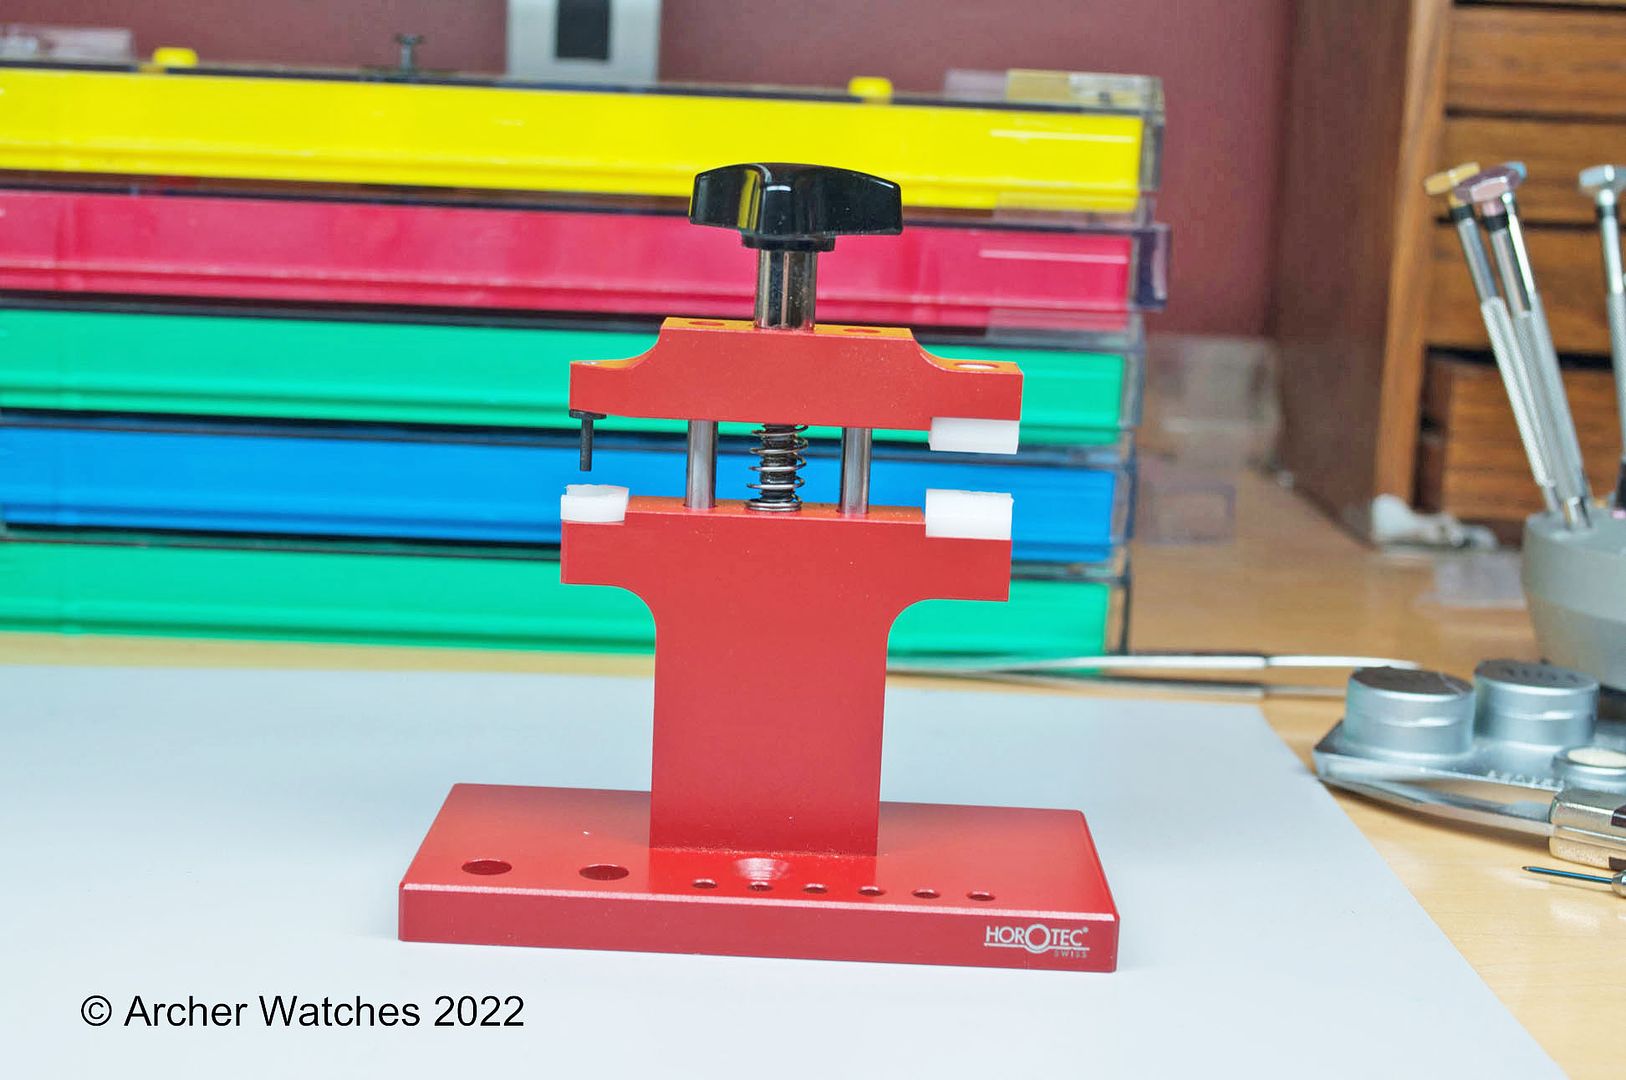
I have this tool from Horotec that is designed for pressing items like case tubes and pushers out and into cases, so that’s what I’ll use here. The left side has a small tube installed in it, and this side is used for pressing items out.
The right side is used for pressing items in, and it’s very straightforward - just plastic on top and bottom, and you put the item between those, and turn the handle to press it in.

The tubes used come in different sizes, so it’s a matter of picking something that will make good contact with the inside portion of the case tube, so you can push it out:

Turning the handle presses the tube out pretty easily:

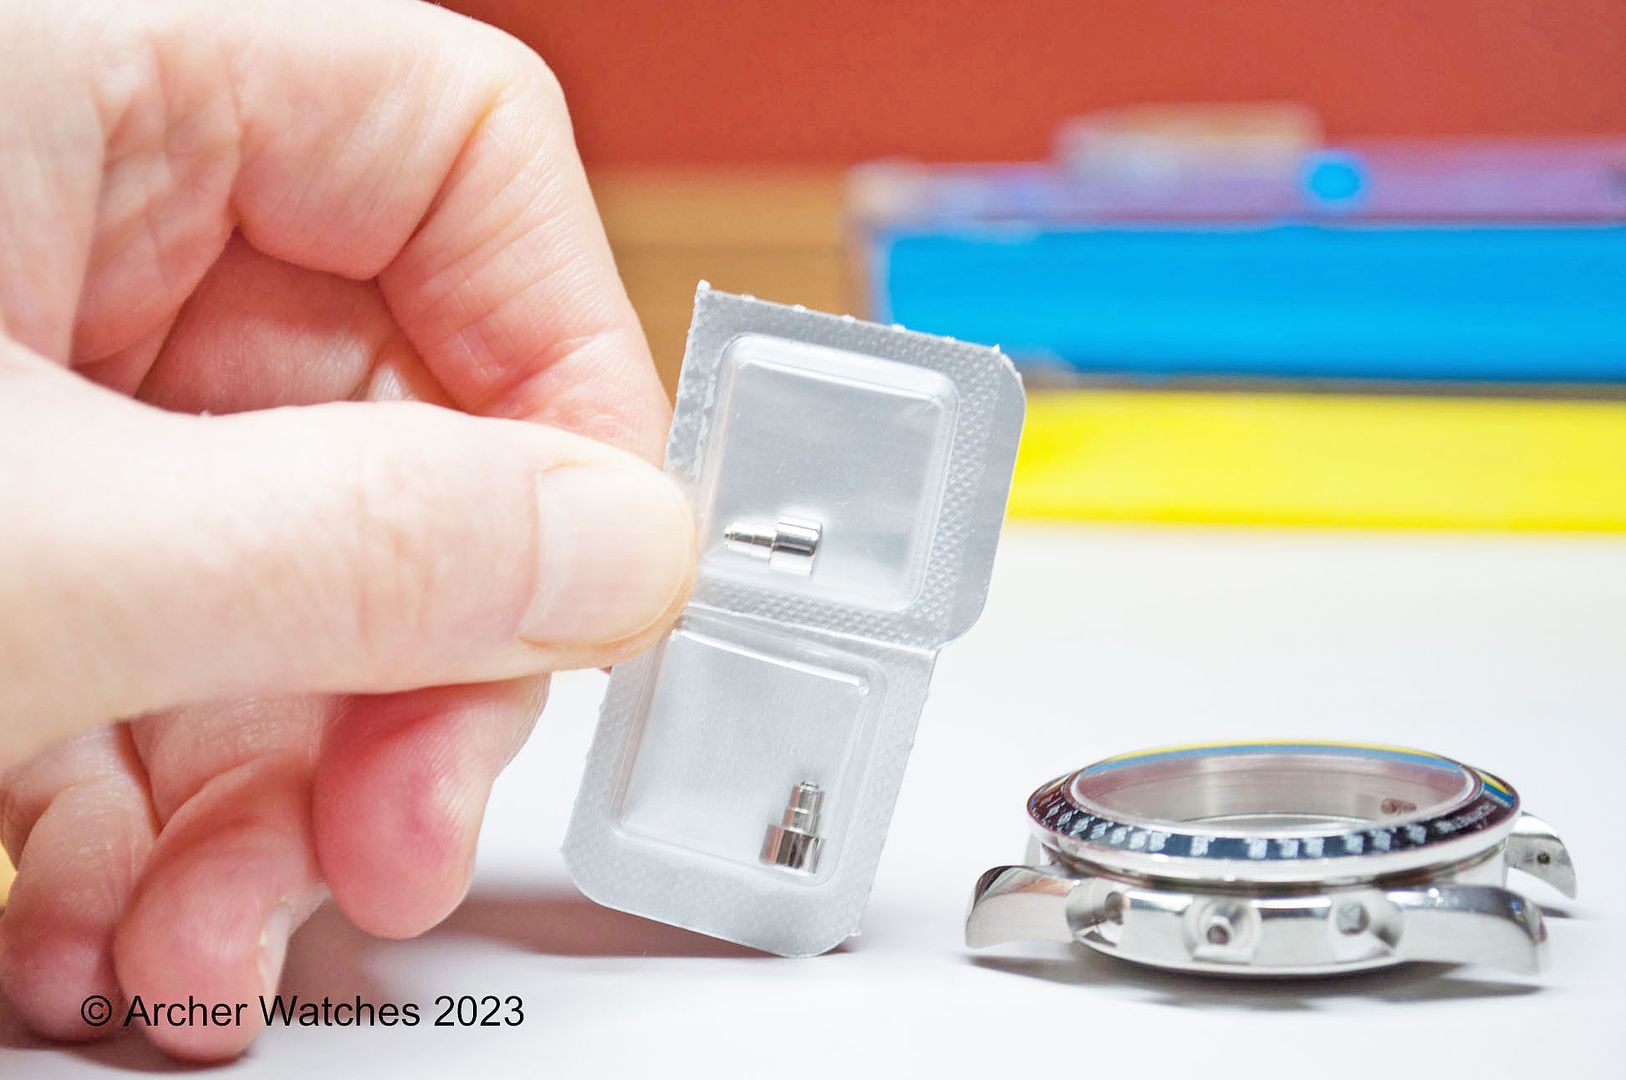
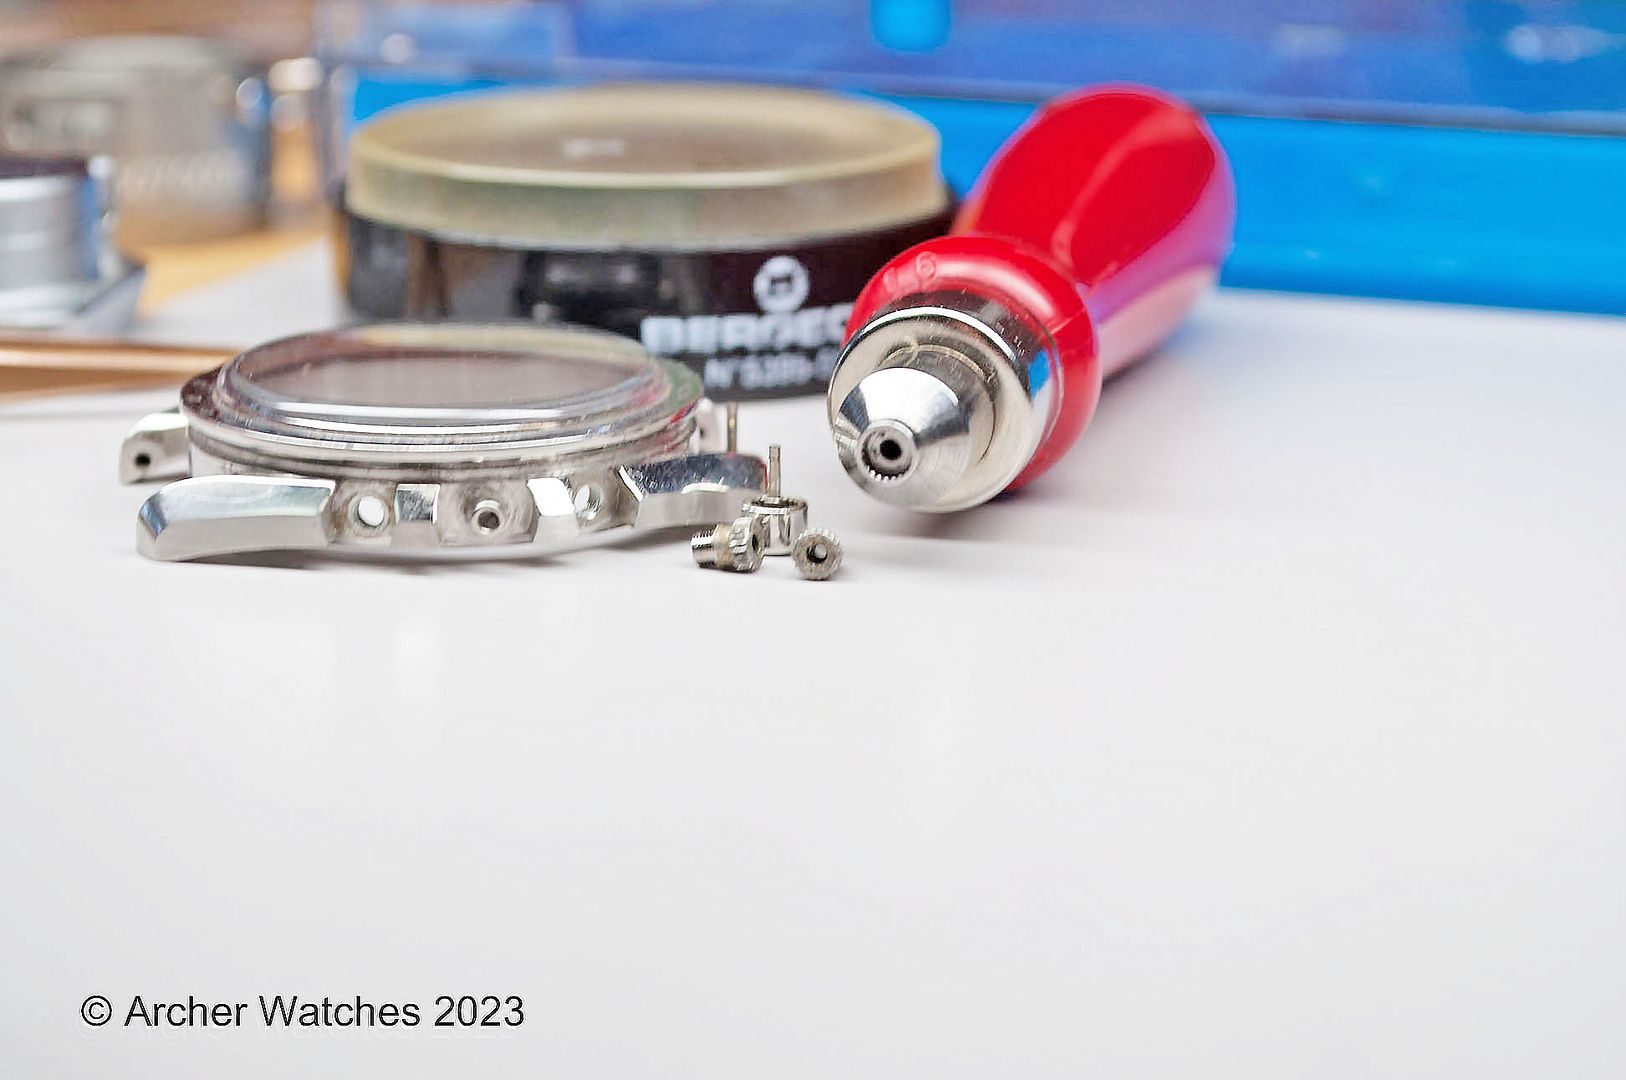
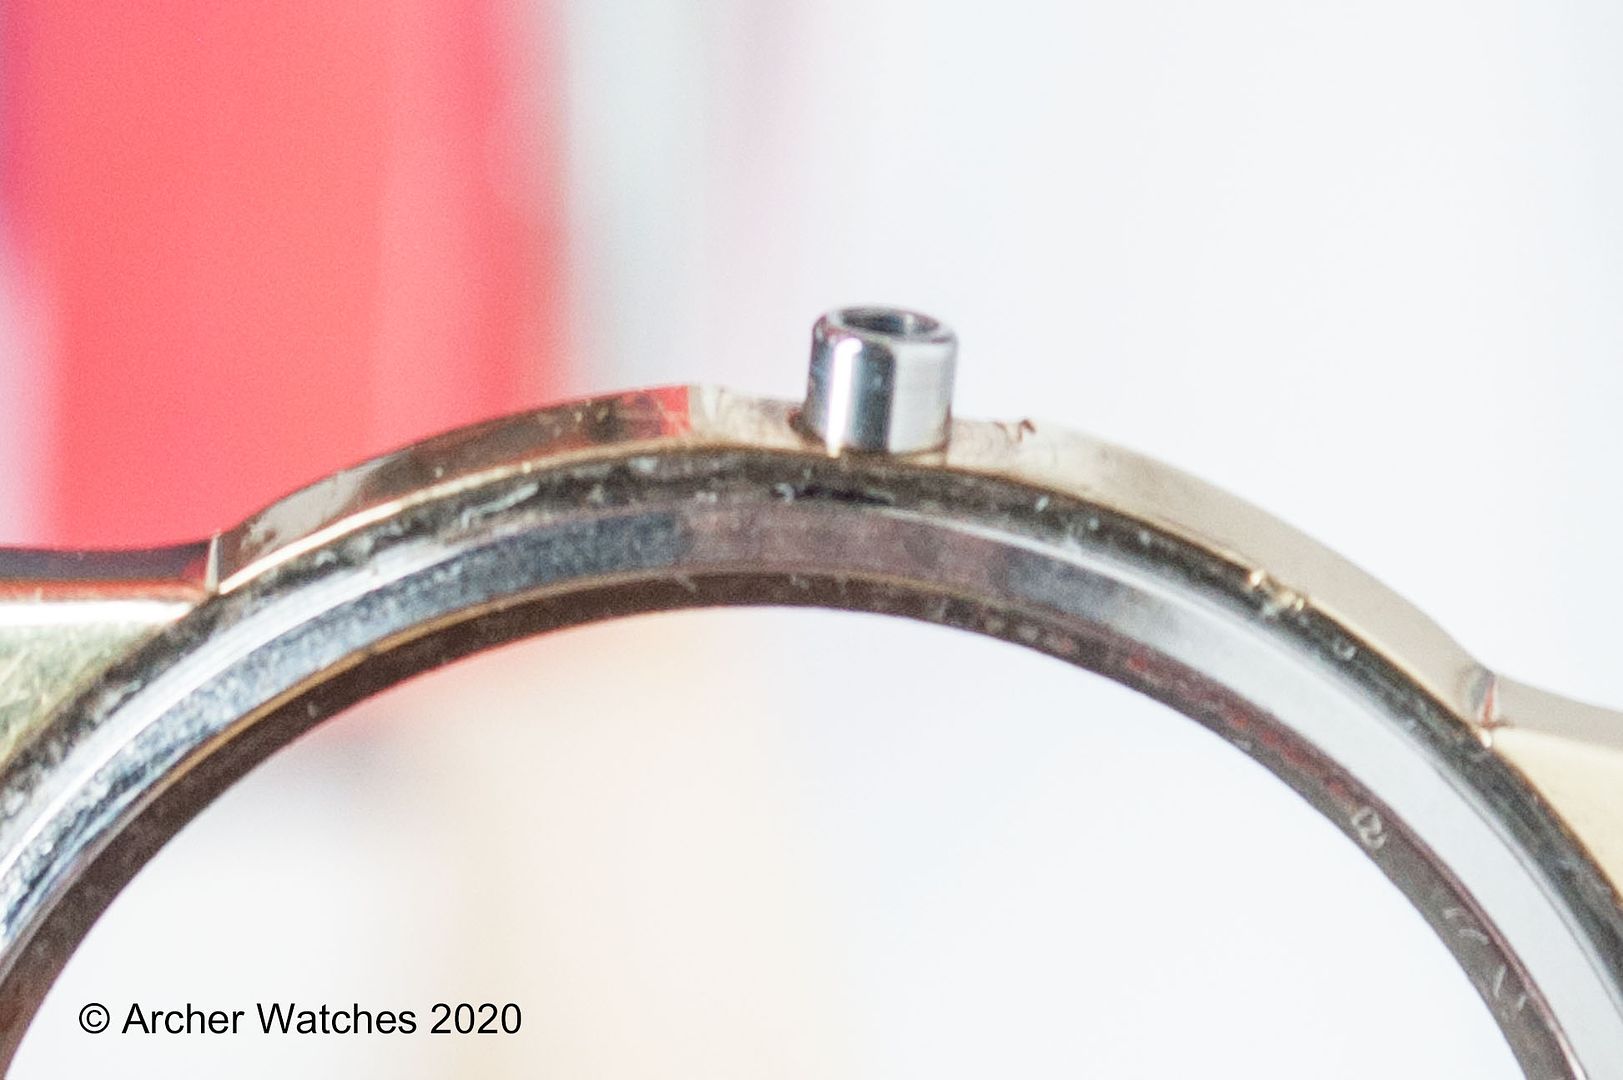
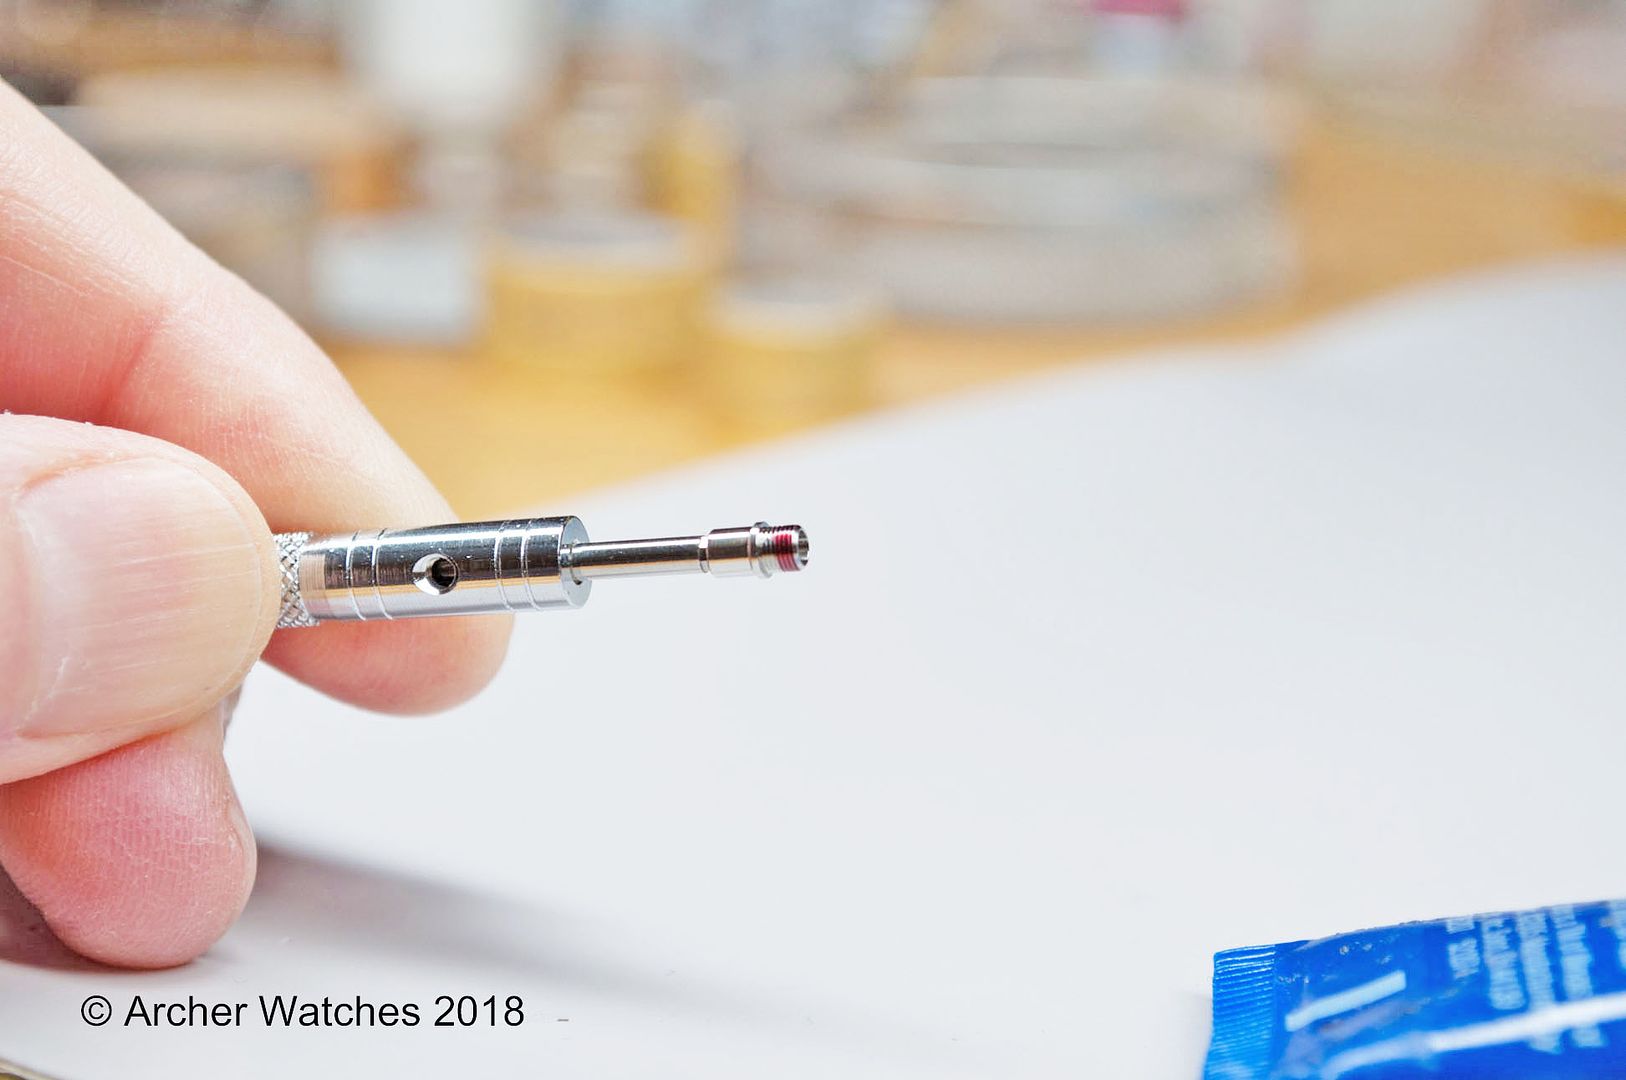
New case tube:

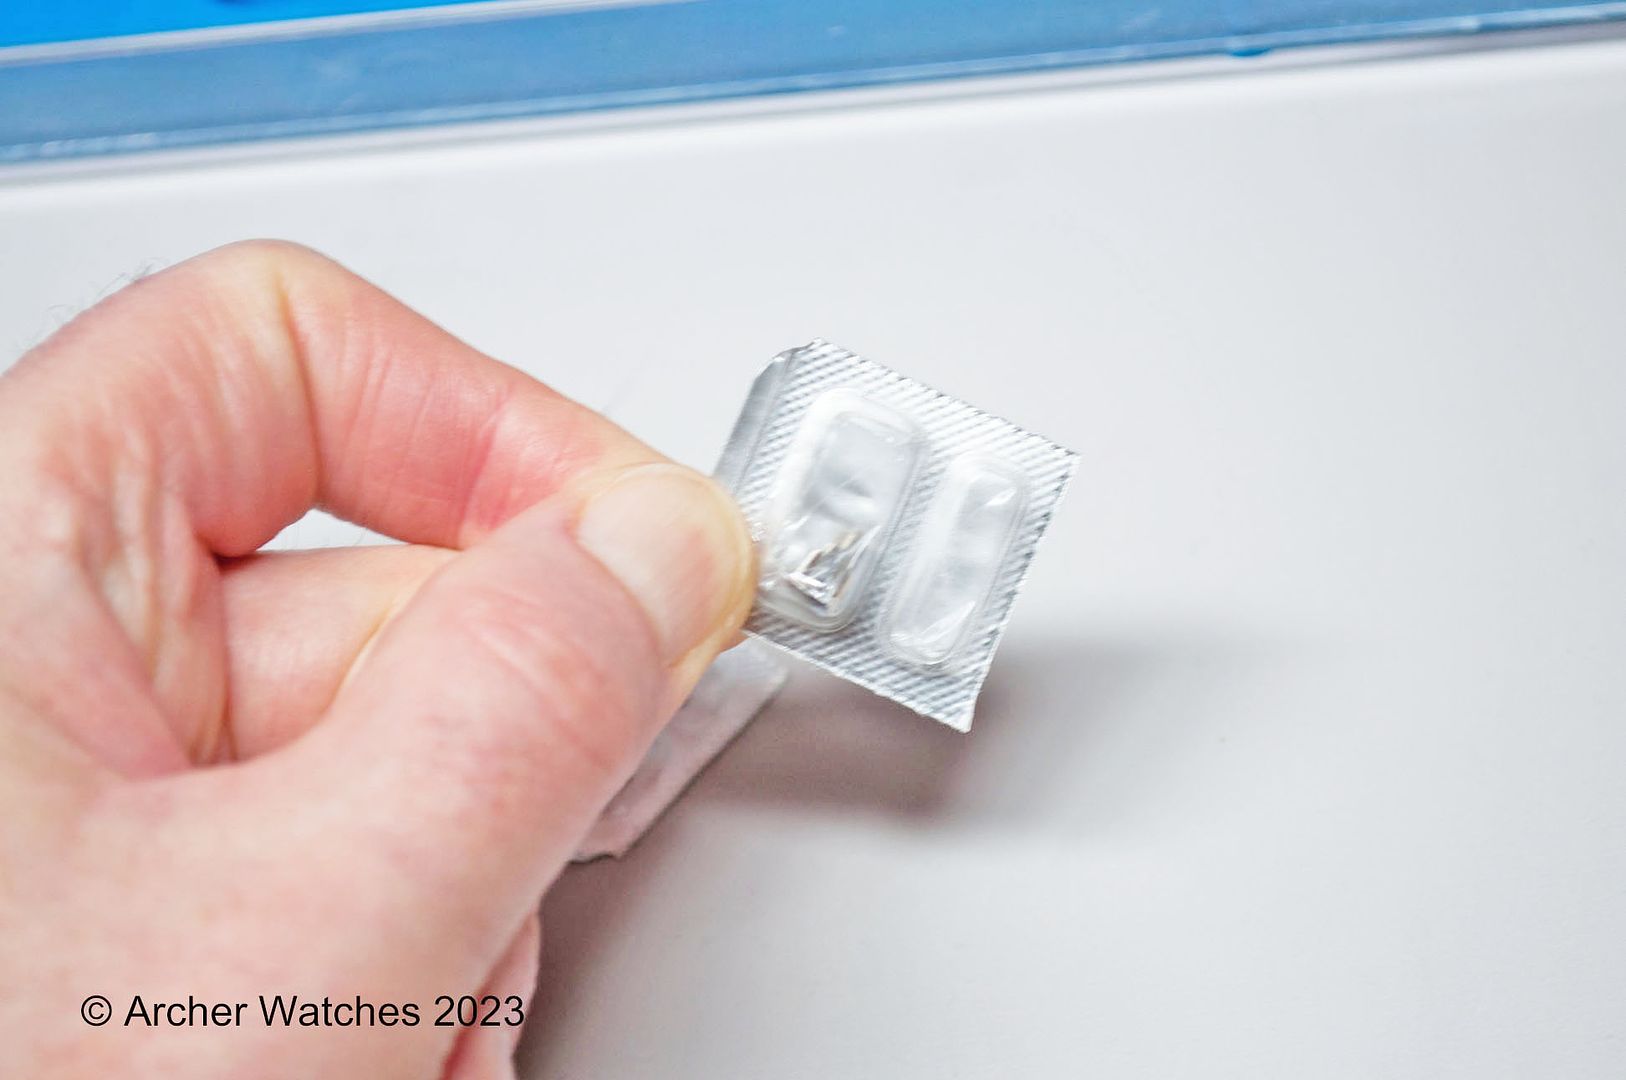
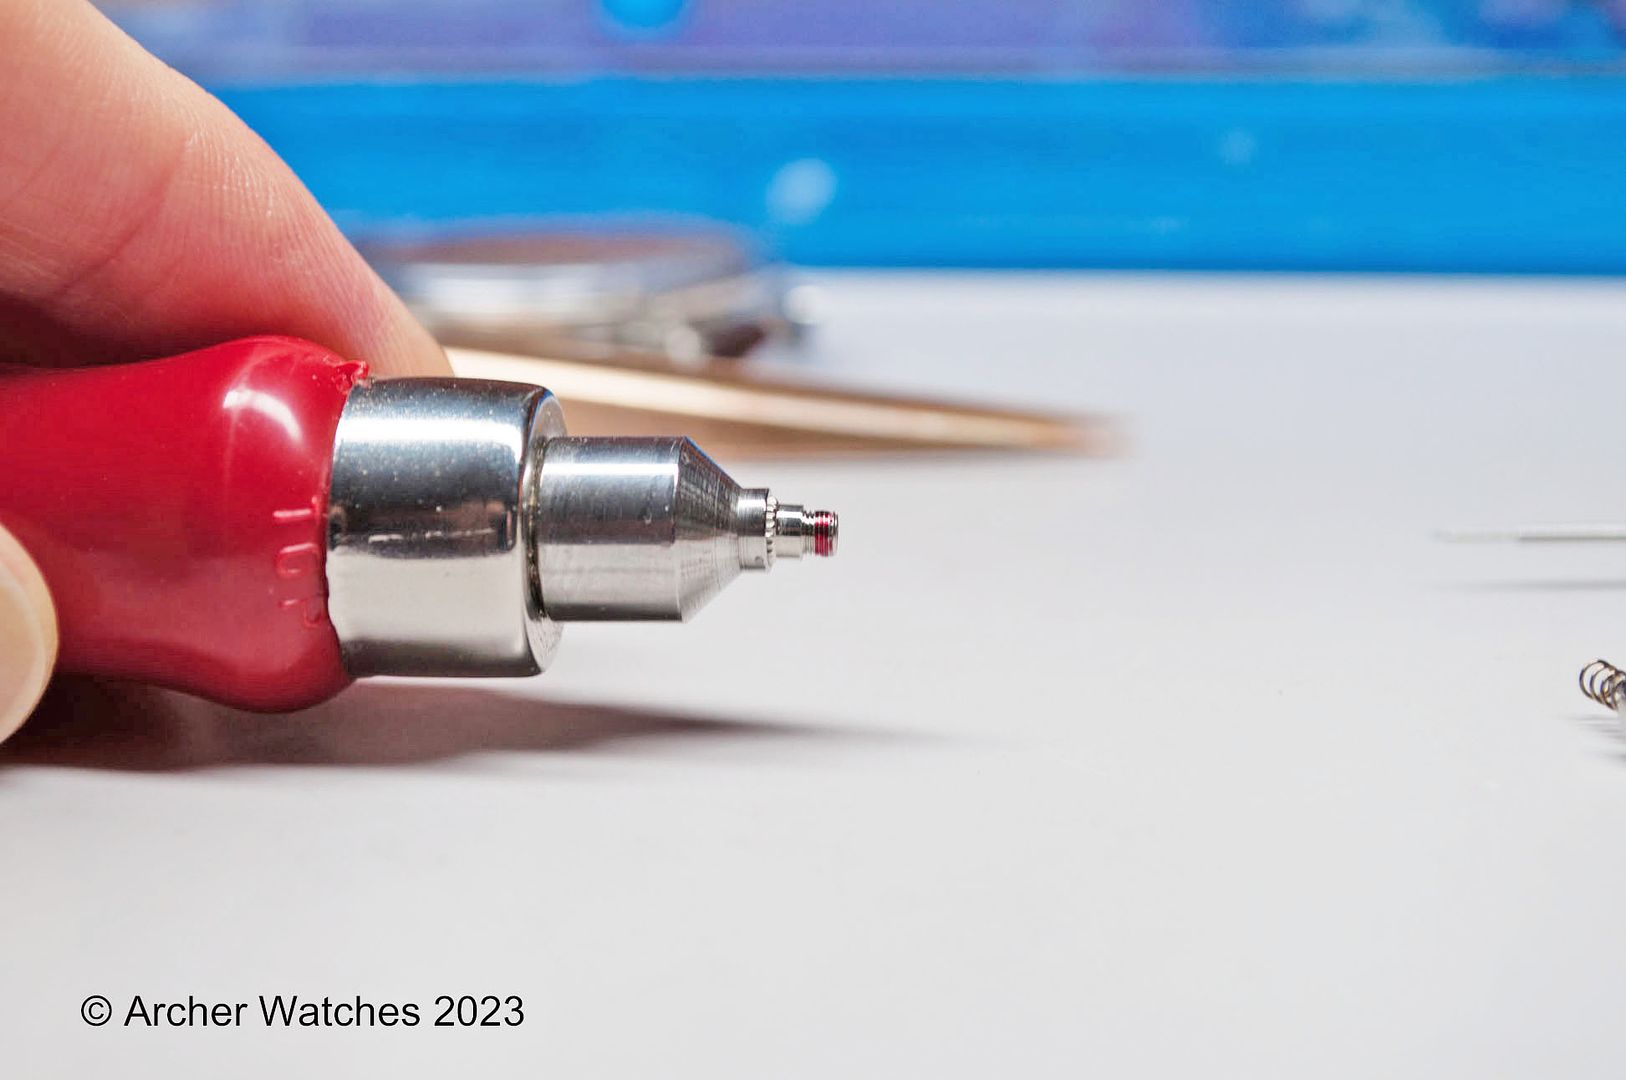
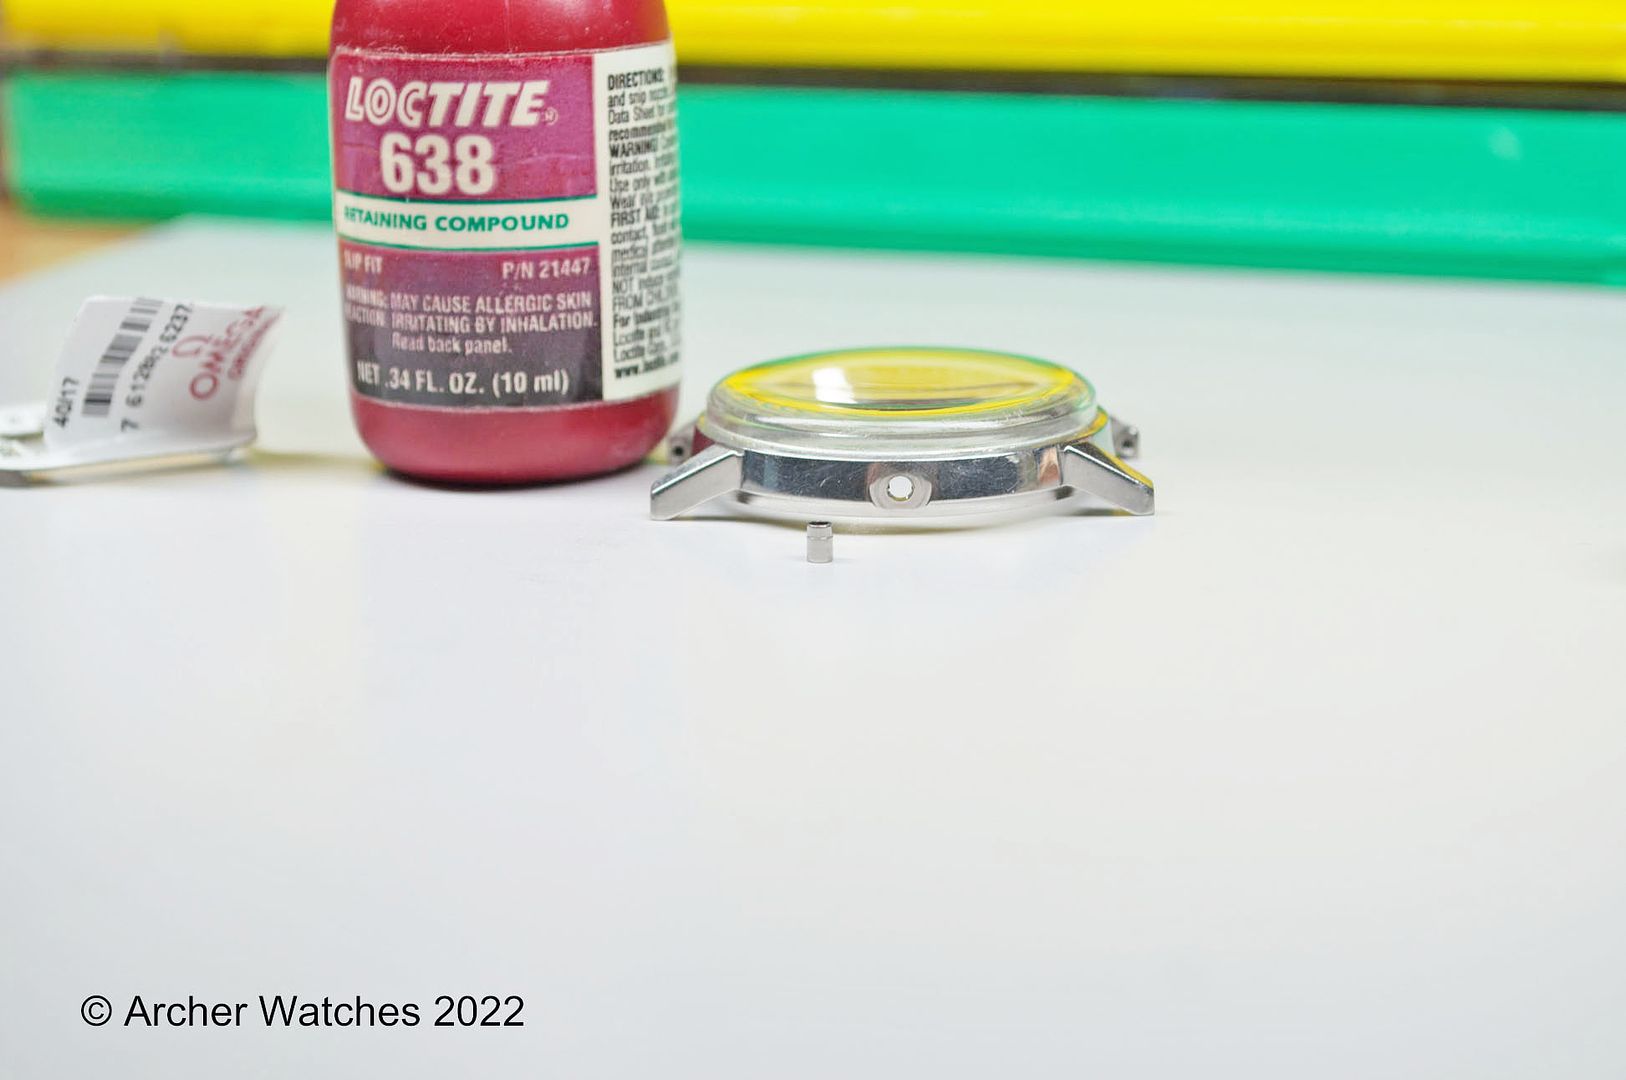
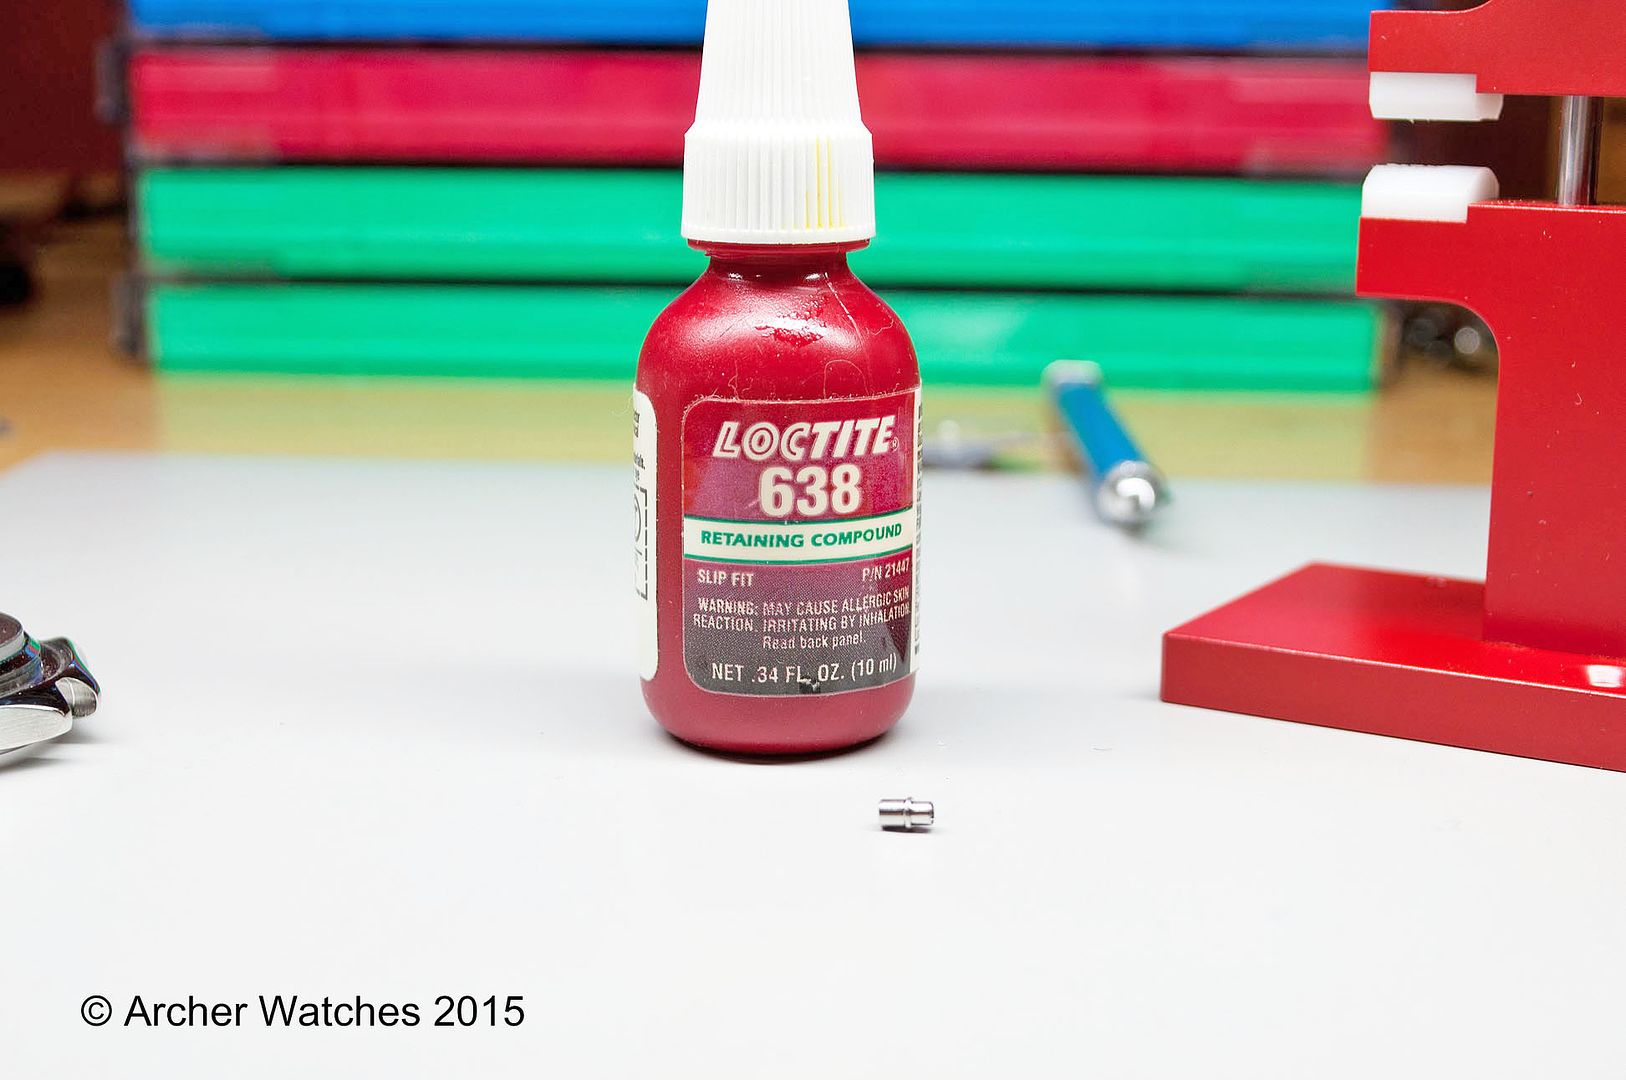
Before the new tube is installed, I apply Loctite 638 retaining compound to the portion of the tube that inserts into the case (this is what is called for in Omega work instructions):

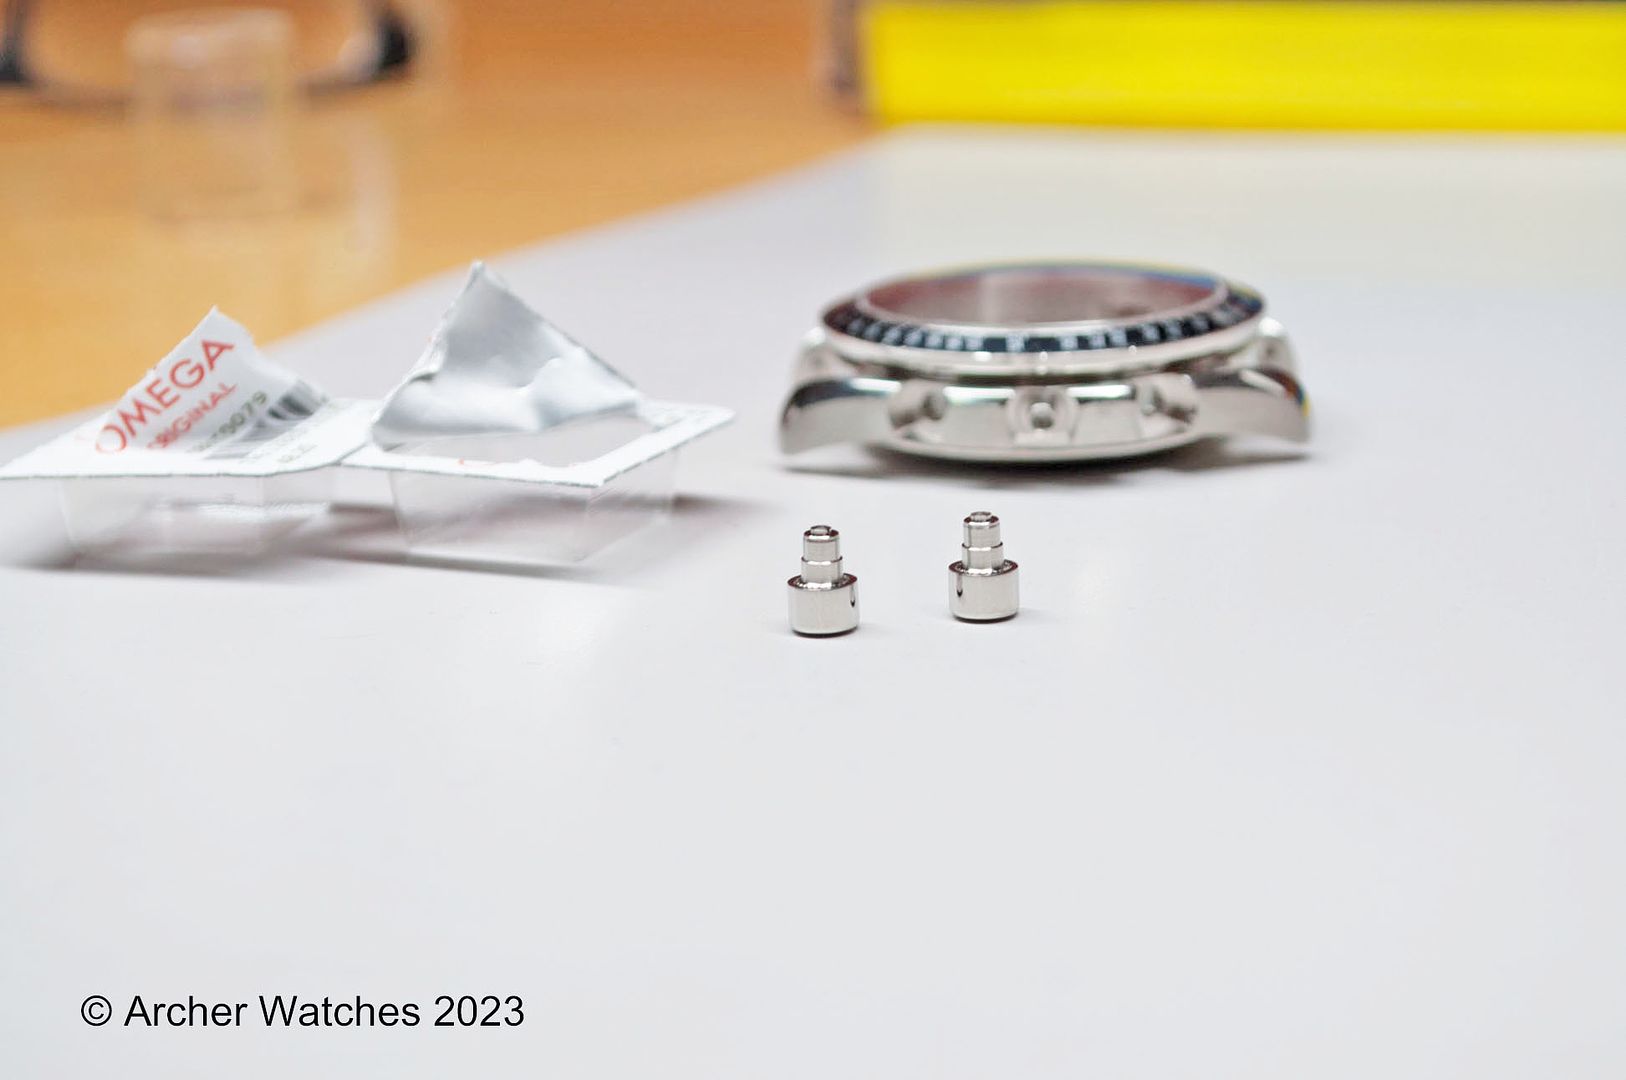
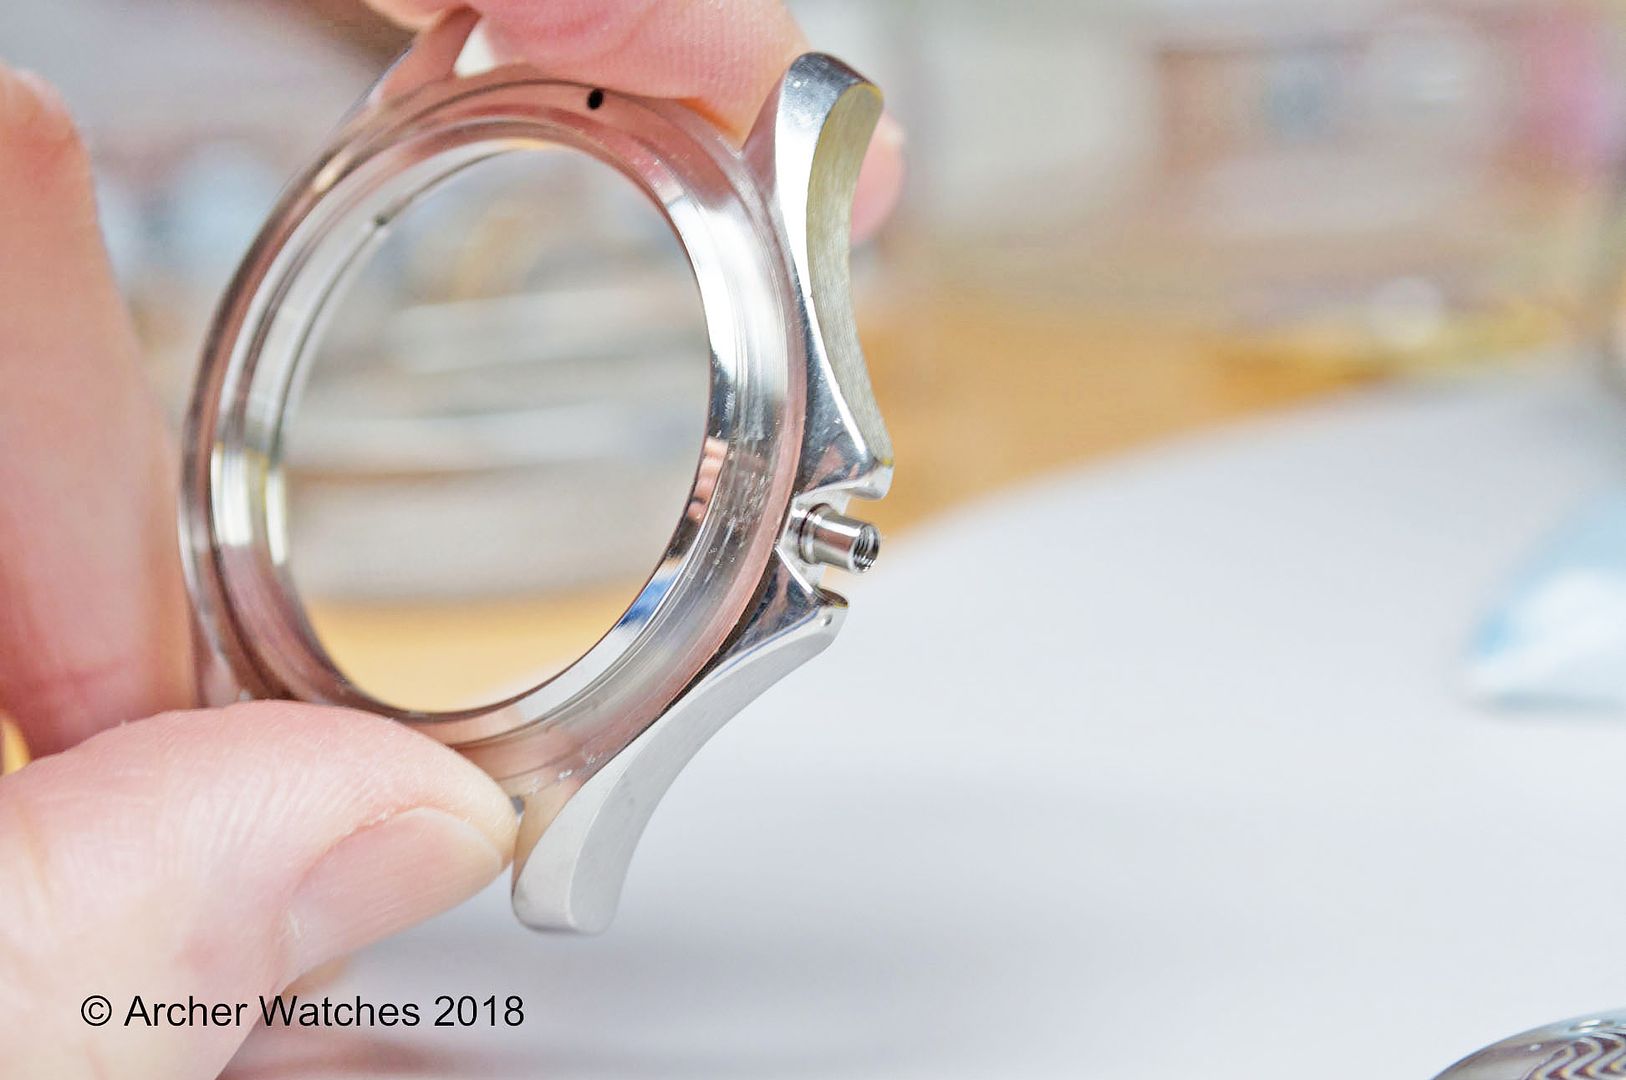
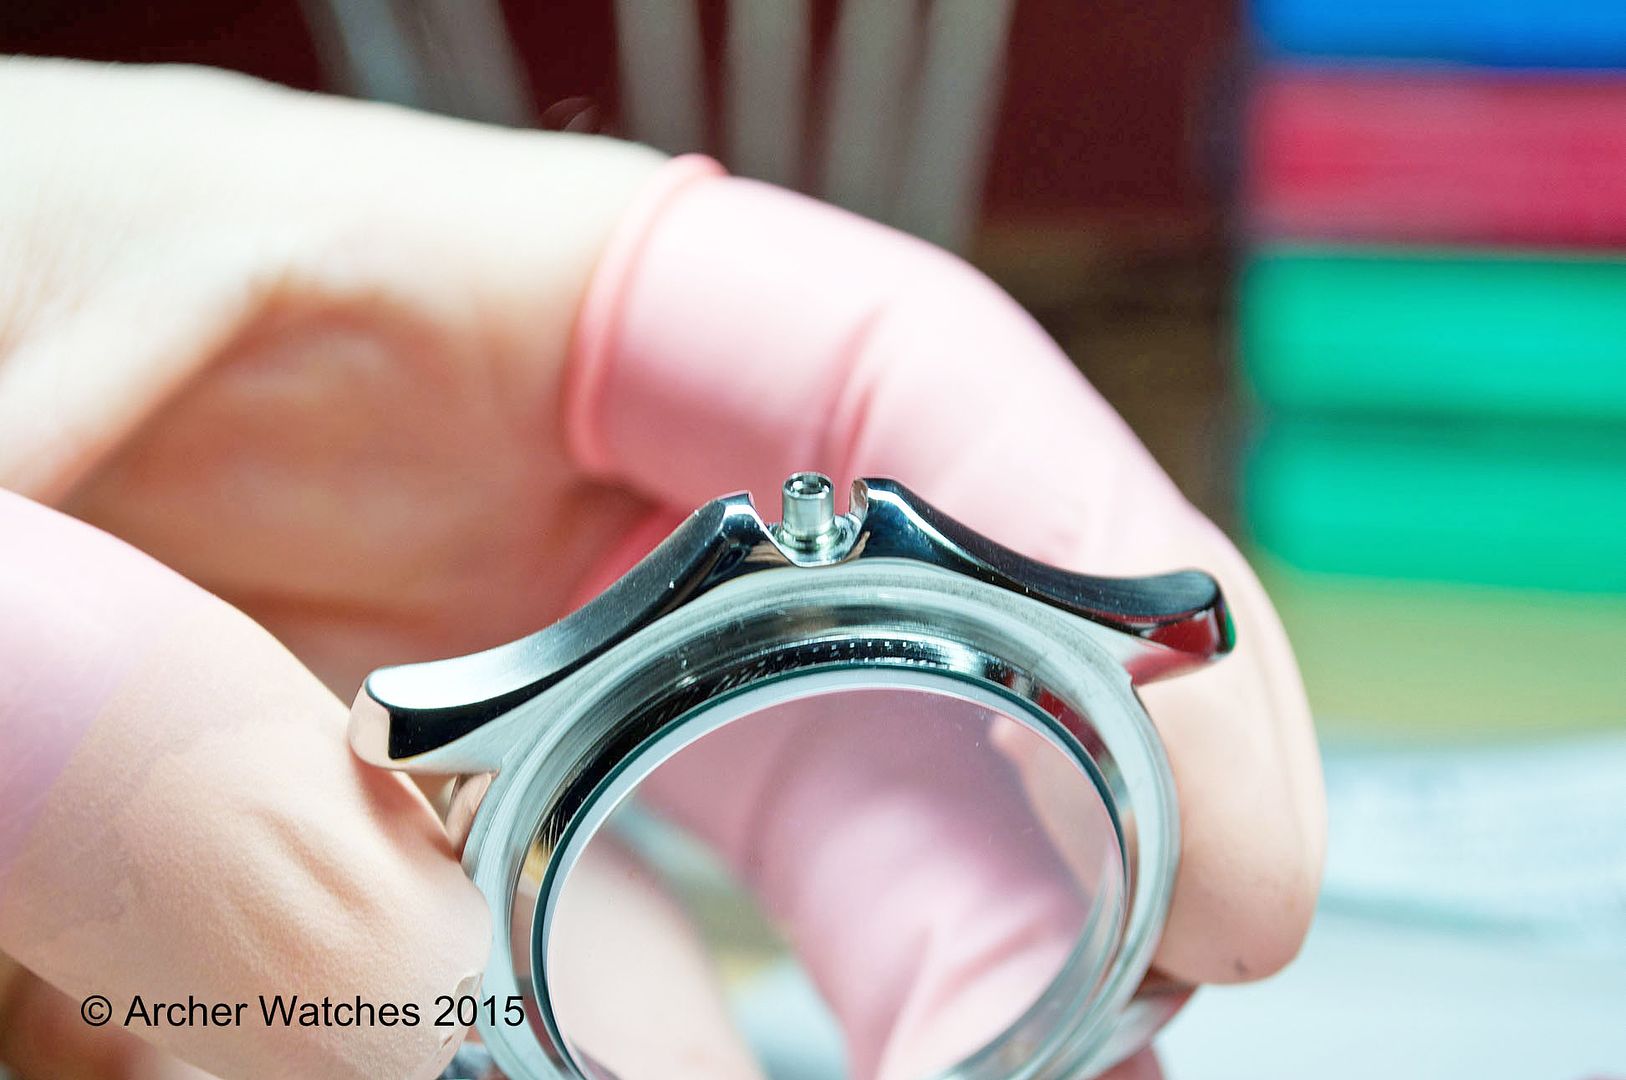
The new tube has now been installed:

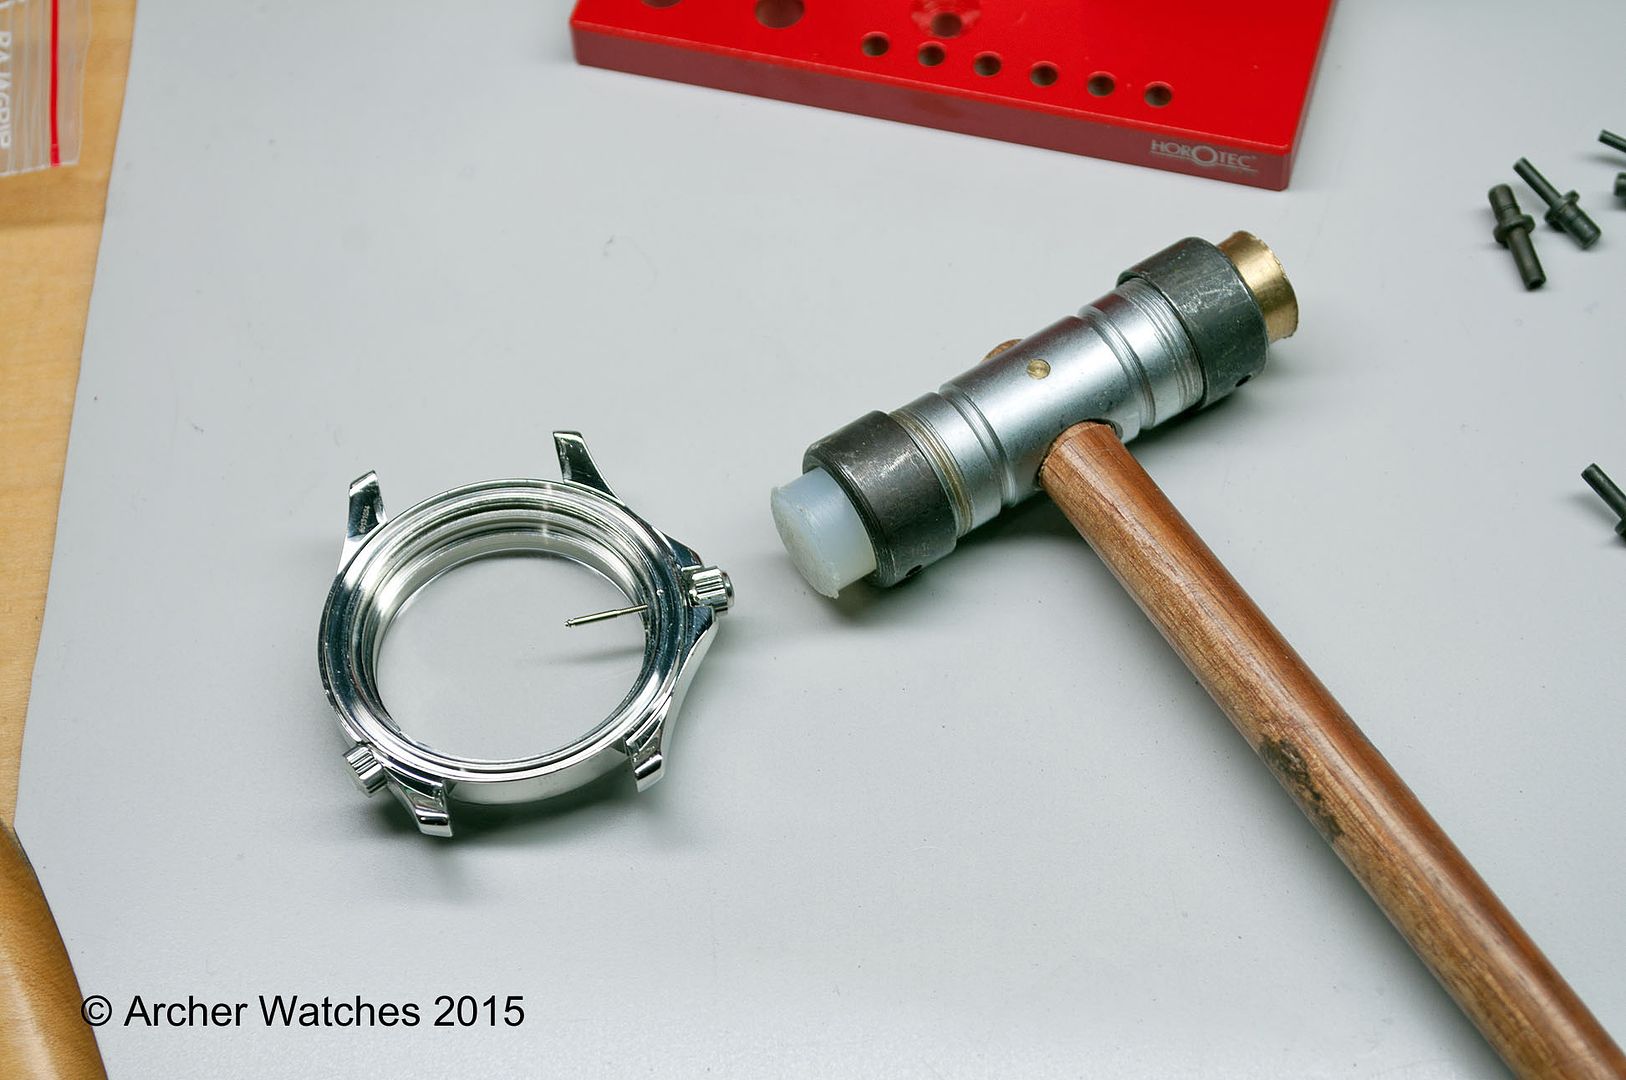
Sometimes these tubes go in with a very heavy press fit, so if this press is unable to get the tube all the way in, I often used the an old crown that I place over the tube, and then use my watchmakers hammer with the plastic impact surface, to finish tapping the tube in the rest of the way.
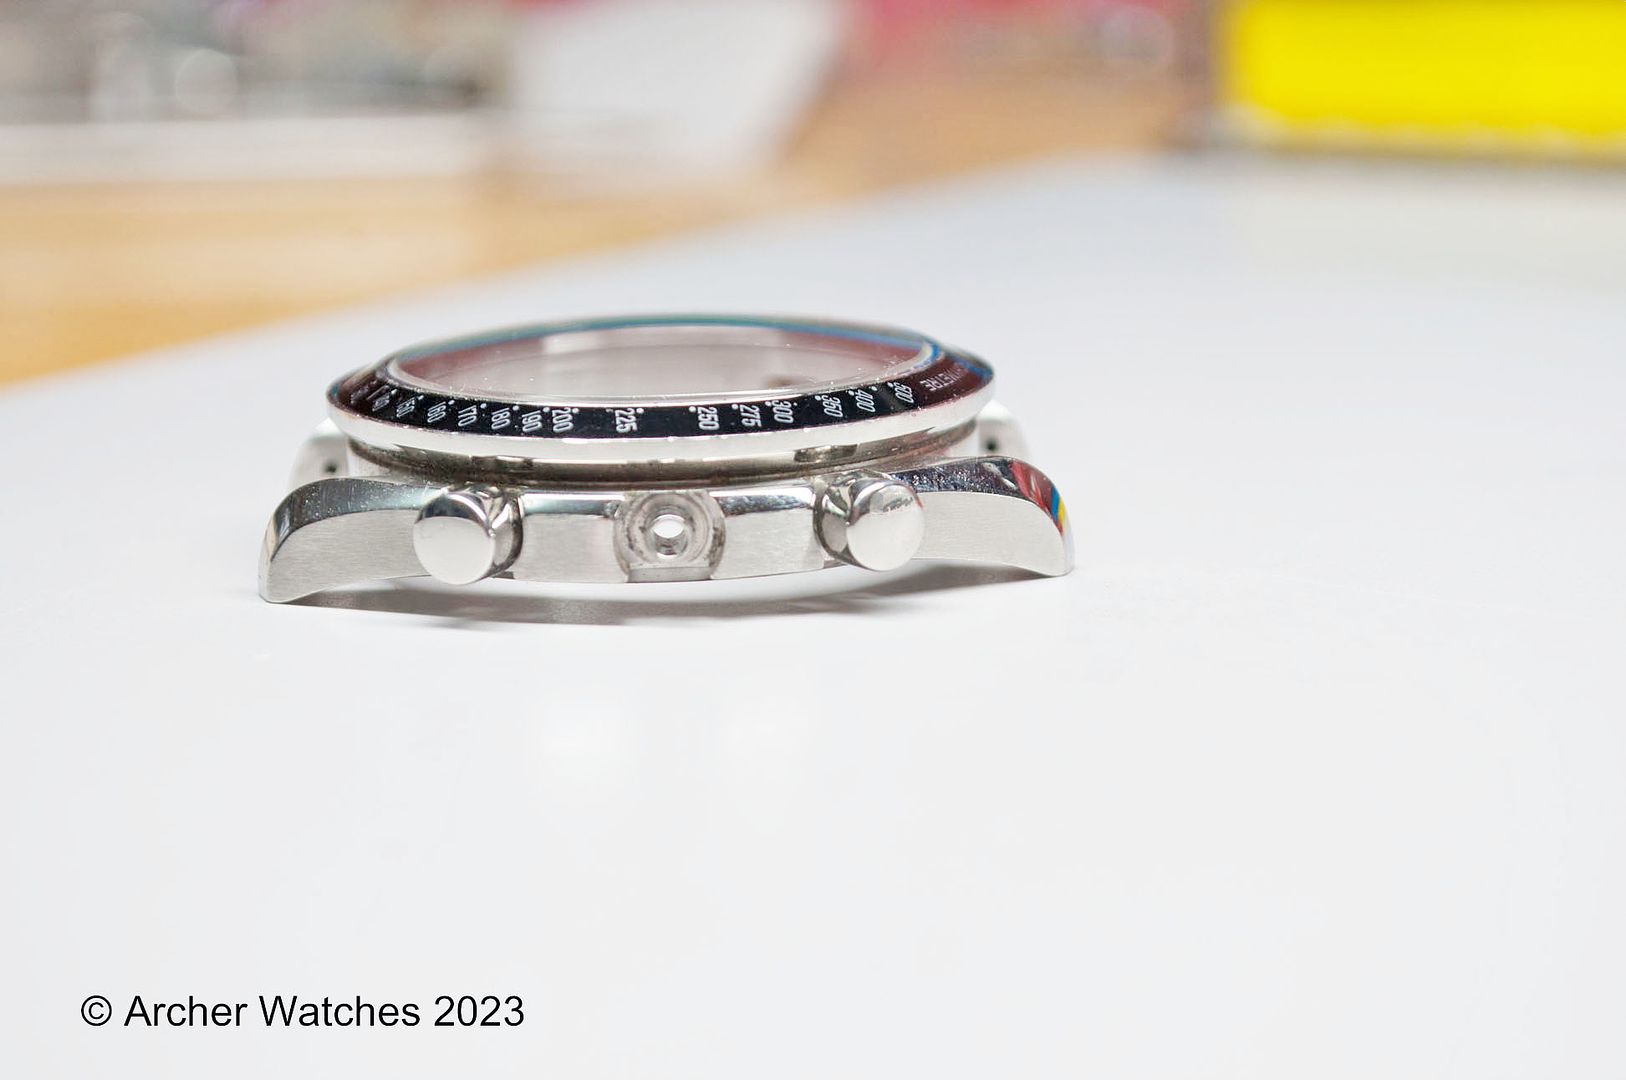
Next let's look at a screw down crown situation, where the case tube is threaded into the case. The first step in this instance is to disassemble the case, because we will need to apply heat to remove the tube:

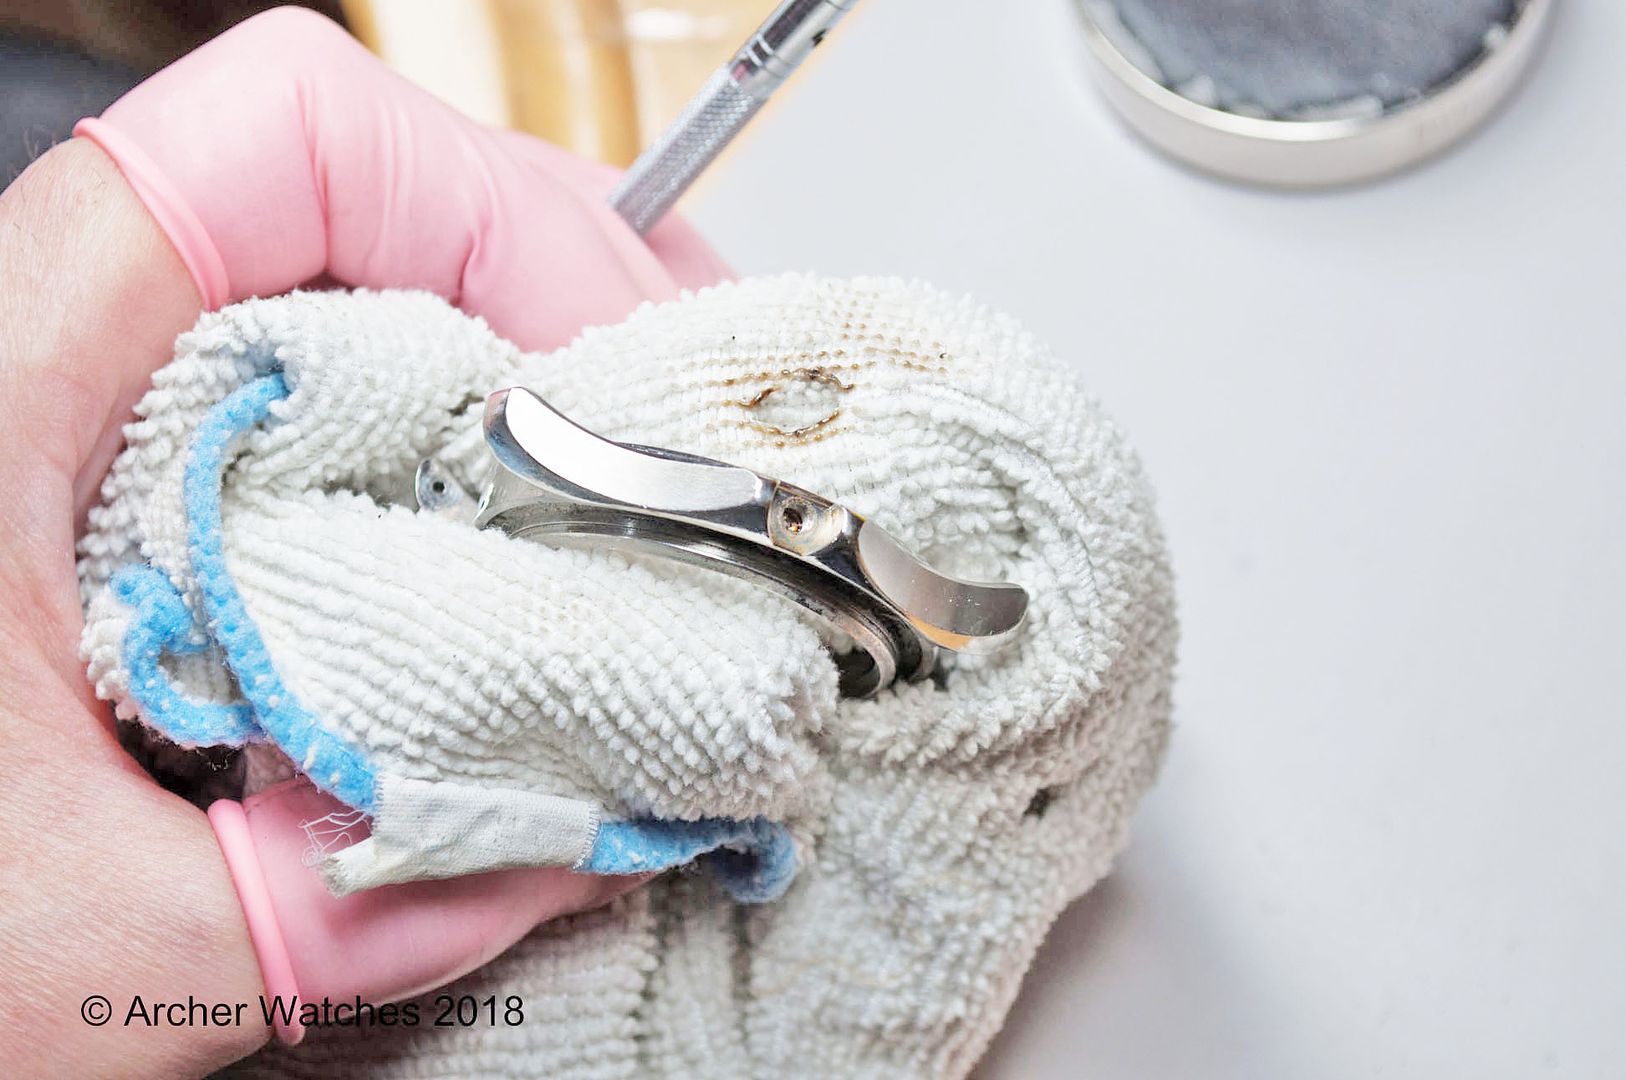
Here I’m using an Omega bezel remover to take the rotating dive bezel off:

Note that prying these bezels off can lead to damage to both the case and bezel, so using a system that more evenly lifts the bezel off is safer.
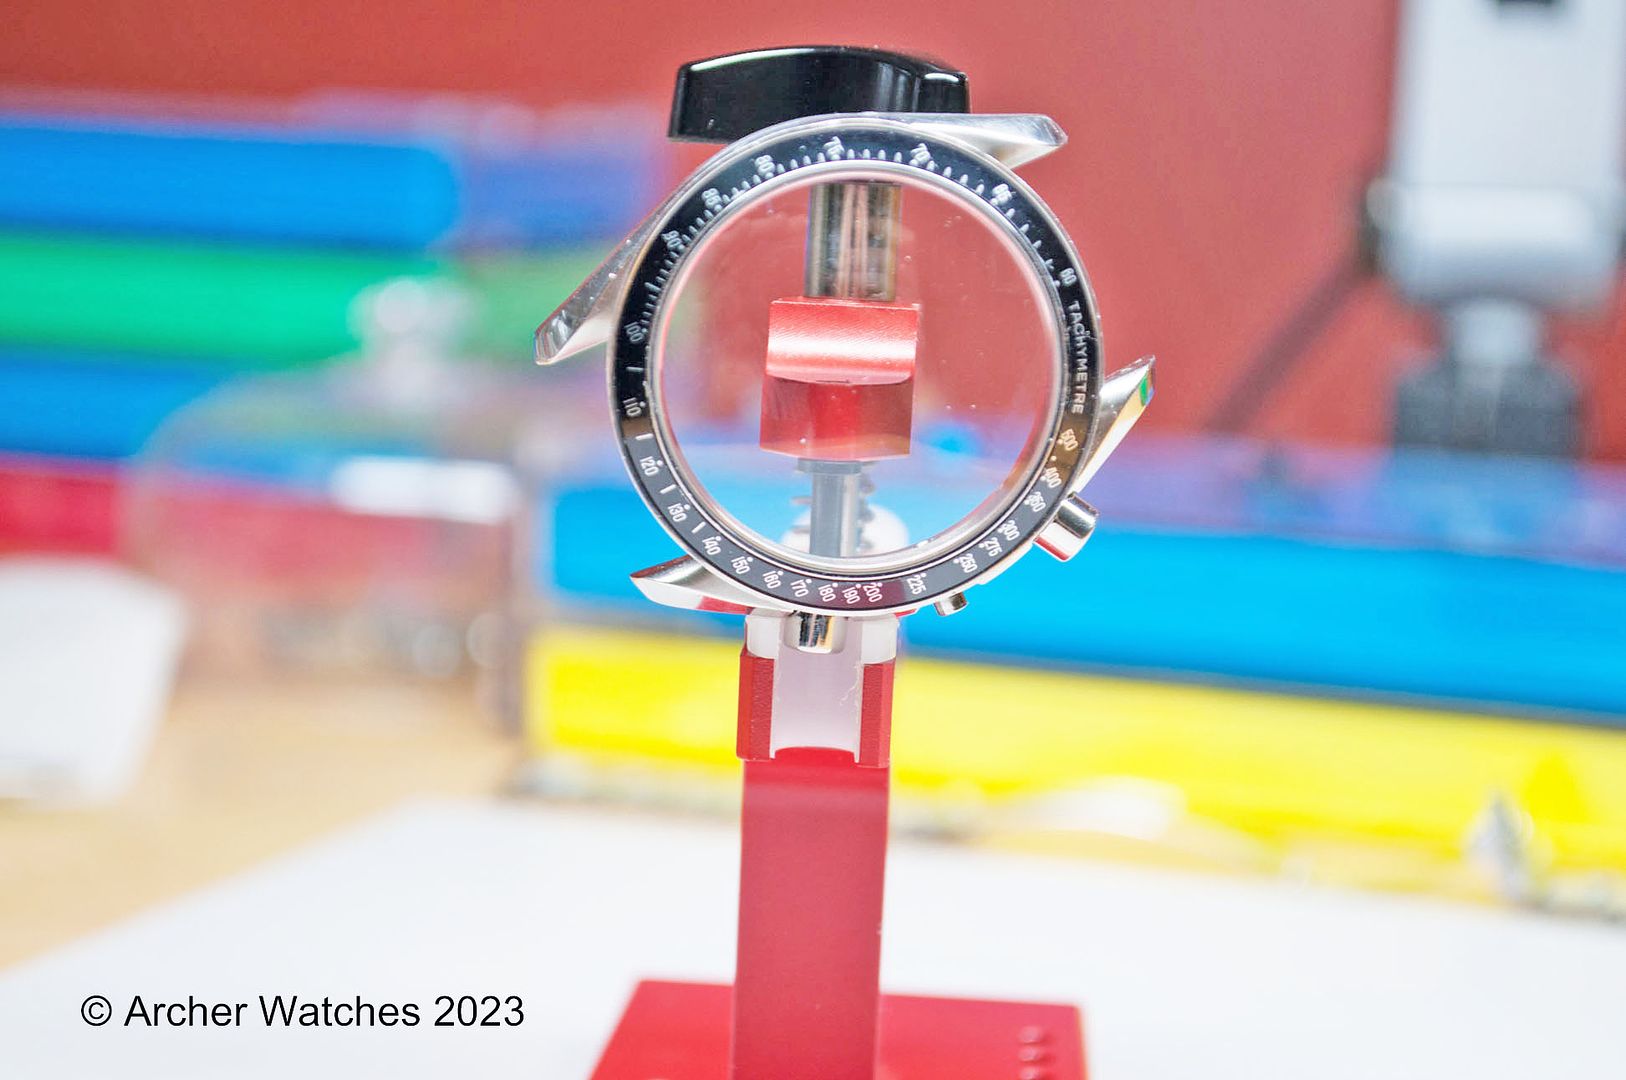
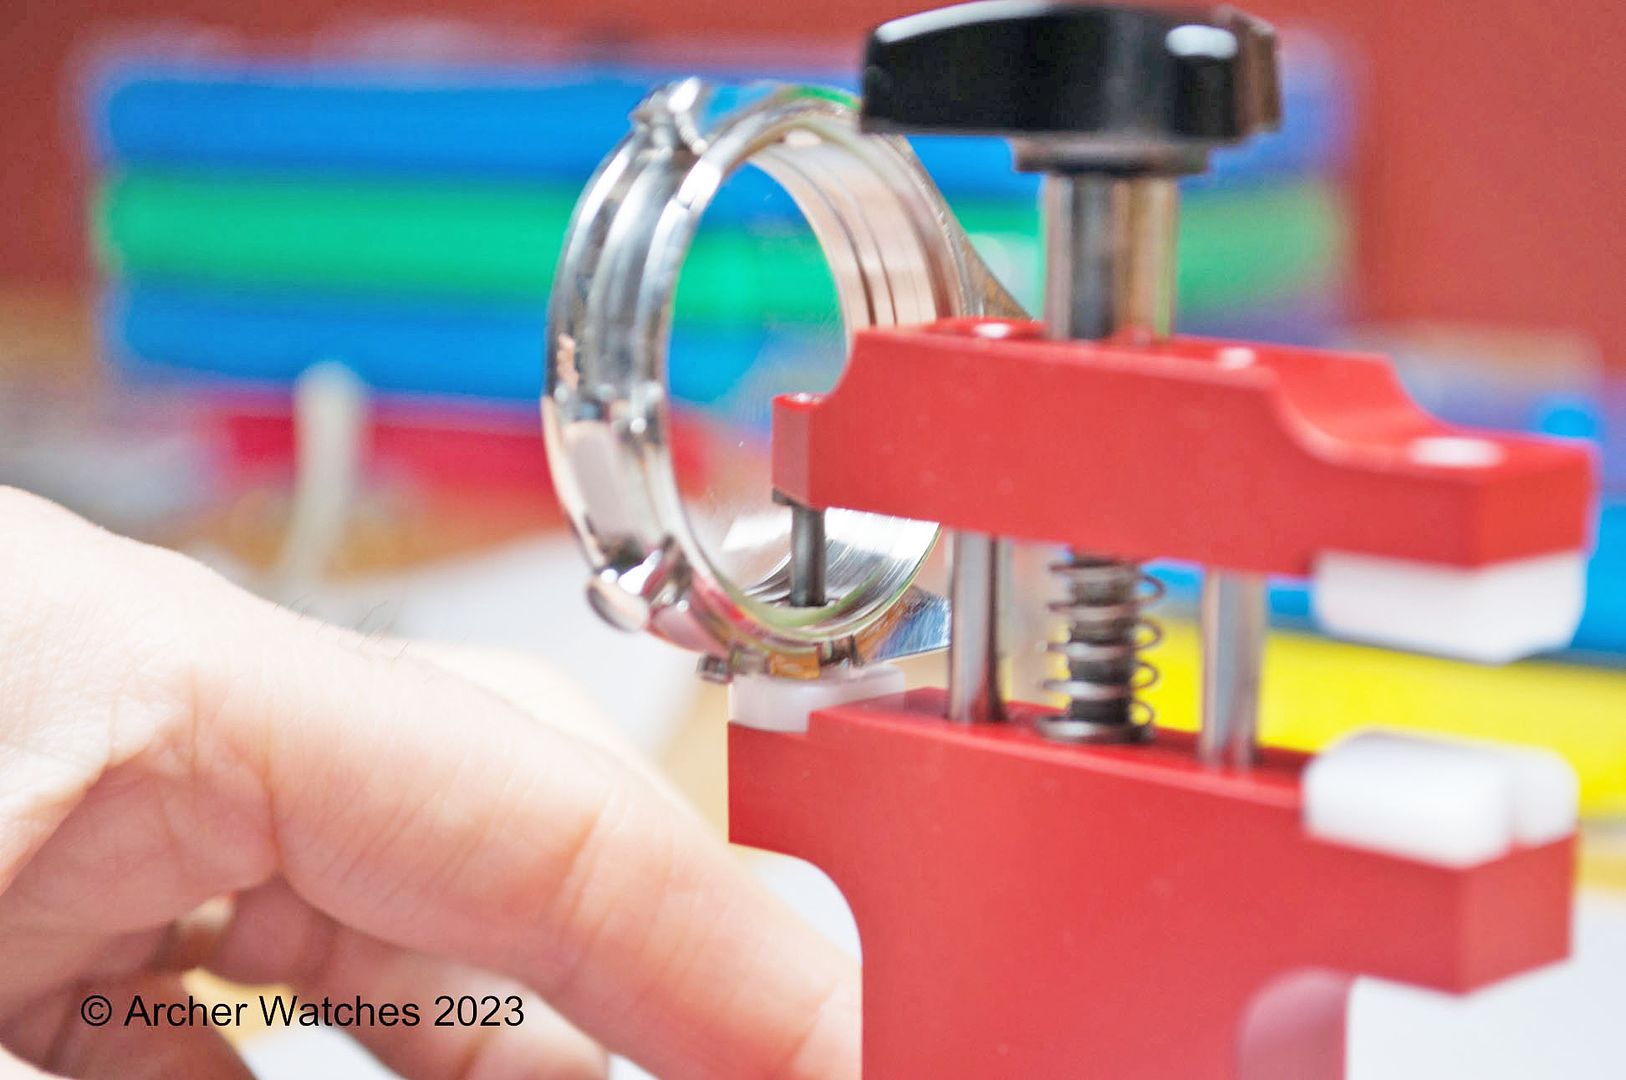
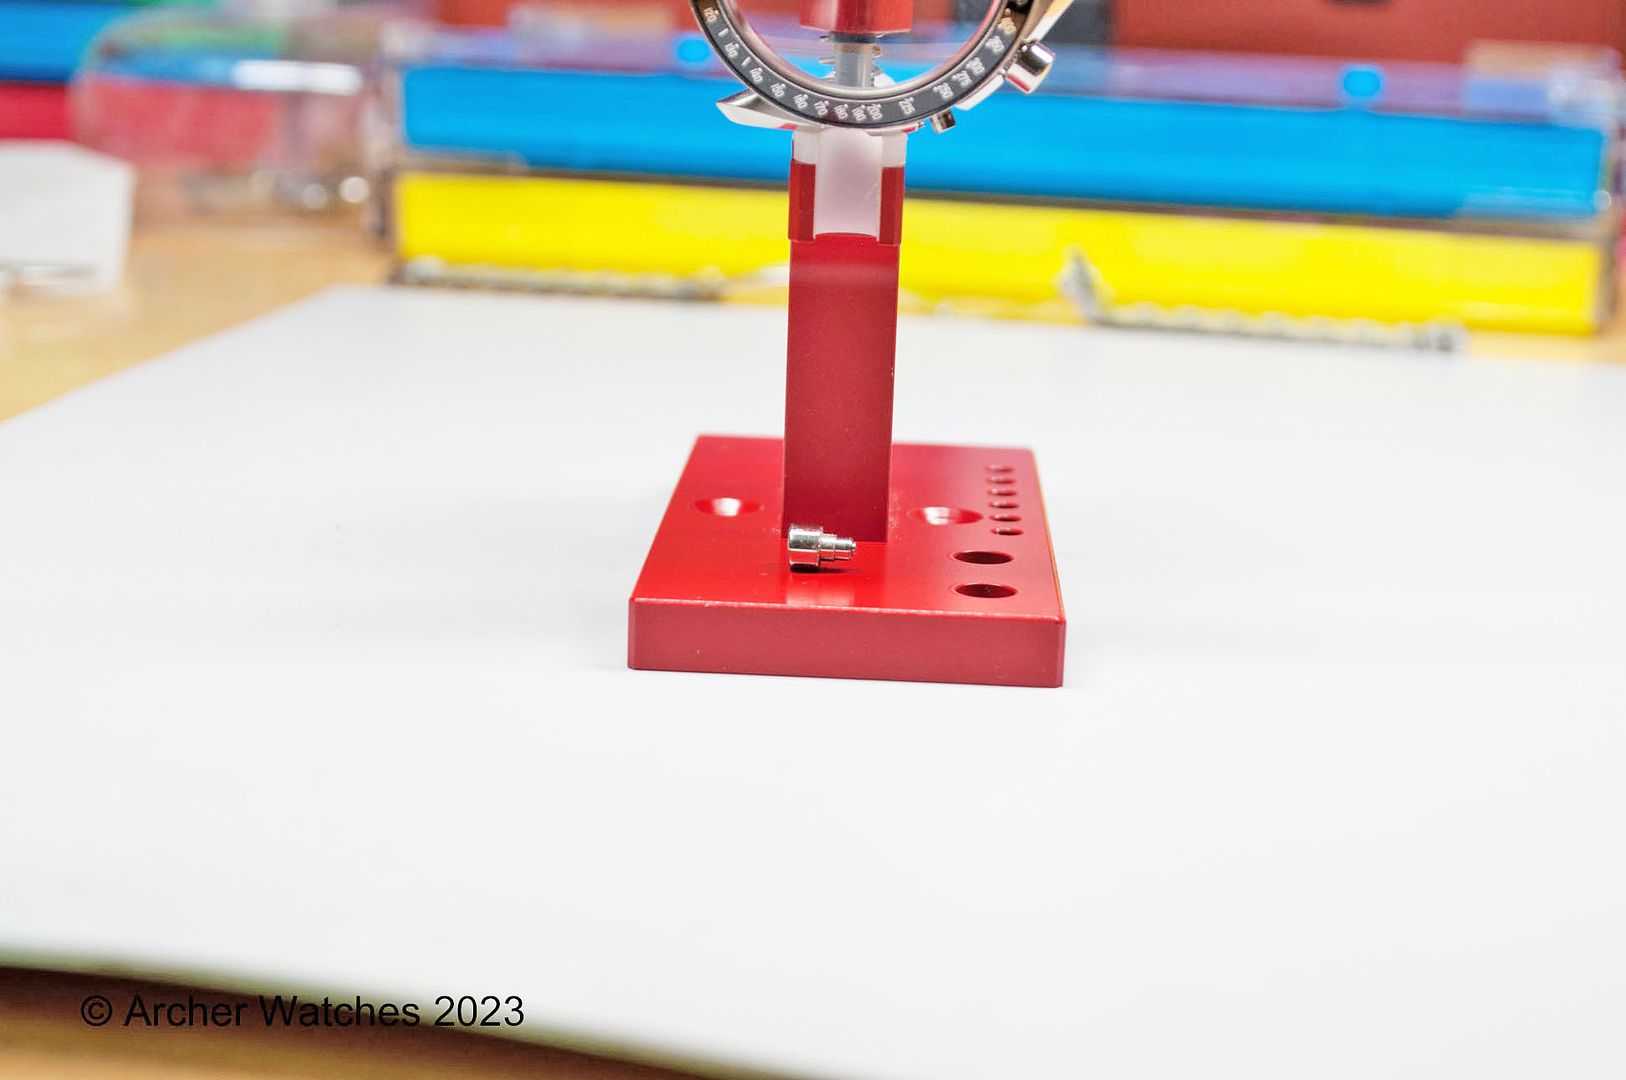
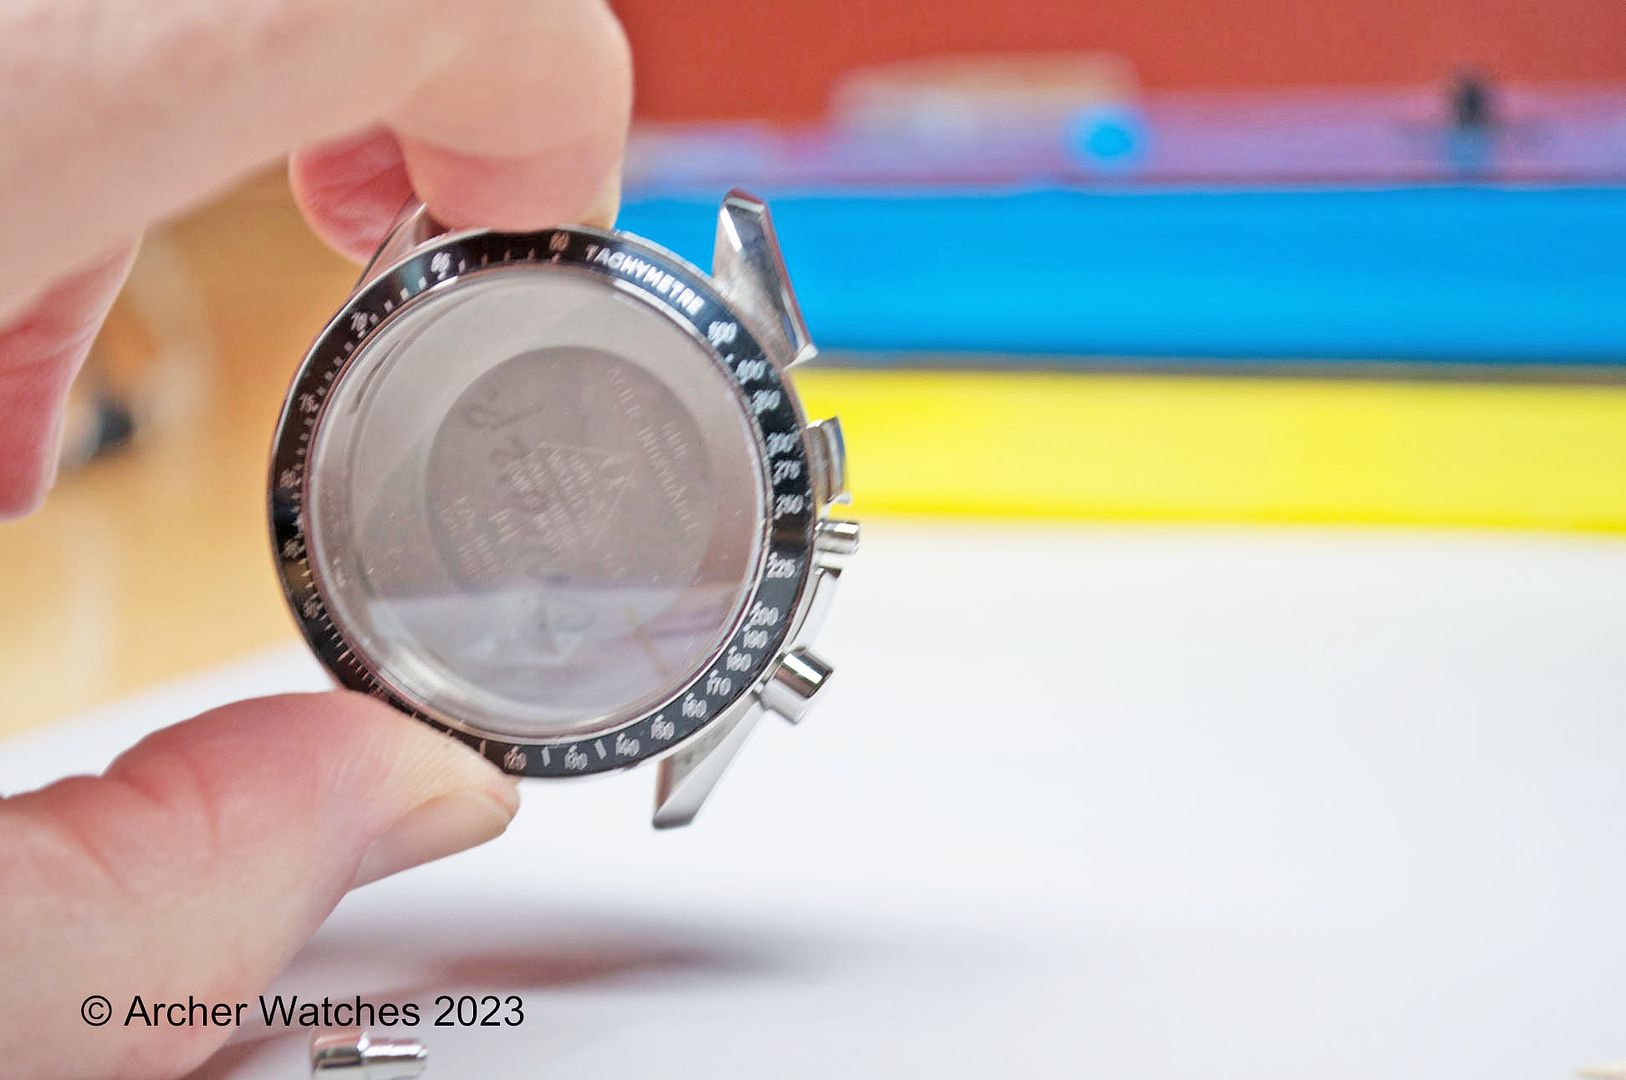
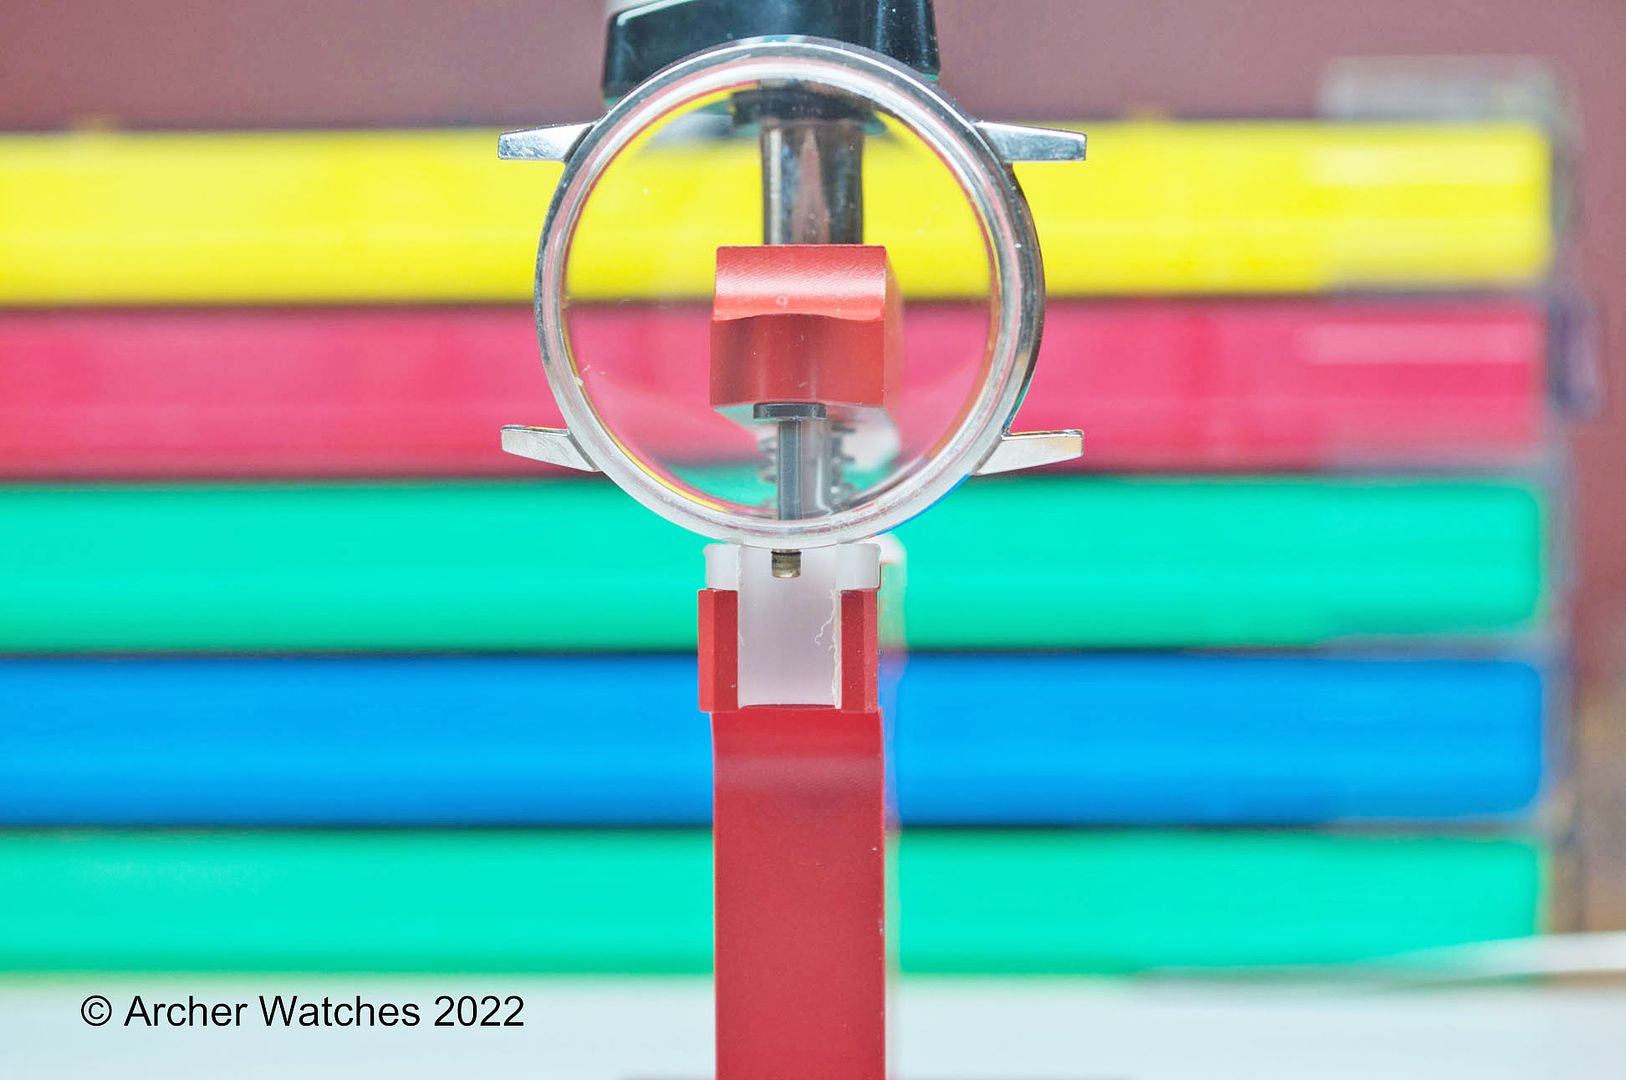
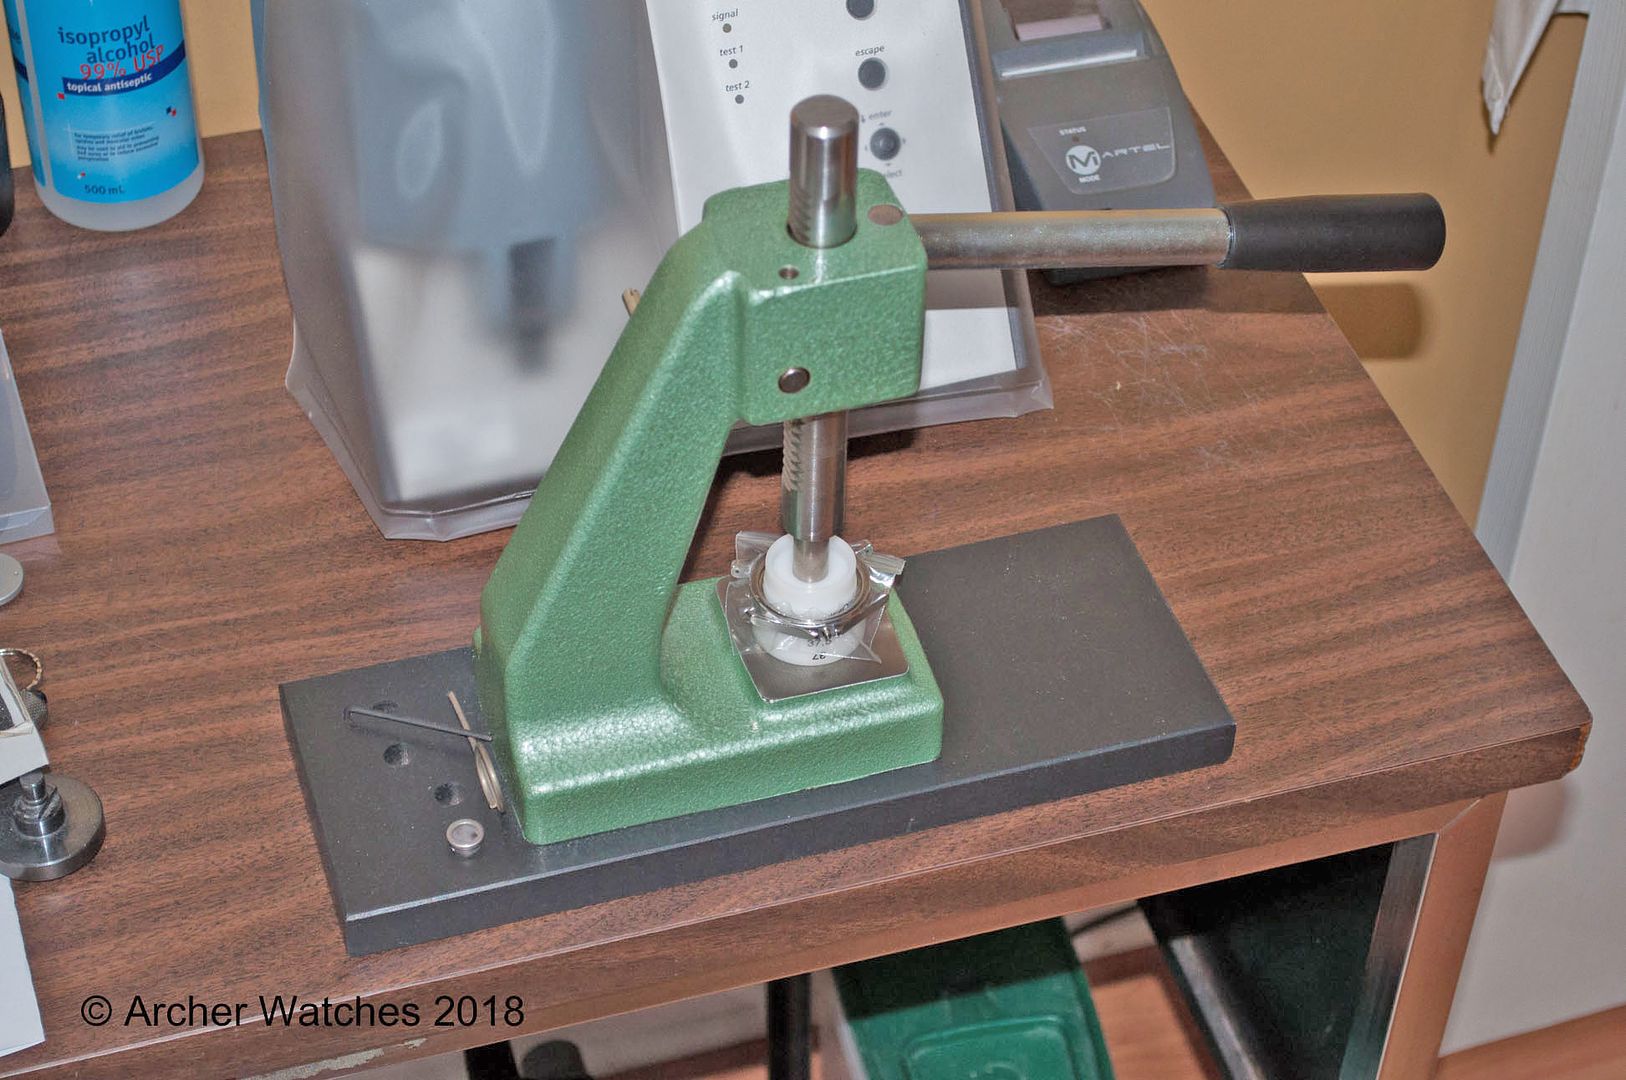
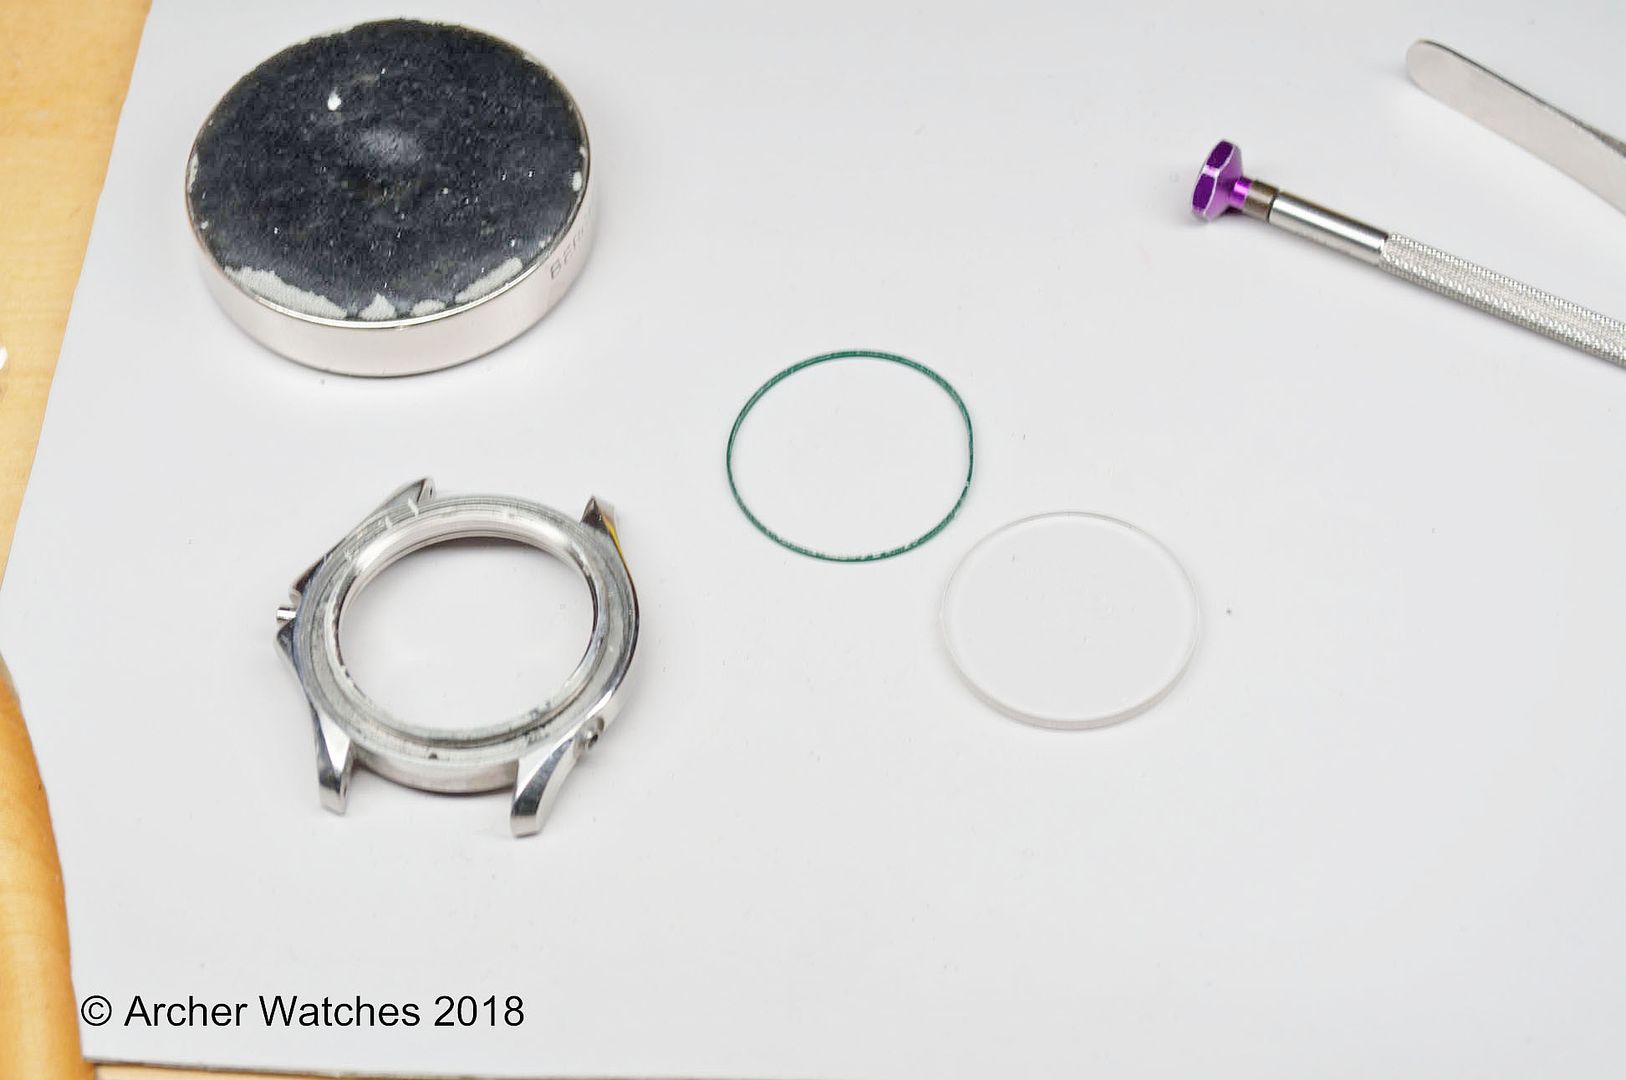
Next, I press the crystal out, because the seal will possibly be compromised by the heat I’m going to apply to the case:

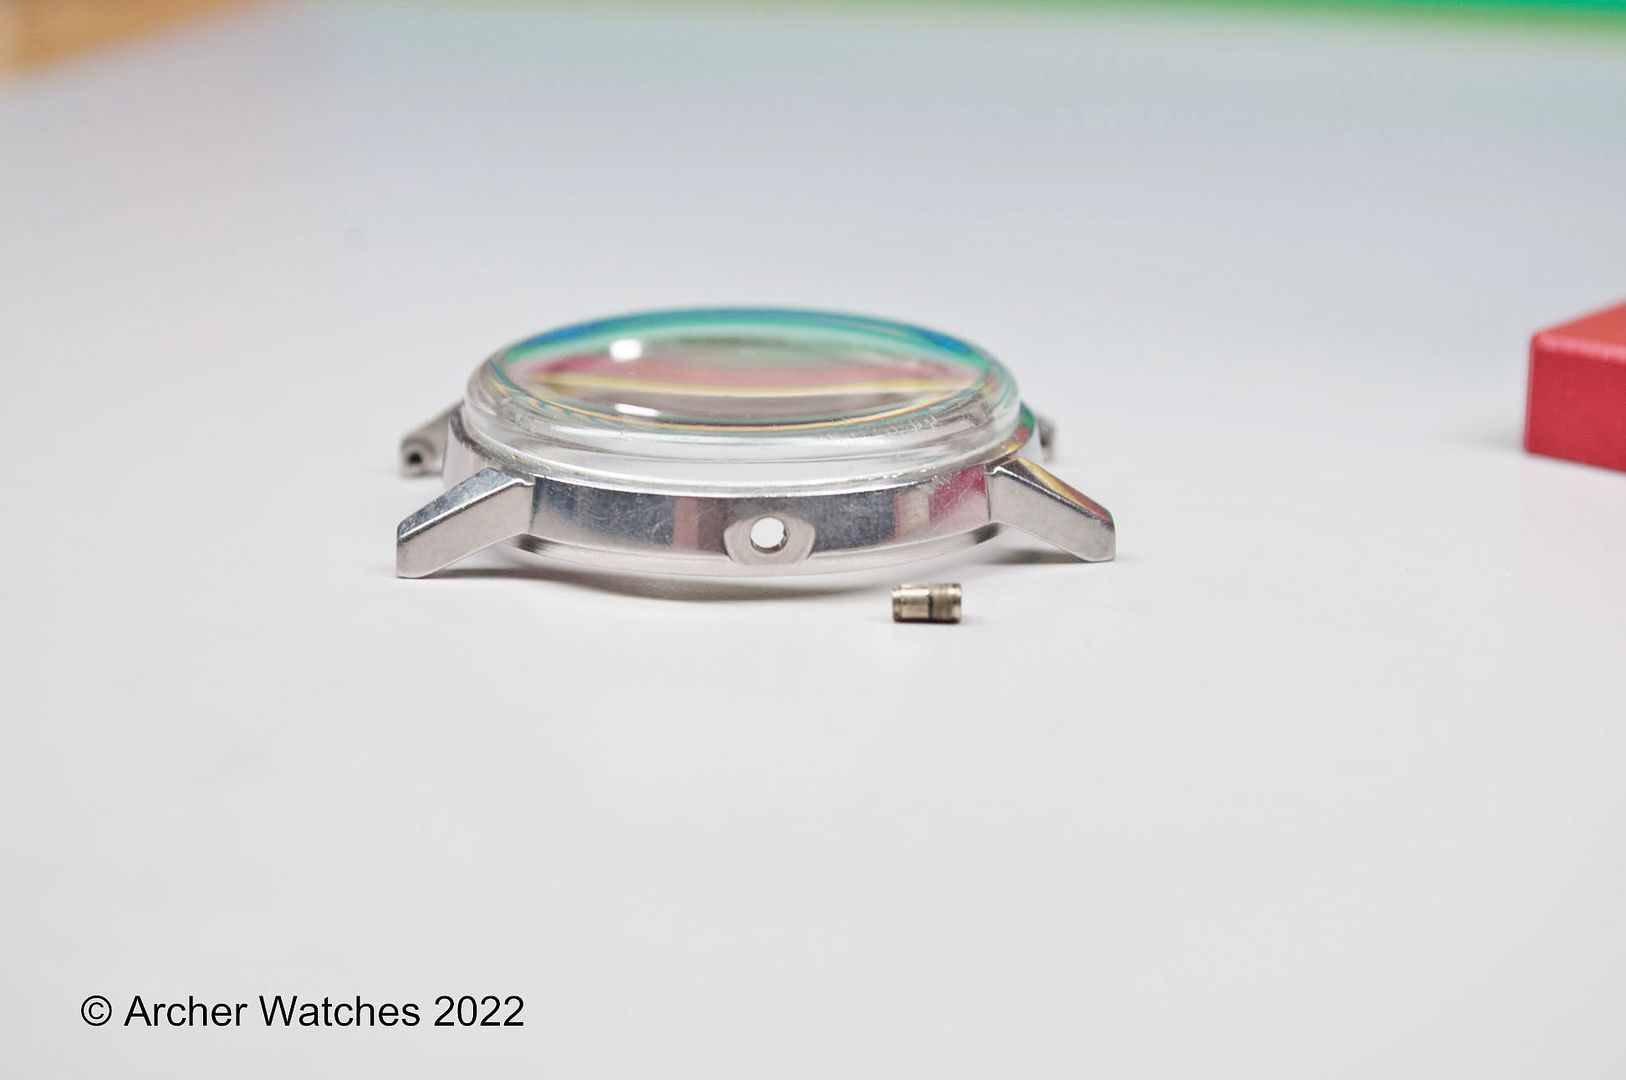
The case is now ready to have the tube removed:

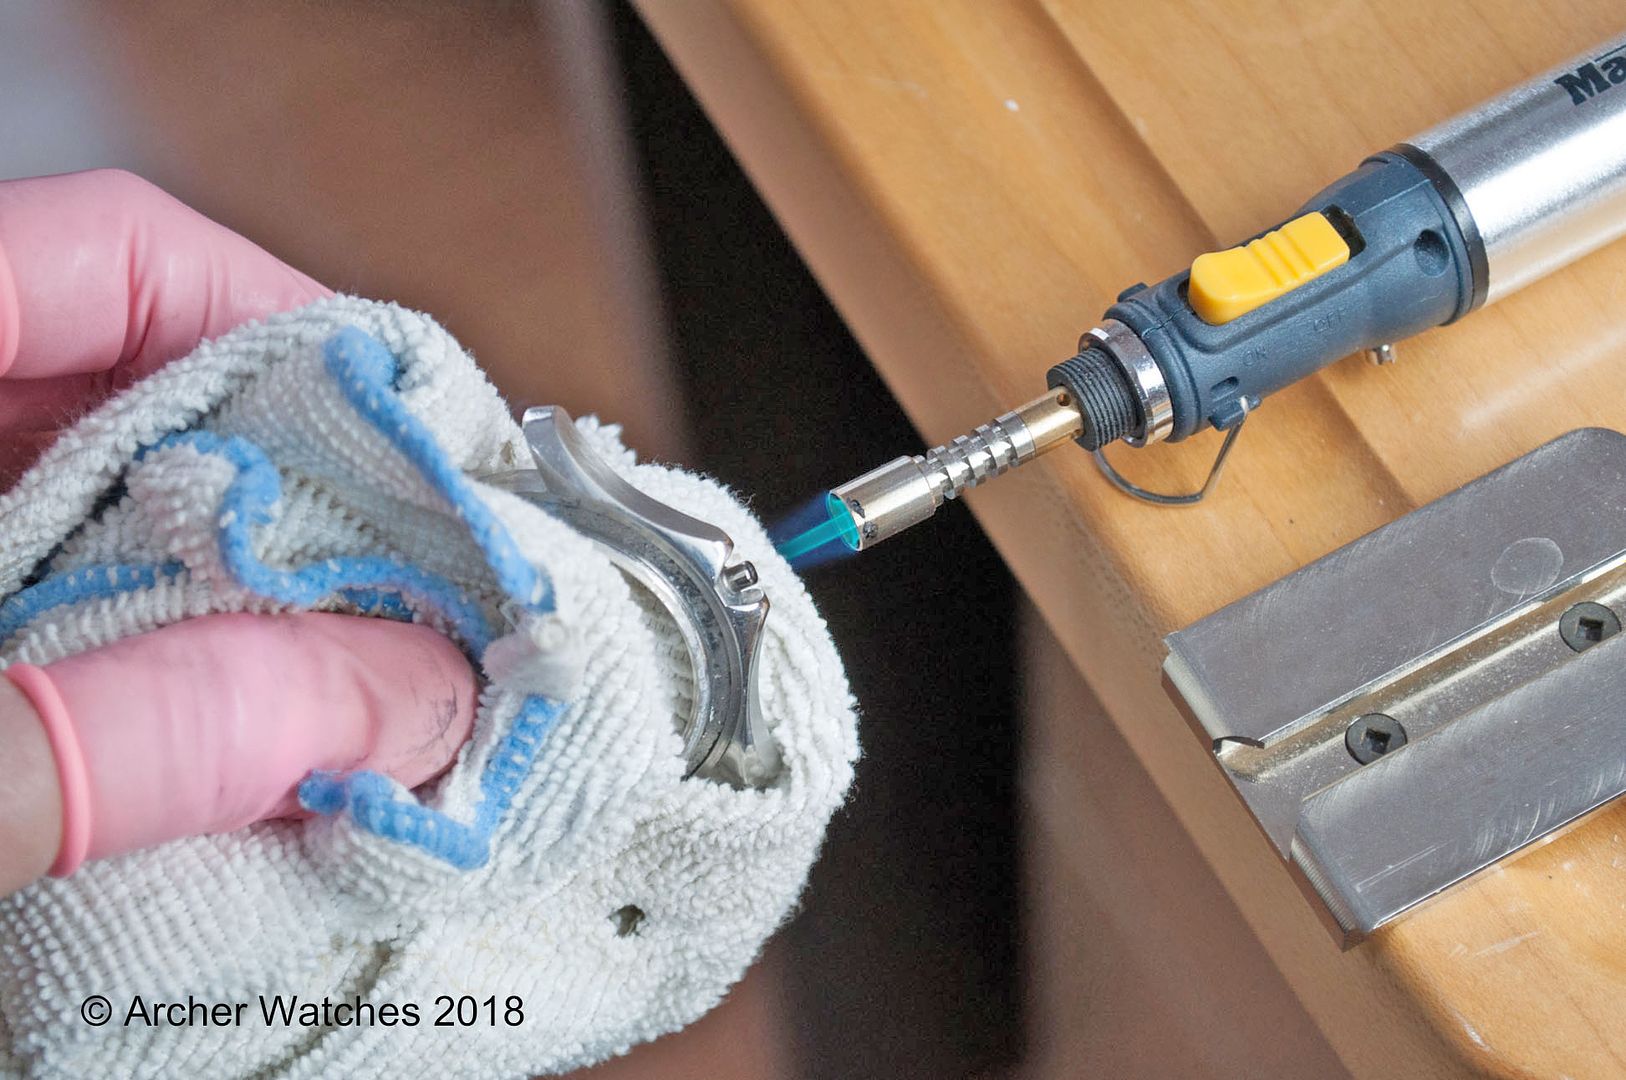
I use a small torch fueled by butane for this, as I can focus the heat exactly where I want it. The heat will help break the bond of the Loctite thread locking compound that was applied to the threads of the tube at the factory:

The case will get very hot, so care needs to be used so you don’t burn yourself.
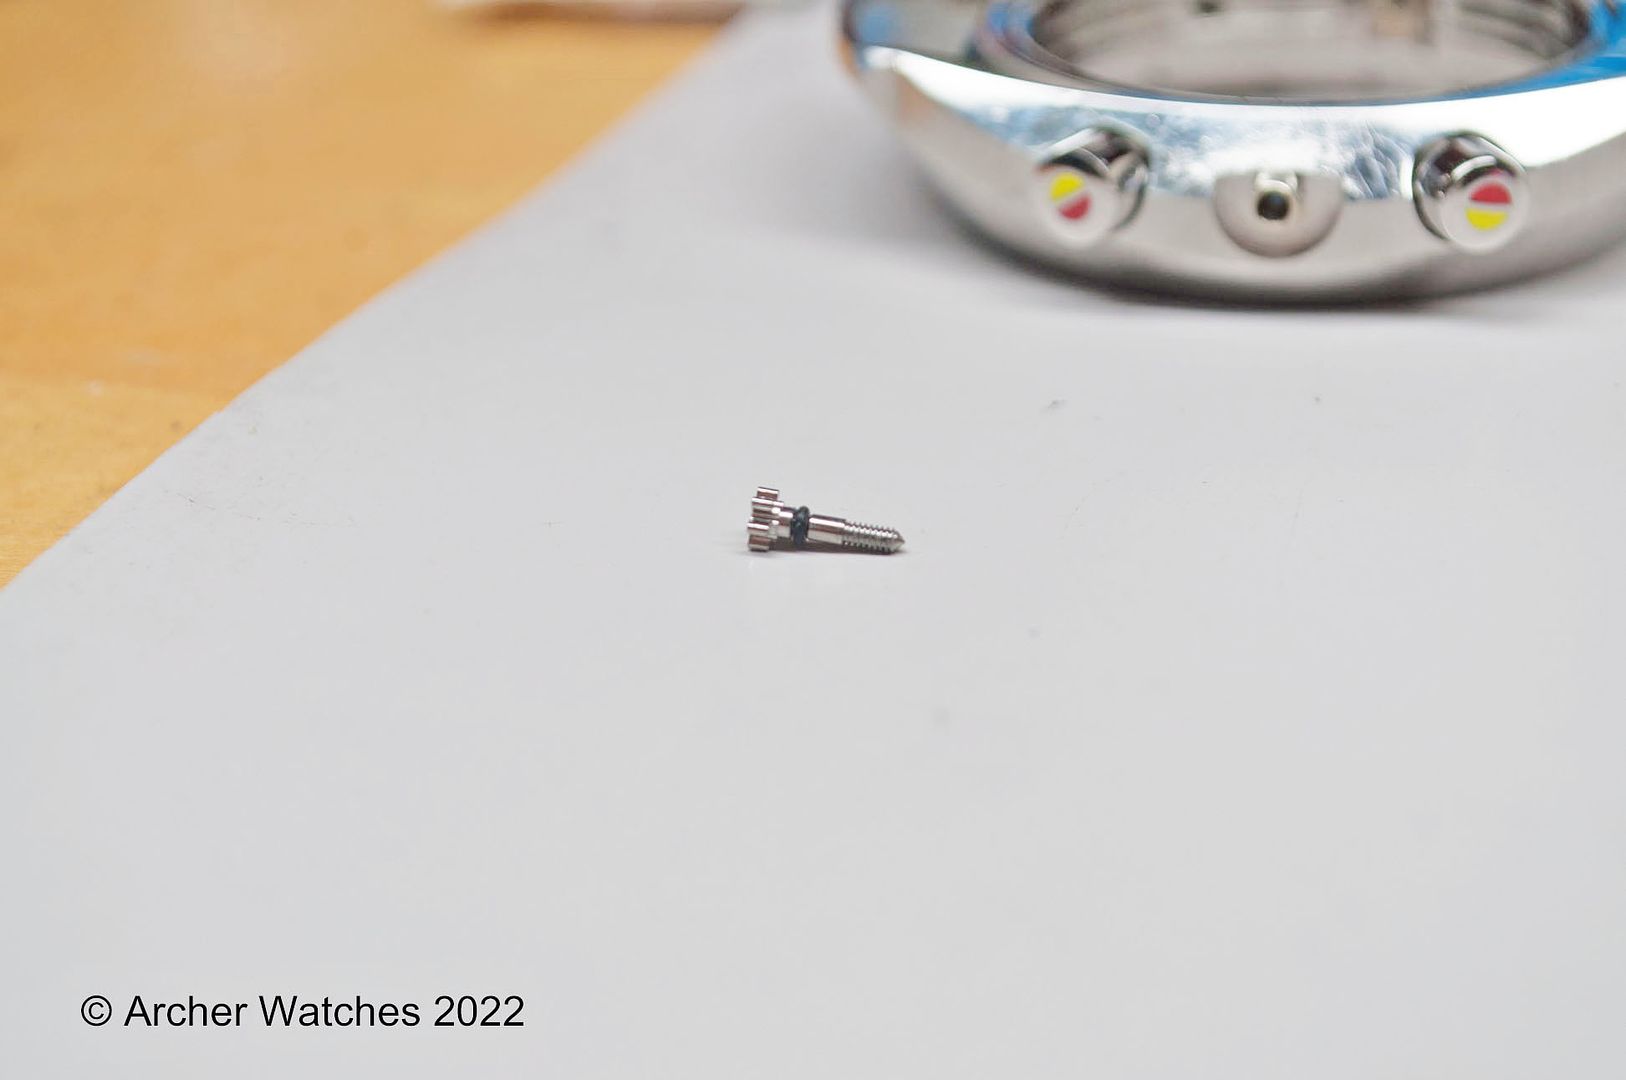
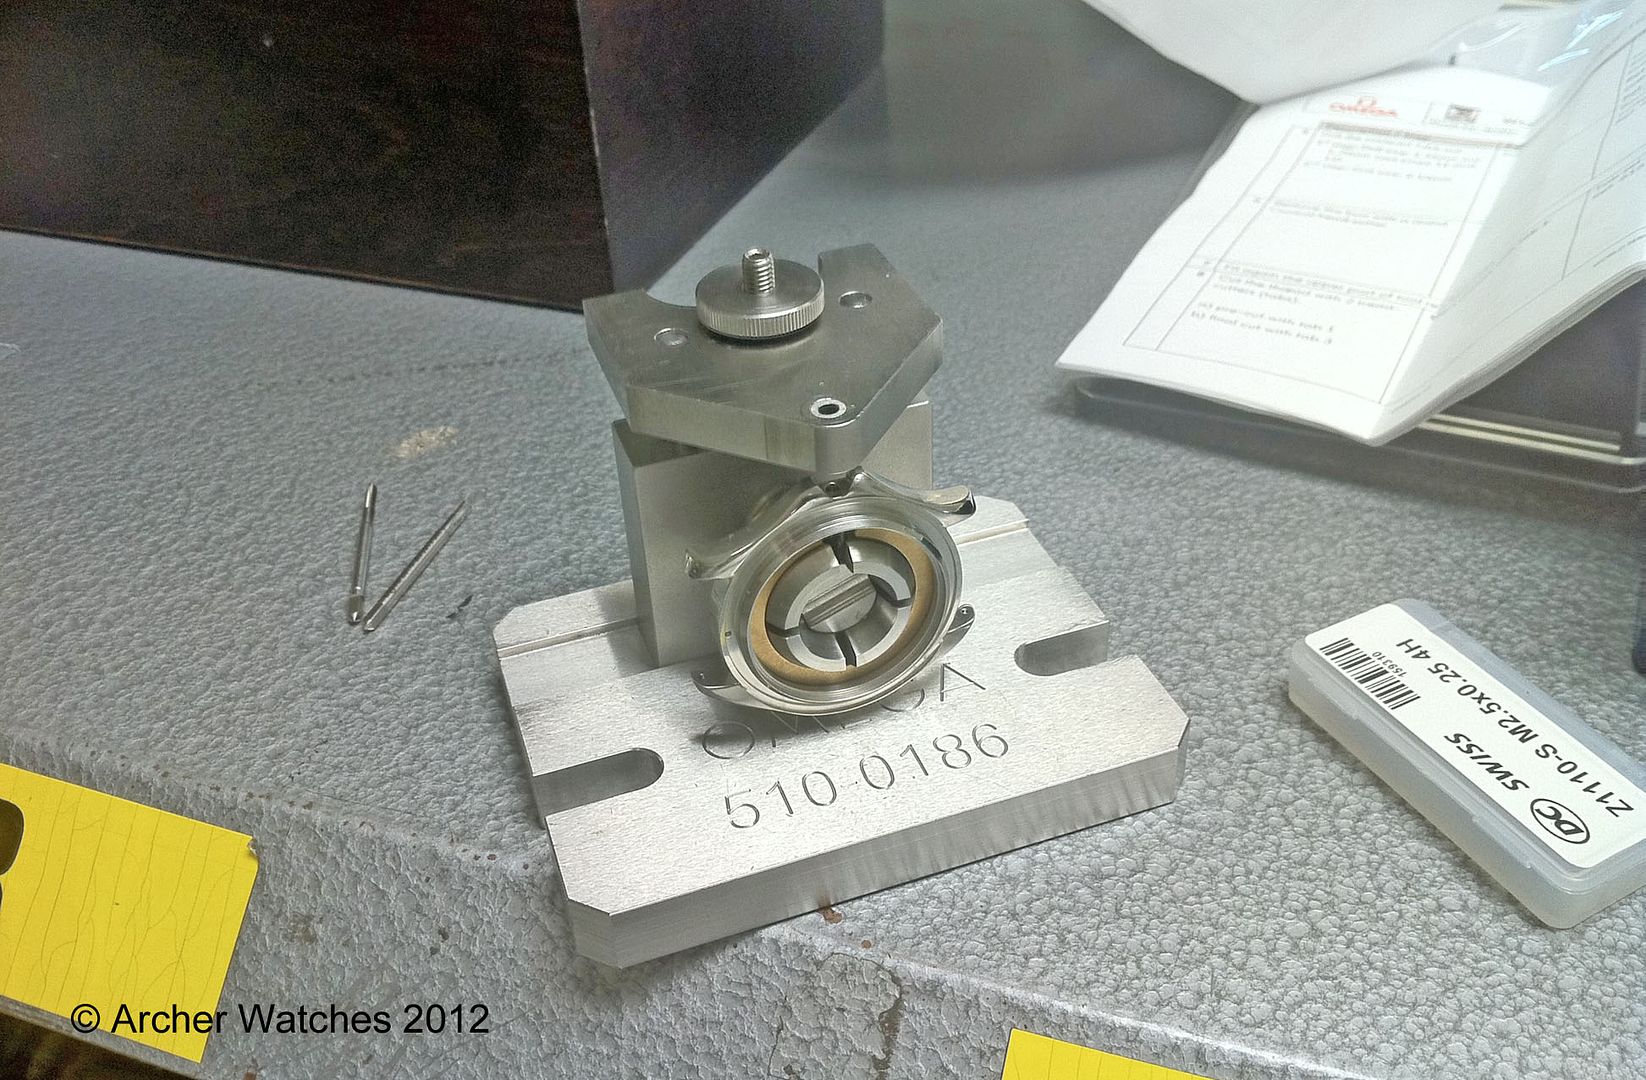
In this instance, the Omega case tube has an octagonal recess machined inside it:

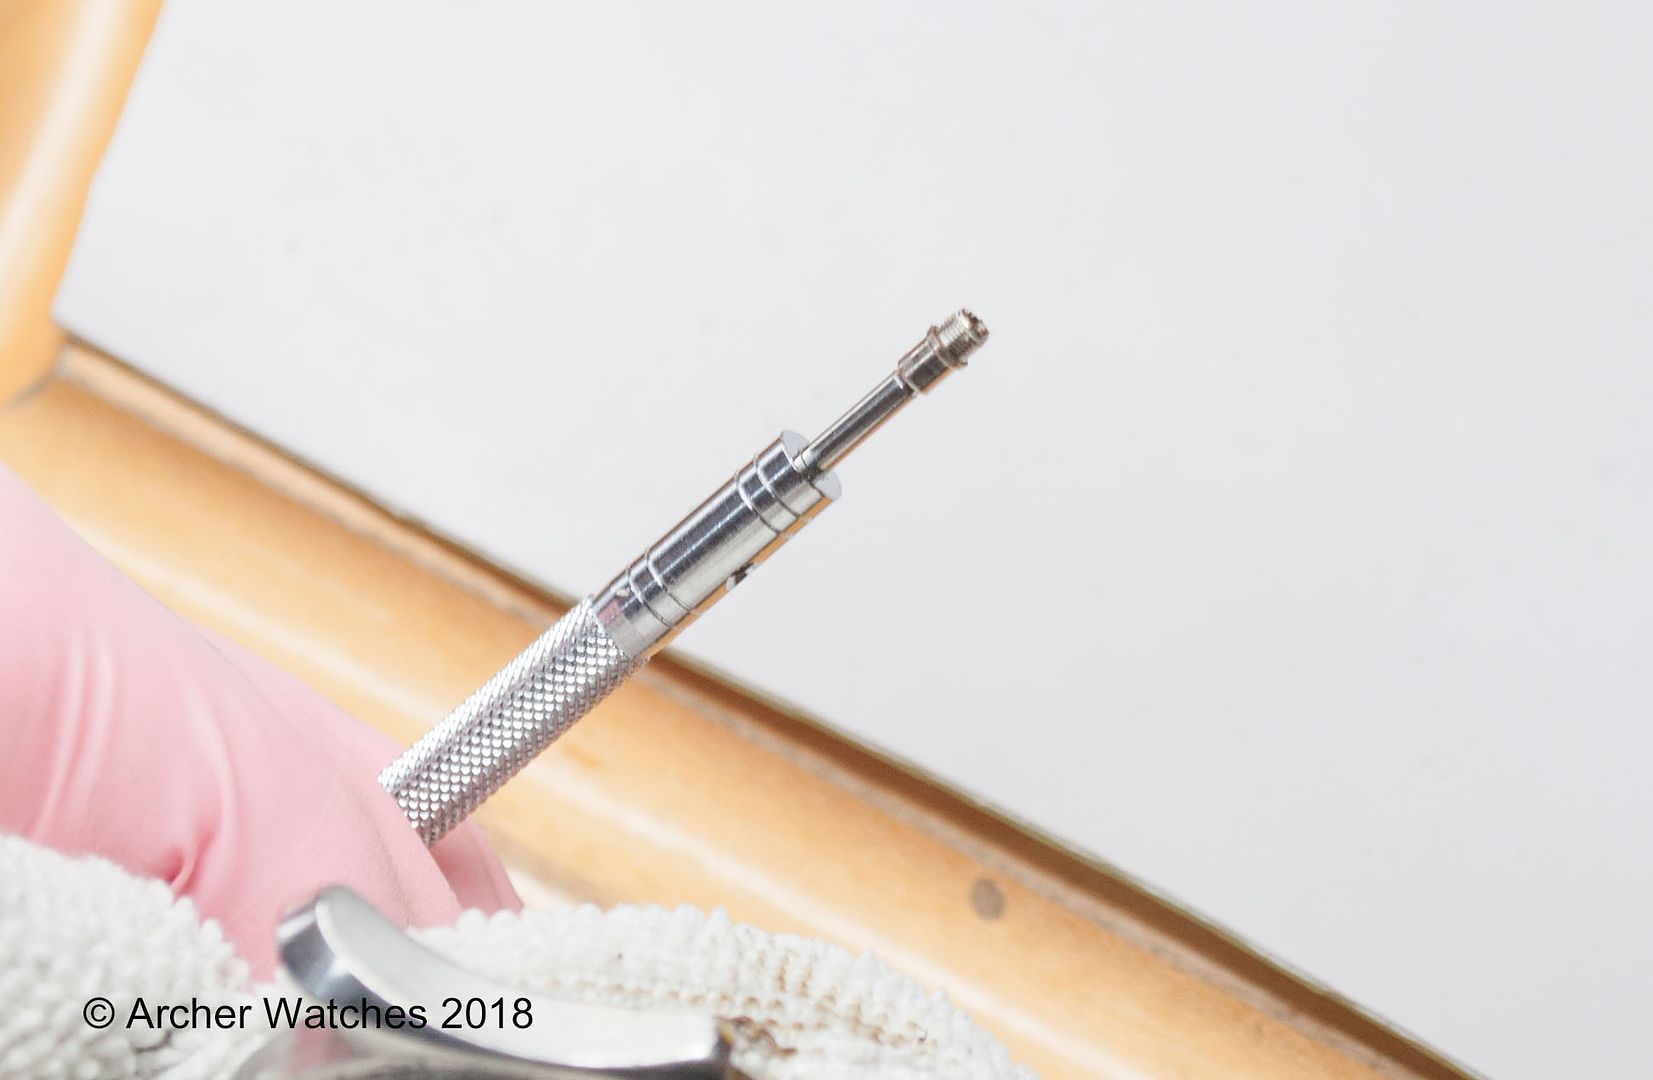
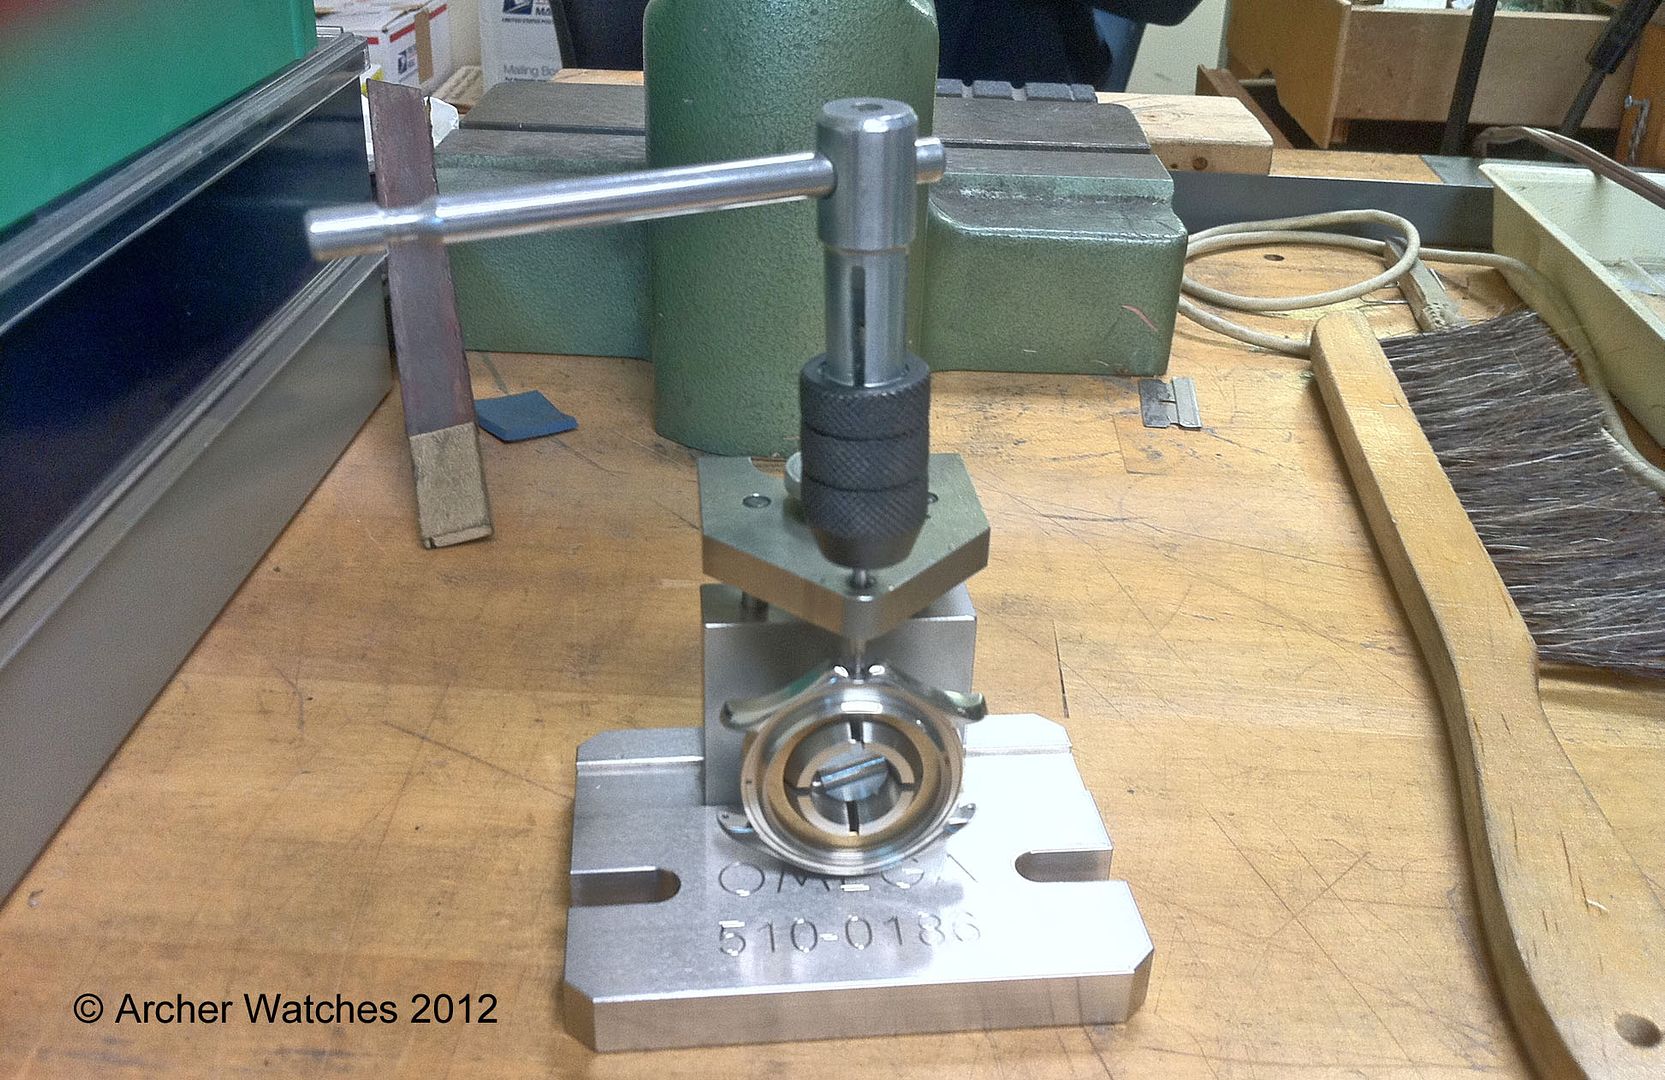
Omega makes a tool to use this to remove and install these tubes, so I use that to turn out the tube:


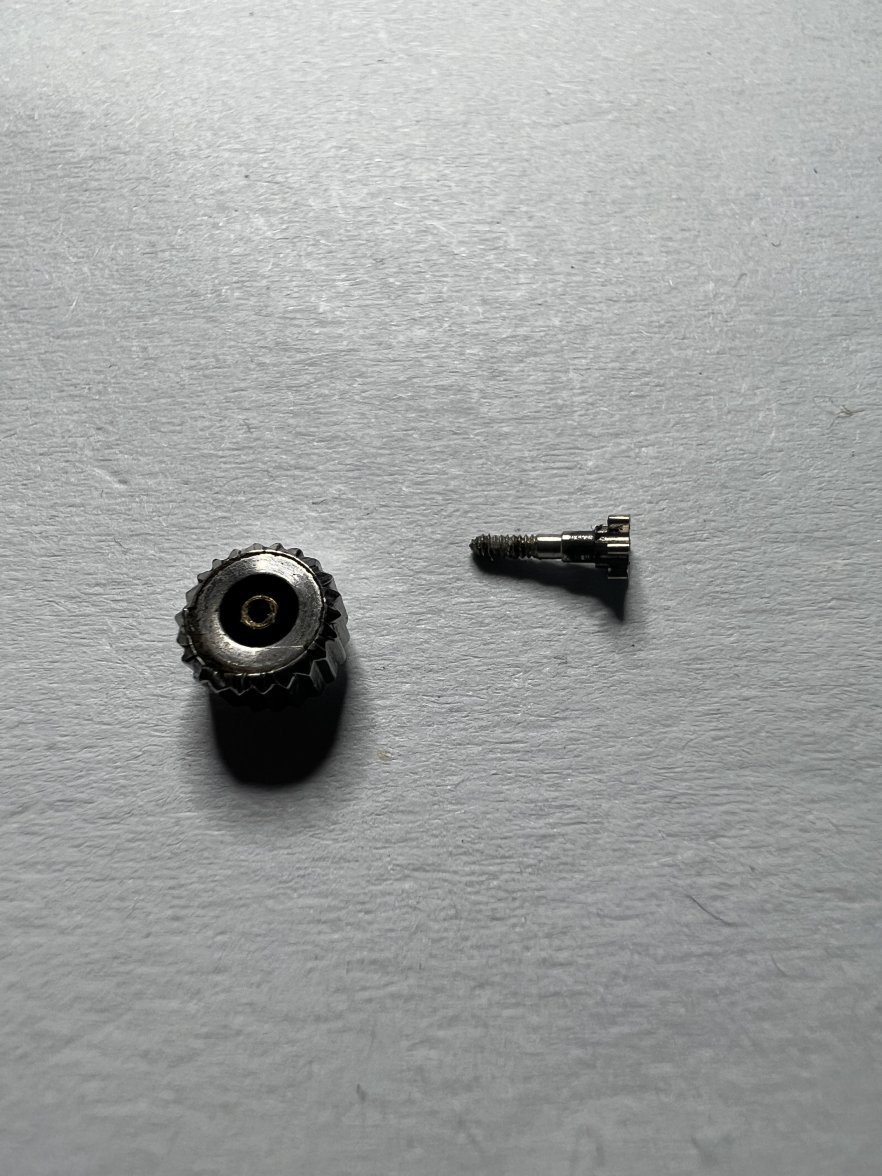
Now the case can be cleaned, and you should make sure that the threads inside the case are free from any residue from the Loctite. Here is the new case tube:

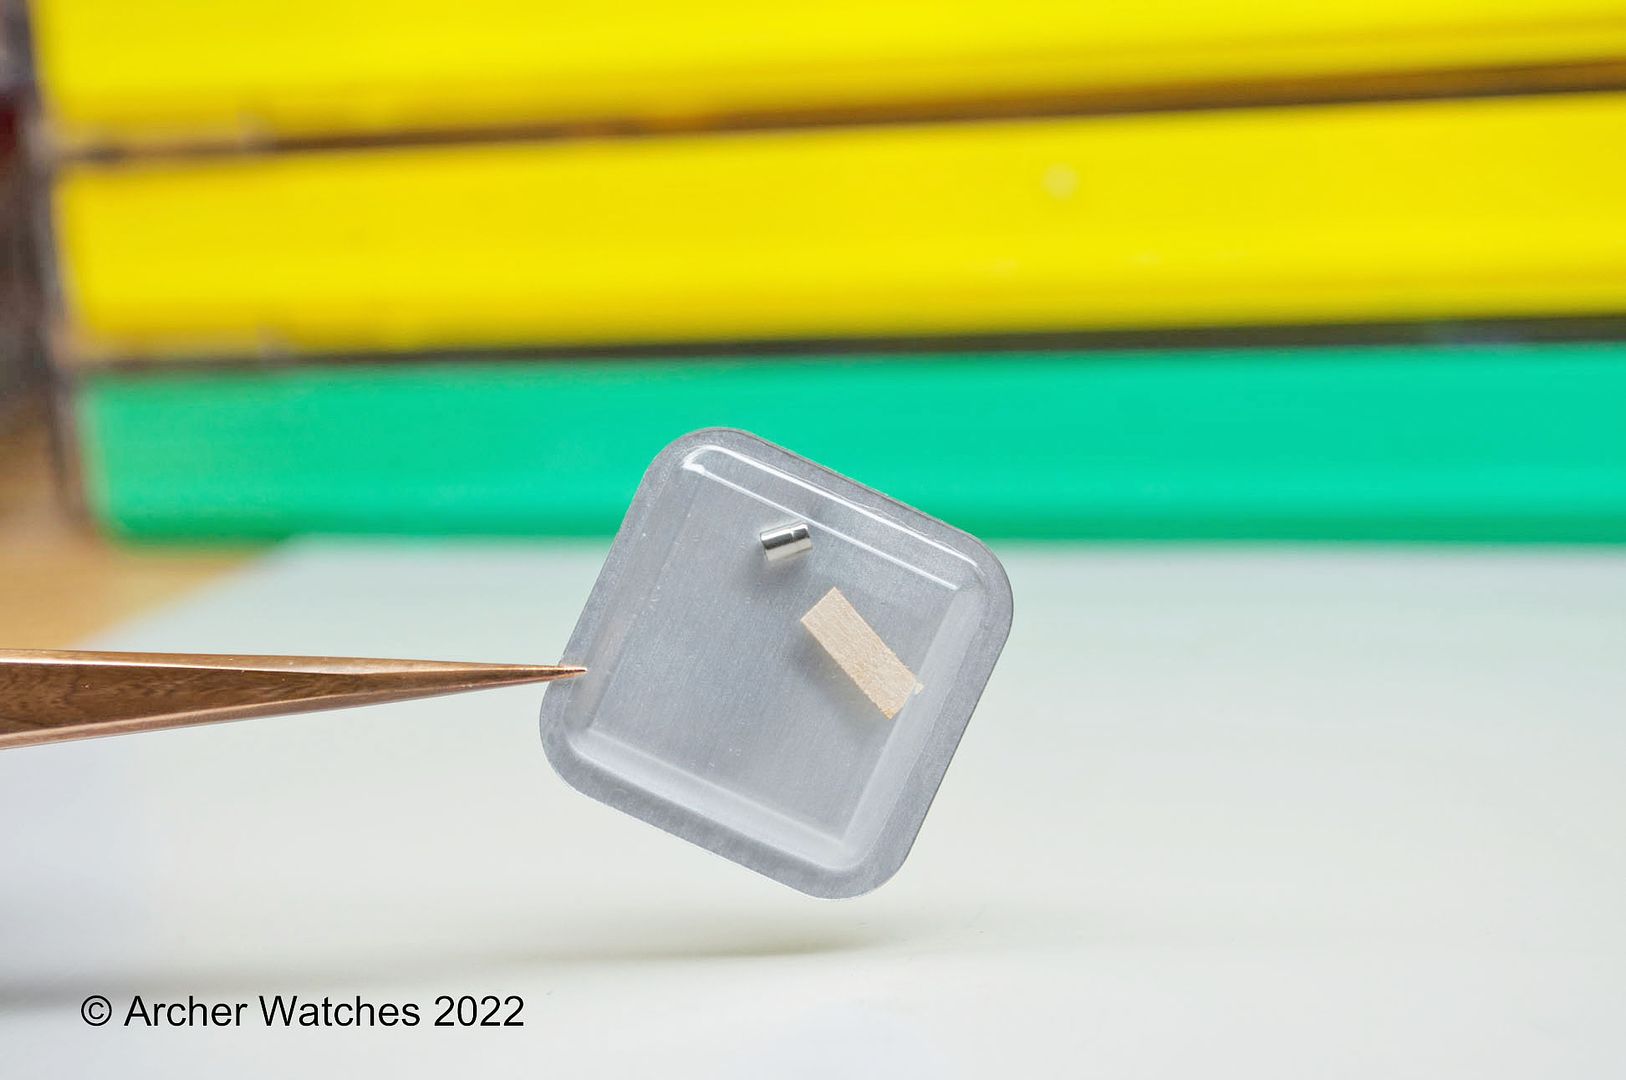
You will note that in addition to the tube, there is a washer. This is a titanium washer that is installed between the case and the case tube - don’t forget this.

Loctite is again applied to the tube, per Omega work instructions:

The tube is then threaded into the case:

Note that if you are changing a screw down style case tube due to damage, it’s best to change the crown and case tube together.
I will continue with other examples in a subsequent post. If you have any questions, please let me know.
Cheers, Al
This thread is the result of a direct request made to cover replacement of case tubes, but I will also include some other common replacement items on cases, such as pushers, correctors, etc.
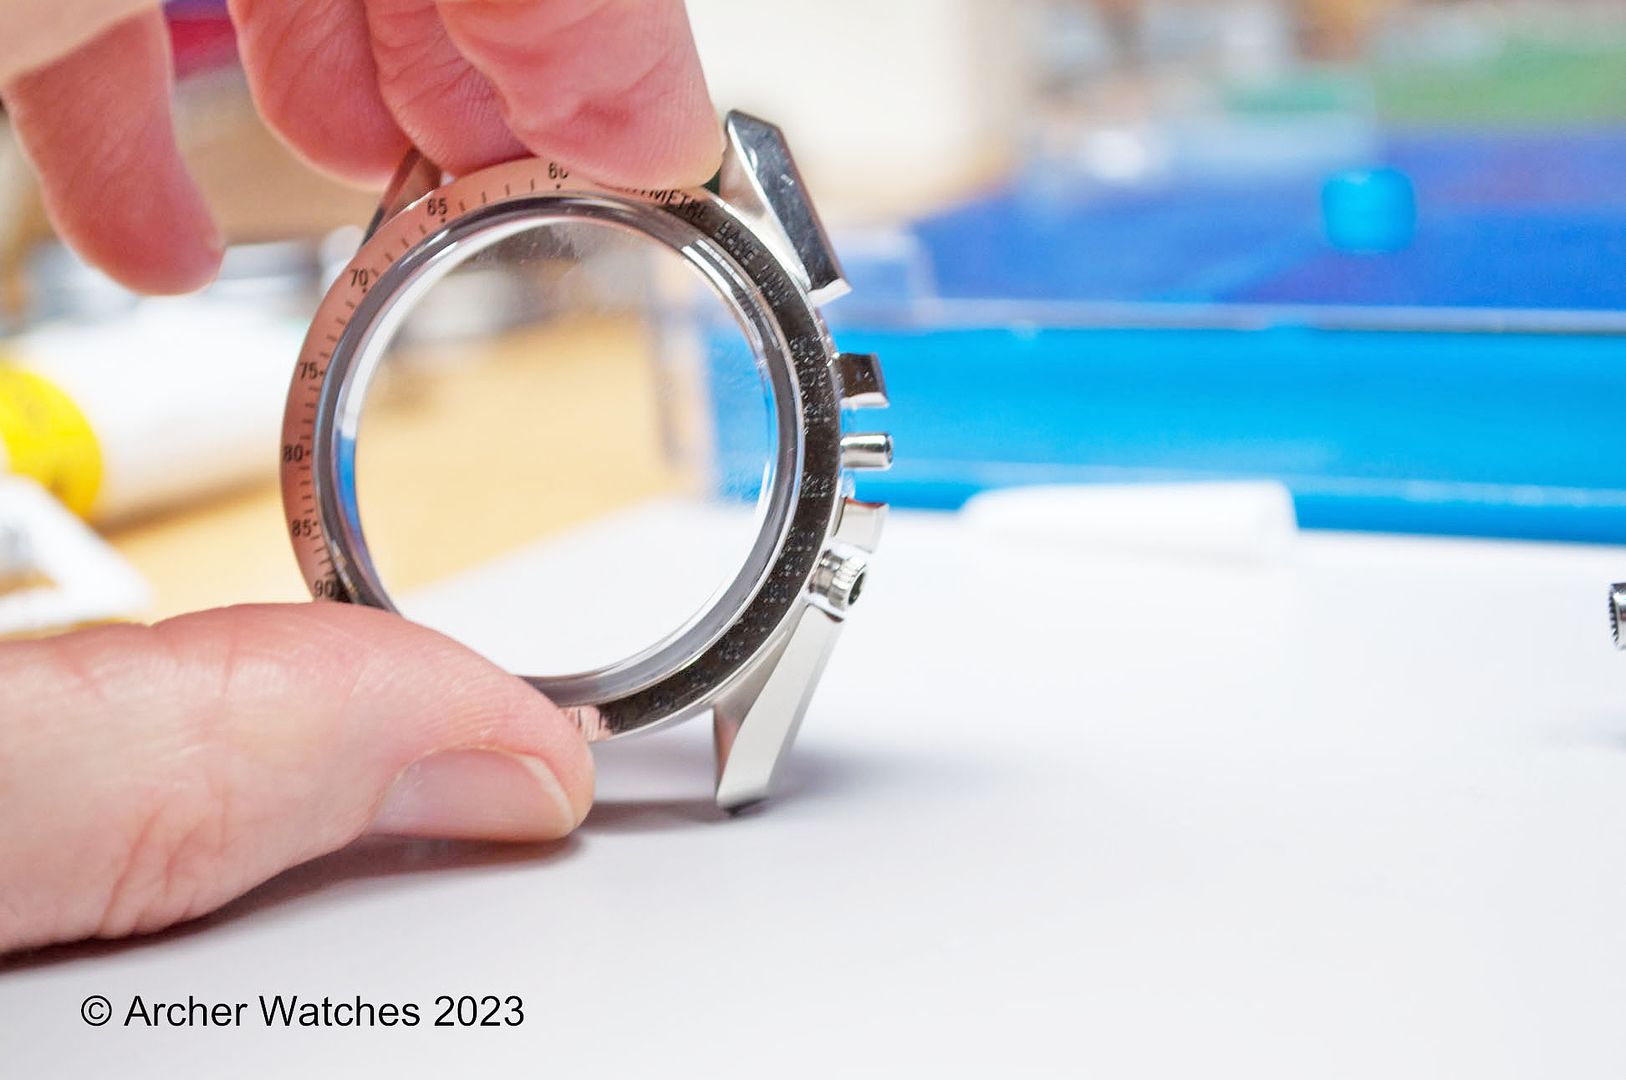
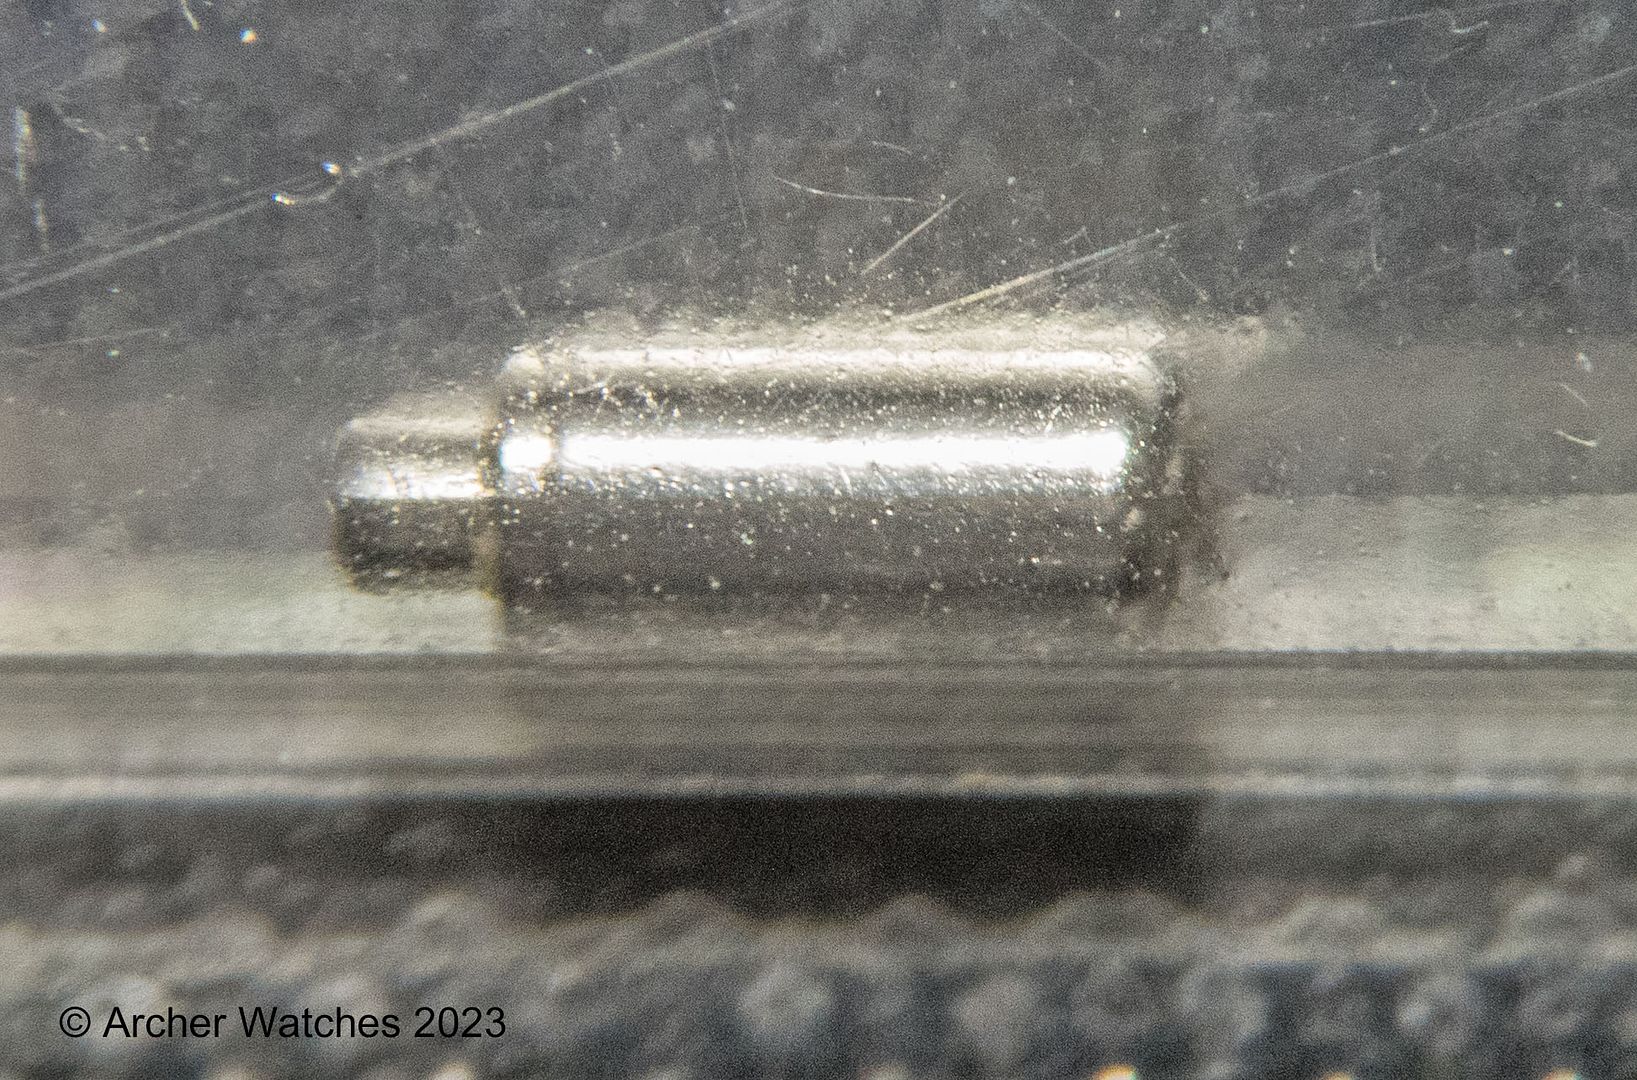
Since case tubes was the specific item a member here requested that I cover, I’ll start there. So the case tube (also sometimes referred to as the pendant tube) is the tube that the crown either screws into, or seals against. These can require replacement for a few reasons, such as impact damage, wear, damaged threads, etc. Here is a simple case tube that is clearly worn:
You might wonder how the rubber O-ring causes wear like this, but over time the O-ring can harden, and become embedded with dirt, which acts as an abrasive. There have been instances where I have been able to polish a slightly worn case tube to make it functional again, but often the best route is complete replacement, with a new tube looking like this:
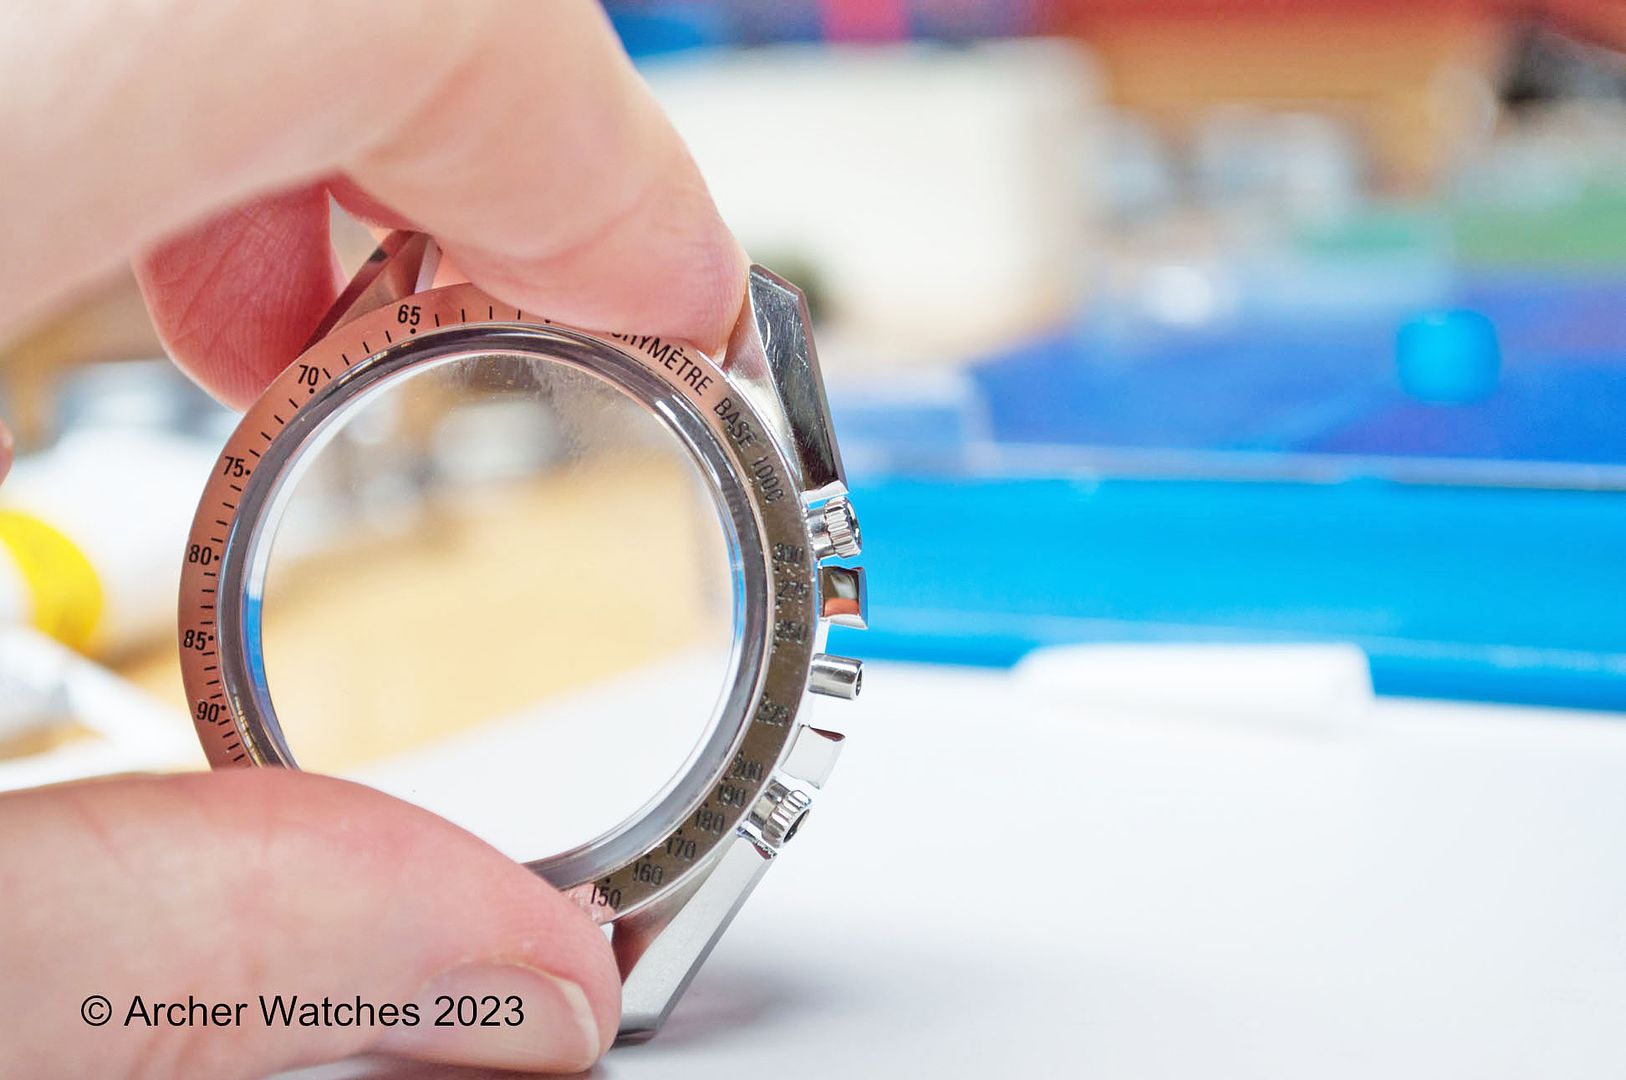
For case tube used with screw down crowns, they often need replacing because they are stripped - this is what a good thread looks like:
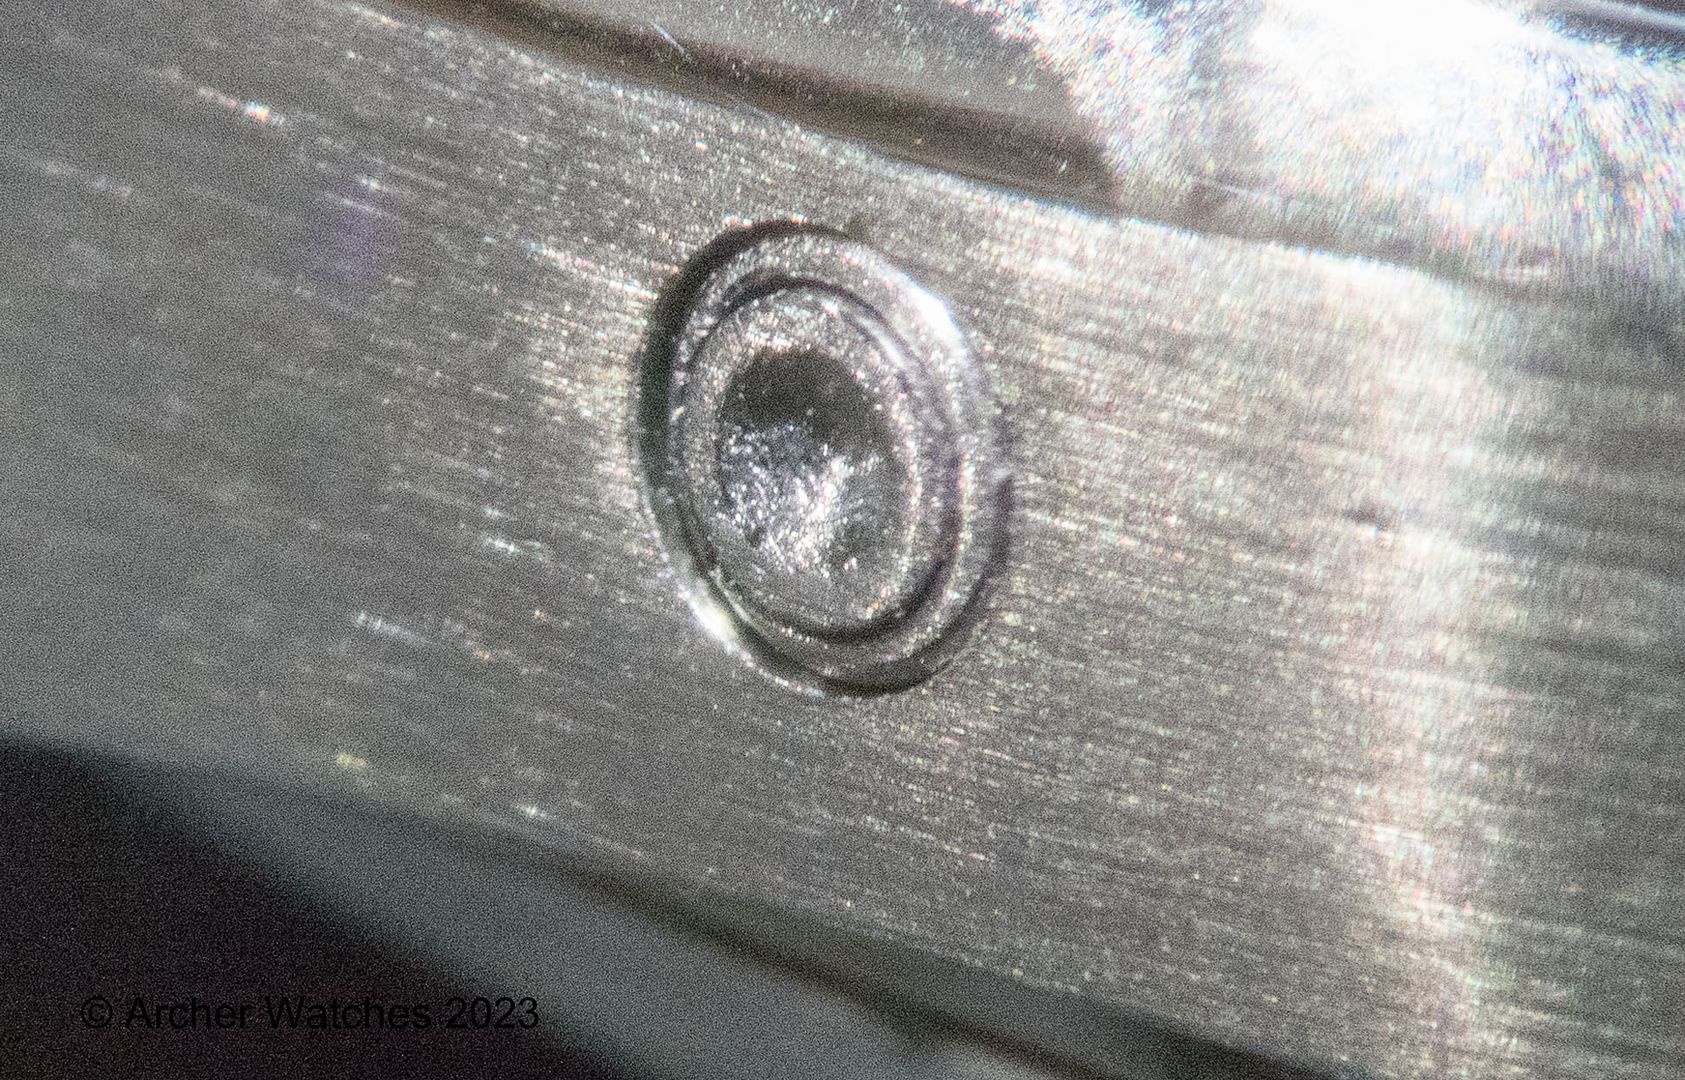
And what damaged threads look like:
Case tube can be attached to the case in different ways. Some are press fitted into the case, so are threaded into the case, and some are soldered into the case.
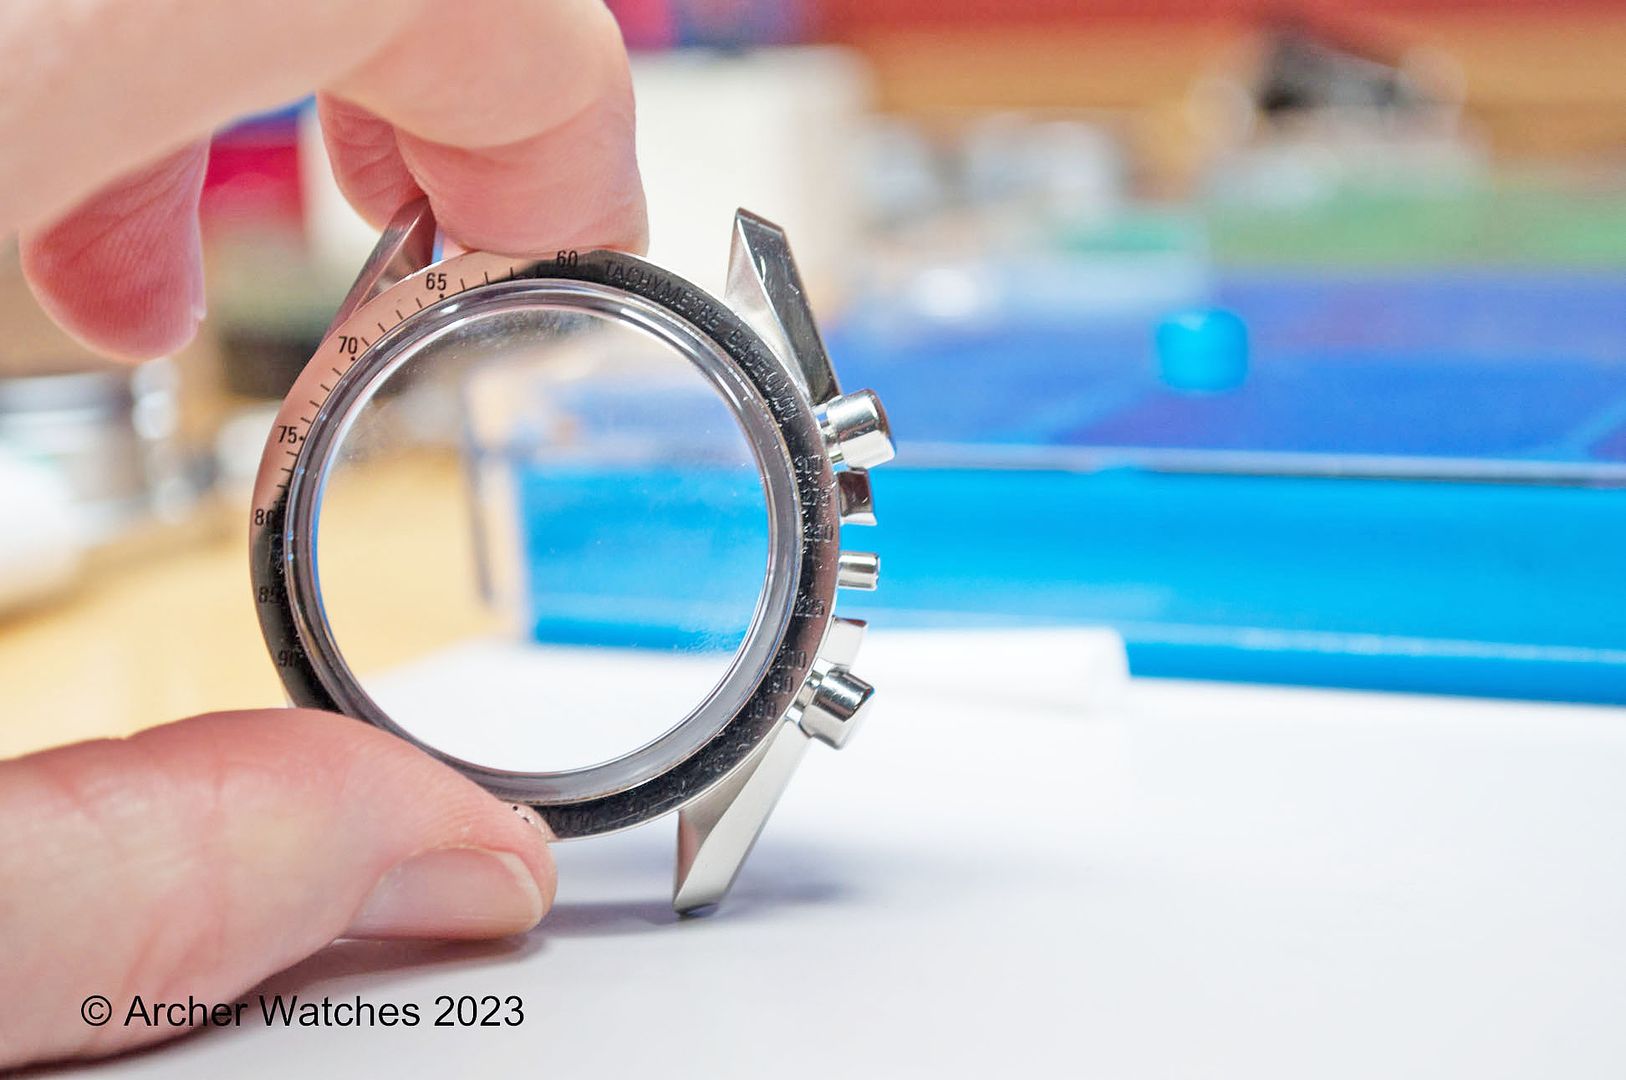
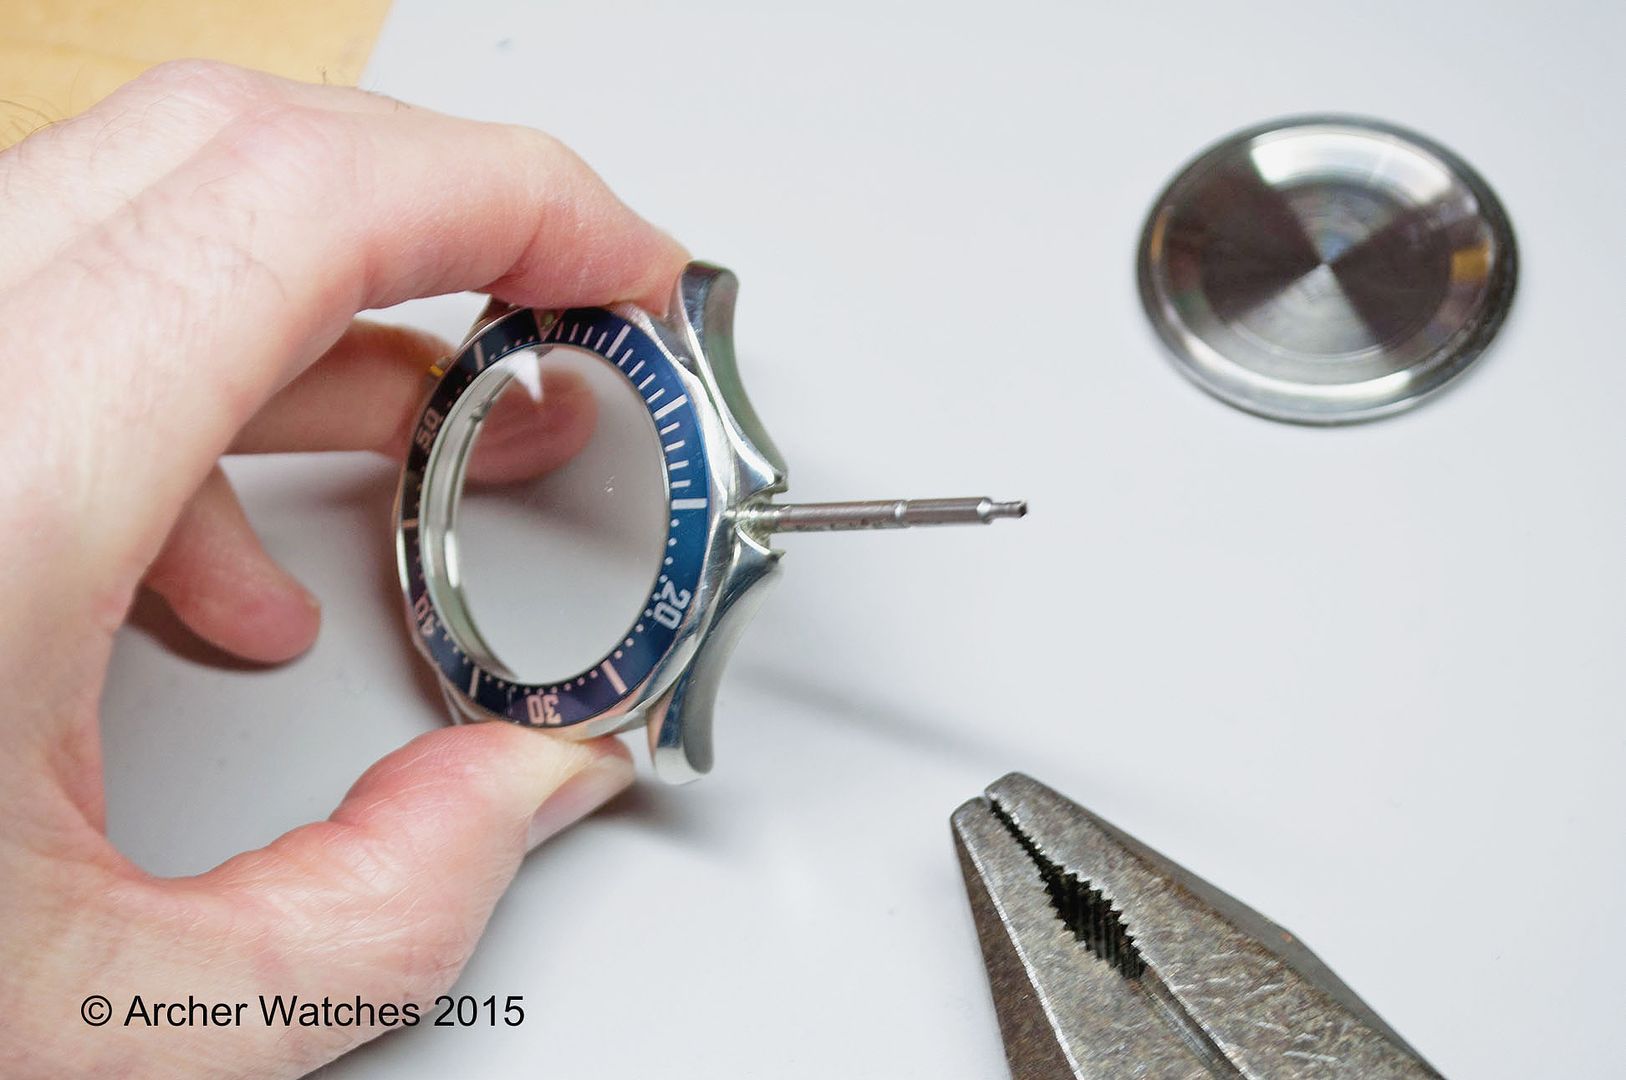
I’ll start with a simple press fitted case tube, and specifically the type that the case tube extends into the case, like this one:
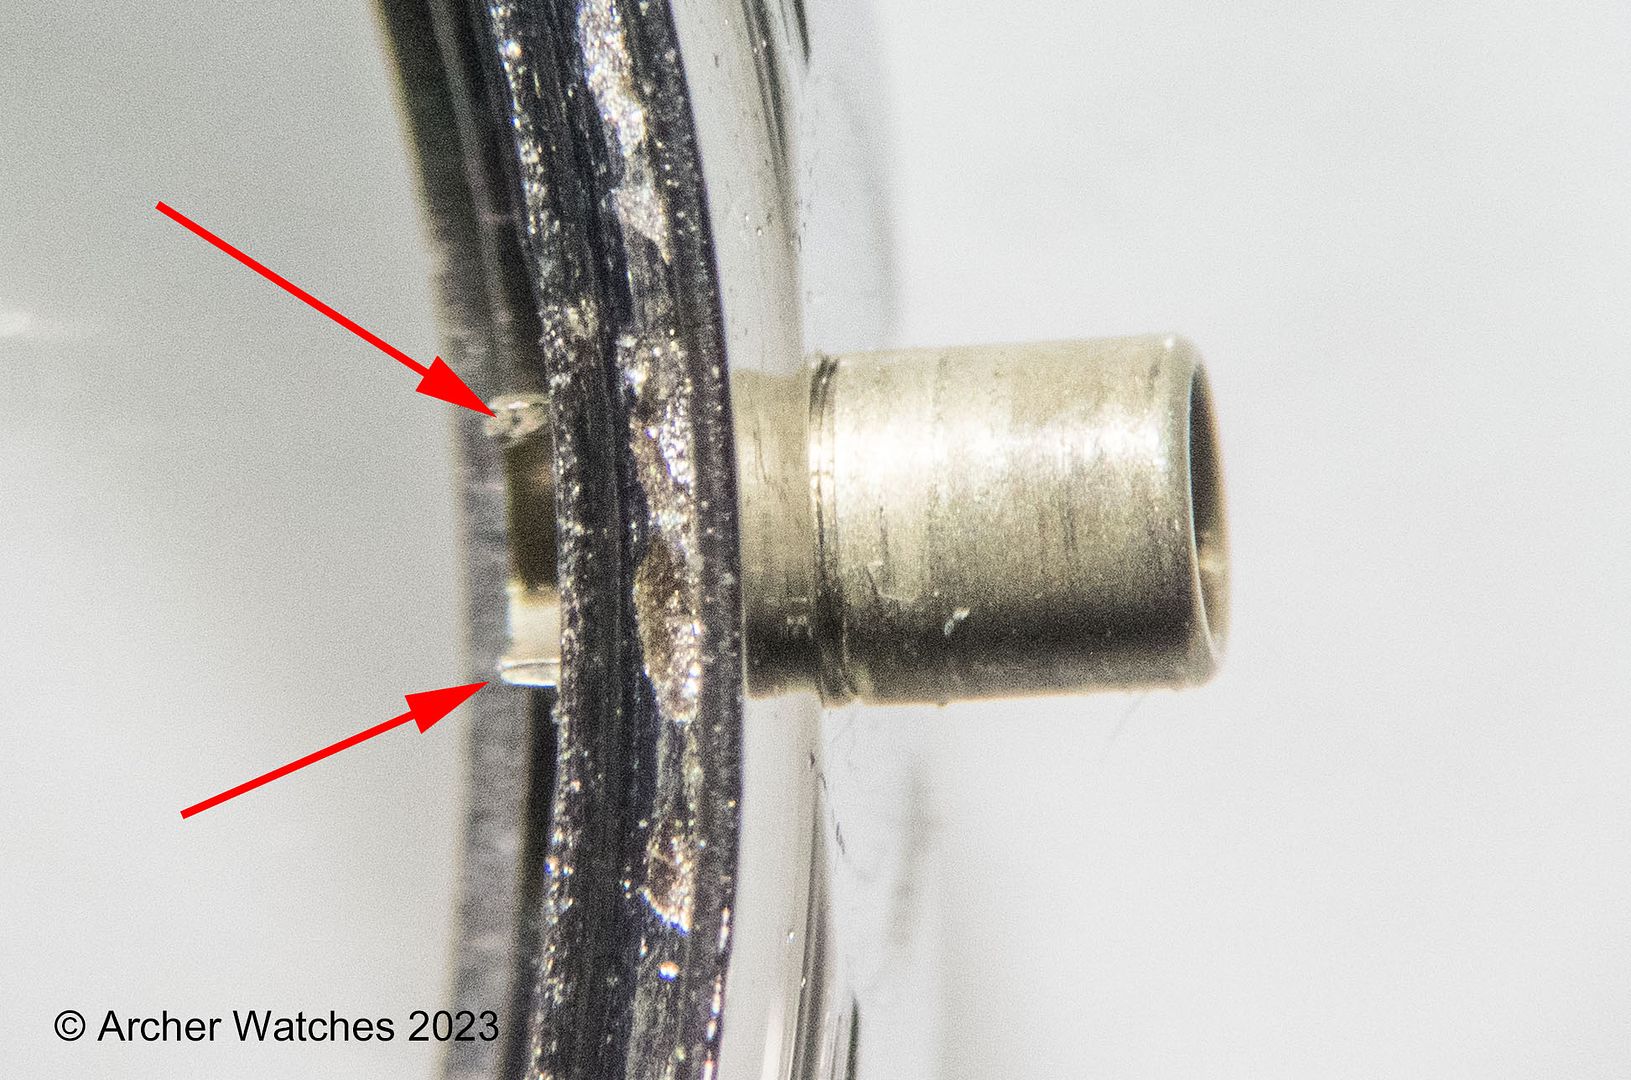
You will note that at the red arrows, it shows that the case tube has been cut out partially, and this is for clearance. So if you come across a case tube like this, it should be replaced with a tube that is also cut out, and the cut out should be oriented “up” when looking into the back of the case like this.
I have this tool from Horotec that is designed for pressing items like case tubes and pushers out and into cases, so that’s what I’ll use here. The left side has a small tube installed in it, and this side is used for pressing items out.
The right side is used for pressing items in, and it’s very straightforward - just plastic on top and bottom, and you put the item between those, and turn the handle to press it in.
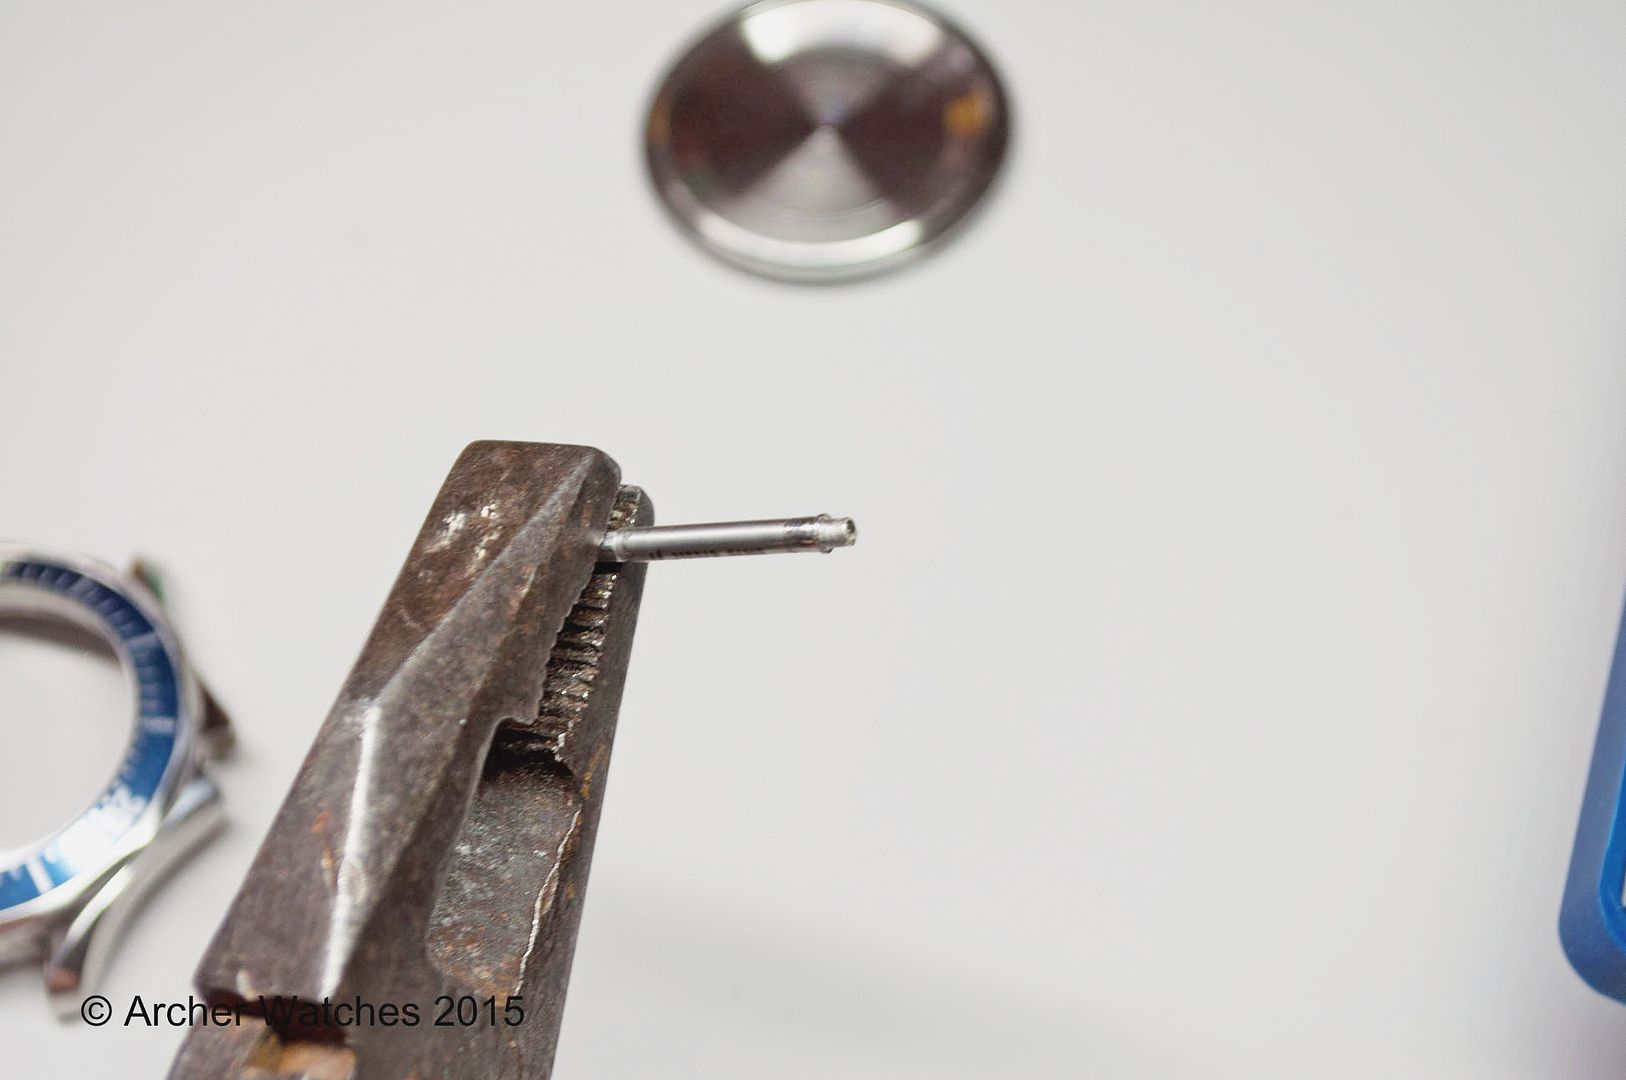
The tubes used come in different sizes, so it’s a matter of picking something that will make good contact with the inside portion of the case tube, so you can push it out:
Turning the handle presses the tube out pretty easily:
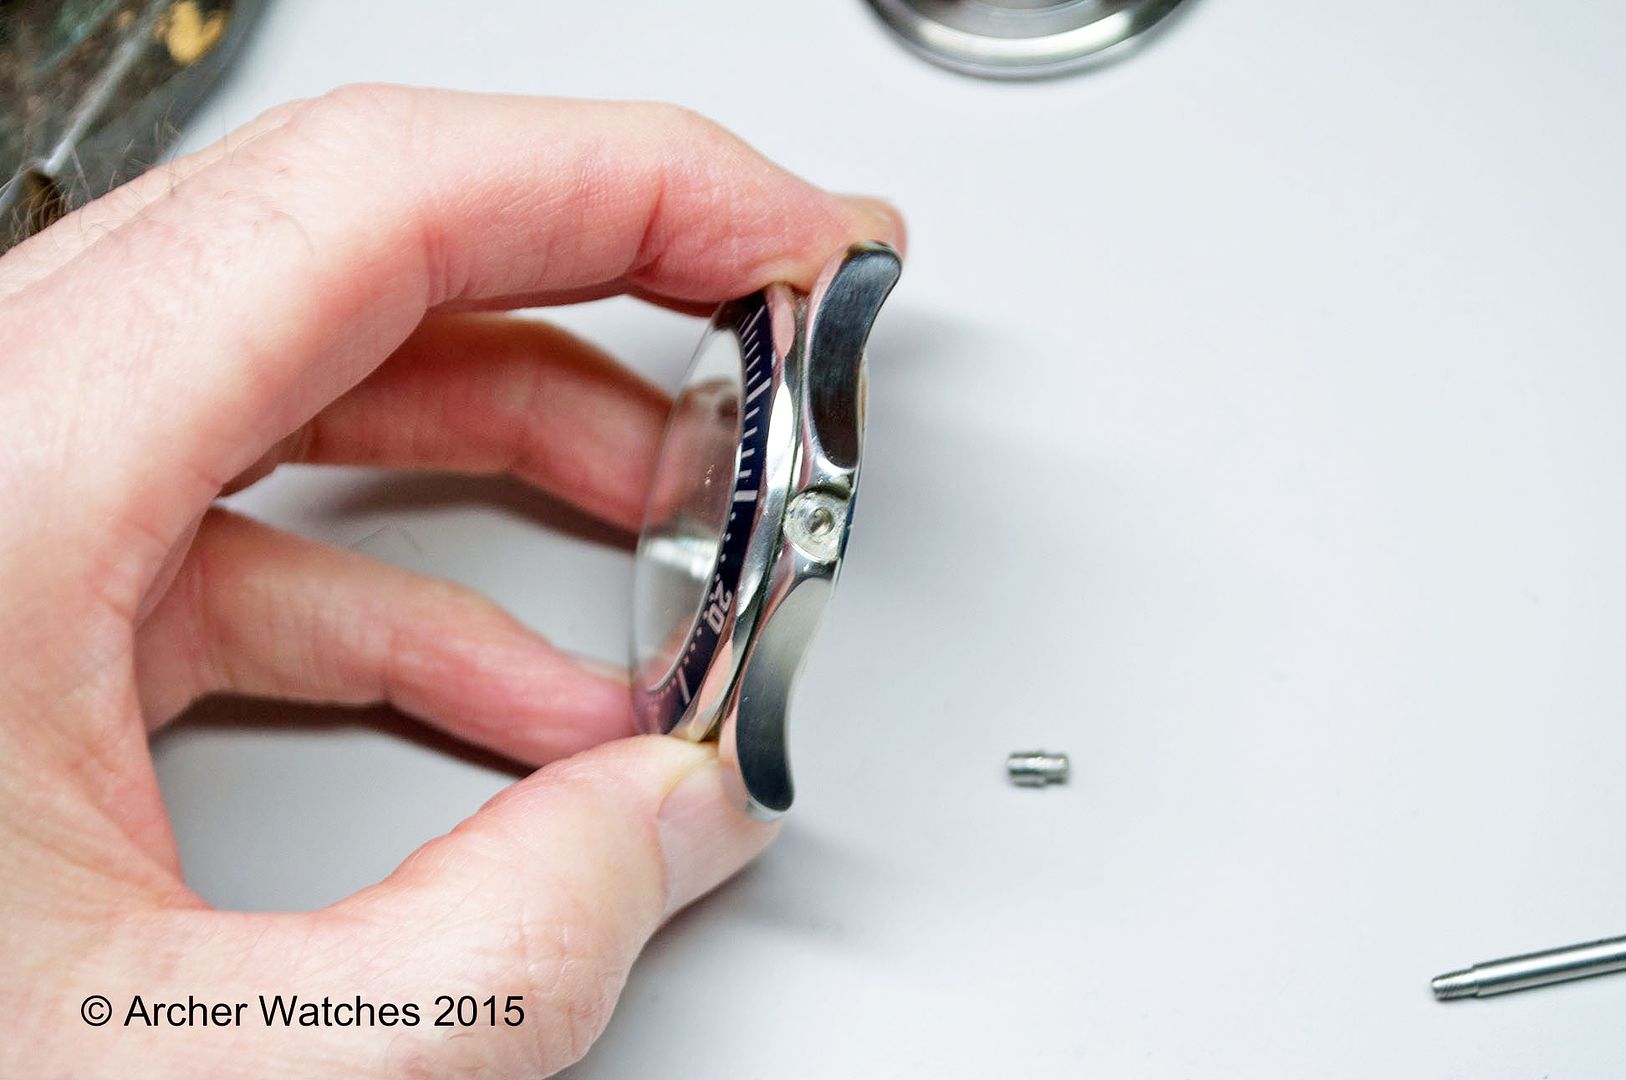
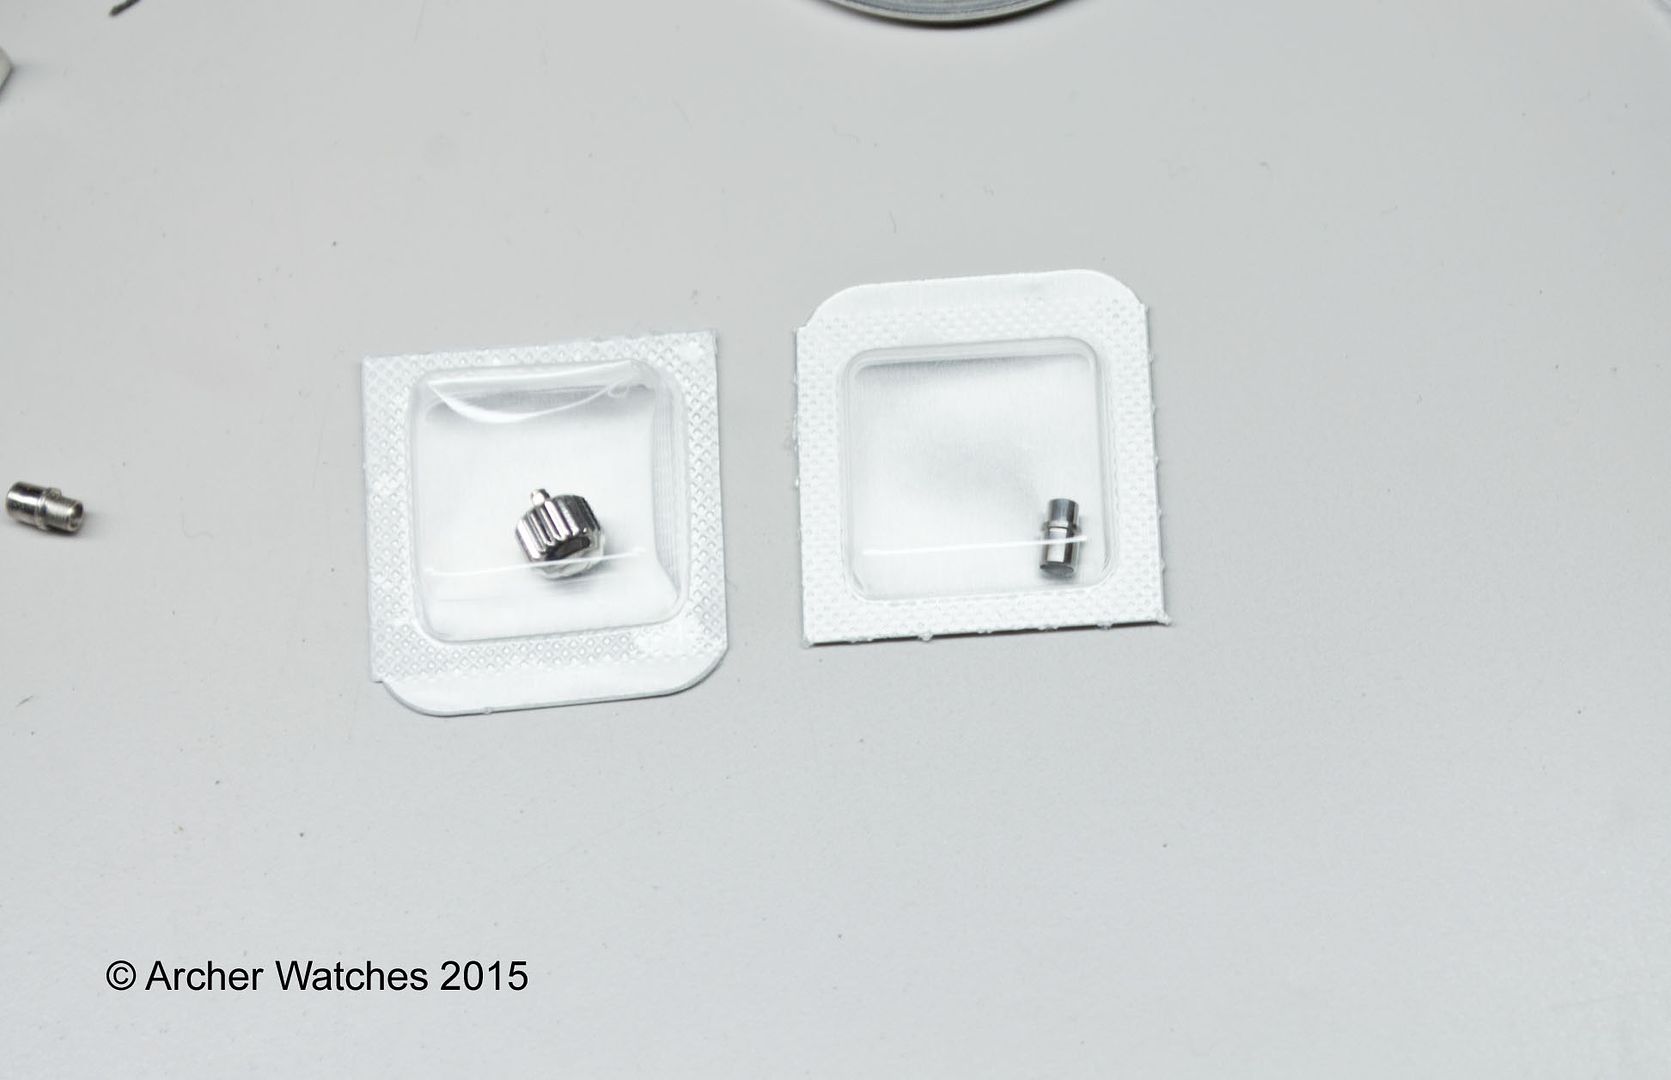
New case tube:
Before the new tube is installed, I apply Loctite 638 retaining compound to the portion of the tube that inserts into the case (this is what is called for in Omega work instructions):
The new tube has now been installed:
Sometimes these tubes go in with a very heavy press fit, so if this press is unable to get the tube all the way in, I often used the an old crown that I place over the tube, and then use my watchmakers hammer with the plastic impact surface, to finish tapping the tube in the rest of the way.
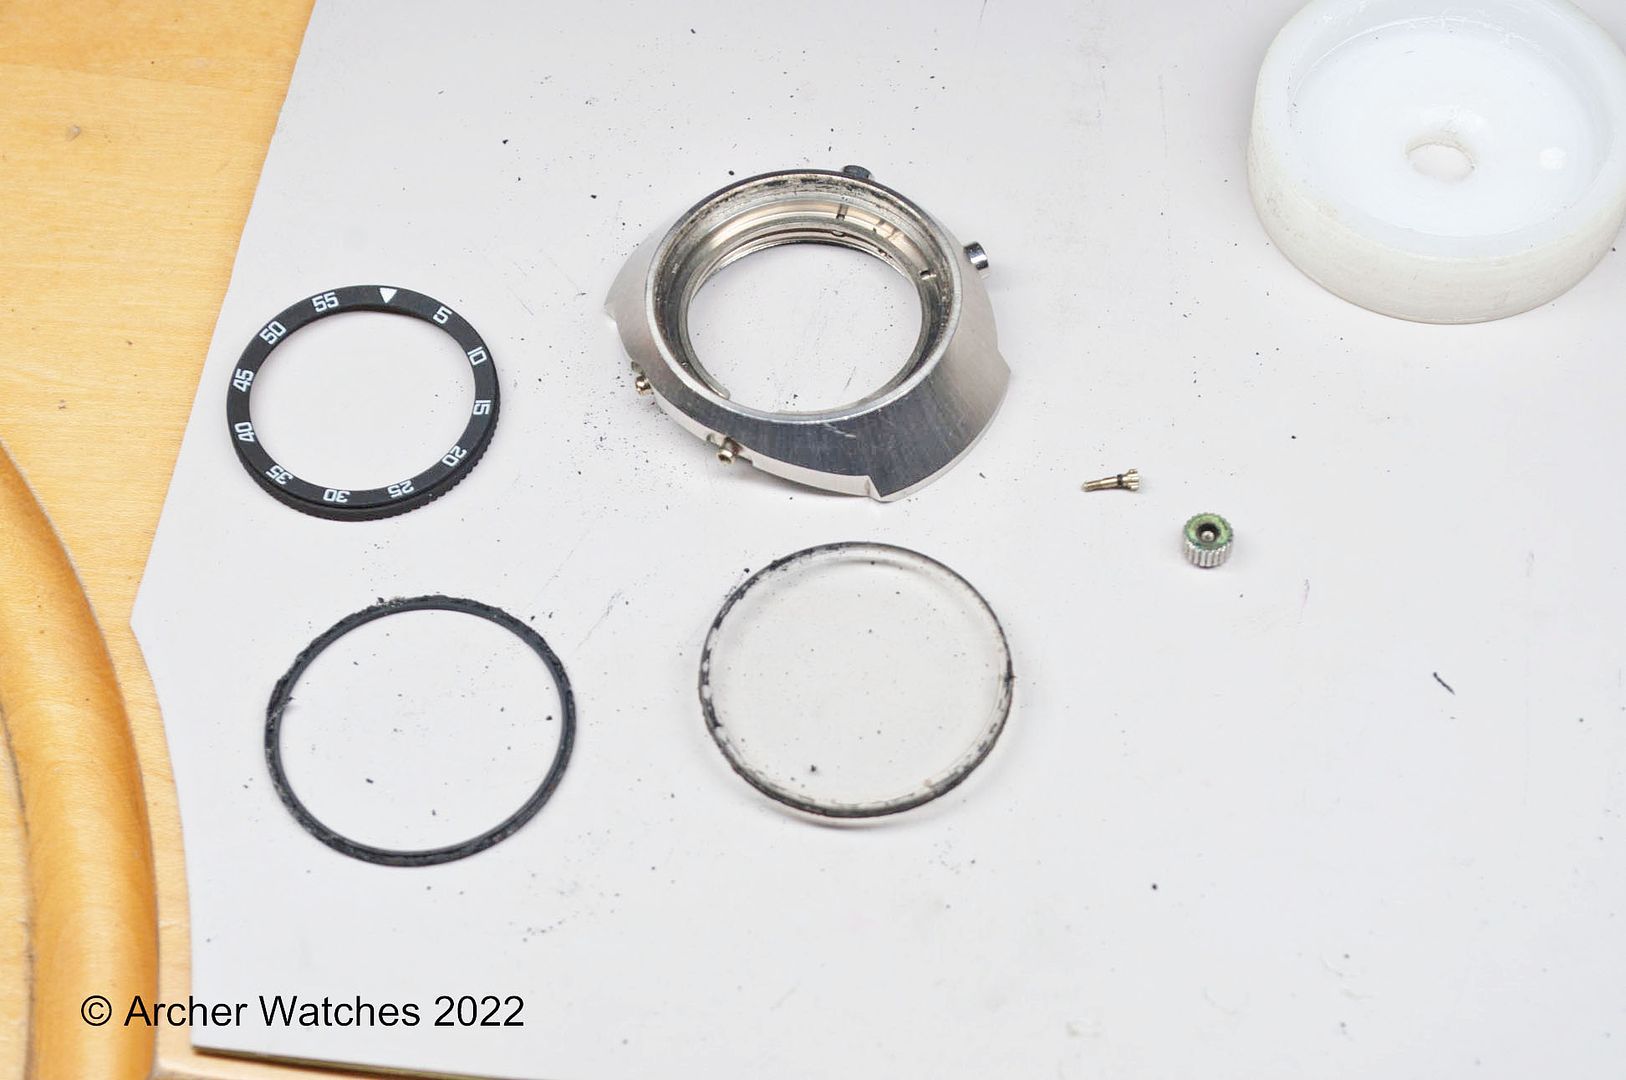
Next let's look at a screw down crown situation, where the case tube is threaded into the case. The first step in this instance is to disassemble the case, because we will need to apply heat to remove the tube:
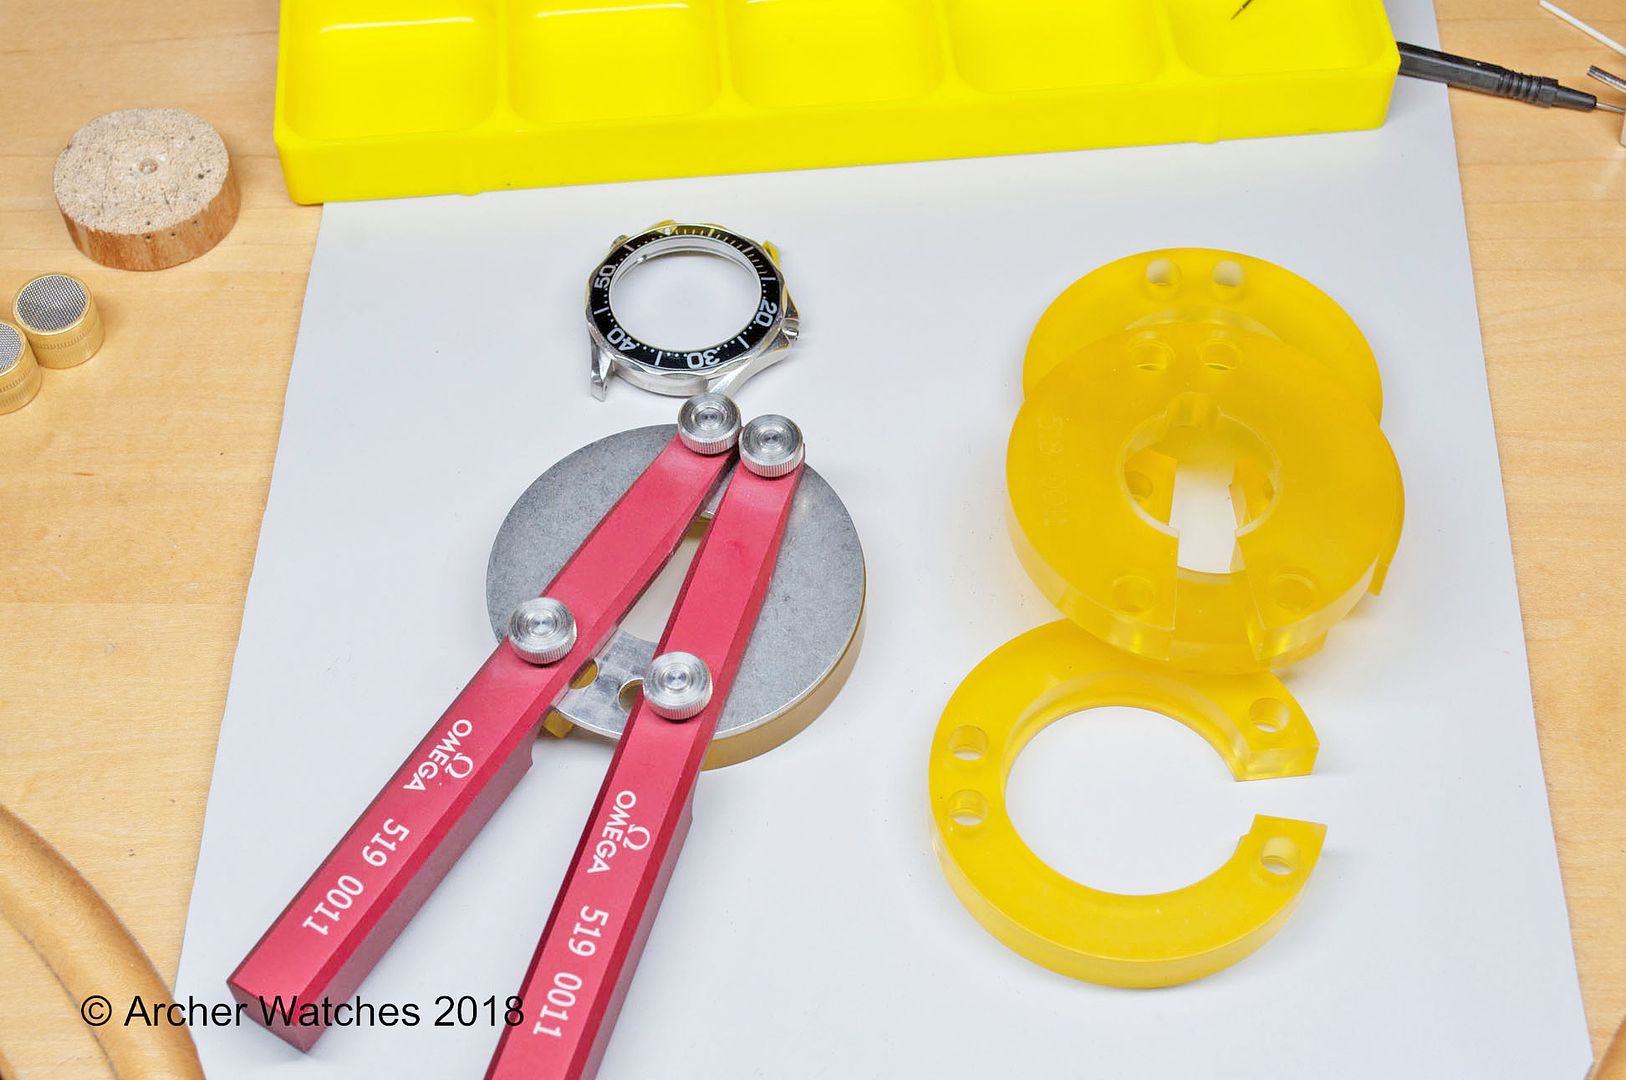
Here I’m using an Omega bezel remover to take the rotating dive bezel off:

Note that prying these bezels off can lead to damage to both the case and bezel, so using a system that more evenly lifts the bezel off is safer.
Next, I press the crystal out, because the seal will possibly be compromised by the heat I’m going to apply to the case:
The case is now ready to have the tube removed:
I use a small torch fueled by butane for this, as I can focus the heat exactly where I want it. The heat will help break the bond of the Loctite thread locking compound that was applied to the threads of the tube at the factory:
The case will get very hot, so care needs to be used so you don’t burn yourself.
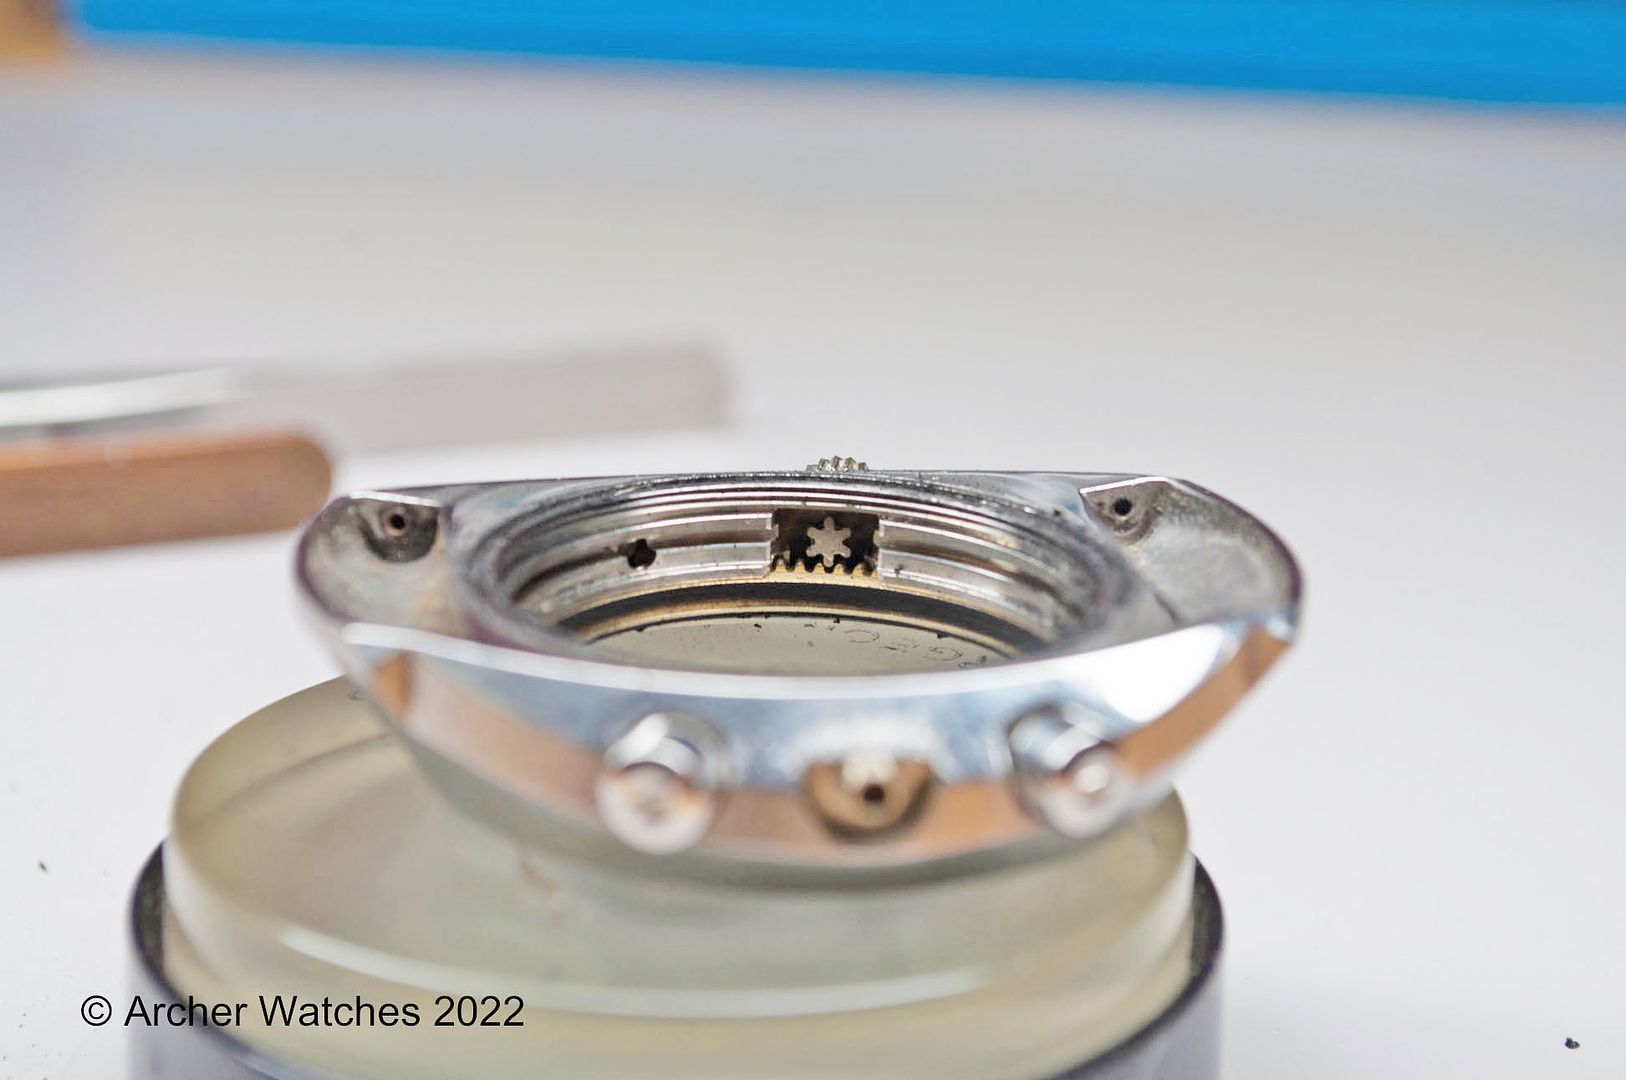
In this instance, the Omega case tube has an octagonal recess machined inside it:
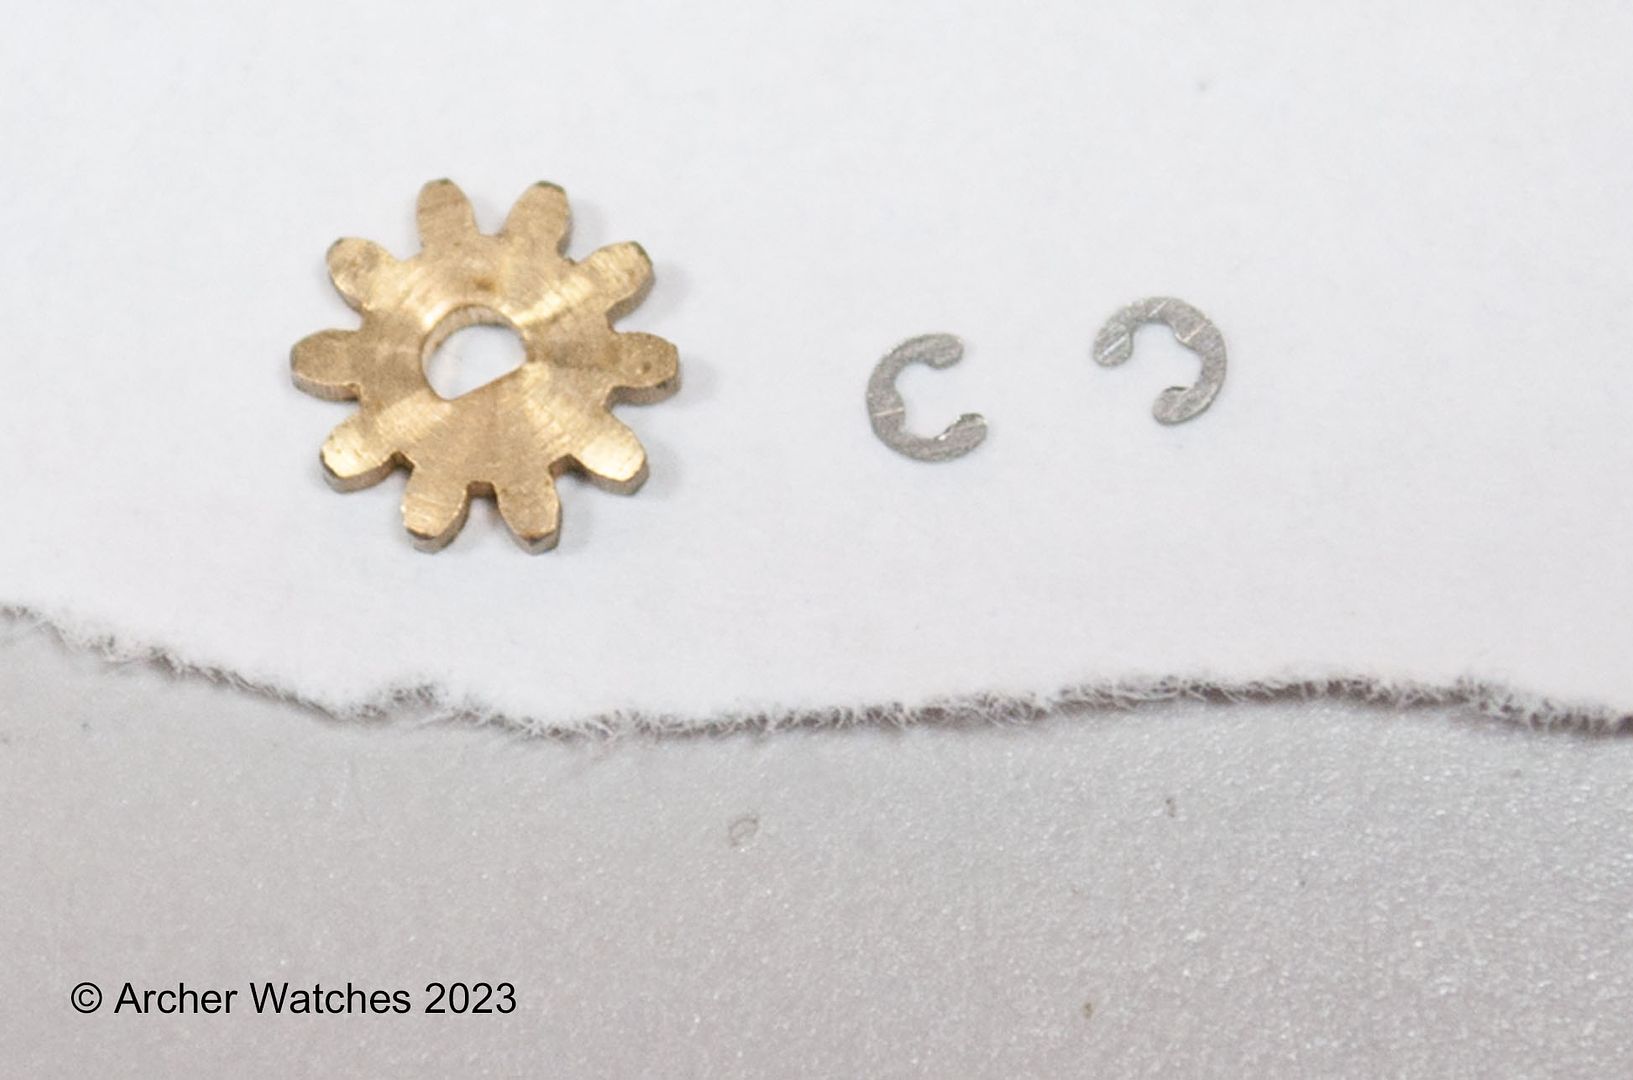
Omega makes a tool to use this to remove and install these tubes, so I use that to turn out the tube:
Now the case can be cleaned, and you should make sure that the threads inside the case are free from any residue from the Loctite. Here is the new case tube:

You will note that in addition to the tube, there is a washer. This is a titanium washer that is installed between the case and the case tube - don’t forget this.
Loctite is again applied to the tube, per Omega work instructions:
The tube is then threaded into the case:
Note that if you are changing a screw down style case tube due to damage, it’s best to change the crown and case tube together.
I will continue with other examples in a subsequent post. If you have any questions, please let me know.
Cheers, Al
.jpg?width=1920&height=1080&fit=bounds)
.jpg?width=1920&height=1080&fit=bounds)
.jpg?width=1920&height=1080&fit=bounds)
.jpg?width=1920&height=1080&fit=bounds)
.jpg?width=1920&height=1080&fit=bounds)
.jpg?width=1920&height=1080&fit=bounds)
.jpg?width=1920&height=1080&fit=bounds)
.jpg?width=1920&height=1080&fit=bounds)
.jpg?width=1920&height=1080&fit=bounds)