Basic watchmaking tips - crystal fitting

Posts
752
Likes
1,288
I am an occasional user too and I have that Horotec screw down press and find it excellent for acrylic and tension ring crystals. I haven't tried it on any other more 'challenging' tasks. I find it very stable and well engineered and positive in use.
 
Posts
12,872
Likes
22,252
I am an occasional user too and I have that Horotec screw down press and find it excellent for acrylic and tension ring crystals. I haven't tried it on any other more 'challenging' tasks. I find it very stable and well engineered and positive in use.

Thanks @size11s Does it work for speedy bezels as well?
 
Posts
12,872
Likes
22,252
I'm not generally a fan of the screw down style, as I prefer a lever style. But it really comes down to how accurately machined the parts are, and if the dies is parallel to the base. I have no experience with this specific model, but I did have a Horotec lever style press that was good for acrylic crystals - not so much for thick dive watch crystals.

Note that the dies on this one are for case backs, so you would have to get a set of tension ring crystal dies.

Thanks Al. Seems a little knowledge can be dangerous.

Do you have any recommendations for a lever press sub £100? Alternatively, if the answer is simply that it’s not possible to get a decent press and dies in that price range, and I’m looking at £400-500, then so be it.
 
Posts
29,111
Likes
75,238
Thanks Al. Seems a little knowledge can be dangerous.

Do you have any recommendations for a lever press sub £100? Alternatively, if the answer is simply that it’s not possible to get a decent press and dies in that price range, and I’m looking at £400-500, then so be it.

None that I am aware of - 100 pounds isn't a lot when it comes to specialty tools like watchmaking gear...
 
Posts
12,872
Likes
22,252
None that I am aware of - 100 pounds isn't a lot when it comes to specialty tools like watchmaking gear...

I thought that might be the case. It seems there’s cheap junk at one end of the spectrum, and professionally grade equipment at the other but little or reasonable quality in the middle.
I’m really only looking at armoured/tension crystals so might give the screw press a go on a couple of cheap watches/crystals.
 
Posts
29,111
Likes
75,238
I thought that might be the case. It seems there’s cheap junk at one end of the spectrum, and professionally grade equipment at the other but little or reasonable quality in the middle.
I’m really only looking at armoured/tension crystals so might give the screw press a go on a couple of cheap watches/crystals.

Let us know how it goes. Just make sure you use the right style of die, and support the case well so the it remains flat during the installation.
 
Posts
792
Likes
915
I have the Horotec press and have used it to install flat sapphire crystals into dive watch cases (new gasket, of course). It does help to loosen and rotate your work as you go; I might remember Al recommending that elsewhere, but I might be rong.

If you see a video of someone installing a sapphire crystal with one of those case closer toys that Harbor Freight sells, I can guarantee you the gasket is not new.
 
Posts
29,111
Likes
75,238
Quick update to this thread - this applies specifically to the Omega Speedmaster Date models (there are many) like this one:


This came in for a full service and some cosmetic work. That included a new bezel requested by the owner, but with these the construction is different that a normal Speedmaster Pro. So first the movement is removed from the case:


Next I use the fixed bezel remover to remove the bezel from the case frame:


This removes the bezel and the crystal - the crystal is pressed into the bezel:


Now much later in the service, and the movement has been serviced, the case frame refinished, and pushers replaced - with the movement mounted in the case frame, you can see that there is no crystal:


There is an O-ring that goes onto the case frame, that seals the bezel and case frame:


New bezel, along with the crystal, and new crystal gasket:


Gasket goes in first, making sure that the internal bevel is facing up to receive the crystal:


The crystal is pressed into the bezel:


Now the bezel and crystal assembly are pressed onto the case:


Done:


So unlike the typical Pro model, the bezel cannot easily be swapped.

Cheers, Al
 
Posts
211
Likes
171
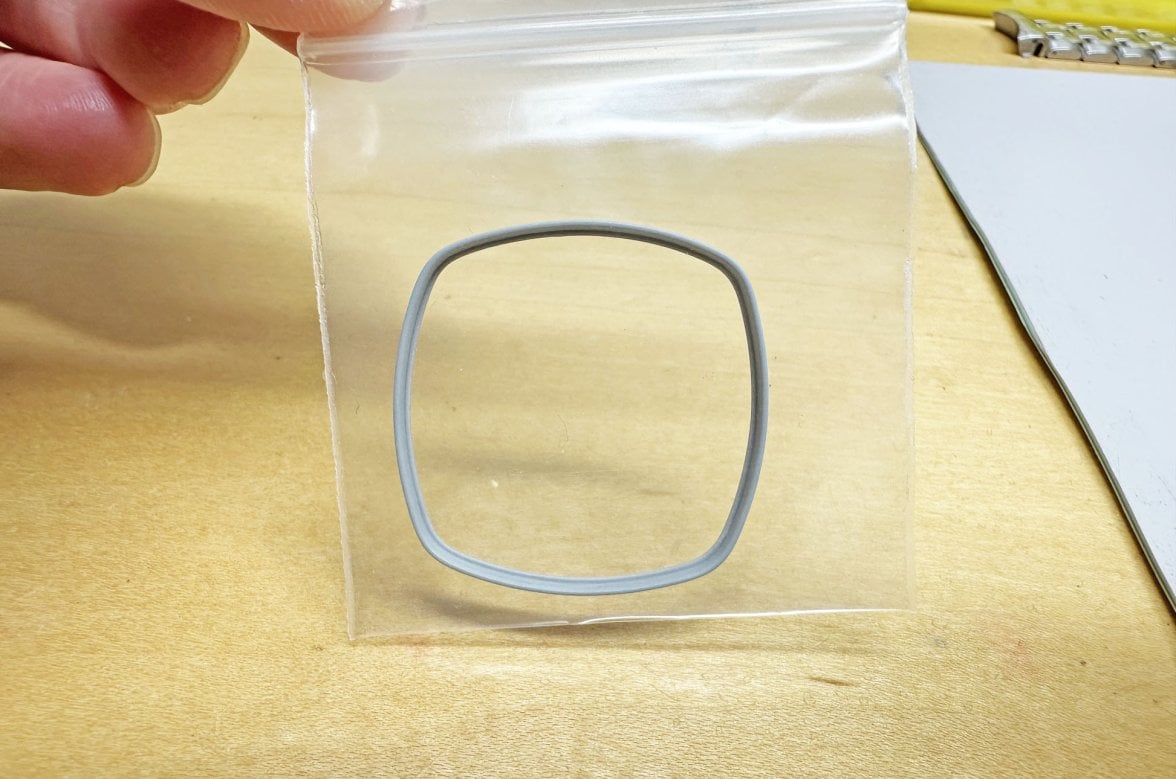
These instructionals are invaluable, no doubt. But sometimes you really have to have experience and talent. I have an Omega 176.005 that I bought without a crystal. It's the type that inserts with a hard plastic seal around it as Al described. It went to 3 different watch makers before I found someone (the 4th) who could successfully install a new crystal and gasket. The first attempt was made by a professional often recommended on these forums (not Al, of course) and ultimately, after a few attempts, his recommendation was to send it to Omega. One thing making it tricky is that the new seals are round while the case and crystal are TV shaped. The gasket is flexible and has to be formed into the case, but I don't believe it sits perfectly against the perimeter of the case recess (before the crystal is installed) as it wants to return to its round shape. I can imagine how that would complicate fitting the crystal. At least 5 crystals were broken before success. Here's the exact culprit:

 
Posts
29,111
Likes
75,238
One thing making it tricky is that the new seals are round while the case and crystal are TV shaped. The gasket is flexible and has to be formed into the case, but I don't believe it sits perfectly against the perimeter of the case recess (before the crystal is installed) as it wants to return to its round shape.

Did you use an Omega crystal gasket? Here's the description...

098EG0030 | L FORM CR GASK 34X34 T1.1 H2.8

The dimensions imply that it is a rectangular seal, rather than round...
 
Posts
211
Likes
171
Actually, the first 3 failed crystal install attempts made by the aforementioned professional were done before I owned it. This is why I bought it without a crystal. The seller recounted the story to me. I later contacted that watchsmith and asked about this. He tersely confirmed the story and told me to send it to Omega. So I don't know what gasket he used. Otto Frei had the gasket for the 176.005 listed as 098EG0028OME-098EG0028. I bought some of those and some crystals and gave them to at least the next guy, who was unsuccessful. I don't recall if the successful watchsmith used my gasket or not, but it seems it was incorrect!
 
Posts
77
Likes
43
This is #10 in my series of basic watchmaking tips - the others can be found in the Watchmaking forum, or by searching on the "Basic watchmaking tips" title.

Fitting crystals in wrist watches is a simple process, but there are several different types of crystals that are fitted in different ways, so I thought a thread to show the differing styles and some procedures would be helpful.

The first thing before fitting any crystal is to make sure that the case that is receiving it is clean and free of debris where the crystal will seat.

I will cover acrylic crystals first, and there are three basic types of crystals that are installed in different ways. The first are the fancy crystals - these are the rectangular crystals found on older watches, and these are primarily glued in place. There are two common glue types used for this - one is a product called GS Hypo Cement - this is a traditional style glue that hardens over time, but stays a little flexible. It’s basically like the old style model airplane glue, so it can be messy to use and creates little strings of glue, so it’s not one I use much really.

I much prefer the UV glues - this glue isn’t nearly as stringy, it’s more fluid coming out of the syringe, and it gives you time to work and do some clean up if any gets on the crystal. The glue is set using sunlight, or if you are in a hurry, you can use a UV lamp. I’m guessing I was out of UV glue when I replaced this crystal:


Note that in addition to acrylic crystals, there are also glass crystals that are of the fancy type that would also be glued in place, and certainly there are round crystals that are glued in also.

The next type of crystal is the compressed style. These are acrylic crystals that are compressed using a tool, then installed in the case, and then released from their compressed state. These crystals do not have tension rings, but will typically have a lip on them that fits into an angled recess in the case.

There are two methods for installing these. One is the common crystal lift you may have seen - this is a clawed device that is used to compress the crystal for installation. Here’s an example with a smaller ladies watch:


You first use the base of the crystal lift to set the crystal in, closing the slide so that the crystal will just lift out:


Then the lift is placed over the crystal, and closed so the crystal is picked up - the base and use of the slide ensures that there is a small amount of the crystal that is sticking out below the jaws of the lift when you pick the crystal up:


The crystal is inserted into the case, and the lift is released:


Another method of installing this type of crystal, is to use the foot operated press that came with the old style crystal cabinets.

This one is on the top of my old GS cabinet, and you select the correct die for the crystal diameter, and the correct plunger, and place the crystal in the die upside down:


The case is then placed on top of the crystal, again upside down, and the foot pedal is used to bring the plunger down. This will force the crystal down into the die, shrinking the outside diameter of the crystal - the case is lowered onto the crystal, and the foot pedal released:


Note that this system also comes in a bench style press that is hand operated, rather than foot operated. Also note that this style doesn’t work with all cases, so only applies to watches where the case or bezel can have the plunger go through them, so some front loading cases you cannot use this type of system with.

Before I move onto the tension ring (armored) style crystals, I wanted to say that there are plenty of other designs out there. One I come across is from the WWW pattern watches - this one is an IWC, and the crystal is held in the case by a threaded locking ring from the inside:


To loosen this ring, I modified the case back opener I use, so ground away the sides of the prongs so that they cleared the inside of the case:


I can then use this to unscrew or screw in the locking ring for the crystal:


From there, the crystal just lifts out:


So just be aware that there are other styles that you may come across that I don’t cover here, but my focus is on the most common styles.

Now to the tension ring or armored crystals. These are crystals where the silver, gold, red gold, black coloured metal ring sits inside the lower part of the crystal, and is integral to that crystal being held into the case. These crystals need the tension ring to lock them into the case. (There are some crystals that look similar, called reflector ring crystals, but on those the ring is not necessarily holding the crystal in place.)

Installing the tension ring crystal requires a press. I use a Bergeon 6173 rack press, which you probably don’t need for acrylic crystals, but when we get to other types it is more critical. I’ve used other presses, but this one has excellent flatness of the dies and rigidity needed for installing crystals.

To install the crystal, the case frame needs good and level support, so I usually find a die that fits snugly inside the case for the bottom. The top die should be for installing this specific type of crystal, so it will have a chamfer on the inside, like this one:


You install the two dies in the press, place the case frame on the lower die, and the crystal on the case frame:


You then press the crystal in, usually in one press - you may hear a snap when it installs:


When selecting the upper die that is going to press on the crystal, I tend to use a die of roughly the same diameter at the crystal, so for a Speedmaster crystal that is 34.13 mm in diameter, I'll use a 34 mm die.

The next style are crystals that are inserted into a case that has some sort of hard plastic seal. These can be mineral crystals, or sapphire crystals. Here I’ll use a Seamaster sapphire crystal installation to illustrate.


The first thing I’ll say some may dispute, but this is how I was taught and how Omega views this - the hard plastic seals that are used for crystals are one time use only items. Now you can remove a crystal, and then press it back in using the same seal, but that seal will never hold as firmly as it did when it was used the first time. You may get away with it, but you may not, so I always default to a new seal. To show how this can be problematic, here is another Seamaster I serviced - I didn’t remove the crystal in this watch, so I left the seal intact that it came with. When I pressure tested the watch, the crystal leaked, building up pressure inside the case. When the pressure inside the test chamber was released, the pressure inside the watch case popped the crystal out of the case:


Once I replaced the seal, the watch passed the pressure testing fine, so it’s very likely that someone had removed the crystal, and used the seal over again.

The seal almost always goes into the case first, and then the crystal is pressed in after. This is opposite to what you do with these hard plastic seals on a case back - you typically put the seal on the case back, then press both the seal and case back into the case. The seals will typically have a chamfer on it, that helps get the crystal started into the case, like this:


The crystal is then placed on top of the case, and then you press it in:


My advice here is to proceed slowly, and to turn the case/crystal on the lower die as you press, to make sure it’s going in evenly. This can be tricky to get right, and sometimes the crystal will not go in straight, and the seal will get pinched under the crystal - that looks like this:


This is one reason that when I am buying a new crystal seal, I always buy them in 3’s, just in case the first doesn’t go well.

When the crystal is fully seated, let it sit for a good 20 minutes. The seals will often bounce back a bit, and push the crystal up in the case, so they often need reseating after a time. Once the case has sat for a while, go back and press the crystal in again, like this:


You can hear the very obvious “click” that indicates that the crystal has been seated again fully in the case. Of course you should always check this - here is a watch that came in like this, with the crystal not fully seated:


I removed the crystal, and installed it again with a new seal, and it looked like this after:


Now these are the common everyday methods that are out there, but there are no doubt exceptions to these as well. I will cover a couple of those exceptions with Omegas in mind, in a subsequent post.

As always, questions are welcome.

Cheers, Al
again very helpfull thank you.
 
Posts
29,111
Likes
75,238
These instructionals are invaluable, no doubt. But sometimes you really have to have experience and talent. I have an Omega 176.005 that I bought without a crystal. It's the type that inserts with a hard plastic seal around it as Al described. It went to 3 different watch makers before I found someone (the 4th) who could successfully install a new crystal and gasket. The first attempt was made by a professional often recommended on these forums (not Al, of course) and ultimately, after a few attempts, his recommendation was to send it to Omega. One thing making it tricky is that the new seals are round while the case and crystal are TV shaped. The gasket is flexible and has to be formed into the case, but I don't believe it sits perfectly against the perimeter of the case recess (before the crystal is installed) as it wants to return to its round shape. I can imagine how that would complicate fitting the crystal. At least 5 crystals were broken before success.

Did you use an Omega crystal gasket? Here's the description...

098EG0030 | L FORM CR GASK 34X34 T1.1 H2.8

The dimensions imply that it is a rectangular seal, rather than round...

@Lancaster

Just as a follow-up to this, I added one of the correct seals that Omega calls for to a recent order, just to see what it looked like...


So this provides us with a couple of valuable lessons. One is that using the correct seal can save you 5 broken crystals. The other is that using a watchmaker who has the right parts access is key to #1.

Cheers, Al
 
Posts
7,519
Likes
13,895
Seems odd that none of the first three repairers could intuit that if the crystal was shaped the correct gasket would be too. Instead they kept trying to use a round gasket, I suppose because they didn't have access to the genuine Omega gasket. But where did the unending supply of crystals come from?
 
Posts
29
Likes
15
Had the crystal pop out of the exibition back.
Does the crystal "sandwich" the seal between the case back recess edge and the crystal edge?
 
Posts
29,111
Likes
75,238
Had the crystal pop out of the exibition back.
Does the crystal "sandwich" the seal between the case back recess edge and the crystal edge?

Yes, the seal goes between the case back recess and the outside diameter of the crystal. It's basically like installing the front crystal on a dive watch. Once that hard plastic (usually grey) seal has been used once, you will need a new one.
 
Posts
29
Likes
15
Yes, the seal goes between the case back recess and the outside diameter of the crystal. It's basically like installing the front crystal on a dive watch. Once that hard plastic (usually grey) seal has been used once, you will need a new one.
Thank you. I used this case for a eta 2891-a9 movement. Hopefully i can put it in a proper case eventually.
Being the case is unknown, do I measure the bezel groove diameter or crystal diameter?