Forums Latest Members

On My Bench - Seiko 7A28-7039

  1. Archer Omega Qualified Watchmaker Nov 10, 2019

    Posts
    26,442
    Likes
    65,464
    Yes, and most material suppliers used to carry the fiberglass "scratch" pens. I don't use them myself - never had the need to, and note that as you use them, the fiberglass breaks down, leaving very tiny particles around. These can be inhaled, so I would advise caution when using this type of pen, in particular when using magnification and breathing directly over the work...

    For my ultrasonic tank used for cases and bracelets, I use Mr. Clean diluted with water - does the job well.
     
    janice&fred and Deafboy like this.
  2. Canuck Nov 10, 2019

    Posts
    13,468
    Likes
    37,960
    Watch material supply houses carry them.
     
    Deafboy likes this.
  3. JimInOz Melbourne Australia Nov 10, 2019

    Posts
    15,476
    Likes
    32,329
    Thanks Al, I'm aware of their fragility, and their attraction to each other, and anything else they can jump onto. I handle them like herding cats, one at a time and then back into their individual plastic cells.

    As these had attracted minute metal particles, I cleaned them using a pegwood stick, bronze tweezers and ...................... RODICO! :eek:. However, after all the parts had been cleaned I used pithwood to remove any residue.

    I don't have any specific quartz oil.

    The tech guide calls out Silicone for seals, Moebius A for most pivots and Seiko Oil S-6 for the switch levers and the centre wheel.

    My watch lubes are as follows:

    Moebius 9010 (SYNT A LUBE)
    Moebius 9104 (SYNT-HP1300)
    Moebius 9415
    Moebius 9501
    Moebius 9504
    Moebius 8200
    Moebius 8217
    Seiko TSF-451 (Silicon)

    I was going to use 9010 on the jewel/bush pivots for all wheels (maybe 9104 on the centre wheel and pinion), 9501 on metal to metal parts (setting lever etc) and Silicon on metal to plastic sliding parts.

    Do you think this is acceptable or should I get some quartz specific oil (and why?).
     
  4. JimInOz Melbourne Australia Nov 10, 2019

    Posts
    15,476
    Likes
    32,329
    The plate came up nicely using an ultrasonic brush and watch cleaner before the US bath. I'll have to order one and try it out, but as Al noted, they can produce minute fibres so I'll be doing in in front of my fume hood (milk container, bottom removed and hooked up to my shop vac :D).
     
  5. jaguar11 Nov 11, 2019

    Posts
    2,696
    Likes
    17,091
    As usual this is a great read! Thank you for posting.
     
    Sidnos likes this.
  6. Archer Omega Qualified Watchmaker Nov 11, 2019

    Posts
    26,442
    Likes
    65,464
    This is a rare exception where the use of Rodico would be okay, in particular if you clean it after.

    Unlike a mechanical movement, there's no load on the pivots most of the time in a quartz watch, so the goal here is to use a light weight oil that won't cause additional drag. No idea what the specifics of this movement are, but high drag will lead to high consumption, and shorter battery life.

    Here's a chart of various oil viscosities:

    ovt5.jpg

    Moebius quartz oil is also known as 9000, so you can see that the viscosity is 100 cST, where 9010 is 150 cST. So 9010 is definitely a heavier oil than what I would use, but unless you are doing a lot of quartz work the 9000 may not be worth buying.

    Cheers, Al
     
    inchpincher, Deafboy and Shabbaz like this.
  7. Larry S Color Commentator for the Hyperbole. Nov 11, 2019

    Posts
    12,526
    Likes
    49,719
    What I love about this is the care and attn. given to a Seiko quartz movement that is in itself lovely. Can’t wait to see the reassembly pics.
     
    Sidnos, Yak1 and michael22 like this.
  8. JimInOz Melbourne Australia Nov 15, 2019

    Posts
    15,476
    Likes
    32,329
    Dear me........almost a week away from this job. Amazing how other issues in life can get in the way, I must learn to ignore them.

    Following oiling guidance from Al I ordered some quartz oil (only a day lost waiting for delivery) but before I could get back to it, my mate (whose incapacitated) needed a storage solution for his kayak, so another day lost in travelling over there, organising all the parts etc. Then another day lost as we had lunch in the city with friends but I eventually managed to get back to work.

    With the bare plate ready, the rotor stators were put on their respective posts, minute wheel and centre wheel/pinion dropped in and then the setting parts were lubricated and fitted. Only one spring involved and it was quite easy to set it on the plastic plate. So, stators (hard to see here) crown/stem and all setting parts in place.

    SettingParts.JPG

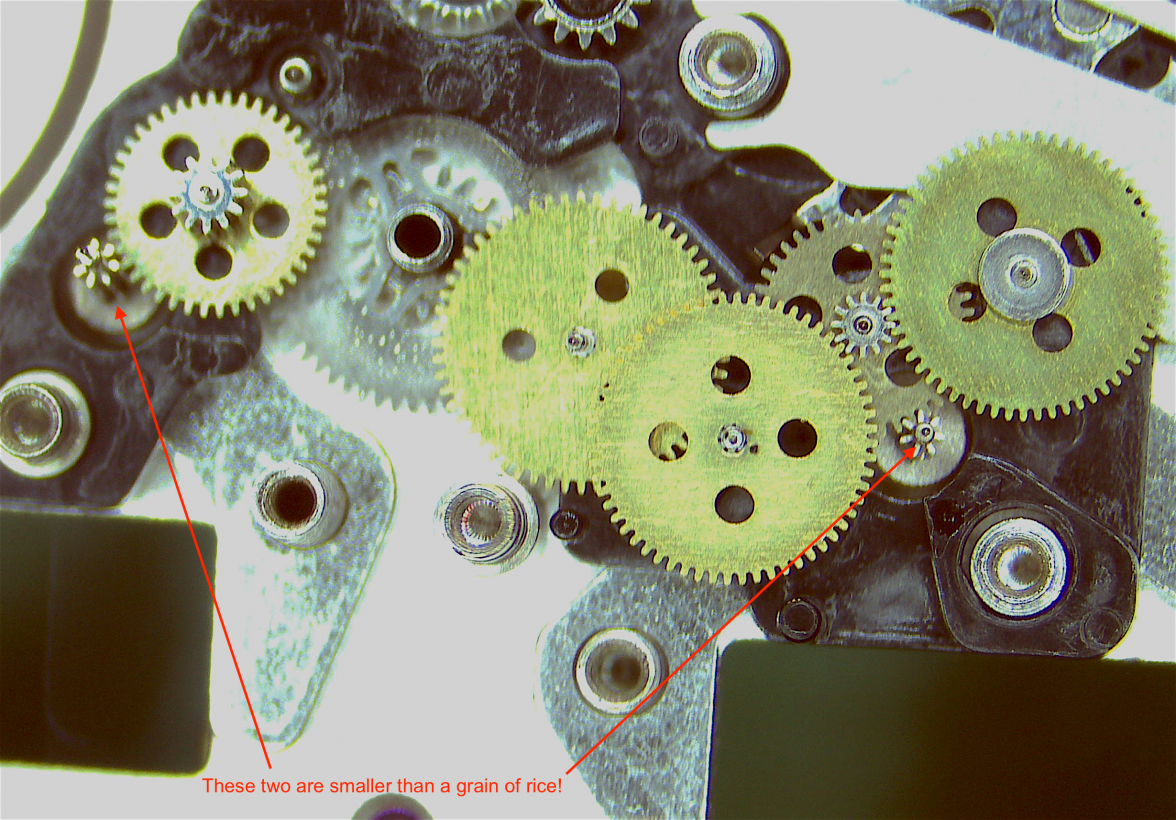
    Then the fun part started, assembling the gear trains. The main one is a PITA, there are ten wheels/rotors and getting them all aligned (with the two rotors being magnetic) is a real test of patience. This is a shot of the train after I had removed the bridge. Those wheels are TINY!

    MainTrain.png

    After much cursing at tiny parts under my breath, a couple of "get up and walk away" breaks I had the main bridge on without crushing anything. The other three bridges followed quickly, some of the wheels needed to be oiled before installation and being so small made it a bit of a challenge not to get too much oil on them, all went fine though.

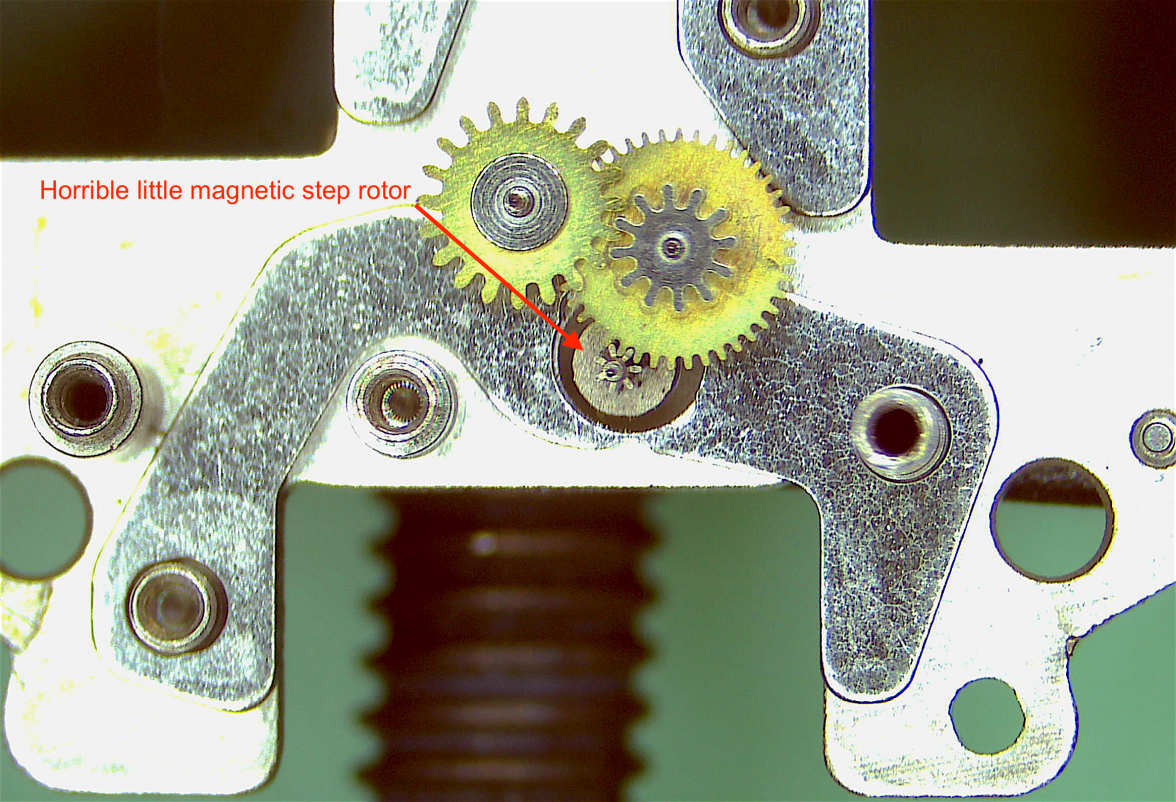
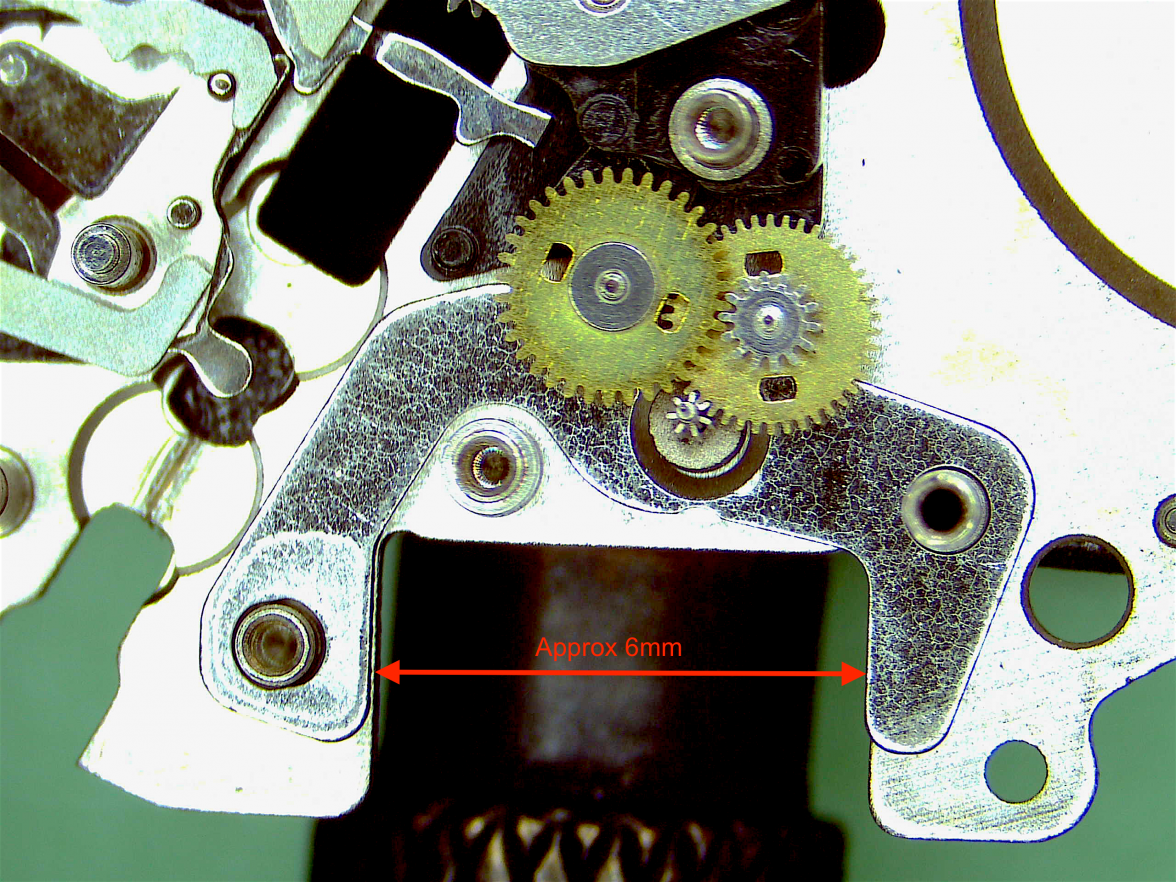
    A couple of shots of the other gear trains so you can see how tiny they are.

    StatorD.png

    The gap in the rotor stators is only about 5 or 6mm.

    StatorC.png

    It was a real sense of satisfaction getting them all nailed down. Next step was to fit the coil blocks, delicate copper wire windings are thinner than a human hair so very careful picking them up from their temporary home and fitting them on the plate (in their correct locations!).

    FittingCoilBlocks.JPG

    The main plastic spacer could then be put on, followed by the circuit block (or rather the "circuit film"). Lastly, the main cover plate and battery parts and the movement was back in one piece again. The old battery was fitted and the movement checked visually to ensure it was working.

    So here we are, getting close. The next step is to fit the dial side parts, dial and hands.
     
  9. michael22 Nov 15, 2019

    Posts
    1,790
    Likes
    1,897
    Why are some rotors magnetic?
     
  10. JimInOz Melbourne Australia Nov 16, 2019

    Posts
    15,476
    Likes
    32,329
    Together with the stator and the coil, they make up a miniature electric stepper motor. Pulses in the coil initiated by the circuitry make the rotor rotate or pulse, in most cases one pulse per second.
     
    Schmoo2k, Larry S and michael22 like this.
  11. Archer Omega Qualified Watchmaker Nov 16, 2019

    Posts
    26,442
    Likes
    65,464
    Yep...I remember the first time I did a quartz chronograph I was amazed at how many pivots had to be lined up under one bridge. I don't end up servicing a lot of quartz movements, but this one from way back comes to mind...an ETA...3 rotors, 10 pivots total, and of course the 4 posts as well, so 14 things have to be lined up properly to make this go on. Yes they are a pain...but after this a bridge with 3 or 4 pivots seems easy! :)

    [​IMG]
     
    Caliber561, Eve, omegaswisst and 3 others like this.
  12. Larry S Color Commentator for the Hyperbole. Nov 16, 2019

    Posts
    12,526
    Likes
    49,719
    I hope this thread puts to rest the notion that somehow watches with good quartz movements like these are somehow lesser watches. Makes my jones for a 9F even stronger.
     
  13. Deafboy His Holiness Puer Surdus Nov 16, 2019

    Posts
    2,181
    Likes
    6,142
    When I serviced my Omega Polaris, I remember not only how small the gears were small but also how thin. To pick them up tweezers have to be in perfect shape and one has to be extra careful so that they do not fly off from the tip of the tweezers.
     
  14. JimInOz Melbourne Australia Nov 18, 2019

    Posts
    15,476
    Likes
    32,329
    Had some spare time yesterday so I took the opportunity to fit the crystal to the bezel, and then fit that to the case, so now the case is all complete and just the pushers and crown/stem to be done. All seems to be going well.

    CaseTogether.JPG

    But then!

    So annoyed!

    :mad:

    I removed the O rings from the pushers and they were so old that one split, one broke into pieces and one actually chipped off.

    I took some microscope pics to show the before and after of the pushers, and the program showed images being taken, but after I'd finished everything and tidied up I went to look at them in the image folder but NOTHING!

    Aaaaaaargh, total waste of time so no pics for you.

    However, with the pushers cleaned up in the US bath and new O rings lubricated and fitted, and the pushers fitted to the case I've calmed down a bit.

    Next job will be dial and hands but as I spent the morning trimming the hedge, blasting the patio and erecting the shade sails for summer, I'm beat, so tomorrow for them.
     
    verithingeoff and omegaswisst like this.
  15. Deafboy His Holiness Puer Surdus Nov 19, 2019

    Posts
    2,181
    Likes
    6,142
    It's ok, your vivid description of the o-rings make the pictures redundant.
    Though I wonder if images in fact ended up in another folder.
     
  16. JimInOz Melbourne Australia Nov 19, 2019

    Posts
    15,476
    Likes
    32,329
    Thought that too, but an hour long search of all patterns turned up nothing. I suspect it was a problem with the software after I changed a setting after opening it.
    From now on I will double check before photographing important stuff.
     
  17. JimInOz Melbourne Australia Nov 20, 2019

    Posts
    15,476
    Likes
    32,329
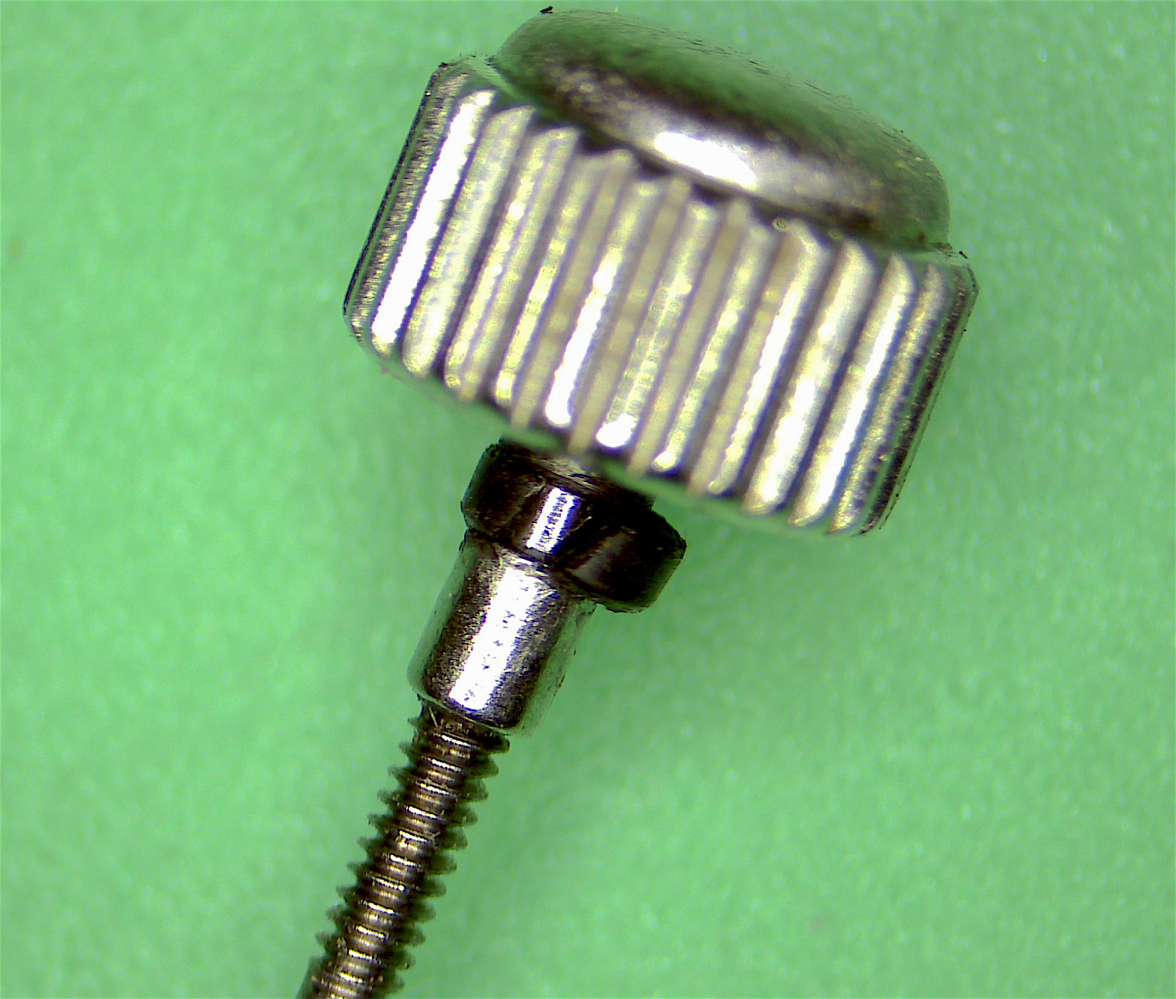
    One of the last things to be fixed/cleaned is the crown/stem assembly. It got delayed as I was waiting for new seals and as they've arrived I can take the old one off, clean the bits and fit the new seal.

    This time I checked my microscope setup to make sure the images got saved!

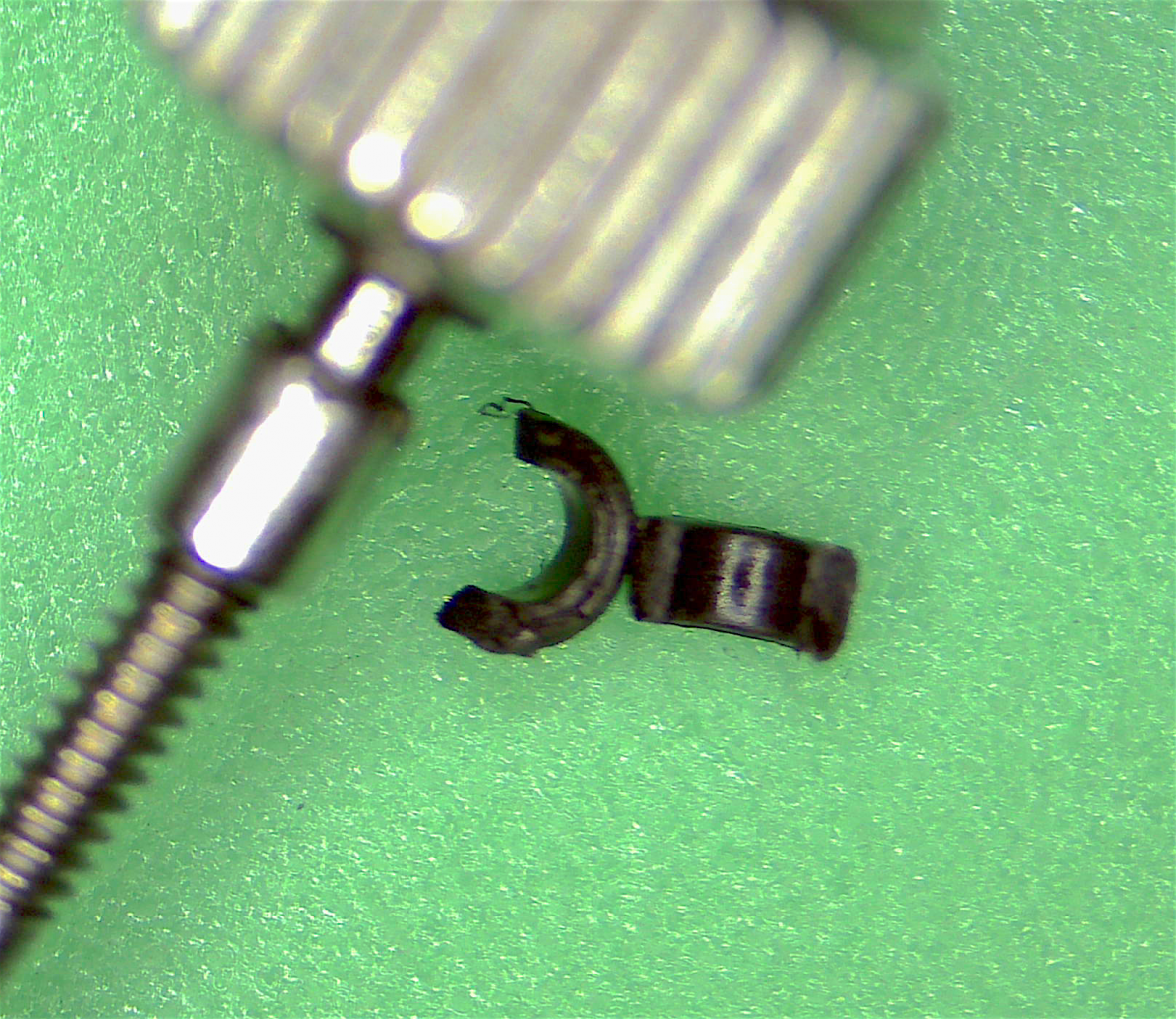
    Here is the stem seal, it was brittle and hard and split like the pusher seals did.

    CrownSealSplit.png

    Then it split in two it was so brittle.

    CrownSealBits.png

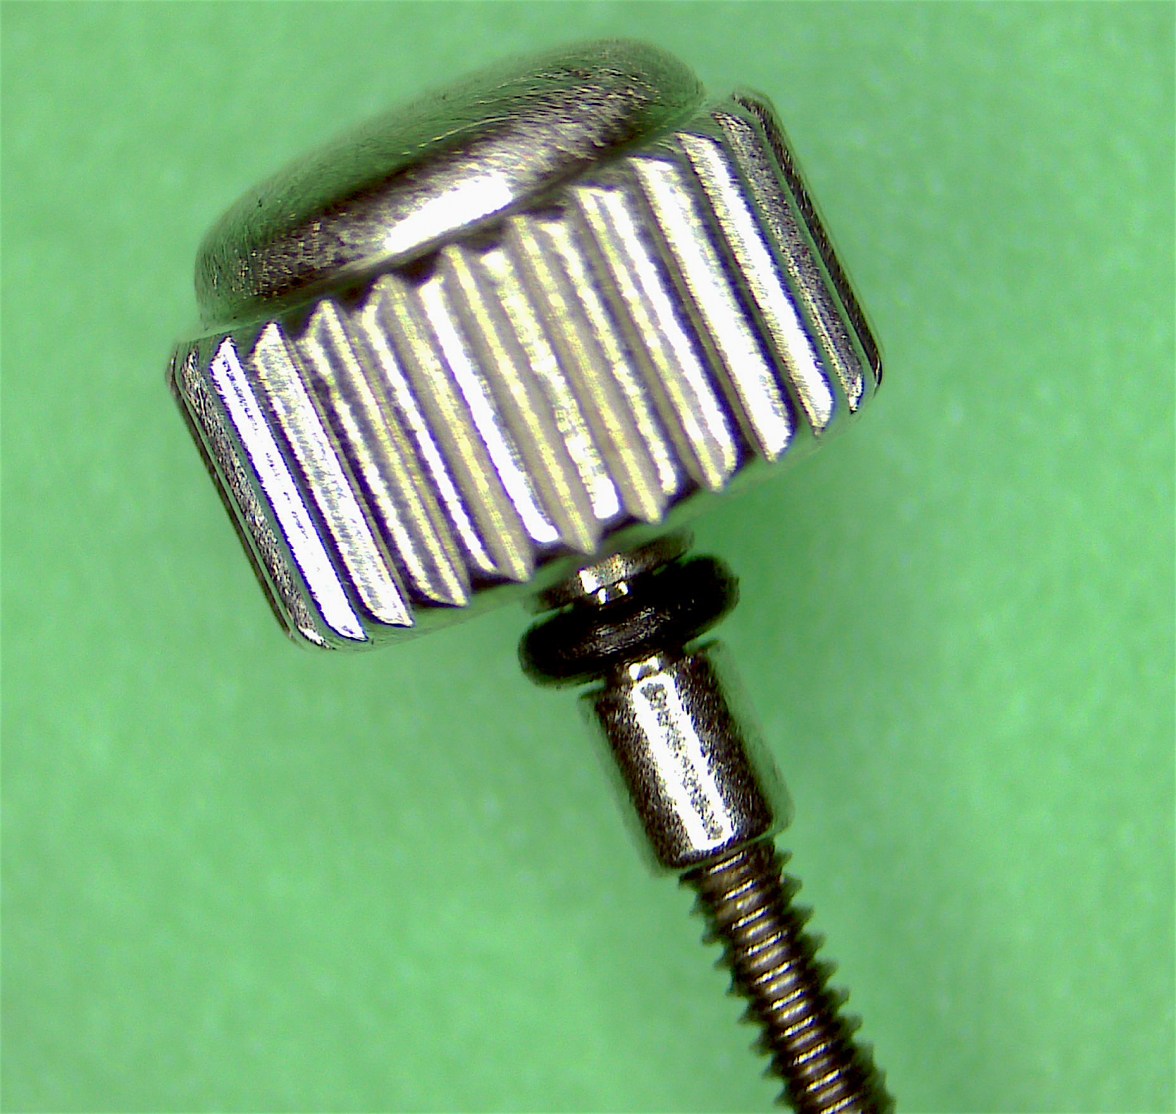
    After cleaning, a new seal was lubricated and fitted. Much nicer!

    CrownNewSeal.png
     
  18. JimInOz Melbourne Australia Nov 20, 2019

    Posts
    15,476
    Likes
    32,329
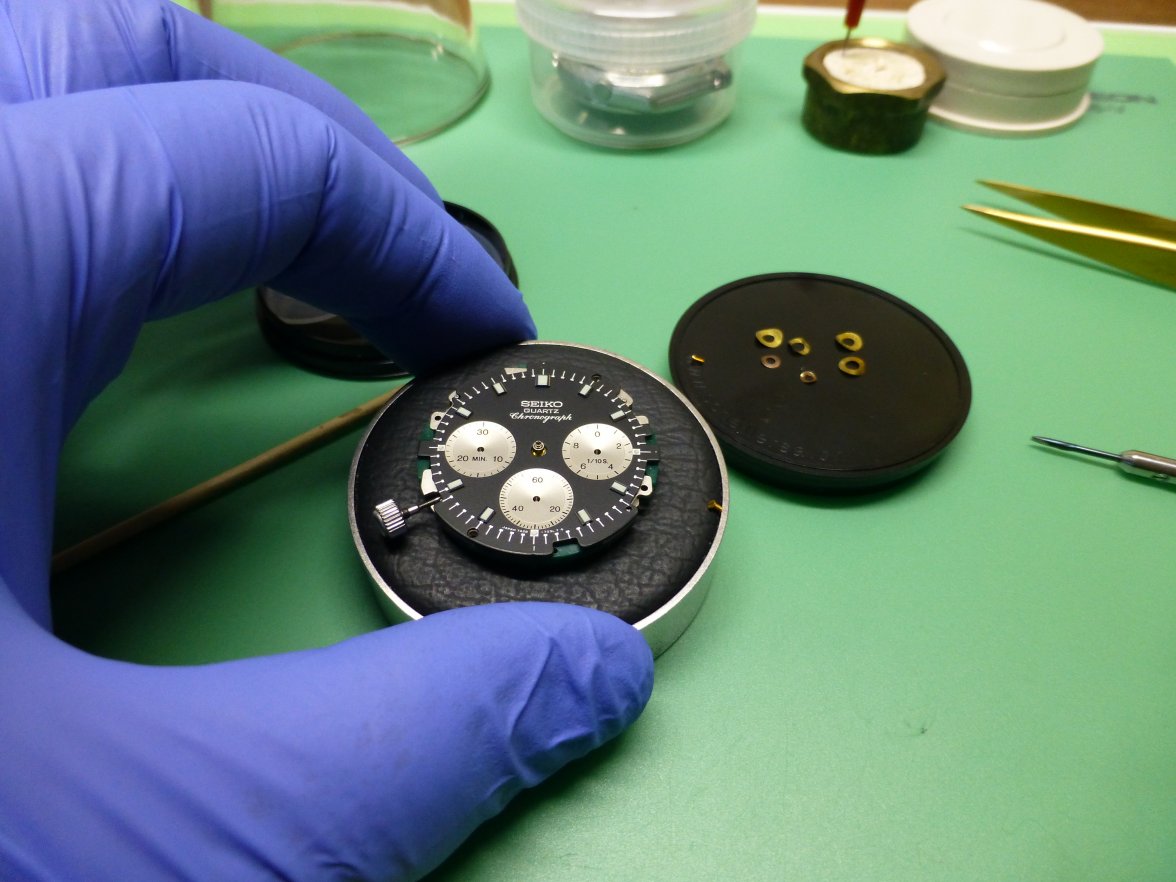
    Dial and hands came next. First the hour wheel was fitted and checked to make sure it engaged properly before seating it. I managed to find a suitable dial washer in my junk box and fitted that and then time for the dial. Here you can see the small dial screws, I'm glad the weren/t and smaller!

    DialFitting.JPG

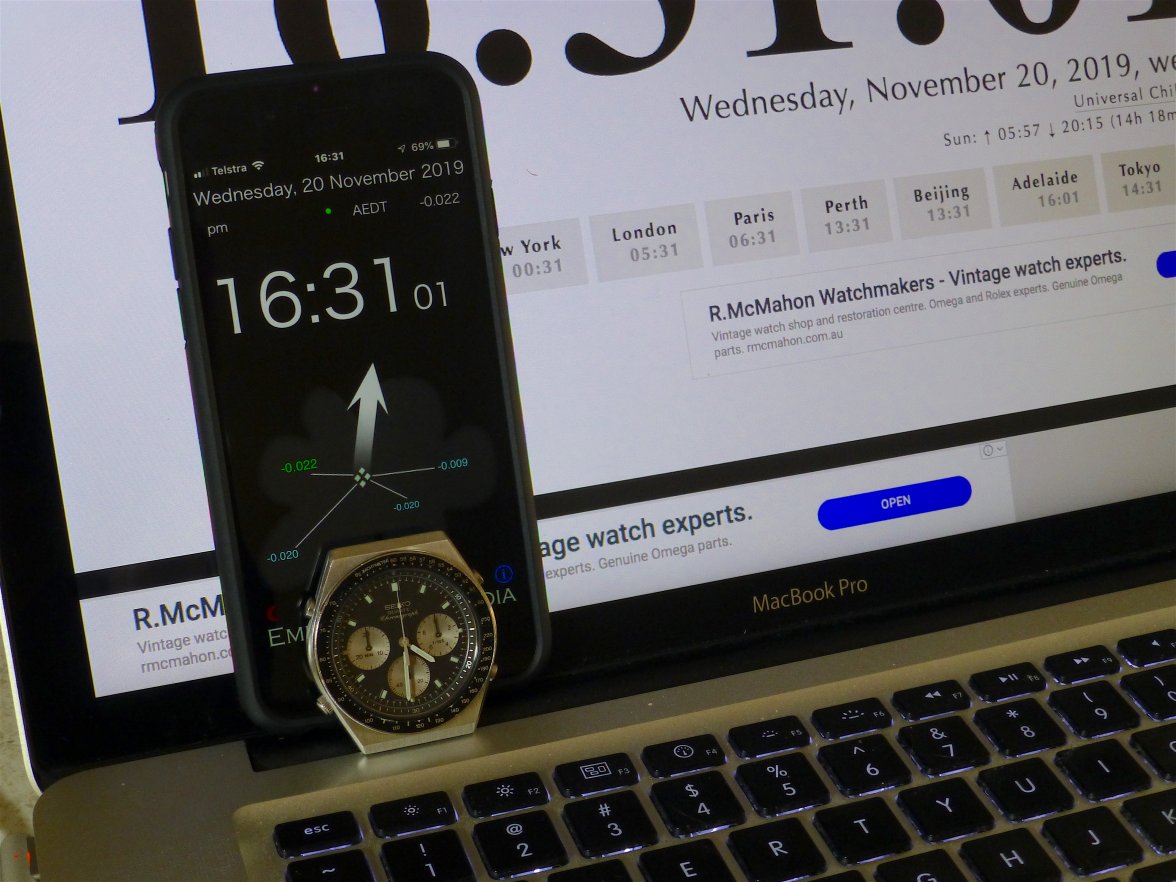
    Then it was hand fitting. Sorry, no interesting pics, I had to concentrate too much. Fitting the chrono seconds hand was a chore because you can't lock it like a mechanical one and due to the play in the magnetic rotor getting it in just the right spot as took two tries, however it all came out well, all cased up and now doing some timing checks.

    TimeSetting.JPG
     
  19. MPWATCH Watch Lover Nov 20, 2019

    Posts
    993
    Likes
    1,865
    These macros shots are incredible thank you very much more sharing

    Super interesting thread
     
  20. zinengineer Nov 20, 2019

    Posts
    212
    Likes
    1,866
    very interesting indeed; love the pics