Christmas is past and finally finished an amateur vintage style watch build

Posts
514
Likes
560
That's a tidy wee watch and a cracking job you have done Chris. Your photographs of the descriptions are excellent and very informative to those that enjoy watch repair, myself included. I am a member of the Watch Repair Talk Forum, it would good to have you as a member.
 
Posts
158
Likes
907
I enjoyed this thread.
Good story, nice pictures, and ofcourse the happy ending
 
Posts
324
Likes
626
Excellent thread,make's one appreciate the process! Congrats!!
 
Posts
3,070
Likes
3,527
Nice work Chris. Which one of you is more pleased with it?
 
Posts
2,218
Likes
4,942
Thanks Guys, it was a fun little project apart from the Customs delay.🙁

Geo, there are other forums? 😉 I will have a look but, whether you need another amateur confusing everyone might be open to debate.

Cheers, Chris
 
Posts
2,218
Likes
4,942
Nice work Chris. Which one of you is more pleased with it?

Hmmm, my wife is very taken with it and has been wearing it this week. She already has a late 90s De Ville quartz and enjoys that as a dress watch. I think if it had been another dress watch then it would have had far less reaction but this is completely different to anything she has. Still not sure she will ever take it in the water though....

As you know, I'm an Engineer so appreciate the aesthetics but tend to follow the words from a Billy Bragg song, "It doesn't matter the colour of the car but, what goes on beneath the bonnet". Second small movement for me so, pleased to learn something.

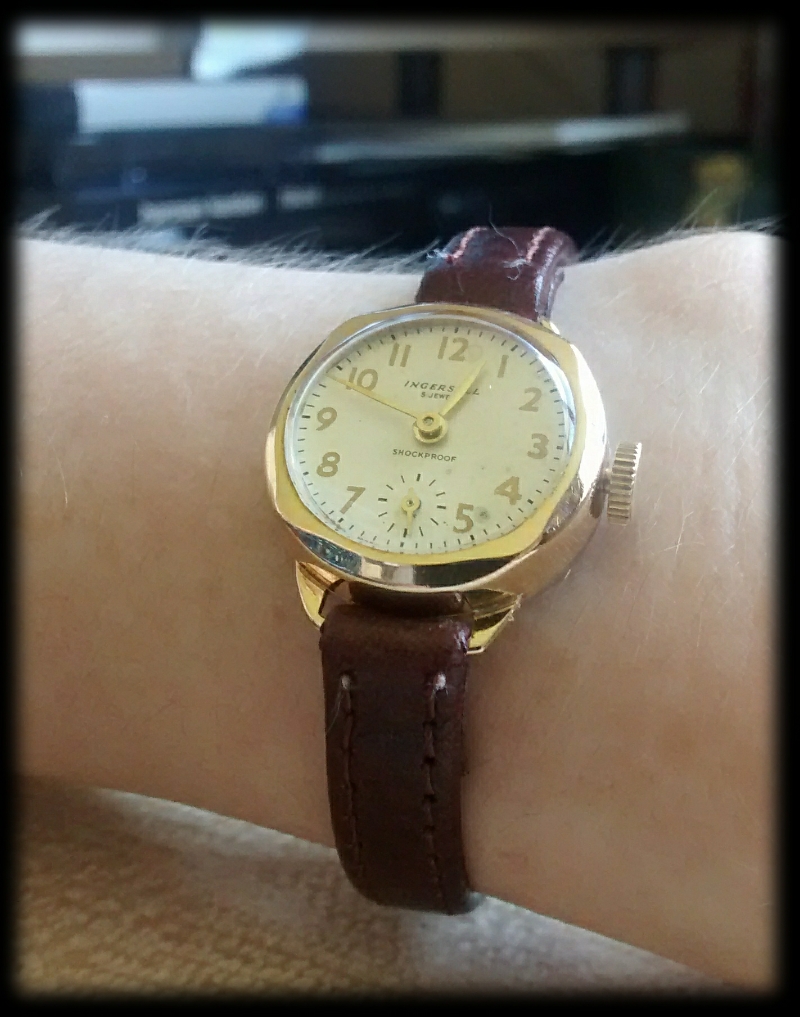
This was the first, my wife's first watch from mid 60s, which had not run for 30+ years and I resurrected for her last birthday. It is a pin lever escapement so no real value but another interesting one for me. Didn't dare do any more than brush off the dial so as it has no sealing at all, it still has 40 year old water spots.


I am holding you entirely to blame for my next project🙄. Will dig out some photos later.

Cheers, Chris
 
Posts
514
Likes
560
Geo, there are other forums? 😉 I will have a look but, whether you need another amateur confusing everyone might be open to debate.

Cheers, Chris

It was just a thought Chris.

I'm an amateur myself and have found it to be a very friendly and helpful place. When I saw the quality of your work, I just thought that it would be good to share it with others that would really appreciate your skills. 😀
 
Posts
514
Likes
560
As you know, I'm an Engineer so appreciate the aesthetics but tend to follow the words from a Billy Bragg song, "It doesn't matter the colour of the car but, what goes on beneath the bonnet.

I too am an engineer and totally agree with what "Billy" has to say. 😀
 
Posts
27,344
Likes
69,731
Well congrats on a job well done, and I was happy to help.

Cheers mate!

Al
 
Posts
2,218
Likes
4,942
It was just a thought Chris.

I'm an amateur myself and have found it to be a very friendly and helpful place. When I saw the quality of your work, I just thought that it would be good to share it with others that would really appreciate your skills. 😀

Hi Geo

Thanks! It's a long learning process as you know and I feel my work is much better now. Still room for improvement and building on my knowledge but that's life. I will have a look at that forum as am always interested to see how others are getting on as well.

Cheers, Chris
 
Posts
2,218
Likes
4,942
I am holding you entirely to blame for my next project🙄. Will dig out some photos later.

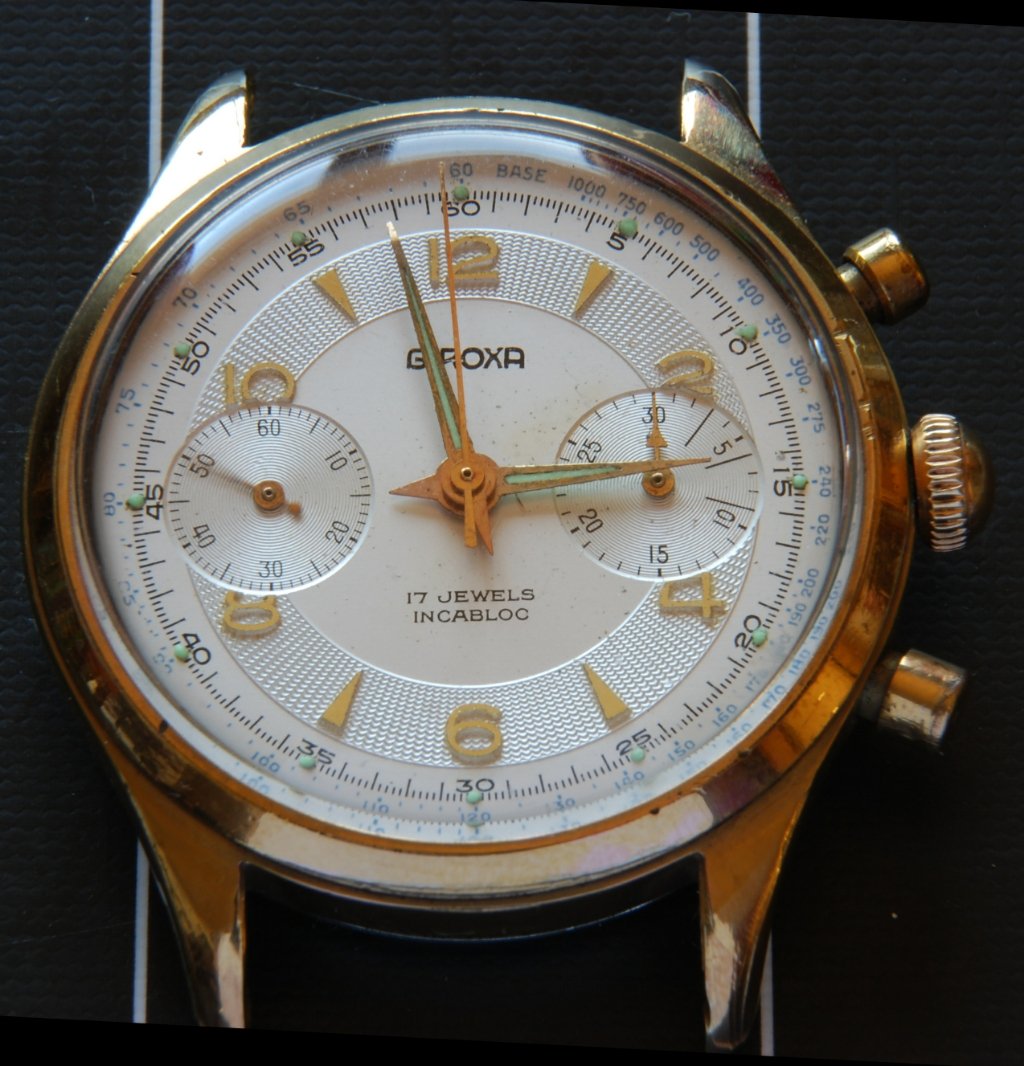
Here it is. First chronograph, a Landeron 48 which arrived yesterday. Not for the Vintage forum obviously as it's not Omega.

Very dirty movement but appears to be complete. Runs but the chronograph does not reset properly. Only a small investment and far safer than starting on an 861 or 321...

Quite a nice dial, am hoping it will clean up a little. Probably late 60s but there is little information out there about Giroxa. Case is not bad. Pushers look as if they might be mismatched but it may just be wear. I should finish with a watch I will wear as well.


Cheers, Chris
 
Posts
27,344
Likes
69,731
Chris - before you dive in and start taking apart the Landeron, make sure you understand which screws are actually screws, and which screws are really eccentrics. Don't even put a screw driver in any slot to turn anything until you know what it's function is, because you don't want to mess up the eccentrics. Putting them back might be a bit more than you bargained for at this point.

Now they still may need adjusting, but as I've said before, do the service and assume everything is okay until you confirm it's not, then start adjusting. Do you have any reference material for adjusting chronographs? If so, read it over carefully before proceeding.

Once you get it all set up and running well, if you want to be challenged you can send it to me and I will mess them all up for you, and you can practice putting them back - my instructor used to do that while we were having lunch! 😀

Cheers, Al
 
Posts
7,225
Likes
24,416
Your wife's watch looks great! Nicely done Chris.👍
 
Posts
2,218
Likes
4,942
Chris - before you dive in and start taking apart the Landeron, make sure you understand which screws are actually screws, and which screws are really eccentrics. Don't even put a screw driver in any slot to turn anything until you know what it's function is, because you don't want to mess up the eccentrics. Putting them back might be a bit more than you bargained for at this point.

Now they still may need adjusting, but as I've said before, do the service and assume everything is okay until you confirm it's not, then start adjusting. Do you have any reference material for adjusting chronographs? If so, read it over carefully before proceeding.

Once you get it all set up and running well, if you want to be challenged you can send it to me and I will mess them all up for you, and you can practice putting them back - my instructor used to do that while we were having lunch! 😀

Cheers, Al

Thanks Al, I have a two references including the Landeron one below (Page 2 "CAUTION"😲) and have noted the ones not to touch but have done nothing with it yet except spend an hour or so orientating myself (hands in pockets!). I wanted to let it down as it is very dirty but can't even do that without some disassembly so, it's running itself down.


Your instructor sounds like a nice chap! I will see how it goes before deliberately messing it up👍. To be honest, I will obviously do that one day when I am have some confidence in everything but not at the moment. Thanks for the offer!

Cheers, Chris
 
Posts
514
Likes
560
Excellent advice Al, I could have done with it myself a couple of years ago as a 48 was the first chrono I worked on. I did get there in the end.

Having seen what you have done before Chris, I have every faith that you will do a great job and look forward to seeing the finished item!
 
Posts
3,070
Likes
3,527
Chris. On the first two or three chronos I did, I marked the top of the eccentrics with a red marker pen once I had identified them and before I started disassembly. That steered me away from then with the screwdriver and it comes off in the cleaning solution.

After the seven eccentrics on the Landeron, the Lemania/Omega movements are a doddle with two for a two register watch and three for a three register watch.
 
Posts
27,344
Likes
69,731
Your instructor sounds like a nice chap!

Cheers, Chris

He was actually - that is how you learn. He would pull all sorts of crap when we were out on a lunch break...adjusting eccentrics back were easy compared to what he used to do to all our balance springs!

I remember one day we all came back and everyone had a broken stem for their fully assembled watch (movements were still in the case), and he gave us 5 minutes to fit a new one. We were only given 1 new replacement stem to work with, so it had to be right the first time. Some people took the 2 broken pieces and used that to measure how long the new stem should be, but I measured it by actually fitting it in the case, which was a good thing. When he broke the stems he also removed a bit off one of the broken ends, so if you "cheated" and used the two broken parts to determine the length, you ended up cutting your replacement too short! Fail! LOL!

Cheers, Al
 
Posts
2,218
Likes
4,942
When he broke the stems he also removed a bit off one of the broken ends, so if you "cheated" and used the two broken parts to determine the length, you ended up cutting your replacement too short! Fail! LOL!

Cheers, Al

Cunning! Sounds like it was a fun course as well. Out of interest, was it in Canada or did you go abroad?

I managed to teach myself this lesson on a 565 without any outside interference. Picked up the old crown/stem, trimmed the new to the same length and it wouldn't go in far enough. Then discovered I had picked up the wrong one from the spares box🤦. Wouldn't mind but it was too short so a new stem was needed. Lesson learnt, I now have different boxes for different movements.

Not touched that movement but it is decased and I have now removed pushers for the first time. I know this is pretty basic stuff but lots to learn over here.

Cheers, Chris
 
Posts
7,353
Likes
33,970
A labour of love but well worth the effort in the end as it really looks spot on👍