Aftermarket Flat-Feet Speedmaster Crowns: Opinions

Posts
206
Likes
94
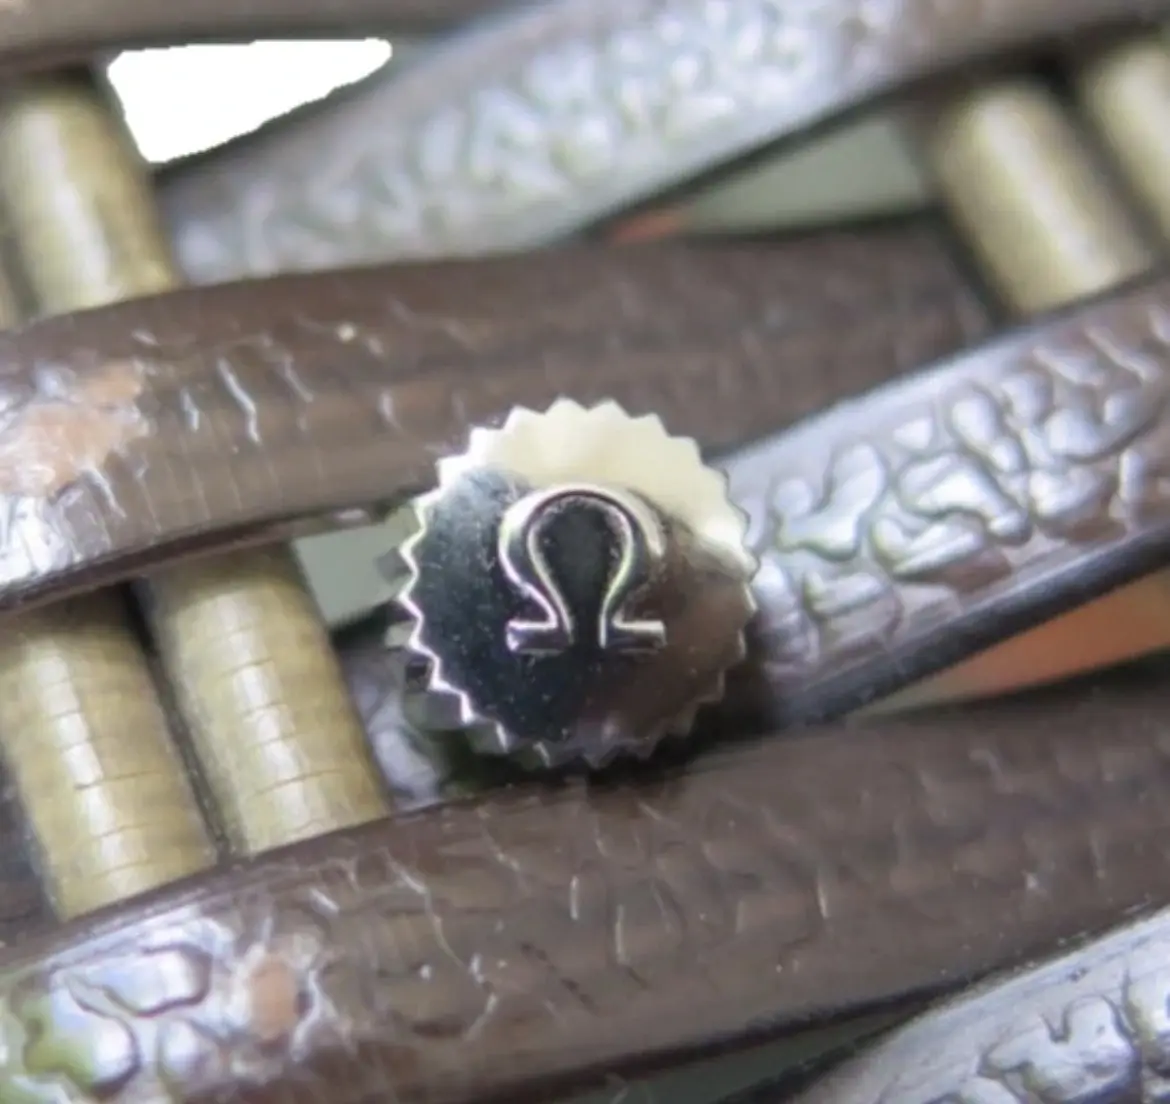
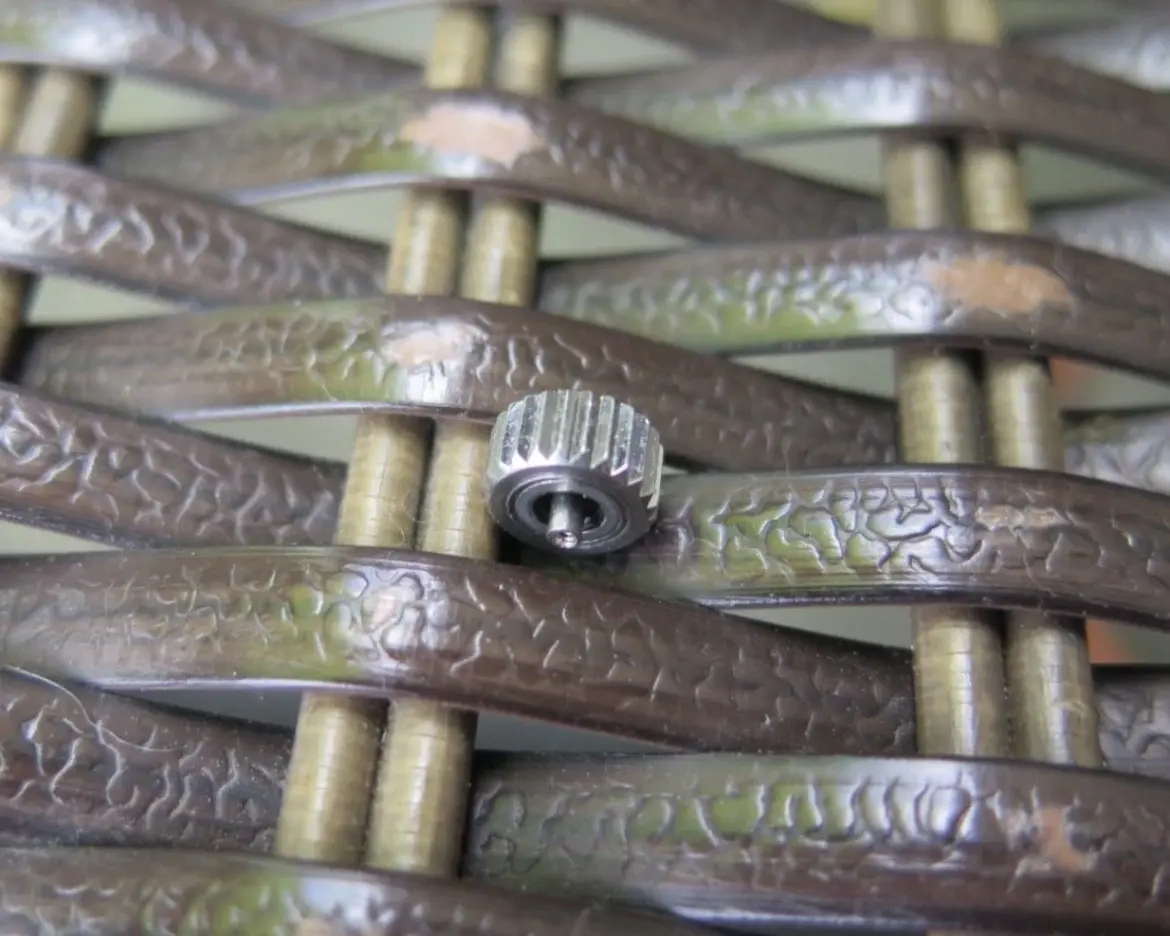
I found these 24-tooth flat-foot aftermarket crowns being sold on eBay:

https://ebay.io/m/VLGm8A

Would these be safe to use on a vintage Speedmaster or would they pose the same water resistance risks as installing an original vintage crown?
 
Posts
1,819
Likes
7,351
what do you think how good the rubber is after 60 years? 馃槈

edit: ah sorry, you said its aftermarket. Depends on how much you would trust an aftermarket part for your several thousands worth watch.
 
Posts
1,811
Likes
3,556
Is that a no then? 馃榿
Yes, it`s no.
Within 3 -6 months you will see a real one on the bay or here on OF.
 
Posts
206
Likes
94
Yes, it`s no.
Within 3 -6 months you will see a real one on the bay or here on OF.
What do you think about rebuilding an original one with new seals for water resistance?
 
Posts
1,544
Likes
3,110
What do you think about rebuilding an original one with new seals for water resistance?
Takes someone willing to do the work and someone willing to pay. They're not designed to be repairable.
 
Posts
1,811
Likes
3,556
What do you think about rebuilding an original one with new seals for water resistance?
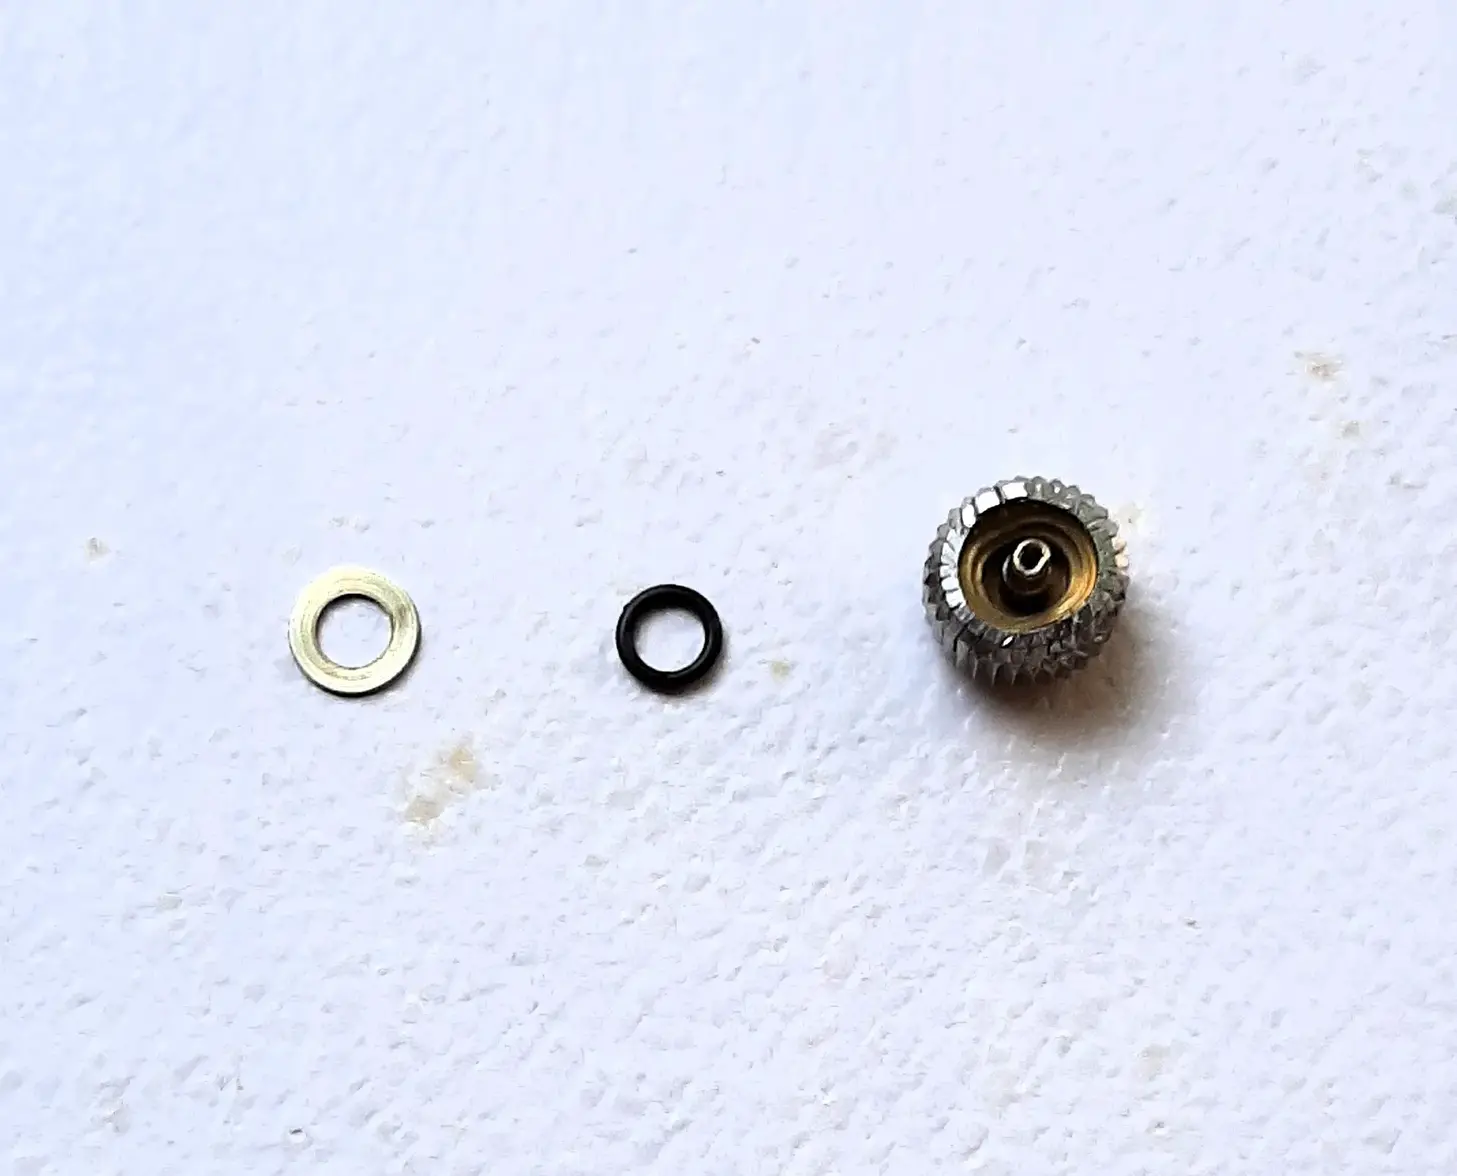
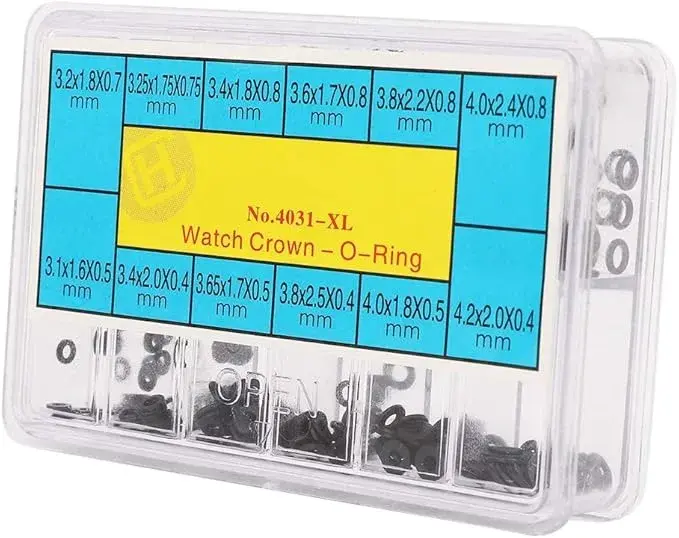
I did it twice on a A2 type crown, it`s a "monks job" and can take 1 -2 hours prying out the old O rings goo/tar. Once cleaned it is easy to push in 2 !! new O ring in size 3.8 x 2.4mm available from sample sets on ebay. Your tube outside should measure 2.5mm diameter so check it first.
Both cleared the 3 atm test but it is not work an Omega watchmaker can do as per Omega rules, nor is it something they have time for.


https://omegaforums.net/threads/would-need-an-advice-about-a-speedmaster-321-crown-a1.99931/

Inside of a crown when you remove the round "lid" taht i opened for science sake so dont do that yourself it is very very difficult to get that lid straight back in ;
 
Posts
206
Likes
94
I did it twice on a A2 type crown, it`s a "monks job" and can take 1 -2 hours prying out the old O rings goo/tar. Once cleaned it is easy to push in 2 !! new O ring in size 3.8 x 2.4mm available from sample sets on ebay. Your tube outside should measure 2.5mm diameter so check it first.
Both cleared the 3 atm test but it is not work an Omega watchmaker can do as per Omega rules, nor is it something they have time for.


https://omegaforums.net/threads/would-need-an-advice-about-a-speedmaster-321-crown-a1.99931/

Inside of a crown when you remove the round "lid" taht i opened for science sake so dont do that yourself it is very very difficult to get that lid straight back in ;
That is an absolutely stellar answer, thank you!
 
Posts
206
Likes
94
I did it twice on a A2 type crown, it`s a "monks job" and can take 1 -2 hours prying out the old O rings goo/tar. Once cleaned it is easy to push in 2 !! new O ring in size 3.8 x 2.4mm available from sample sets on ebay. Your tube outside should measure 2.5mm diameter so check it first.
Both cleared the 3 atm test but it is not work an Omega watchmaker can do as per Omega rules, nor is it something they have time for.


https://omegaforums.net/threads/would-need-an-advice-about-a-speedmaster-321-crown-a1.99931/

Inside of a crown when you remove the round "lid" taht i opened for science sake so dont do that yourself it is very very difficult to get that lid straight back in ;
I was able to purchase an A1 crown from @speedb who has kindly dissolved the original gaskets. Do you know where I might be able to find the correct sized o rings to fit the A1 crown?
 
Posts
1,811
Likes
3,556
I was able to purchase an A1 crown from @speedb who has kindly dissolved the original gaskets. Do you know where I might be able to find the correct sized o rings to fit the A1 crown?
O ring/gaskets for crown on ebay, only use round ones - flat gaskets dont work here - and look for 3.8x2.4mm and 0.8 thickness or similair. Be carefull opening them as mine had the sticker on the wrong side so they all fell out....馃が;

@speedb curious to learn what solvent you used and for how long, that may be alot easier then prying them out !

 
Posts
206
Likes
94
O ring/gaskets for crown on ebay, only use round ones - flat gaskets dont work here - and look for 3.8x2.4mm and 0.8 thickness or similair. Be carefull opening them as mine had the sticker on the wrong side so they all fell out....馃が;

@speedb curious to learn what solvent you used and for how long, that may be alot easier then prying them out !

That is absolutely brilliant! Is one enough or did you use two?
 
Posts
381
Likes
373
O ring/gaskets for crown on ebay, only use round ones - flat gaskets dont work here - and look for 3.8x2.4mm and 0.8 thickness or similair. Be carefull opening them as mine had the sticker on the wrong side so they all fell out....馃が;

@speedb curious to learn what solvent you used and for how long, that may be alot easier then prying them out !


Left in acetone until i was sure there was no more gasket, acetone causes the gasket to swell and eventually disintegrate and does not leave any residue or damage the metal components of the crown. It also gets rid of any old grease or dirt.
 
Posts
1,811
Likes
3,556
Left in acetone until i was sure there was no more gasket, acetone causes the gasket to swell and eventually disintegrate and does not leave any residue or damage the metal components of the crown. It also gets rid of any old grease or dirt.
Many thanks, will give that a try next time !
 
Posts
1,811
Likes
3,556
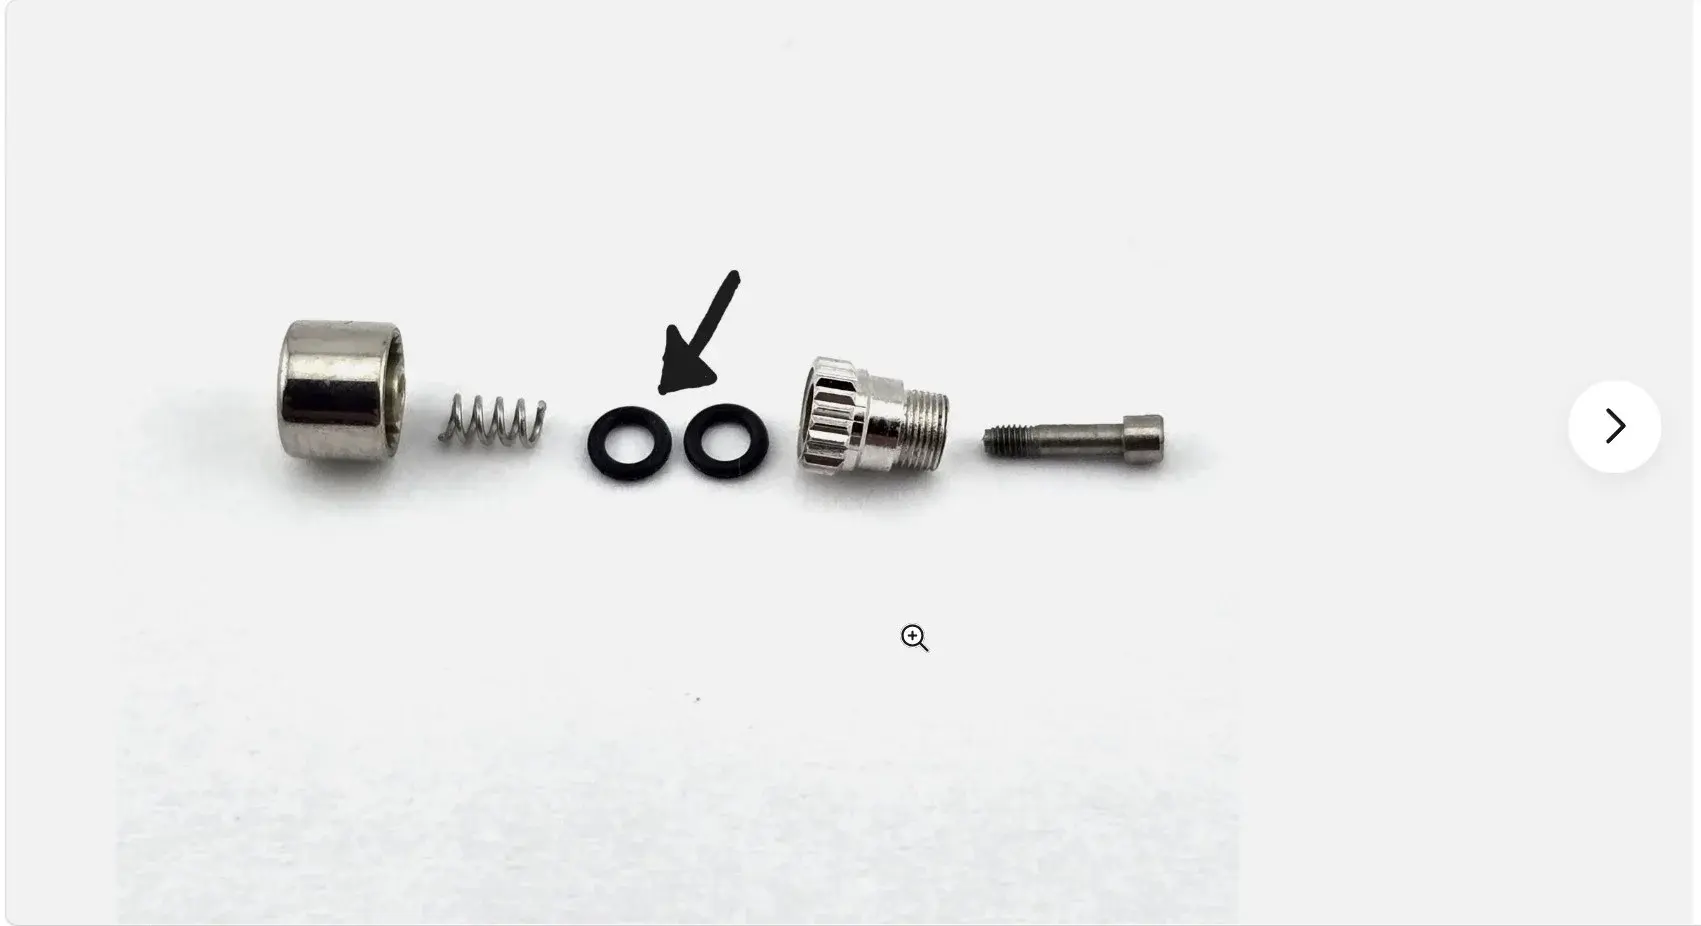
And to make this DIY section complete @jolyon here is the pusher in parts. The cap on the left gets fixed on the pusher section sticking out of the case by the screw on the right which you screw in from inside the case after you take out the movement. The other parts are fixed into the case with a special "hollow" screwdriver. So have your watchmaker install new WP pushers and ask him to use the old caps.
edit ; there must also be a very small metal o-ring/washer mounted on the outside of the case, not pictured here

This only applies to screw in pushers, so 145.012 and up, and maybe late 105.012 ? as the early 105.012 have pressed in ones and i dont know that assembly.

 
Posts
206
Likes
94
And to make this DIY section complete @jolyon here is the pusher in parts. The cap on the left gets fixed on the pusher section sticking out of the case by the screw on the right which you screw in from inside the case after you take out the movement. The other parts are fixed into the case with a special "hollow" screwdriver. So have your watchmaker install new WP pushers and ask him to use the old caps.
edit ; there must also be a very small metal o-ring/washer mounted on the outside of the case, not pictured here

This only applies to screw in pushers, so 145.012 and up, and maybe late 105.012 ? as the early 105.012 have pressed in ones and i dont know that assembly.

Absolutely awesome that! Thank you!
How come on the 105.012 push fit pushers there is a sort of brass coloured collar on the stem? I noticed that tends to be the tell for whether original pushers are present.