Working with a digital Microscope

Posts
1,650
Likes
5,222
I wanted to share my first experience working with an entry level digital microscope that i got on amazon. And maybe ask for some advice. It was clear i didnt expect any miracles at this price point, but i was not ready to pay large amounts for a professional device.
This one was advertised with x50 magnification, so i thought it was worth a try.


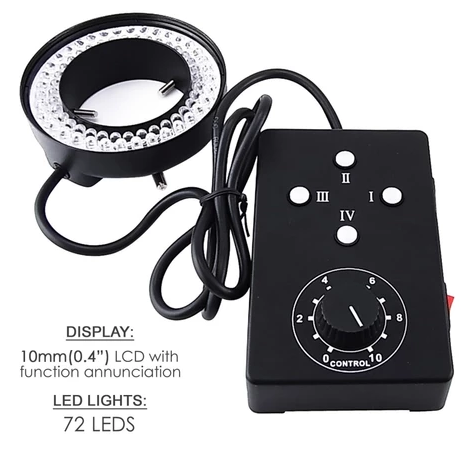
To my surprice the quality of the LCD screen was not too bad, and that i could even focus on the objects, however i experienced major problems with the lighting and holding the object at a correct angle. Maybe some experienced people can chim in and give an advice. do you use some additional light source or do the professional devices have sufficient light source?

Here some of the better shots that i got:


Pallet fork

I tried different backgrounds some brighter, some darker.
Here is a darker one but it had some weird surface, so was hard to focus properly.


Tried to check the parts for wear under zoom, but the results were rather average.


The hardest was focusing on the jewels. There is definitely an issue with insufficient lighting to get proper results 🙁

I would apreciate any advice or comments on this matter!
Thanks!
 
Posts
5,522
Likes
9,437
I guess the obvious question (for me) is if you can swap out the bulb, or use supplemental lighting from the sides. If supplementing, try to keep the color temperature close to the microscope bulb. I would think two supplemental lights (one on each side to minimize shadows) would help a lot.
 
Posts
1,650
Likes
5,222
I guess the obvious question (for me) is if you can swap out the bulb, or use supplemental lighting from the sides. If supplementing, try to keep the color temperature close to the microscope bulb. I would think two supplemental lights (one on each side to minimize shadows) would help a lot.
I will try! Thank you!
The microscope is using 8 integrated LEDs with rather cold temperature. You can see the refrection of light on the Balance Jewel.

If the light source comes from the sides though, i am afraid i can forget looking at the Pallet fork from the Dial Side of the main plate. I guess the light would have to come directly from above. 🤔

Otherwise i would only see a black hole, like there... 🙁
 
Posts
8,258
Likes
19,449
Is the lighting source in a ring format?
 
Posts
1,650
Likes
5,222
Is the lighting source in a ring format?
Yes, exactly.
 
Posts
8,258
Likes
19,449
One possibility is using a larger ring light that allows more control.. like this one with four-zone control to illuminate from different angles and brightness control to adjust lighting intensity by each zone or as a whole... depends how much more you want to invest in your setup.

HS-72 Ring Light 62mm 72 LED Microscope Camera Illuminator Flash Lens ($64.90)
.
 
Posts
24,263
Likes
54,031
I feel compelled to respond to this post. 😉

Generally speaking, a ring illuminator is a good start for a cheap reflected light microscope like this but it won't truly be able to mimic epi-illumination, where the light comes through the objective itself. You could upgrade the ring illuminator to get more light and/or supplement it with an additional focused beam on a gooseneck that can be adjusted on a case-by-case basis. The contrast is going to depend a lot on the surface finish of the object you are imaging.
 
Posts
466
Likes
1,388
As someone who is married to a pathologist, I love this.
 
Posts
1,650
Likes
5,222
One possibility is using a larger ring light that allows more control.. like this one with four-zone control to illuminate from different angles and brightness control to adjust lighting intensity by each zone or as a whole... depends how much more you want to invest in your setup.

HS-72 Ring Light 62mm 72 LED Microscope Camera Illuminator Flash Lens ($64.90)
.
Thanks for the advice. It seems the illuminator costs as much as i paid for the microscope though 😗
 
Posts
1,650
Likes
5,222
I feel compelled to respond to this post. 😉

Generally speaking, a ring illuminator is a good start for a cheap reflected light microscope like this but it won't truly be able to mimic epi-illumination, where the light comes through the objective itself. You could upgrade the ring illuminator to get more light and/or supplement it with an additional focused beam on a gooseneck that can be adjusted on a case-by-case basis. The contrast is going to depend a lot on the surface finish of the object you are imaging.
I had to google what epi-illumination means. 😗Yeah i did expect that the results could be somewhat unsatisfactory, but at this price point i thought its worth a try.
Thank you for the advice!
 
Posts
1,650
Likes
5,222
As someone who is married to a pathologist, I love this.
Not sure i understand the connection! 😵‍💫
 
Posts
8,258
Likes
19,449
Thanks for the advice. It seems the illuminator costs as much as i paid for the microscope though 😗

but I suspect is a more economical alternative than going for the epi option! 😉 in the meantime, keep capturing and sharing more images!
 
Posts
5,522
Likes
9,437
If you want to see into a hole, get a small LED flashlight and shine that in.
 
Posts
17,942
Likes
37,522
Welcome to the frustrating world of getting decent shots.

While the LED segment lights are good for non-reflective surfaces, they are a real PITA on jewels etc. One solution is to use a diffused ring light, however this is impractical in your setup and a bit expensive. It also impedes access if you use the scope for oiling.

Try to use the scope in as much natural daylight as you can.

You should use a non-reflective base over the silver table. Try some white card, it may help throw some light back to the sides and will provide a neutral background for easier focussing.


If jewels are hard to inspect, try putting the jewel on a white plastic jar lid (semi-translucent) with a light source beneath or from the sides beneath the object.


While you may never get perfect shots with your current setup, it's enough for you to start leaning about lighting etc.
 
Posts
7,177
Likes
23,253
As someone who is married to a pathologist, I love this.

As someone who is pathologically married, I love this too.
 
Posts
17,942
Likes
37,522
Another tip, when you're inspecting jewels and the reflections of your light are in the wrong place, rest the jewel at an angle until you can see the area you want to look at.

Here's an example, I usually hold the jewel with my tweezers but it's difficult to photograph and hold a tiny jewel at the same time.

The risk of something going PING! increases exponentially when one hand is doing something else.

 
Posts
1,650
Likes
5,222
Another tip, when you're inspecting jewels and the reflections of your light are in the wrong place, rest the jewel at an angle until you can see the area you want to look at.

Here's an example, I usually hold the jewel with my tweezers but it's difficult to photograph and hold a tiny jewel at the same time.

The risk of something going PING! increases exponentially when one hand is doing something else.

Thank you very much for your valuable input!
I will try making some daylight experiments in natural light, but for this i have to wait till the weekend, during the week i only have time in the evening after work. Also the trick with "plastic jar lid with a light source beneath", sounds like worth a try! 👍 😀
I will report hopefully improved images here!
 
Posts
792
Likes
918
Regarding the shock protector jewels above, they look so tame and relaxed in the picture, not the conniving little bastards that they really are.
 
Posts
2,446
Likes
7,040
The OP pictures are generally underexposed. Can you increase exposure time or camera exposure gain? You may end with a slower frame rate in the process. Also, with shiny finishes there will be overexposure in some areas as you attempt proper exposure generally.
 
Posts
16,863
Likes
47,901
Mrs STANDY is a entomologist and looks down a microscope day in day out.


https://www.mmsmicroscopes.co.uk/product/photonic-stereo-microscope-light-source-led-halogen-light-guides/