- Posts
- 72
- Likes
- 96
keisuke_z
·I don’t post that much here so I thought I’d share my most recent project.
I decided to take on the challenge of mirror polishing the outer links on my @Forstnerbands Forstner 1450 so it would better match my 42mm POLMLE. I did this mostly out of curiosity of whether I could do it and get a good result as opposed to a desire for a shinier bracelet... and also to confirm whether it would look good or not since most examples of the "president style" are either all brushed or have polished centre links. I ultimately learned a lot about refinishing and had a great time working on this.
Here’s a quick before pic:

To start, the factory finishing on the Forstner is brushed/satin, but typically the way to achieve this is to get to a full or almost completely smooth surface first, then add the brushing grain or satin finish to it. On the Forstner, the side faces of the links look like the horizontal brushing lines were applied using quite a coarse grain sandpaper, which leaves noticeable grooves in the metal.

This meant that just polishing with a buff and diamond compound wouldn’t be enough - in the pic of my test run below you can see that despite being polished, the grooves remain, which mean that more steps are required to smooth out the face prior to polishing:

Based on some video tutorials I’ve watched, I knew I could theoretically achieve a smooth surface with enough time just buffing with compound, which basically just moves the metal with heat and friction. But having only a 3-speed handheld rotary tool and not the proper buffing compounds, I opted to use a multi step sanding process, working my way from 30micron down in prep for a final pass of 0.5micron diamond polish on the rotary buff.
To achieve a flat surface on the side faces, I had to work on each link individually, with the exception of the chain of fixed links. Initial test attempts at doing a whole chain of links together, either sanding on the table or putting the links in a vice and sanding them there, didn’t yield good results due to the differences in taper and a requirement was to sand against a flat surface to ensure the face would be 'true'. Working on each link separately assured a better result, so that’s what I ended up doing:


For the fixed links, I used a combo of finishing stones (to true up the taper, since there was some very minor variation of link widths) and sandpaper (to remove the deep scratches) in the vice. Note that this was an unnecessary step but still deeply satisfying, as I was able to perfect the taper match across the fixed links. For the fixed links, the vice was necessary to keep the links level and aligned with each other. Unfortunately, I didn't take any photos while using the stones as it was quite messy, but here's a shot of the sandpaper stage in the vice:

After completing side face polishing stage, I debated how to deal with the top of the links. The factory finishing had also left minor grooves (not as deep as the side faces though), so if I wanted to really get a true mirror polish, I would also need to flatten the top surface of each link until it was perfectly smooth. How to accomplish this?
I first gave it a try using thin strips of sandpaper with the links in the vice facing away from me. Basically, I would loop the sandpaper strip around with the dome facing away and slowly work it like a saw, letting gentle friction do the work (w/the grit facing in, if that makes sense). Doable? Yes, but it would likely take me an hour per link, and the sandpaper tended to slip off. This was also carpal tunnel hell, trying to maintain such a delicate grip on the sandpaper.
My second approach was to use finishing stones to flatten the surface with individual links in the vice. This was very successful but extremely arduous - a slip of the stone and I ended up with a flat spot. I did perfect the technique after a few tries on spare links, but ultimately decided it wasn't worth the effort. The alternative approach to this would be disassemble each link using a bracelet link remover tool, and work with just the outer pieces. This would allow for easier sanding and polishing of the top surface... which I also considered but shelved, thinking about how painful it would be for my pre-existing carpal tunnel injuries.
I ultimately settled on just polishing the tops with diamond compound and a bullet felt buff until I got a reasonably good polish. The grooves were still somewhat visible, so it's not a perfectly flat surface but good enough. I can see why on bracelets like the jubilee, only the centre links are polished and not the outer links... the amount of labour involved would be much too high! This approach was relatively simple - tape up the centre links and slowly work each outer link until polished.
And so that was that! Here are some pics of the final results:


After / Before:

Final thoughts:
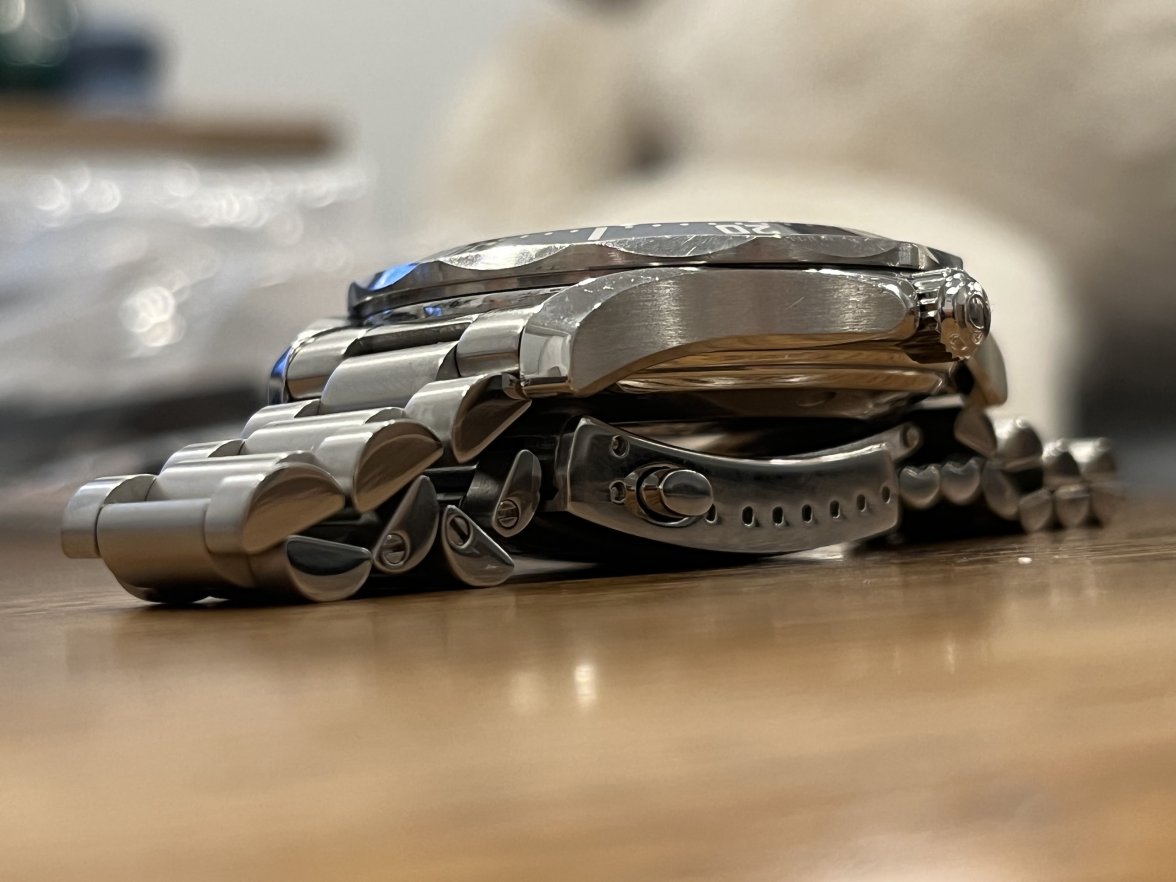
The stretch links plus the milled clasp make this a really great bracelet to wear, especially on the POLMLE. Sized correctly, it doesn’t feel top heavy at all, despite the heft of the 42mm PO case. I hope that Forstner reintroduces the stretch links for the contemporary flat link, because it really makes all the difference. IMO, it's more comfortable than having a micro-adjustable clasp, and considering how big a proponent I am of the adjustable clasp, that's saying a lot!
That said, it would be nice if the solid endlinks were a tad taller so they met the height of the PO mid case better. I really can’t complain though, since this is the pre-2018 Seamaster endlink and Forstner never intended for them to be used on a PO. =)
Overall, this was a super fun project. The whole act of slowly manual sanding and polishing was practically meditative for me and I loved it. Getting a true mirror surface on the sides of the fixed links was so deeply satisfying that I picked up another 1450, spent 4 hours polished the side faces right after unboxing before swapping it into my 2220.80, and also ordered myself a Foredom micromotor (rotary tool) to work on future projects:

Next mod to this will likely be grinding and smoothing off the little nub that sticks out the top edge of the clasp. I find it gets caught on things, and I prefer a more rectangular look to the clasp... but that's for another day..
Hope you enjoyed my write up!
I decided to take on the challenge of mirror polishing the outer links on my @Forstnerbands Forstner 1450 so it would better match my 42mm POLMLE. I did this mostly out of curiosity of whether I could do it and get a good result as opposed to a desire for a shinier bracelet... and also to confirm whether it would look good or not since most examples of the "president style" are either all brushed or have polished centre links. I ultimately learned a lot about refinishing and had a great time working on this.
Here’s a quick before pic:
To start, the factory finishing on the Forstner is brushed/satin, but typically the way to achieve this is to get to a full or almost completely smooth surface first, then add the brushing grain or satin finish to it. On the Forstner, the side faces of the links look like the horizontal brushing lines were applied using quite a coarse grain sandpaper, which leaves noticeable grooves in the metal.
This meant that just polishing with a buff and diamond compound wouldn’t be enough - in the pic of my test run below you can see that despite being polished, the grooves remain, which mean that more steps are required to smooth out the face prior to polishing:
Based on some video tutorials I’ve watched, I knew I could theoretically achieve a smooth surface with enough time just buffing with compound, which basically just moves the metal with heat and friction. But having only a 3-speed handheld rotary tool and not the proper buffing compounds, I opted to use a multi step sanding process, working my way from 30micron down in prep for a final pass of 0.5micron diamond polish on the rotary buff.
To achieve a flat surface on the side faces, I had to work on each link individually, with the exception of the chain of fixed links. Initial test attempts at doing a whole chain of links together, either sanding on the table or putting the links in a vice and sanding them there, didn’t yield good results due to the differences in taper and a requirement was to sand against a flat surface to ensure the face would be 'true'. Working on each link separately assured a better result, so that’s what I ended up doing:
For the fixed links, I used a combo of finishing stones (to true up the taper, since there was some very minor variation of link widths) and sandpaper (to remove the deep scratches) in the vice. Note that this was an unnecessary step but still deeply satisfying, as I was able to perfect the taper match across the fixed links. For the fixed links, the vice was necessary to keep the links level and aligned with each other. Unfortunately, I didn't take any photos while using the stones as it was quite messy, but here's a shot of the sandpaper stage in the vice:
After completing side face polishing stage, I debated how to deal with the top of the links. The factory finishing had also left minor grooves (not as deep as the side faces though), so if I wanted to really get a true mirror polish, I would also need to flatten the top surface of each link until it was perfectly smooth. How to accomplish this?
I first gave it a try using thin strips of sandpaper with the links in the vice facing away from me. Basically, I would loop the sandpaper strip around with the dome facing away and slowly work it like a saw, letting gentle friction do the work (w/the grit facing in, if that makes sense). Doable? Yes, but it would likely take me an hour per link, and the sandpaper tended to slip off. This was also carpal tunnel hell, trying to maintain such a delicate grip on the sandpaper.
My second approach was to use finishing stones to flatten the surface with individual links in the vice. This was very successful but extremely arduous - a slip of the stone and I ended up with a flat spot. I did perfect the technique after a few tries on spare links, but ultimately decided it wasn't worth the effort. The alternative approach to this would be disassemble each link using a bracelet link remover tool, and work with just the outer pieces. This would allow for easier sanding and polishing of the top surface... which I also considered but shelved, thinking about how painful it would be for my pre-existing carpal tunnel injuries.
I ultimately settled on just polishing the tops with diamond compound and a bullet felt buff until I got a reasonably good polish. The grooves were still somewhat visible, so it's not a perfectly flat surface but good enough. I can see why on bracelets like the jubilee, only the centre links are polished and not the outer links... the amount of labour involved would be much too high! This approach was relatively simple - tape up the centre links and slowly work each outer link until polished.
And so that was that! Here are some pics of the final results:
After / Before:
Final thoughts:
The stretch links plus the milled clasp make this a really great bracelet to wear, especially on the POLMLE. Sized correctly, it doesn’t feel top heavy at all, despite the heft of the 42mm PO case. I hope that Forstner reintroduces the stretch links for the contemporary flat link, because it really makes all the difference. IMO, it's more comfortable than having a micro-adjustable clasp, and considering how big a proponent I am of the adjustable clasp, that's saying a lot!
That said, it would be nice if the solid endlinks were a tad taller so they met the height of the PO mid case better. I really can’t complain though, since this is the pre-2018 Seamaster endlink and Forstner never intended for them to be used on a PO. =)
Overall, this was a super fun project. The whole act of slowly manual sanding and polishing was practically meditative for me and I loved it. Getting a true mirror surface on the sides of the fixed links was so deeply satisfying that I picked up another 1450, spent 4 hours polished the side faces right after unboxing before swapping it into my 2220.80, and also ordered myself a Foredom micromotor (rotary tool) to work on future projects:
Next mod to this will likely be grinding and smoothing off the little nub that sticks out the top edge of the clasp. I find it gets caught on things, and I prefer a more rectangular look to the clasp... but that's for another day..
Hope you enjoyed my write up!
Edited: